Thorssoli's Ironman MkIII Build - Finished Suit Pics Page 26!!

Re: Just What This Forum Needs: Another Ironman Build

Wrist plates printed:


The hands are pretty much done too:


The main exception are the fingertips for the middle and ring finger as well as the middle of the pinky. I'm not sure why, but for some reason Jarvis doesn't like those bits. If I've done my math right, they should be done by now (while I'm surfing the interwebs and sipping coffee).

In other news, I had him make some of the chest greeblies:


For the international audience, here's that same picture in metric:


I'm still tinkering with the model for the helmet in the hopes of finding an economical way of printing it (instead of just making a big, expensive, Ironman-helmet-shaped-brick). My friend Matt is working on it too. Unfortunately, neither one of us is especially adept at 3D modelling. We've decided that beating our heads against the machine is probably the best way to figure it out.

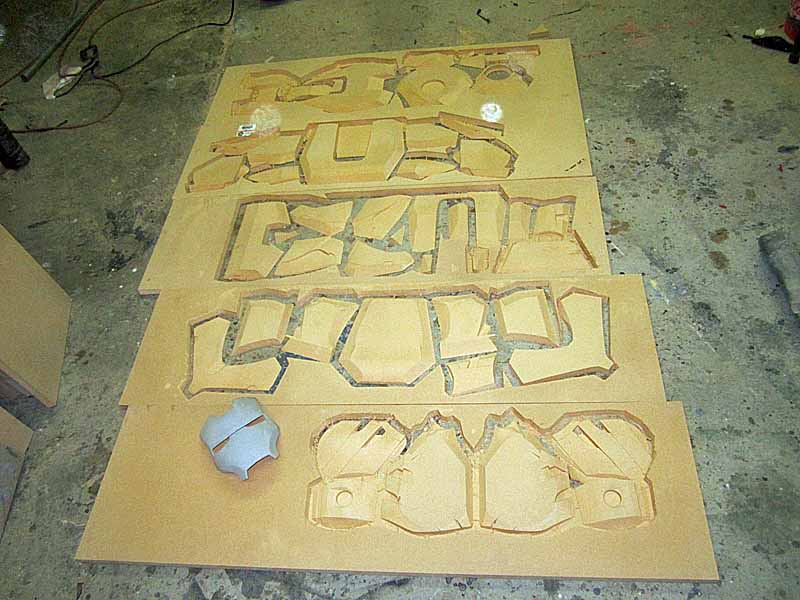
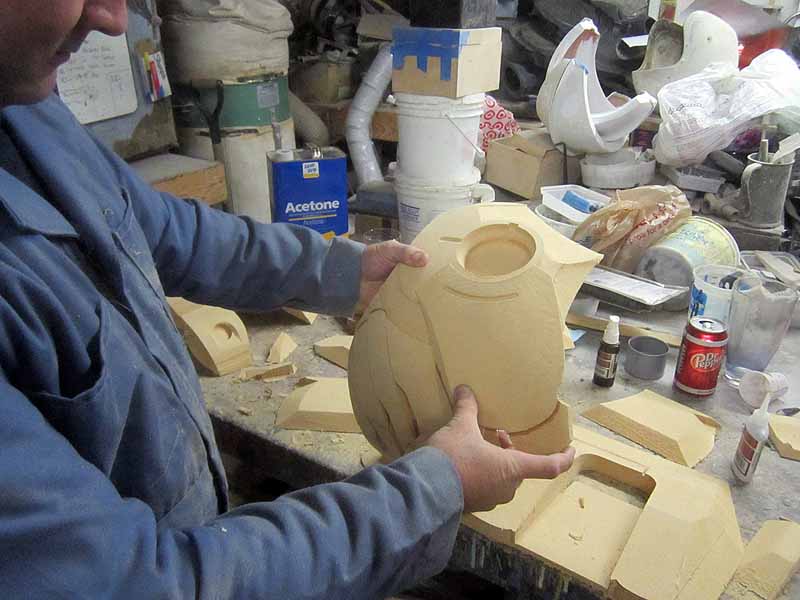
In other news, chest carve #3 is finishing up right now. Once that's done, I'll get Lopez to work on carve #4. I've also found a few flawed parts and some smaller pieces I'm going to do with the CNC machine, so it looks like it will be a total of 6 separated carving projects to make the main portion of the chest. Then I'll have to decide if I'd rather make the abdomen, the other leg, or the flaps for the back next.

Decisions, decisions...
 
Last edited:
Re: Just What This Forum Needs: Another Ironman Build

Chest carve #3 of 6 is done:


The hands are done too:


Now Lopez is on to part 4 of the chest and Jarvis is building the top of the helmet. In the end, Matt came up with the separation scheme we're using. The helmet will be separated along the seam lines, printed as separate parts, and then reassembled prior to molding.

While that's going on, I've started the bodyshop work on the pelvis. I've decided I can't call it a "diaper" because it's too close-fitting. Maybe "iron thong." In any case, here it is coated in epoxy:


Tomorrow, when the coating has cured, I'll be doing a bit of filling and sanding to get rid of the seams from the separate slices. Then I'll be carving out the seams that are supposed to be there. There's still a couple more pieces that need to be added before I can make a mold though, so it'll be a little while for this part.

Stay tuned...
 
Re: Just What This Forum Needs: Another Ironman Build

There are two materials the printer needs in order to make a piece. The "model" material is a photosensitive resin that becomes rigid when exposed to UV radiation. It costs about $0.30/gram.

Since the machine can't print on top of nothing, it also uses a "support" material to fill in the spaces under any undercuts or overhangs. The support is water soluble so it can be washed off after the print job is done. That stuff costs about $0.15/gram.

So printing one of the hands uses up about $200 worth of material.

Fortunately, the prize package I won includes a six-month supply of printing material. Otherwise there's no way I'd ever be able to afford this project. Even so, I'm still feeding the bigger pieces to the CNC machine so they can be carved out in much cheaper MDF prior to assembly and minor bodywork.

EDIT: to answer your question, I have no idea what the total cost will be. I'm just glad I don't have to pay for it all.
 
Wow. That's unbelievably expensive. Unlikely anybody else will be duplicating this any time soon. What did you do to win this contest?
 
Re: Just What This Forum Needs: Another Ironman Build

Wow. That's unbelievably expensive.

I suppose it depends on what you thing your time is worth. If I'd spent the time building the hands as pep models, I'm certain I'd spend more than $200 worth of my own labor to piece them together and I'd still have to do a lot more filling and sanding and smoothing before I'd have anything presentable to show for it.

What did you do to win this contest?

You can see the contest details here: Make It Real Challenge They were looking for examples of processes that begin with something in a computer, whether it was a CAD drawing, a photoshop sketch, or a 3D model and then turn it into a tangible thing. It turns out my Space Marine build was just the ticket. If you haven't read my instructable there, I'd suggest you settle in for a few minutes and give it a read. I had a lot of fun with the write-up.
 
Last edited:
Re: Just What This Forum Needs: Another Ironman Build

Progress continues. Jarvis has made one of the flaps for the back as well as the shoulder and elbow pivot details:


He's working on the next flap right now.

Yesterday Lopez finished the fifth carve for the chest:


There's a lot of parts:


The sixth carve should've been done this morning, but I had a Z-axis calibration problem and the whole thing was only carved to half of the required depth. I'm re-doing it right now.

While I'm tempted to start gluing all of the slices together, I really have to fight the urge so I don't have a bunch of half-built parts waiting around in need of parts that aren't cut yet in order to make the complete piece. It's hard to resist the temptation though:


In about six hours, Lopez will be done with the last of the chest parts and I can get started on putting it all together. Meanwhile, I'm splitting up the arm parts and laying them out for carving.

Stay tuned...
 
Re: Just What This Forum Needs: Another Ironman Build

If I could make a request, I would love to see progress/work shots of how you'll be putting everything together. I can't say enough how much I love this build, and I'd really like to see your techniques for assembling the parts!
 
Re: Just What This Forum Needs: Another Ironman Build

The assembly isn't all that interesting. It's basically a somewhat simple 3D jigsaw puzzle held together with some CA-adhesive, then coated with epoxy to give it a strong, sandable surface that I can do the final smoothing and fairing to.

Pictures will be posted. How many depends on who shows up to hang out in the workshop this evening.
 
Re: Just What This Forum Needs: Another Ironman Build

Double post. Oops.
 
Last edited:
Re: Just What This Forum Needs: Another Ironman Build

As promised, here's some pics of the assembly process for the chest...

For starters, Lopez finished the sixth set of parts:


The first thing I did was to lay out the parts where I could see them all and start putting together the bits that seemed to obviously fit together:


Eventually I had bits that were recognizable:


As I found where each of the pieces fit together, I stuck them in place with a quick bead of cyanoacrylate adhesive:


There was a tiny bit of mismatch in the last couple of seams. That's due to the fact that my carving machine really isn't meant for this kind of precision work. Still, it's not too bad:


Fortunately, all of the problem areas are in the portion of the suit that will be covered by the upper chest plate:


The whole thing might be a tiny bit too big, but I think it'll work:


Thoughts?
 
Re: Just What This Forum Needs: Another Ironman Build

My thoughts, looks good, and doesn't look overly large either
 
Re: Just What This Forum Needs: Another Ironman Build

I think the sizing looks fine. It should be a little deeper than your own chest. The movie suit is bigger in the chest as part of the design, which is great because it gives plenty of room to put in electronics and fans (and fans and more fans).
 
Re: Just What This Forum Needs: Another Ironman Build

Any possibility that you can upload the STL files for the hand? Maybe on thingivese.com or on here? Id love to print them out on my printer as well!
 
Back
Top