banistersmind
New Member
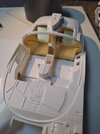
My birthday this year allowed me to realise a long held dream of purchasing the Fujimi Blade Runner Police Spinner.
Having lurked around these boards for a while and followed the outstanding work of many of you - particularly wayouteast - I have begun work on my iteration of this classic vehicle.
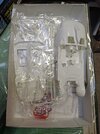
I've spent a lot of time considering how to tackle this project because I want to light it and possibly personalise my build. The Paragrafix Photoetch set was a must and I was able to purchase that ahead of time. For the lighting, I'm going to go for componentry from Light My Bricks here in Australia. They produce lighting solutions for Lego kits which are plug and play thus idiot proof in terms of construction. It will make lighting my Spinner relatively easy and I'll be able to avoid soldering - which I suck at.
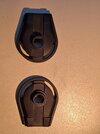
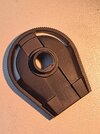
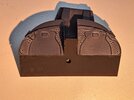
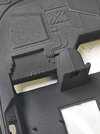
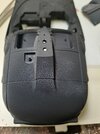
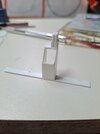
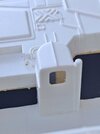
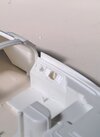
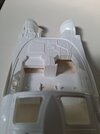
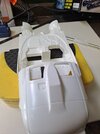
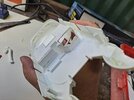
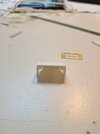
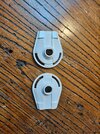
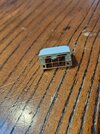
For this opening post, I'm sharing some images of the cutting and altering process which I've been working away at over the past few days. The process has been a lot easier than I thought it would be - it has just been time consuming. A lot of drilling, carving in very tight areas, sanding with emery boards and test fitting the Paragrafix components. I preserved the standard back panel that goes behind the seats and I'm going to see if I can repurpose it and overlay it on the Paragrafix replacement so there's more visual interest, but we'll how that pans out. I completed the front tyre covers and the driver's control panels. Again those were a lot easier than I'd anticipated. The clear plastic arcs on the wheel covers are very forgiving in concealing the wonkiness of my sanding but I think I've done an okay job with these.
I'm a big podcast fan and over the past few days I managed to knock off two excellent series from the BBC - "The Lazarus Heist" & "Death In Ice Valley. There was also wine...several glasses.
The process wasn't without error. I think I over sized the holes in the side door control panels but I reckon I'll be able to fix these with later on.
I'll be taking a break before I start planning for the next stage.
Having lurked around these boards for a while and followed the outstanding work of many of you - particularly wayouteast - I have begun work on my iteration of this classic vehicle.
I've spent a lot of time considering how to tackle this project because I want to light it and possibly personalise my build. The Paragrafix Photoetch set was a must and I was able to purchase that ahead of time. For the lighting, I'm going to go for componentry from Light My Bricks here in Australia. They produce lighting solutions for Lego kits which are plug and play thus idiot proof in terms of construction. It will make lighting my Spinner relatively easy and I'll be able to avoid soldering - which I suck at.
For this opening post, I'm sharing some images of the cutting and altering process which I've been working away at over the past few days. The process has been a lot easier than I thought it would be - it has just been time consuming. A lot of drilling, carving in very tight areas, sanding with emery boards and test fitting the Paragrafix components. I preserved the standard back panel that goes behind the seats and I'm going to see if I can repurpose it and overlay it on the Paragrafix replacement so there's more visual interest, but we'll how that pans out. I completed the front tyre covers and the driver's control panels. Again those were a lot easier than I'd anticipated. The clear plastic arcs on the wheel covers are very forgiving in concealing the wonkiness of my sanding but I think I've done an okay job with these.
I'm a big podcast fan and over the past few days I managed to knock off two excellent series from the BBC - "The Lazarus Heist" & "Death In Ice Valley. There was also wine...several glasses.
The process wasn't without error. I think I over sized the holes in the side door control panels but I reckon I'll be able to fix these with later on.
I'll be taking a break before I start planning for the next stage.
Attachments
-
 20211101_144016.jpg3.7 MB · Views: 292
 -
 20211110_164840.jpg845.8 KB · Views: 319
 -
 20211110_164832.jpg914.7 KB · Views: 277
 -
 20211110_133307.jpg973.1 KB · Views: 248
 -
 20211108_171848.jpg1.2 MB · Views: 237
 -
 20211107_092328.jpg228.9 KB · Views: 235
 -
 20211107_092307.jpg746.1 KB · Views: 230
 -
 20211106_151252.jpg1.3 MB · Views: 232
 -
 20211106_142424.jpg1.3 MB · Views: 233
 -
 20211106_125259.jpg2 MB · Views: 221
 -
 20211111_093232.jpg930.3 KB · Views: 198
 -
 20211111_095523.jpg1.5 MB · Views: 222
 -
 20211111_101127.jpg2.4 MB · Views: 215
 -
 20211111_101312.jpg2 MB · Views: 298
Last edited:
")