STEVE THE SWEDE
Sr Member
After finishing Jez ESB Boba helmet I swore that I would never do one again, these helmets just drives me insane. :wacko However, a while ago Boba Maker asked me if I would agree to paint up one of he's new helmet casts and armour. Since I already owned one of he's new helmets I just couldn't say no. For those of you who haven't seen he's work in person I full heartly recomend it. super clean and smooth casts, primed and ready to paint. That's right people, no tedious clean up work needed. BM, is also one of the nicest people I've ever dealt with here, first class all the way.
Since I've already made a tutorial on this subject (can still be viewed on www.starwarshelmets.com), this thread won't go to deep on the techniques, just the basics and sharing some pics of the progress. I hope you'll enjoy it, thanks for the interest.
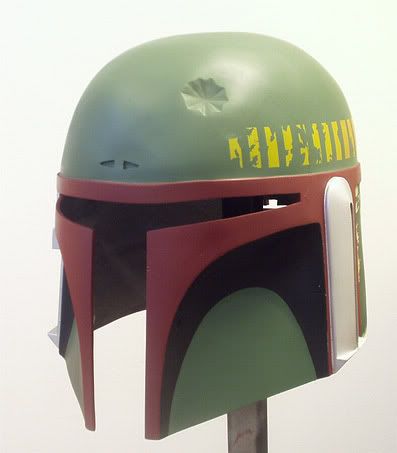
Jumping back two months, the pre primed helmet has the basic colours. Most of them was the ones sugested be Lee, others were custom mixed.
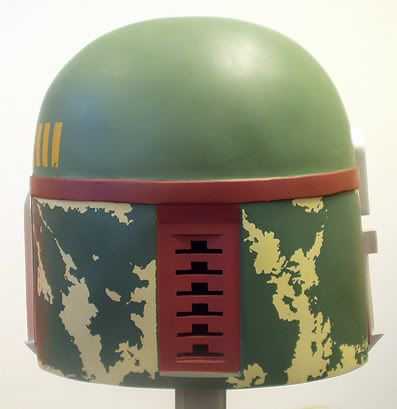
The "fjords of norway map" was traced then filled with masking fluid and then I hit the back with green/blue. The mask was removed and, Voila.

The green ear was shiped with the all topical approach, meaning that all scratches are painted on top of the main green colour. Fine black hairline scratches has been added but still no "dirt wash" to blend it all together.

Range finder ear, still looking rather new and shiny, all that wil change later on.
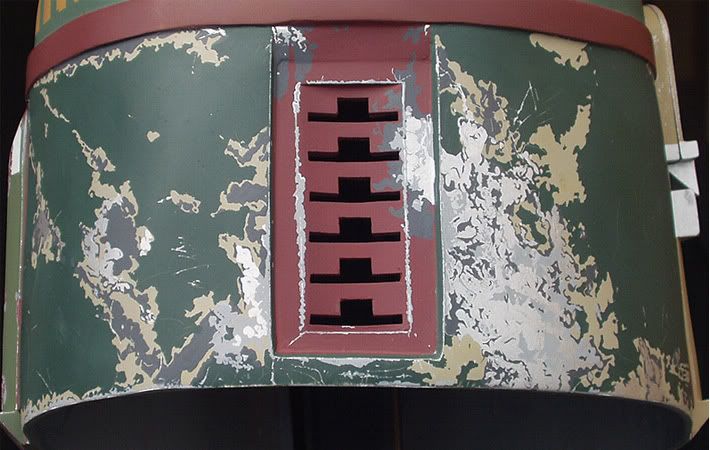
The finished back. almost everything was done topical. Also added a element of grey/white scratches ontop of the silver ones. This can clearly be seen on the original (probably bare plastic) but I haven't seen it been replicated before. Still no dirt wash.
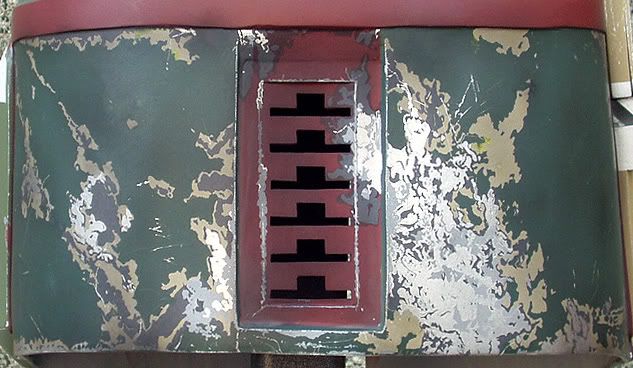
Smudge time. Several layers of thinned acrylic wash has been added to blend and soot it down. Makes all the different in the world, doesn't it. BTW, thanks for tip Lee, it worked out great.
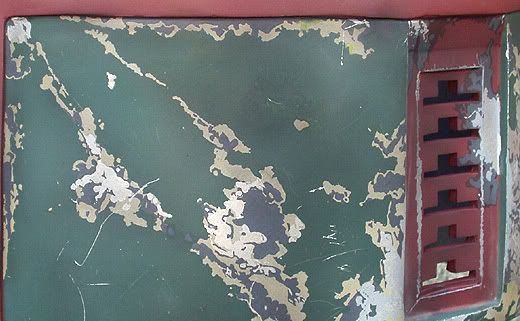
Same area after the wash.
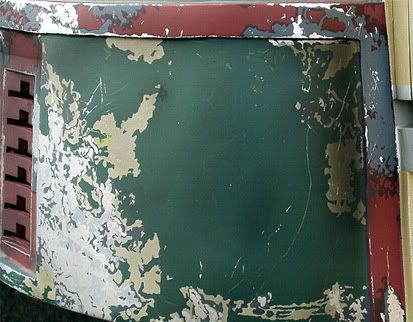
Work beginns on the red trimms and mandibles. Same technique as before, everything is applied topical with a brush. No wash yet.
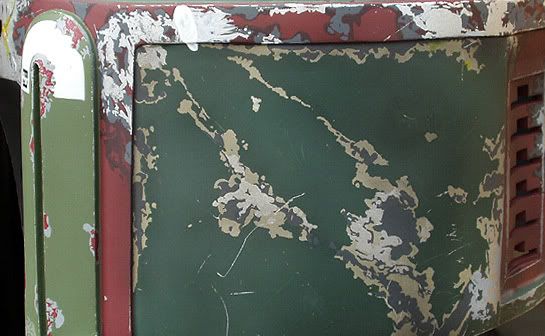
The other side with the infamous "thumb print" done with thinned down Valejo, best darn acrylic paint in the world.
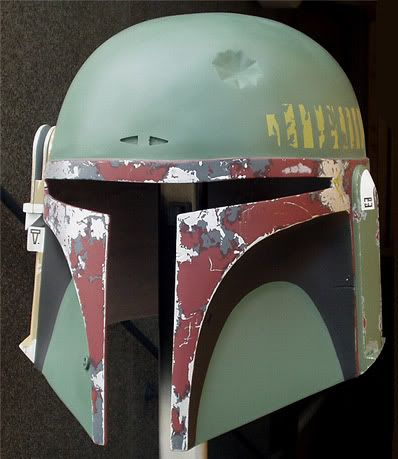
The finished mandibles complete with the crack repair. No wash yet here either.
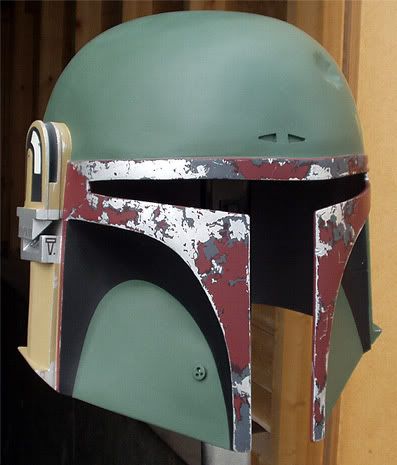
Another view.
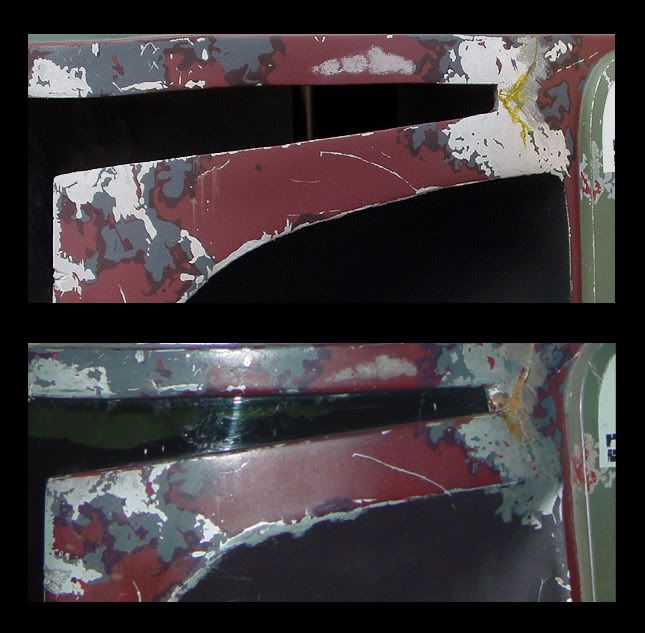
Flexing muscles with the original. It will look even better with the dirt wash, remember the back people.
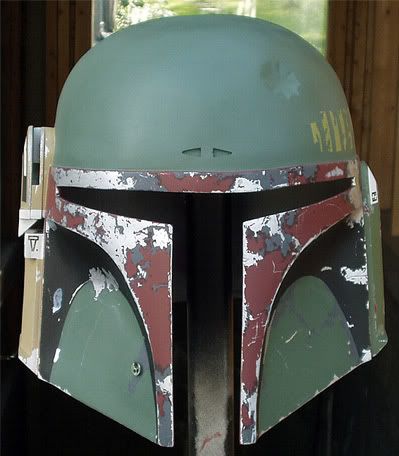
Continuing on the black and green cheeks. Nothing new here, everything's painted ontop of the base color.
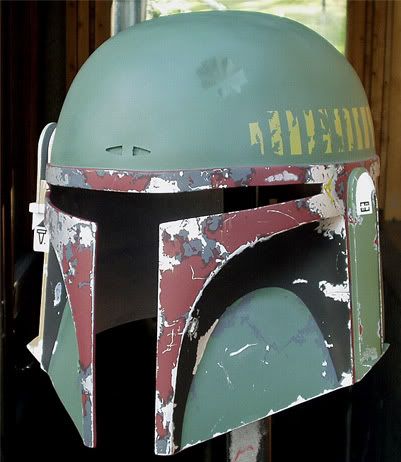
Another view. Can't wait to smudge these parts down, damn that's where the magic happens.
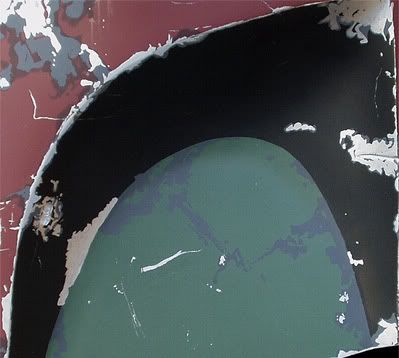
Detail of the cheek.
Well that's it for now. I have more then 70 hours put down so far and there's still plenty of work to do. If you guys enjoy the thread I will continue to update until the helmet is finished.
NEW UPDATE 270806:
Real life has gotten in the way the last few days and I haven't been able to work on the helmet as much as I'd hoped for. Anyhow, here's a couple of new pics of the dome area, this is a pretty chaotic area of the helmet, very easy to screw up.
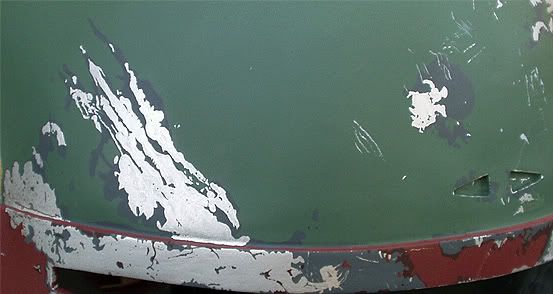
Detail shot of the side scratches, there's still more that needs to be done here but at least it's a start.
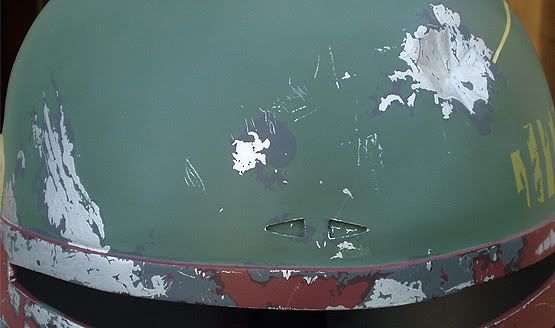
Front of the dome, not finished either but most of the larger scratches are there.
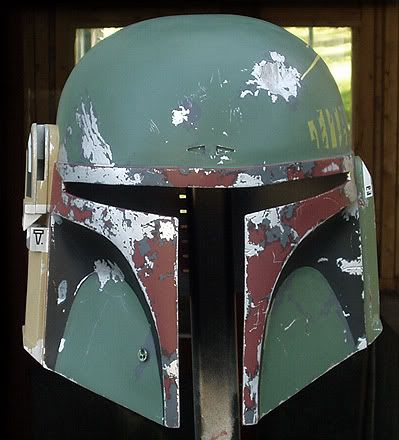
An overview of the resent work, it's finally starting to look like a Fett helmet. You can also see thin stripes of masking tape on the right side. I'm using it as a "direction" guide before I trace the long thin dome scratch. It's very easy to get this one miss placed.
That's it for now, I will soon update this thread with new pics so please stay tuned.
NEW UPDATE 010906
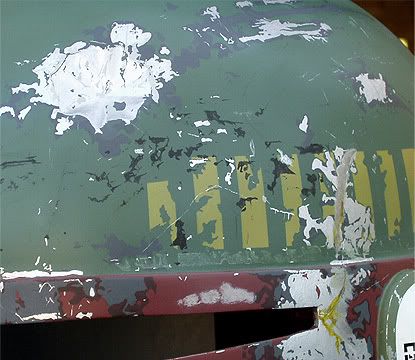
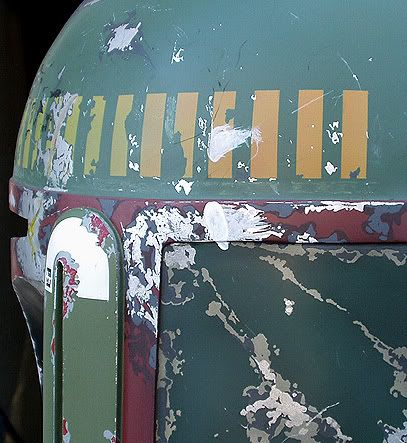
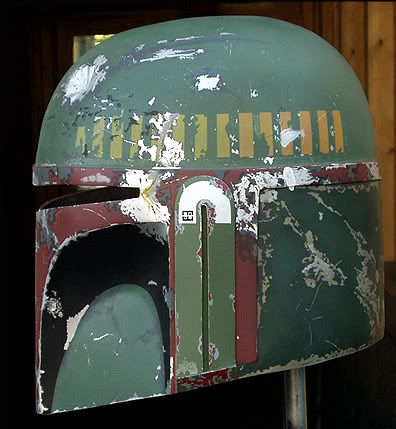
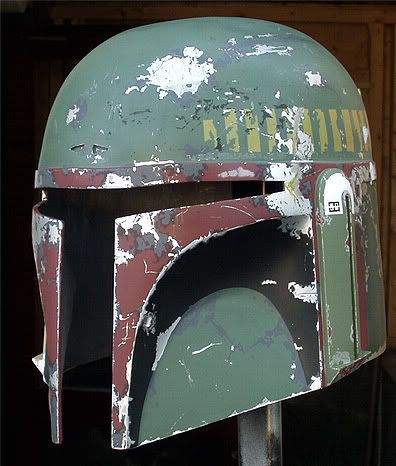
Moving towards the end now. This side of the helmet has been extremly painstaking to paint. LOTS OF DETAILS. I hope you enjoy the pics.
As always, if you have any questions feel free to ask.
LAST UPDATE 110906
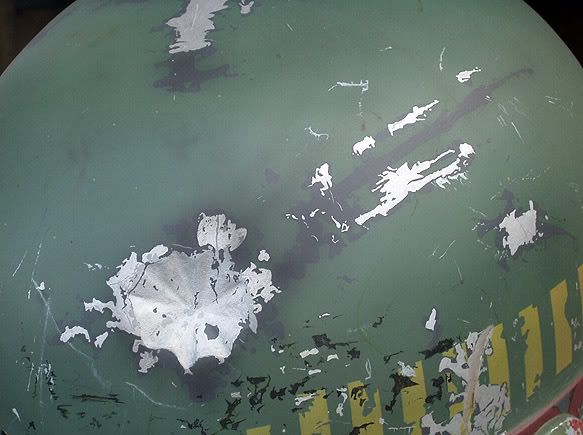
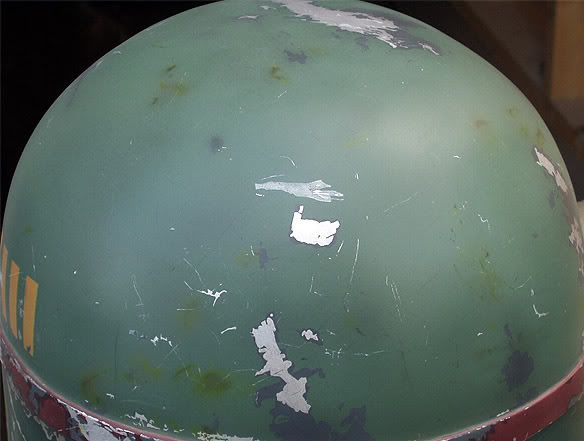
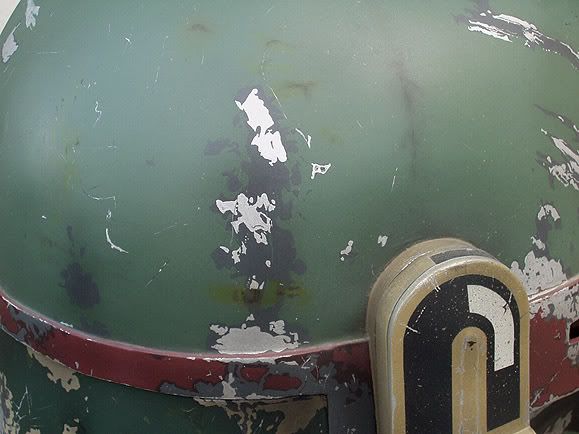
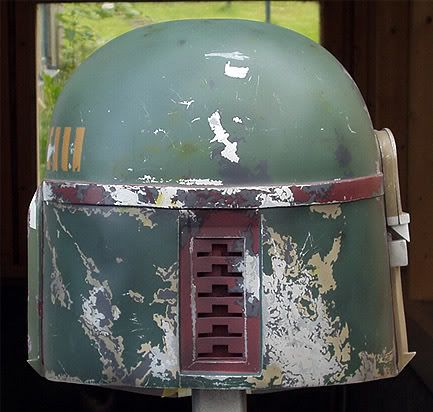
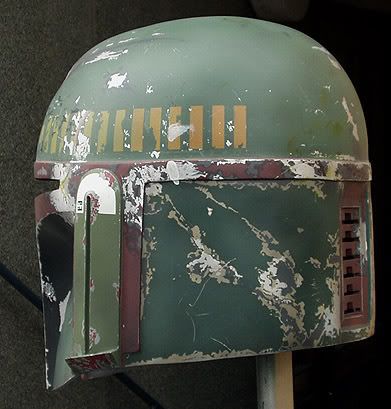
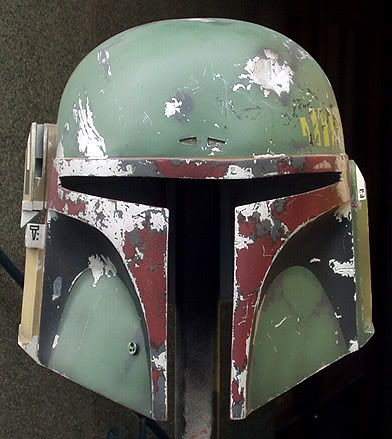
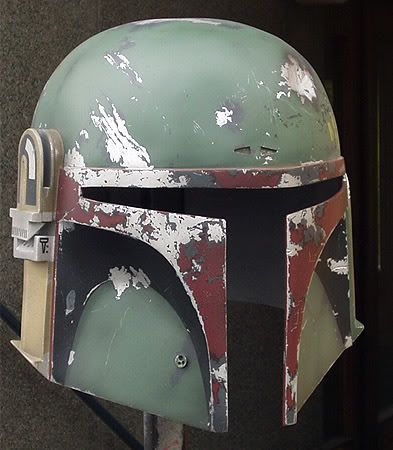
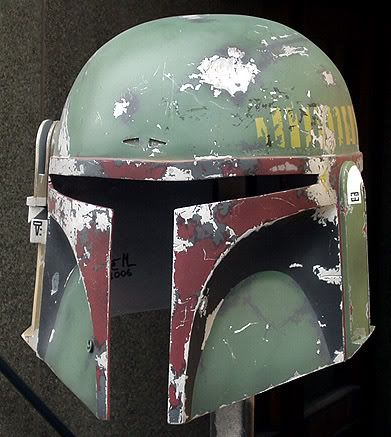
Allright. It's finally done. All the remaining scratches has been added. The entire helmet has been dirt washed. Soot and stains has been added with various techniques. The whole shebang's been sealed, first with a satin coat and then dusted with flatt to give it a dusty look. Now all that's left is to attach the range finder and visor and then take some cool studio photos of it. Thanks all for your interest, I hope you'll enjoy the new pics. Oh, BTW. For those of you who wonder what the clock finally stoped at here's the answere: 143 hours.. Well worth it though, IMO. On with the pics:
Thanks again, looking forward to show you the final studio pics.
Steve.
Thanks for your interest.
Steve.
Since I've already made a tutorial on this subject (can still be viewed on www.starwarshelmets.com), this thread won't go to deep on the techniques, just the basics and sharing some pics of the progress. I hope you'll enjoy it, thanks for the interest.

Jumping back two months, the pre primed helmet has the basic colours. Most of them was the ones sugested be Lee, others were custom mixed.

The "fjords of norway map" was traced then filled with masking fluid and then I hit the back with green/blue. The mask was removed and, Voila.

The green ear was shiped with the all topical approach, meaning that all scratches are painted on top of the main green colour. Fine black hairline scratches has been added but still no "dirt wash" to blend it all together.

Range finder ear, still looking rather new and shiny, all that wil change later on.

The finished back. almost everything was done topical. Also added a element of grey/white scratches ontop of the silver ones. This can clearly be seen on the original (probably bare plastic) but I haven't seen it been replicated before. Still no dirt wash.

Smudge time. Several layers of thinned acrylic wash has been added to blend and soot it down. Makes all the different in the world, doesn't it. BTW, thanks for tip Lee, it worked out great.

Same area after the wash.

Work beginns on the red trimms and mandibles. Same technique as before, everything is applied topical with a brush. No wash yet.

The other side with the infamous "thumb print" done with thinned down Valejo, best darn acrylic paint in the world.

The finished mandibles complete with the crack repair. No wash yet here either.

Another view.

Flexing muscles with the original. It will look even better with the dirt wash, remember the back people.

Continuing on the black and green cheeks. Nothing new here, everything's painted ontop of the base color.

Another view. Can't wait to smudge these parts down, damn that's where the magic happens.

Detail of the cheek.
Well that's it for now. I have more then 70 hours put down so far and there's still plenty of work to do. If you guys enjoy the thread I will continue to update until the helmet is finished.
NEW UPDATE 270806:
Real life has gotten in the way the last few days and I haven't been able to work on the helmet as much as I'd hoped for. Anyhow, here's a couple of new pics of the dome area, this is a pretty chaotic area of the helmet, very easy to screw up.

Detail shot of the side scratches, there's still more that needs to be done here but at least it's a start.

Front of the dome, not finished either but most of the larger scratches are there.

An overview of the resent work, it's finally starting to look like a Fett helmet. You can also see thin stripes of masking tape on the right side. I'm using it as a "direction" guide before I trace the long thin dome scratch. It's very easy to get this one miss placed.
That's it for now, I will soon update this thread with new pics so please stay tuned.
NEW UPDATE 010906
Moving towards the end now. This side of the helmet has been extremly painstaking to paint. LOTS OF DETAILS. I hope you enjoy the pics.


As always, if you have any questions feel free to ask.
LAST UPDATE 110906
Allright. It's finally done. All the remaining scratches has been added. The entire helmet has been dirt washed. Soot and stains has been added with various techniques. The whole shebang's been sealed, first with a satin coat and then dusted with flatt to give it a dusty look. Now all that's left is to attach the range finder and visor and then take some cool studio photos of it. Thanks all for your interest, I hope you'll enjoy the new pics. Oh, BTW. For those of you who wonder what the clock finally stoped at here's the answere: 143 hours.. Well worth it though, IMO.


Thanks again, looking forward to show you the final studio pics.
Steve.
Thanks for your interest.
Steve.
