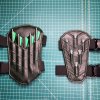
Green Arrow Quiver

We first saw the new Quiver unveiled at SDCC 2016 and then for the first time on the show in Season 4. It instantly become my new favorite prop from the show.
The Quiver is radically different from the previous Seasons 1-3 Quiver. Larger, more oval shape, and with a completely different outer leather layer around the quiver body.
Detailed info:
- Holds 32 shafts (Seasons 1-3 Quiver held 18)
- Leather outer layer with scored lines/details
- Cordura underneath
- Material for the Quiver body/shell is unknown
- Leather straps connect to harness, which then attaches to the Quiver.
- Quiver body has slight tapered effect. Larger opening at the top rather than the bottom.
- Rivets on the Quiver itself have not been identified
Process:
Quiver v1
I started working on the Green Arrow Quiver shortly after it debuted in Season 4. While not being certain of the core material, and a lack of solid reference (Great reference shots would come much later in 2017). I decided to experiment with EVA foam. What an original idea right? 
One thing I learned the hard way working on the Season 1-3 Quiver was that to get the right shape for the body you need some sort of buck, or something mold the material around. This is something I continued to improve with each version of the Quiver.
For the outer layer material I used Forest Green Vinyl. I first mapped out the template on the vinyl. Then cut out the slots, and the bottom. I did this differently later but on the first version of the Quiver this is how I did it. Then I went to my sewing machine and stitched out the pattern on the vinyl.


 The core is like I mentioned EVA foam. I used Barge Cement to glue it together and a heat gun to shape it. Once I had the shape down, I used Wood glue to coat the foam seal it, and provide some strength. After 2 coats of Wood Glue the foam will hold its shape. Then I applied a layer of Fiberglass cloth and more wood glue on top. After a few more coats you have a very rigid, and sturdy Quiver shell. The more you Fiberglass cloth and glue you add the stronger the quiver will be.


 Next I wrapped the Quiver in
 Black 1,000 Denier Cordura Nylon Fabric, you can find it on
Amazon. I recommend a spray adhesive, or Barge cement. After the Cordura layer is glued on, then I glued the vinyl wrapper on to the Quiver. I used Barge cement for this as well. The rivets are simple thumb tacks.

Quiver v2
One of the things I wanted to improve on my original Quiver was the overall shape. So I 3d printed a form to use a buck. This is to give the Quiver a taper effect like the screen used Quiver, and also to widen the opening and make it more uniform.
I printed the buck at two different scales. I ended up making Quivers at both sizes, the smaller one being the preferred choice. The buck itself is 4 different pieces printed and stacked together. I covered the outside with tape so my foam wouldn't stick to the sides.


Since this was a new buck, I had to create a new template. I covered the buck in tape cut it out, and drew out the pattern. Then I transferred the pattern over to the Vinyl.


The rest of the process was almost exactly the same. I created the Quiver body with foam, wrapped around the buck. Hardened with Wood Glue and fiberglass cloth. Several layers of glue and fiberglass built up to give it a durable shell. Next I covered the raw Quiver shell with a layer of black Cordura.

Just like on the last Quiver, I used my sewing machine to stitch the detail into the outer layer of the vinyl.


Unfortunately I don't have any more images of the build process. So I'll just drop some completed shots of the Quiver.


