TerranCmdr
Well-Known Member
I've had this costume nearly complete since last August and haven't had the time to get my build website up (my son arrived around the same time), but I've been dying to share it. So I might as well get started here - I have most of this written up already and just need to go through the pictures. I may end up updating my website and linking that but I just wanted to share something at least!
I need to take a better full body shot, but here's me on Halloween with my little BB unit


Anyway, I'll start with the helmet. I wanted to do this costume as cheaply as possible so the obvious choice for me was Pepakura. I found a file here, downloaded the program, and started printing. 19 pages later I had what would become my helmet. Many nights of spent Xacto blades later and I had all the pieces. I then glued everything together using quick-dry adhesive and was pretty proud of the result.

The process for this is pretty well established, so I gathered my supplies and went to town with the fiberglass resin.

I jammed a piece of foamcore in there for stability but it didn't do much - the darn thing dried lopsided.

Nonetheless I fearlessley pressed on and applied "Rondo" to the interior of the helmet. Nasty stuff.

I taped the helmet down with the hope that it would straighten itself out. It did not. At this point I also thought it was a bit too big, so I decided to just start over.
This time around was much easier. I now had access to a printer that would cut and score the paper for me. I had to edit the plans in Ai, which took the better part of a couple weeks' worth of lunch breaks, but the payoff was so worth it.

(Click for video!)
The printer took maybe 20 minutes to do what took me weeks the first time. I also scaled the helmet down to 98% this time in the hopes that it would fit my head better. So once again I went about gluing all 600+ tabs together, using CA glue this time, which sucks when you get it on your fingers.


A few short days later and I had my second helmet! Compared to the first one it was tiny, but I was confident it would fit properly.
Once again I pulled out the fiberglass resin. This time however I was careful to have something for the parts to dry properly - a foam head with padding, and a foamcore construction for the visor part. Things went a lot smoother.


I had to trim down the bottom part of the helmet beacuse for some reason the pep file had that part really narrow. It wouldn't even fit over my head. Some tin snips took care of that.

Then it was time to Rondo once again. It took a few batches to coat the insides of both pieces but it came out ok. Still working on getting the right consistency with this stuff.


Finally it was time to start slapping Bondo on the thing! I went pretty generous with my first coat.

Then, of course, lots of sanding. At this point I realized the pep file didn't include the rear "mohawk" on the helmet, so I decided to add that with some foamcore and more Bondo.


Following that it was more Bondo, more sanding, and so on. In between coats, I marked trouble spots with sharpie. On the visor, I decided to add in a lip that wasn't present in the pep file.


It was really coming along! I was feeling confident so I decided to prime up the visor to see how it would look. I had just a couple places that needed attention...

At this point I also decided to do the scariest thing - drilling a hole in the helmet to attach the visor! The bolts I sourced from Home Depot, they are a close approximation.


It went well! The test fit looked good too. It was looking pretty good at this point so I decided to give spot putty a try and prime the whole thing up. (I wasn't impressed with the spot putty.)


Ok, one more pass with the Bondo and we'll call it good enough!

Sprayed the heck out of it with filler primer in an attempt to fill any small imperfections, and finally got the white primer/basecoat on! Was pretty happy with my work at this point.

In between sanding I was figuring out exactly how I wanted my helmet to look. I decided on a paint scheme similar to Poe's helmet in the beginning of TFA. I was able to import the pep file into my 3d software (MODO) and use that to visualize my paint schemes. Once I was set on the scheme and details, I used the same printer to print and cut some vinyl decals. I bought spraypaint and sprayed it on a piece of cardboard, then use the Pantone swatches at work in an attempt to match the color. They came pretty close.


From there it was on to masking and painting. I started with the visor. I used the "French's" technique to create the chipped paint look. I did discover not to leave the mustard on for too long as it can stain the undercoat. For the scratches I just used whatever sharp object I had laying around (I think maybe a screwdriver?)


The rest of the helmet was pretty straightforward. Came out pretty nice.


I then applied the decals. I wasn't sure my printer would have the resolution necessary for the "sliced onion," but it turns out it did and it looks great!


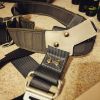
With all the decals on it was time to get some foam padding on the inside. I used a few pieces of foam I found in the toss-pile at my previous job and just cut and fit using scissors and hot glue. It's not pretty, but it's also not visible when I wear the helmet. At this point I realized just how snug the helmet fit and figured I should probably have done a 99% or so scale. I have to really squeeze my head into this thing. Still, it looks pretty decent.
I should note at this point I had to cut the bolts down that hold the visor on. I lack the proper tools so I had to use a hacksaw. Definitely earned the beer that night.

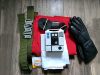
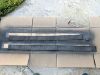
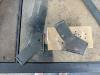
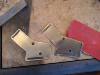
With all of that finished it was time for the greeblies. I modeled the pieces out in Rhino and sent the files over to my awesome friend who has a badass 3d printer. I was extremely impressed with the resolution and detail. I had originally planned to print the leg flares as well, but the material cost was prohibitive, so I settled for a half-piece with the plan to cast and copy.


The pieces didn't even really need any sanding, so I just hit them with a few coats of filler primer and painted them up in silver and black acrylic. For the mic I used a piece of cut down paint can for the metal bar & some wire I had laying around. I attached it to the helmet using 1/2" neodymium magnets (I got the idea from this build). I love this attachment method as I can rotate the mic to wherever I like, or remove it completely for transportation/storage.

The greeblies were glued to the helmet using Gorilla Glue. I had never used the stuff before but it was a perfect adhesive for this. It foams up and really bonds strong. After the greeblies were attached I used some Nuln oil and a paper towel to add some weathering, as well as some dry-brushing with silver (may have slightly overdone that, oh well.) Still on the list for this helmet is the visor, for which I already have a sheet of amber acrylic, I just need to make a buck to form it over.
I couldn't be happier with how this whole helmet turned out. Pepakura is a challenging thing to work with, but with enough patience the outcome can be pretty nice. I think overall this helmet probably cost me less than $100 in materials. (Bondo, resin, primer, spraypaint, 2d/3d printing.)


I need to take a better full body shot, but here's me on Halloween with my little BB unit
Anyway, I'll start with the helmet. I wanted to do this costume as cheaply as possible so the obvious choice for me was Pepakura. I found a file here, downloaded the program, and started printing. 19 pages later I had what would become my helmet. Many nights of spent Xacto blades later and I had all the pieces. I then glued everything together using quick-dry adhesive and was pretty proud of the result.
The process for this is pretty well established, so I gathered my supplies and went to town with the fiberglass resin.
I jammed a piece of foamcore in there for stability but it didn't do much - the darn thing dried lopsided.
Nonetheless I fearlessley pressed on and applied "Rondo" to the interior of the helmet. Nasty stuff.
I taped the helmet down with the hope that it would straighten itself out. It did not. At this point I also thought it was a bit too big, so I decided to just start over.
This time around was much easier. I now had access to a printer that would cut and score the paper for me. I had to edit the plans in Ai, which took the better part of a couple weeks' worth of lunch breaks, but the payoff was so worth it.
(Click for video!)
The printer took maybe 20 minutes to do what took me weeks the first time. I also scaled the helmet down to 98% this time in the hopes that it would fit my head better. So once again I went about gluing all 600+ tabs together, using CA glue this time, which sucks when you get it on your fingers.
A few short days later and I had my second helmet! Compared to the first one it was tiny, but I was confident it would fit properly.
Once again I pulled out the fiberglass resin. This time however I was careful to have something for the parts to dry properly - a foam head with padding, and a foamcore construction for the visor part. Things went a lot smoother.
I had to trim down the bottom part of the helmet beacuse for some reason the pep file had that part really narrow. It wouldn't even fit over my head. Some tin snips took care of that.
Then it was time to Rondo once again. It took a few batches to coat the insides of both pieces but it came out ok. Still working on getting the right consistency with this stuff.
Finally it was time to start slapping Bondo on the thing! I went pretty generous with my first coat.
Then, of course, lots of sanding. At this point I realized the pep file didn't include the rear "mohawk" on the helmet, so I decided to add that with some foamcore and more Bondo.
Following that it was more Bondo, more sanding, and so on. In between coats, I marked trouble spots with sharpie. On the visor, I decided to add in a lip that wasn't present in the pep file.
It was really coming along! I was feeling confident so I decided to prime up the visor to see how it would look. I had just a couple places that needed attention...
At this point I also decided to do the scariest thing - drilling a hole in the helmet to attach the visor! The bolts I sourced from Home Depot, they are a close approximation.
It went well! The test fit looked good too. It was looking pretty good at this point so I decided to give spot putty a try and prime the whole thing up. (I wasn't impressed with the spot putty.)
Ok, one more pass with the Bondo and we'll call it good enough!
Sprayed the heck out of it with filler primer in an attempt to fill any small imperfections, and finally got the white primer/basecoat on! Was pretty happy with my work at this point.
In between sanding I was figuring out exactly how I wanted my helmet to look. I decided on a paint scheme similar to Poe's helmet in the beginning of TFA. I was able to import the pep file into my 3d software (MODO) and use that to visualize my paint schemes. Once I was set on the scheme and details, I used the same printer to print and cut some vinyl decals. I bought spraypaint and sprayed it on a piece of cardboard, then use the Pantone swatches at work in an attempt to match the color. They came pretty close.
From there it was on to masking and painting. I started with the visor. I used the "French's" technique to create the chipped paint look. I did discover not to leave the mustard on for too long as it can stain the undercoat. For the scratches I just used whatever sharp object I had laying around (I think maybe a screwdriver?)
The rest of the helmet was pretty straightforward. Came out pretty nice.
I then applied the decals. I wasn't sure my printer would have the resolution necessary for the "sliced onion," but it turns out it did and it looks great!
With all the decals on it was time to get some foam padding on the inside. I used a few pieces of foam I found in the toss-pile at my previous job and just cut and fit using scissors and hot glue. It's not pretty, but it's also not visible when I wear the helmet. At this point I realized just how snug the helmet fit and figured I should probably have done a 99% or so scale. I have to really squeeze my head into this thing. Still, it looks pretty decent.
I should note at this point I had to cut the bolts down that hold the visor on. I lack the proper tools so I had to use a hacksaw. Definitely earned the beer that night.
With all of that finished it was time for the greeblies. I modeled the pieces out in Rhino and sent the files over to my awesome friend who has a badass 3d printer. I was extremely impressed with the resolution and detail. I had originally planned to print the leg flares as well, but the material cost was prohibitive, so I settled for a half-piece with the plan to cast and copy.
The pieces didn't even really need any sanding, so I just hit them with a few coats of filler primer and painted them up in silver and black acrylic. For the mic I used a piece of cut down paint can for the metal bar & some wire I had laying around. I attached it to the helmet using 1/2" neodymium magnets (I got the idea from this build). I love this attachment method as I can rotate the mic to wherever I like, or remove it completely for transportation/storage.
The greeblies were glued to the helmet using Gorilla Glue. I had never used the stuff before but it was a perfect adhesive for this. It foams up and really bonds strong. After the greeblies were attached I used some Nuln oil and a paper towel to add some weathering, as well as some dry-brushing with silver (may have slightly overdone that, oh well.) Still on the list for this helmet is the visor, for which I already have a sheet of amber acrylic, I just need to make a buck to form it over.
I couldn't be happier with how this whole helmet turned out. Pepakura is a challenging thing to work with, but with enough patience the outcome can be pretty nice. I think overall this helmet probably cost me less than $100 in materials. (Bondo, resin, primer, spraypaint, 2d/3d printing.)
Last edited: