You are using an out of date browser. It may not display this or other websites correctly.
You should upgrade or use an alternative browser.
You should upgrade or use an alternative browser.
Studio 2 1/48 scale Firefox model (PICS)
- Thread starter Keith
- Start date
Firefoxm31
Sr Member
ok, pull up a chair...this may take a while... JK 
I'll rub through the basics for you on this one. Honestly, it would require enough modifications to warrant just scratch building a new one to really get it right. Here we go just the same.
First, the overall fuselage is too narrow, should be more robust. This would be a major change so I guess leave this one out. The nose of the model is shaped wrong. if you look at screen grabs or photos I've posted on my build you can see how far off it truly is. The facets of the nose were called "chisel nose" and the overall contours of the plane's nose and main fuselage are the primary design from Greg Jien's original concept.
The main fuselage could be made to look better by rounding the "square-ish look this kit has over the top. The only area that is this shape is just behind the canopy avionics hump for lack of a better word. The cockpit is too far forward, however if you add an extension to the nose this can be remedied. The nose isn't broad enough, nor does it have the correct angles and curves on the bottom section. Two things would be good to modify here. The area just behind the canards on the bottom side when viewed from the side takes a sweeping arc toward the nose of the plane. It stops where the facets start. All replicas of this plane I've seen to date have this area beveled / chamfered almost to a halfway mark along the fuselage to help meet the angular face of the belly intakes, this is not right at all. Also, a strong point always missed., making this plane more difficult to model is the fact that the entire bottom of the nose takes a downward sweep from the canards to the tip. The main turbine fan intakes side profile have a delicate curve to them when viewed from this angle. This again would be quite a modification to make but it's up to you as to how far you want to go on fixing this. The intake shrouds are way too pronounced stretching too far forward where they meet the area of the intake inlet "tunnel" as I call it. The rear engine nozzle cowling/shroud should be longer and more angled and not attached to itself as the kit represents. the cowlings for the engine nozzles are thicker with some "vanes" in the inner vertical curved wall. The drag chute/ drone area is too thin on the kit and needs to be made more contoured/ robust and rounded except for the ends. Nozzles are overly simplified, but for this model, get the job done, even provided with the inner burner cans, good deal.. Wing tips are surprisingly not bad at all, even possessing the curved tips. I'd say stick with the simplified recessed panel arrangement unless you have about 60 years to redo. The Firefox miniatures have one of the most intensive recessed panel line patterns I've ever seen on an aircraft. well this should get you going anyway, good luck and ask questions if you need to.
Sincerely,
Will
Keith
Sr Member
I've now received the model and have made the nose a bit longer and i've also made the top air intakes more accurate.
The glass is just resting in place in these pics and has not been fully polished yet after sanding:


BTW, I bought firefox on DVD for some more reference and noticed that the blue thunder helicopter is in the film for some reason :confused
Thanks wackychimp for hosting,
Keith.
The glass is just resting in place in these pics and has not been fully polished yet after sanding:


BTW, I bought firefox on DVD for some more reference and noticed that the blue thunder helicopter is in the film for some reason :confused
Thanks wackychimp for hosting,
Keith.
Firefoxm31
Sr Member
you got the idea here took one of your images and gave it a tweek this is more like what you would want in the end
Best,
will

Best,
will

Keith
Sr Member
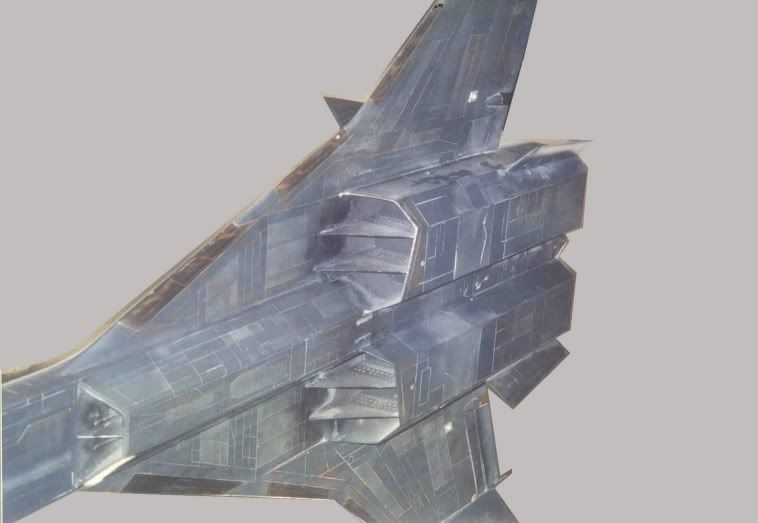
I've now fitted the rear section onto the plane. I knew it was going to be a big job just fitting it, but then i noticed how inaccurate the rear section was. I had to reshape the whole thing, as well as adding a few parts.
I've still got to add more details, but here it is so far:


I didn't take any photos of how it was before, but i found the picture below on the net of a standard build:


Thanks wackychimp for hosting,
Keith.
I've still got to add more details, but here it is so far:


I didn't take any photos of how it was before, but i found the picture below on the net of a standard build:


Thanks wackychimp for hosting,
Keith.
Keith
Sr Member
I've added some more detail to the rear section:

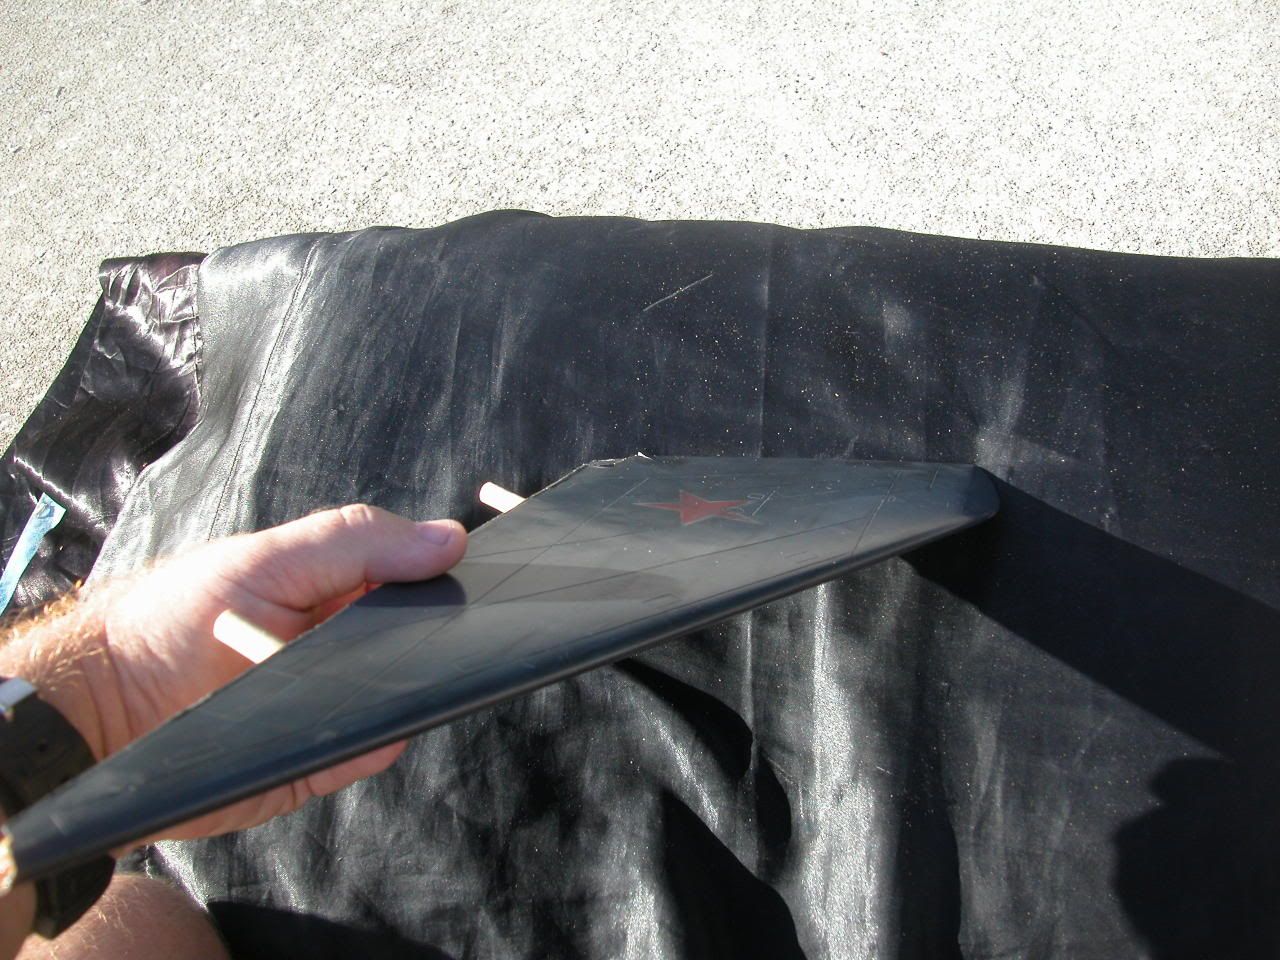
Here are the wing tips after i scribed the panel lines (which are filled with dust so they show-up in the pic). Only the control surfaces were there orignally. I also changed the shape of the wing tips a bit:

Here you can see the front fins. I had to make two new ones as the one of the orignal ones was thinner than the other. They slot in place with two metal rods each:

The air brakes are now scribed in, but they don't show-up very well in the picture. I hope to have the main body finished by the end of the week:

Thanks wackychimp for hosting,
Keith.

Here are the wing tips after i scribed the panel lines (which are filled with dust so they show-up in the pic). Only the control surfaces were there orignally. I also changed the shape of the wing tips a bit:

Here you can see the front fins. I had to make two new ones as the one of the orignal ones was thinner than the other. They slot in place with two metal rods each:

The air brakes are now scribed in, but they don't show-up very well in the picture. I hope to have the main body finished by the end of the week:

Thanks wackychimp for hosting,
Keith.
Firefoxm31
Sr Member
Hey there Keith,
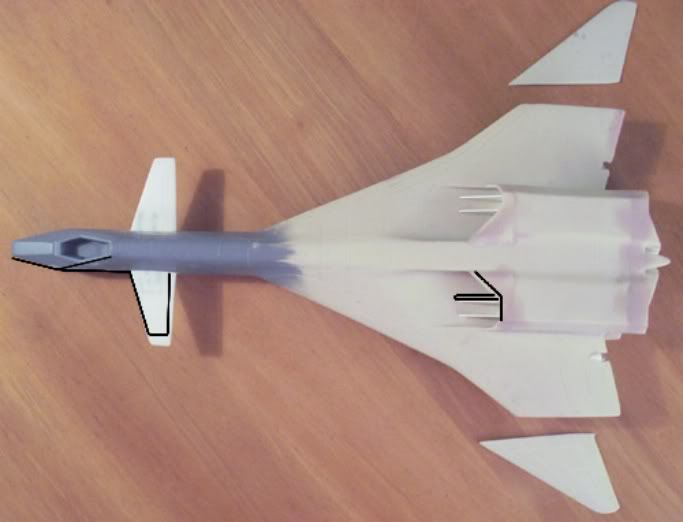
I took a look at your top shot and here's what could be fixed. Your canards are too large, cut them down a bit. Also, the intake inlet shrouds need to be half the width before the triangular interface begins. You would also move over your air splitter at that point.(still don't know what the technical term for these is called). Again, I took the liberty of grabing your photo and super-imposing the fixes.
Best,
Will

Firefoxm31
Sr Member
the answer to your intake fix is jeweler files got em? and this is screen accurate for your tips, you almost have it too. 
Will

Will

Firefoxm31
Sr Member
top of the tip no, bottom yes


Firefoxm31
Sr Member
alot better.. I got quite a bit done on my Firefox too, but not hijacking your thread, just updating mine..go take a look when ya get a chance..
Will
Will
ZOMBIEREPELLENT
Sr Member
http://cs.finescale.com/forums/1/362318/ShowPost.aspx#362318
Someone is making a kit of this in 1:32 scale at FSM.
Someone is making a kit of this in 1:32 scale at FSM.
Keith
Sr Member
I decided to rework the shape of the nose to make it more accurate:


All the panel lines have been redone and the whole body has been primed. The seams between the parts came out perfect after some very careful fitting, filling and sanding.

I've still got some more landing gear doors to make and the fins for the bottom intakes have to be fitted:

Thanks wackychimp for hosting,
Keith.


All the panel lines have been redone and the whole body has been primed. The seams between the parts came out perfect after some very careful fitting, filling and sanding.

I've still got some more landing gear doors to make and the fins for the bottom intakes have to be fitted:

Thanks wackychimp for hosting,
Keith.
falcondesigns
Well-Known Member
That would be our own Firefoxm31.Alexander
JediG60racer
Sr Member
^ and I am looking forward to owning one of his model kits..
Firefoxm31
Sr Member
ventral stablilizer fins are too long on the Studio two plane cut em down to a little more then half the size you have now in length.. here's the real deal (please no one use image without my permission) ohh, so let me see a side shot of your new nose.
Best,
Will

Best,
Will

Keith
Sr Member
OK, thanks for the info. I will cut the bottom fins shorter, but i might not beable to cut them quite as short as they should be, as they have three metal rods passing through them to hold them onto the plane.
Here is the new nose from the side:

The wing tips and tail fins don't need to be glued, as they are a nice tight fit, again, using three metal rods each. The wing slats that fit between the main wing and the wing tips have still got me to made and fitted:

Its looking good now its all put together and its BIG.:

Thanks wackychimp for hosting,
Keith.
Here is the new nose from the side:

The wing tips and tail fins don't need to be glued, as they are a nice tight fit, again, using three metal rods each. The wing slats that fit between the main wing and the wing tips have still got me to made and fitted:

Its looking good now its all put together and its BIG.:

Thanks wackychimp for hosting,
Keith.


