Phantom017
Well-Known Member
So from the very first time I saw the movie Stargate and Anubis and the Horus Guards came onto the screen I loved everything about them. I especially liked the head movement and the glowing eyes. I knew that someday I wanted to make one of these helmets. Well my available resources at the time didn't allow for this nor did I have any idea where to start.
Fast forward to 2013 and with the popularity of pepakura files flooding the costuming scene I decided one day to take a stroll through the interwebs and see if I could find some cool files to try. Then it showed up on my screen. A pep file for an Anubis and Horus guard helmet. I was instantly hooked. I downloaded the file and what you see here is my build of an Horus guard helmet. I chose Horus for 2 reasons. In the movie they are the pilots of the death gliders. I am an airline pilot so I figured it was appropriate. And 2 I like to usually go for the recognizable yet still a bit obscure characters. I seen several Anubis heads but only a few Horus.
I found RPF member HONUS67 who was instrumental in helping me build this helmet and getting the animatronics to work. I have never done anything with servos or programing circuit boards before and his instructable here Animatronic Stargate helmet really helped me piece this thing together.
This is my very first PEP build (I know nothing like taking a huge leap with both feet for an initial project) That with the electronics made things interesting.
So I started with a stack of Card stock. I used 110lb for extra rigidity. I also figured I would start with the head because on paper it for some reason looked easier....
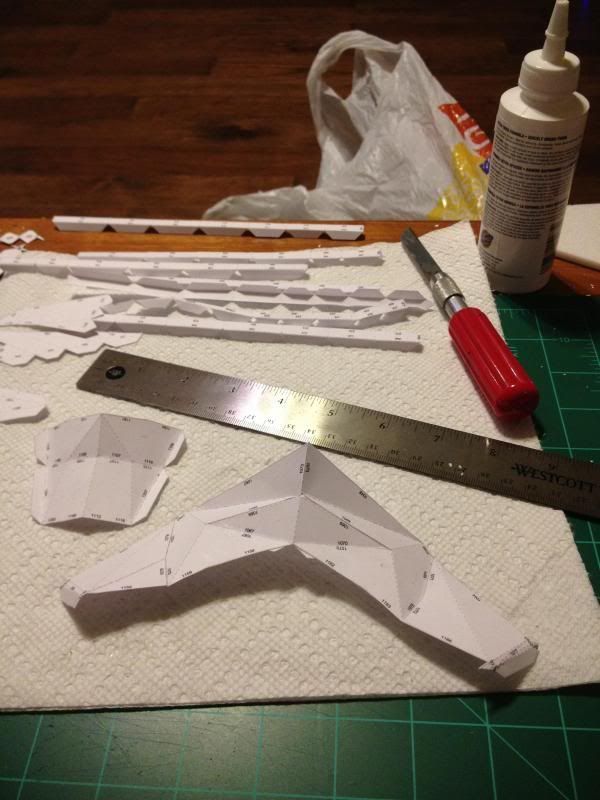
One thing I noticed is that a lot of people use hot glue to hold there peps together. Let me just say is that Scotch makes a very quick drying white glue found in most hobby stores that sell scrapbooking supplies that worked superbly. The glue once seated dries in approximately 10-20 seconds (sometimes quicker) and I never had any problems with the bond.
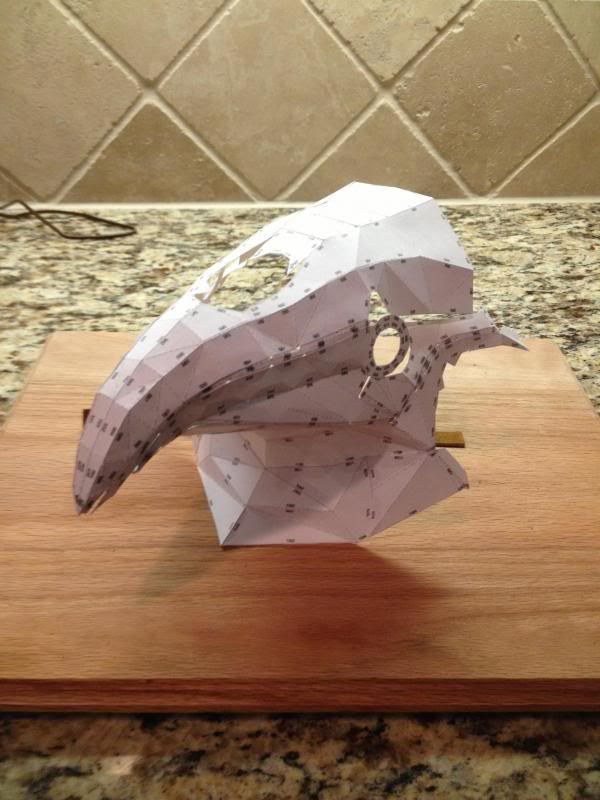
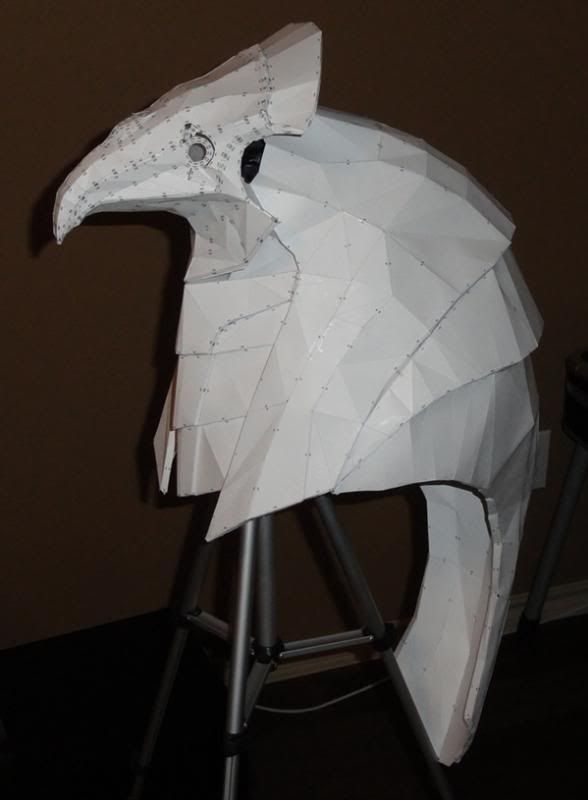
So on to the head. There are a lot of curves on this thing and made for a very interesting time putting it together. I also ended up not building the eyes up because I was going to be covering it with paper mache' AND craft foam later and was planning on lighting the eyes so I left them unfinished. Which was also a time saver as they are one of the most complex parts of the entire build.

After assembling the Head I started on the front of the main helmet... I guess you can call it a chest piece even though it sits on your shoulders. The pep file has an interior wall build too that I did only for the edges to help hold the shape together.
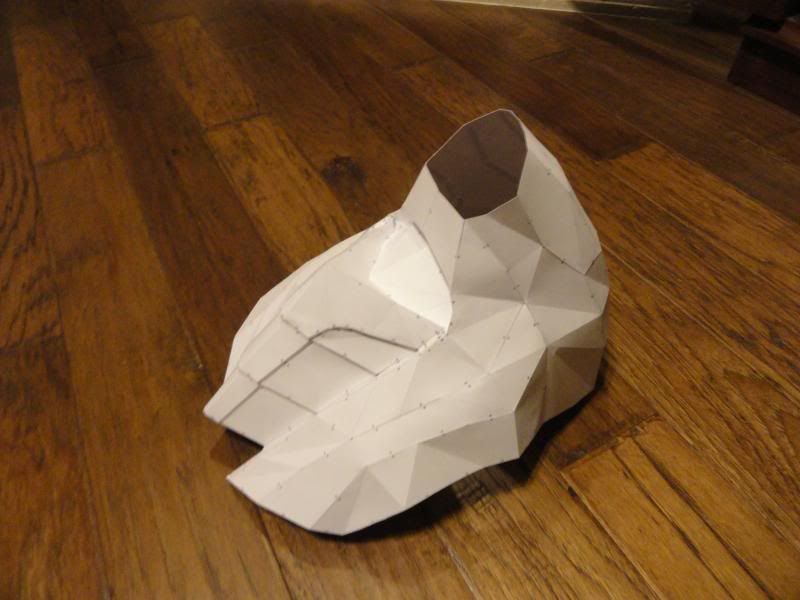
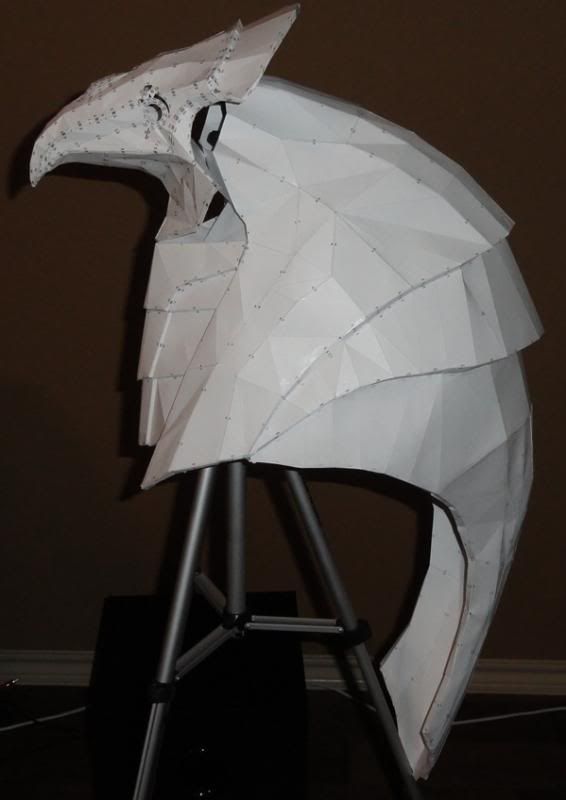
The flare of the main helmet as seen in the previous photo was reduced once the rest of the helmet was assembled however in the movie the helmet flare is almost to the ends of the shoulders it appears. I do wish this pep would of flared out a bit more but it still looks good once put together.
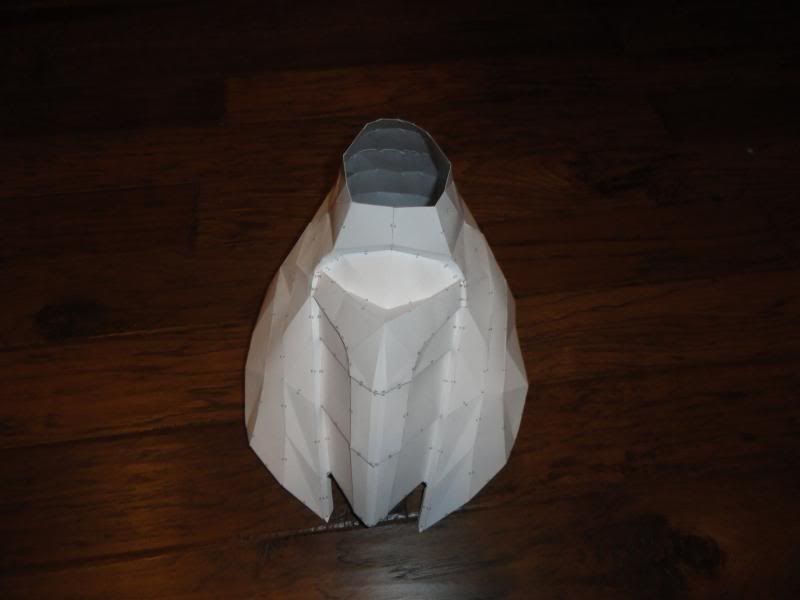
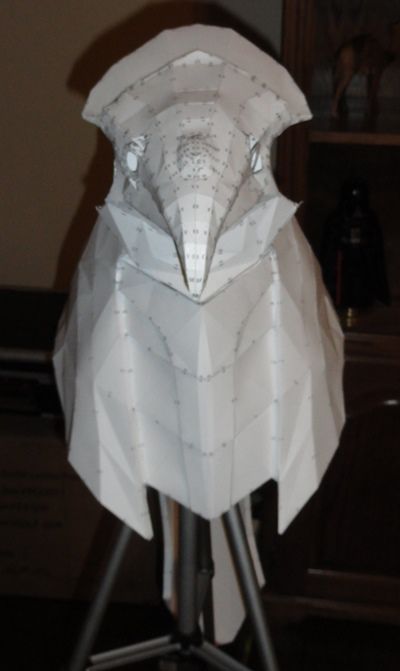
Once I had the main parts together I set them up for a test fitting.... Looks like a Horus Guard helmet to me so far!
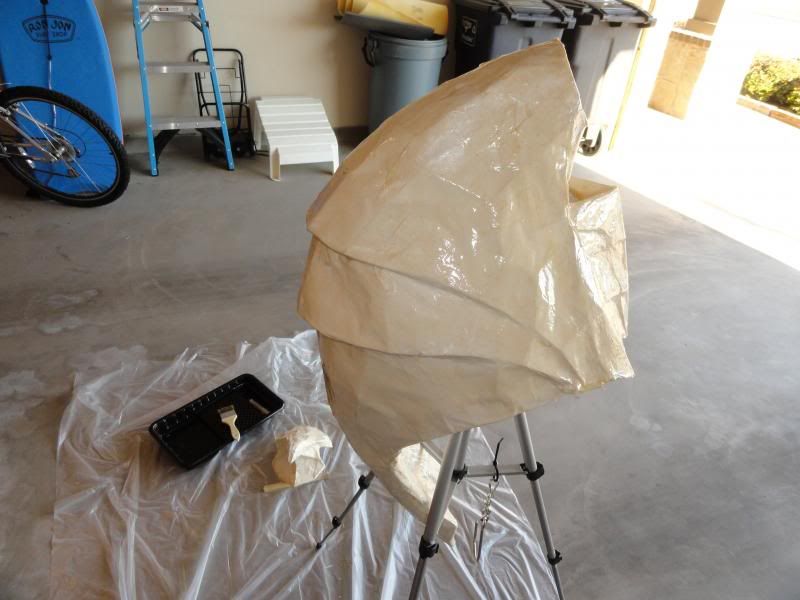
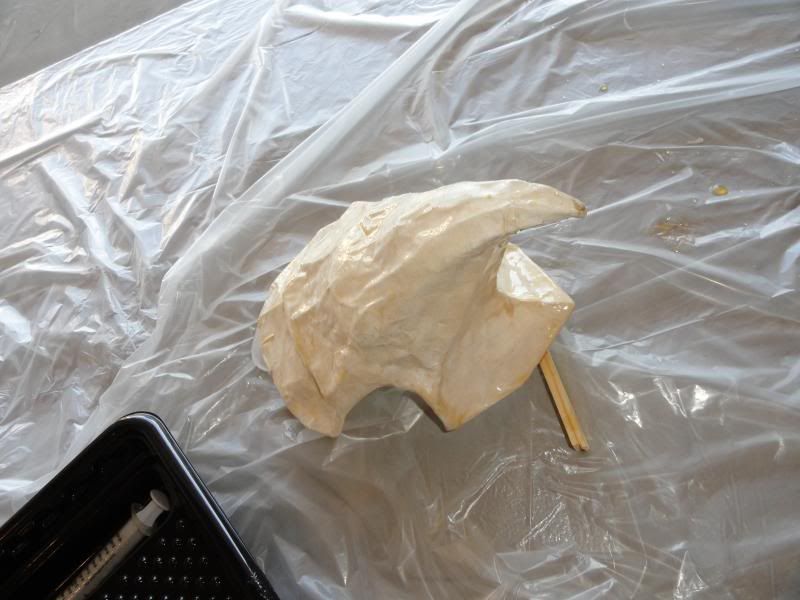
Next I used butcher paper to paper mache the entire helm and head to help make it more rigid and to try and smoothen out the corners and angles left by the pep. It worked great. The thick paper became really solid when dried. The only down side was that thicker paper holds more water and that water leaked out as it was drying into the original card stock and ended up warping the pep just a bit. It took a little bit of readjusting and forming when I used 3M Fiberglass resin on top of the paper mache to help strengthen that even more.
Here is a pic of the resin overtop of the paper mache as it is drying. The head piece also was covered in paper mache and resin to help with strength.
I know that most of the detail from the pep seems hidden under all those layers but this was intentional. I knew from the beginning that I was going to cover it in craft foam and all the detailing would be on top anyway so really the only thing the pep was for was the initial form.
Stay tuned for next episode... The craft foam cometh!
Fast forward to 2013 and with the popularity of pepakura files flooding the costuming scene I decided one day to take a stroll through the interwebs and see if I could find some cool files to try. Then it showed up on my screen. A pep file for an Anubis and Horus guard helmet. I was instantly hooked. I downloaded the file and what you see here is my build of an Horus guard helmet. I chose Horus for 2 reasons. In the movie they are the pilots of the death gliders. I am an airline pilot so I figured it was appropriate. And 2 I like to usually go for the recognizable yet still a bit obscure characters. I seen several Anubis heads but only a few Horus.
I found RPF member HONUS67 who was instrumental in helping me build this helmet and getting the animatronics to work. I have never done anything with servos or programing circuit boards before and his instructable here Animatronic Stargate helmet really helped me piece this thing together.
This is my very first PEP build (I know nothing like taking a huge leap with both feet for an initial project) That with the electronics made things interesting.
So I started with a stack of Card stock. I used 110lb for extra rigidity. I also figured I would start with the head because on paper it for some reason looked easier....

One thing I noticed is that a lot of people use hot glue to hold there peps together. Let me just say is that Scotch makes a very quick drying white glue found in most hobby stores that sell scrapbooking supplies that worked superbly. The glue once seated dries in approximately 10-20 seconds (sometimes quicker) and I never had any problems with the bond.
So on to the head. There are a lot of curves on this thing and made for a very interesting time putting it together. I also ended up not building the eyes up because I was going to be covering it with paper mache' AND craft foam later and was planning on lighting the eyes so I left them unfinished. Which was also a time saver as they are one of the most complex parts of the entire build.


After assembling the Head I started on the front of the main helmet... I guess you can call it a chest piece even though it sits on your shoulders. The pep file has an interior wall build too that I did only for the edges to help hold the shape together.


The flare of the main helmet as seen in the previous photo was reduced once the rest of the helmet was assembled however in the movie the helmet flare is almost to the ends of the shoulders it appears. I do wish this pep would of flared out a bit more but it still looks good once put together.
Once I had the main parts together I set them up for a test fitting.... Looks like a Horus Guard helmet to me so far!


Next I used butcher paper to paper mache the entire helm and head to help make it more rigid and to try and smoothen out the corners and angles left by the pep. It worked great. The thick paper became really solid when dried. The only down side was that thicker paper holds more water and that water leaked out as it was drying into the original card stock and ended up warping the pep just a bit. It took a little bit of readjusting and forming when I used 3M Fiberglass resin on top of the paper mache to help strengthen that even more.
Here is a pic of the resin overtop of the paper mache as it is drying. The head piece also was covered in paper mache and resin to help with strength.


I know that most of the detail from the pep seems hidden under all those layers but this was intentional. I knew from the beginning that I was going to cover it in craft foam and all the detailing would be on top anyway so really the only thing the pep was for was the initial form.
Stay tuned for next episode... The craft foam cometh!


