Alright, by request I have prepared a short tutorial on my Calc Bubble prep.
First, to clarify. This tut is for a very specific set of calc bubbles. This is the bubble strip found within, to my knowledge, only select Exactra 20, and T-2000 calculators.
The Exactra 20 that contains this bubble strip is identified by it's dark grey view screen. Most Exactra 20s feature a red screen.
The calculator in question is pictured below on the left. The standard is on the right. Note the subtle difference in screen color.
See? Told you it was subtle.
")
If you have this calculator, upon opening it you will also note it's unique blue mounting board.
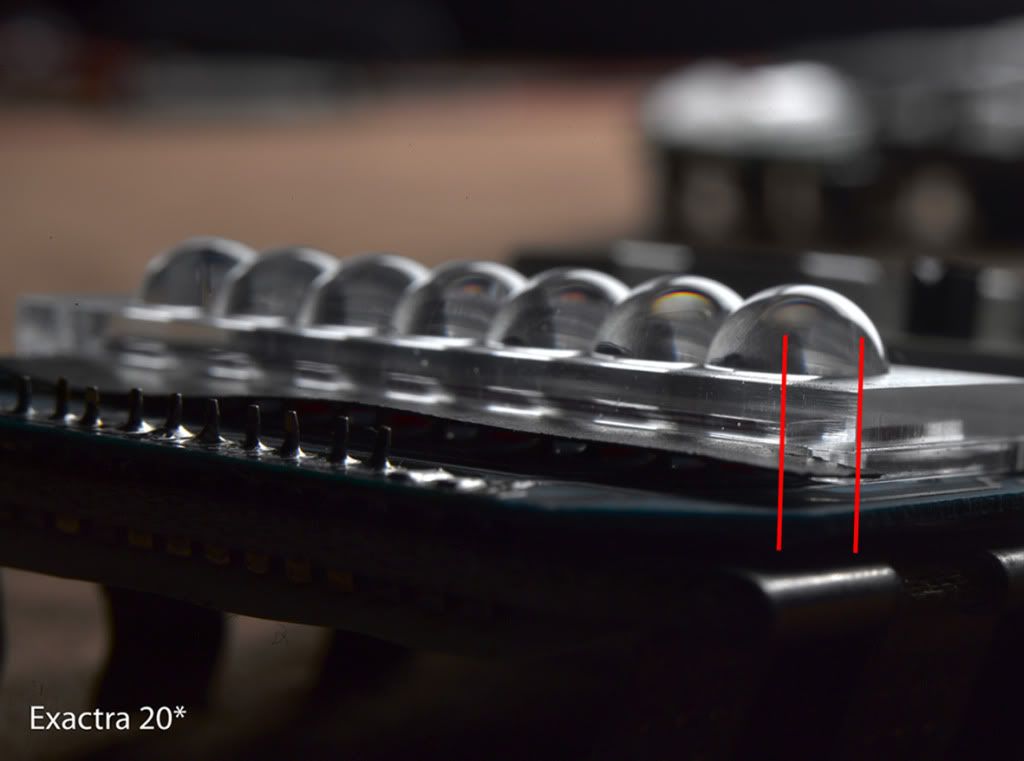
You'll also notice that the bubbles are completely rounded along the edges where they don't touch one another. This is unique to this strip. Most have a slightly flattened edge there.
In addition, the surface surrounding the bubbles on this strip has been frosted, and the recess on the back side is smaller than most. Most strips, if frosted at all, are frosted on the bottom around the recess.
In the pic you can see the plastic posts that are used to mount the strip to the board. These are passed through holes in the board, and melted to fix the strip in place.
To free the strip, you'll need to stick a needle file between the display board (blue) and the main board to file the melted area away. It will then pull right off. Or, if you don't care about the calculator, you can just put your thumb under the unattached edge and lift. This will break the blue board free, enabling you to work freely. I know because I did it by accident. lol
====================================
I have no actual photos of the work to follow. So I made a 3D model. :cool
====================================
Once you get the strip free, you will have a piece that looks like this:
Those posts need to be removed before work begins. They will prevent any precision in the next step. Just sand them down. Feel free to go below the surface with them, it will help, just don't touch the corners of the "legs" as you'll want to start with them all exactly as they are.
For the next step, you're going to start with this:
Minus the posts, of course...I forgot to remove them from the model here. :facepalm
Take some blue painters tape and completely cover the area between the uprights. Be neat about it, we want complete coverage with a single layer.
Start with a coarse grit sand paper. I used 80g. Fix it to a truly flat surface, and carefully slide the bubble strip across it until the legs are nearly gone. Switch to a finer grade, 120g is good here, and continue until you start to sand the blue tape.
STOP NOW!!!
Now we remove the tape, and switch to a fine grade. I started with a 240g wet dry here. Wet sand your way until it's just about flat. Then I switched to 400g wet sanding, and continued until flat.
Stopping there, you'll find yourself with something like this:
This is the point where I started trying to fit it into my Graflex clamp. At .520", it just didn't fit with the clamp tight enough to hold the flash itself. Nor was it wide enough to fill the recesses of the clamp if I had continued to sand the back until it fit. So, I trimmed the sides, a little at a time, until I reached a solid, and proper looking fit.
After carefully sanding the sides, a little at a time, and test fitting it until it was
just too tight, I switched back to my wet sanding, bringing it carefully to a perfect fit. The end result was about .020" off of each side.
Voila!
From here I just clamped it (centered) into the Graflex clamp which I had taped off on the ends. Then I took a file, and trimmed the edges, stopping just as I began to mark the tape.
Then I removed the bubble strip and tape from the clamp, and cleaned it up.
I returned to my wet sanding to do the final trimming of the ends.
Once happy with that, I was left with this:
Then I took some #00000 steel wool, and went back over all of the sanded areas (Wet). Then I friction polished them. Friction polish = Rubbed on my jeans until hot.
===================================
Typing this took longer, and sounds more complicated than the project itself. I literally spent
maybe 20 minutes shaping this bubble strip.
I'll be sure to a "Production" assembly to mimic the toe pic so that judgement may be passed on my bubbles.
Happy building all!
thumbsup