Star Trek First Contact Phoenix

Muzza

Sr Member
Before you ask what scale this ship is we call it printer scale. This is when you get the largest part you need to print and you enlarge it to fit the volume of your printer.
The model was designed by Robert James Models who also offers the print for sale.
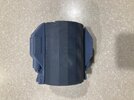
The Phoenix will be mainly printed in resin with the exception of the engine bell that was printed in PLA on a FDM printer.
 
Last edited:
This the largest part of the ship the center section that houses the nacelles. The Z axis on the printer is 400mm.
And yes I am making two of them.

aa.jpgaaa.jpgaaaa.jpg
 
Last edited:
Robert is an amazing designer, his kits are extremely well engineered, well worth the money. He also has several available for free so yiu can see what his work is all about. I watched his progress on the Stargate Daedelus and the Phoenix, he puts a lot of thought and care into everything.
 
The capsule comes in two different types windows open and windows filled in. For this project I will be building one with the blacked in windows and the other one with a fully lite cockpit.

i.jpg

The interior of the capsule has guide rails for the cockpit to fit into it neatly.
ii.jpg
 
I had quite a lot of problems trying to printing the engine bells in resin. And be for you try to give me advice on how to do it, I will let you know that I had about 10 shots at it. lots of angles, hollowed it put holes for suction the whole 9 yards with no luck.
So first print on my Creality MAX and I popped this out.
A little spray putty, sand and paint and this will do fine.
d.jpgdd.jpg
 
Last edited:
Working on the arm for the nacelle I have opted to use a aluminum arrow shaft to increase the ridge ditty. The file already has a hole running straight throw the arm easy to slide a hollow tube into and also allowing the wiring for the electrical to run through it.
The tube will need to be trimmed down where it connects to the main body, as the distance between the two sides will just allow for the wiring to pass through.

pylon.jpgPylon1.jpg bb.jpg

Once glue together I also pinned the warm to the nacelle with some solid brass rod.
 
Last edited:
Not sure what they call this part of the Phoenix it is possible that's where the Warp Core was situated.
I had to reduce the size of the parts glued around the center core section by 0.5mm so they fitted neatly around.

zz.jpgzzz.jpgzzzz.jpgzzzzz.jpgzzzzzz.jpg
z.jpg
 

Attachments

  • zzzzzzz.jpg
    zzzzzzz.jpg
    621.6 KB · Views: 132
Jumped a head a little and assembled the bottom engine section and have thrown some paint on it.
Plus added some lights for effect. Even though in the movie the lower engine bells didn't have any lighting.

e.jpgee.jpg

Just need to add a little weathering just to tone in down a little.
 
Not sure what they call this part of the Phoenix it is possible that's where the Warp Core was situated.
I had to reduce the size of the parts glued around the center core section by 0.5mm so they fitted neatly around.

View attachment 1599984View attachment 1599985View attachment 1599986View attachment 1599987View attachment 1599988
View attachment 1599983
We molded the pieces on the real one very similarly to how you did.
Tony Preciado (one of the guys in the ILM mold room) referred to those as the "Slurpee dispensers" - so that's what we called them.
 
Last edited:
We molded the pieces on the real one very similarly to how you did.
Tony Preciado (one of the guys in the ILM mold room) referred to those as the "Slurpee dispensers" - so that's what we called them.
Would you know what decals had been used around the cockpit? John told me that they were rub-on's but of what? If you could remember?
 
Would you know what decals had been used around the cockpit? John told me that they were rub-on's but of what? If you could remember?
We used a lot of Letraset rub-on letters and symbols - probably from the "microgramma bold extended" font sheets since that was the Star Trek font. I do recall some sheets having only symbols and lines, but I don't remember if those sheets had a special name.

Any other decals used could have come from ANY of the kits that the modelshop had lying around, so I couldn't even guess at that. We would dig through piles of stuff and see something cool, then just stick it on. We didn't worry about what it came from unless we needed multiples.

I think the Phoenix logo was a custom decal.
Cheers for the info, I just might make some decals for it and some funny sayings in the text. I did see a "M" on the Phoenix the exact symbol used on the AT-AT it would have been a rub on by the look of it.
 
VERY COOL! thank you for showing your build! i have the model but i havent started it yet
 
Hey Muzza!

Any more progress on your Phoenix?

Here's some paint reference of the original Phoenix. It may not have been done when I took these pics - John Goodson looks to be still working on it, but it must'a been close. Sorry these aren't great quality pics. I just took a picture of the photo with my phone.
I also included a couple shots of the engines under construction. That's me working on the Cochrane warp nacelle. Talk about a childhood thrill!

Phoenix 1.JPG


Phoenix 2.JPG

Phoenix 3.JPG


And here I am building Humanities first warp engine! I present to you: The Cochrane Warp Engine !

Phoenix 4.JPG


.... And here is the rocket engine. If you look into the maneuvering engine bells, you can see that we used large snaps for the insides.

Phoenix 5.JPG
 
Hey Muzza!

Any more progress on your Phoenix?

Here's some paint reference of the original Phoenix. It may not have been done when I took these pics - John Goodson looks to be still working on it, but it must'a been close. Sorry these aren't great quality pics. I just took a picture of the photo with my phone.
I also included a couple shots of the engines under construction. That's me working on the Cochrane warp nacelle. Talk about a childhood thrill!

View attachment 1605926

View attachment 1605927
View attachment 1605928

And here I am building Humanities first warp engine! I present to you: The Cochrane Warp Engine !

View attachment 1605929

.... And here is the rocket engine. If you look into the maneuvering engine bells, you can see that we used large snaps for the insides.

View attachment 1605930
WOW these photos are fantastic!!
Thank you so much for taking the time to add them to the post.
I have never seen the Phoenix with the logo on it, was it removed for the movie?
 
Drilling holes for the wiring. The distance between the pylons where they meat on the middle is not very thick.
bbb.jpg

Drilling a hole down the length of the middle of the ship with my (300mm x 6mm) 12" x 1/4" drill bit.
bbbb.jpg

Now the hole has been made I can now thread the wiring through the Pylon into the center of the ship.
bbbbb.jpg
I added some punched out styrene circles and glued it to the pivot bracket so it looks like there is a pivot pin holding the pylon in place.
 
The logo was only on the side that has the cockpit windows.
I'd have to go back to see when it might have been visible in the film.
 
Back
Top