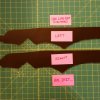
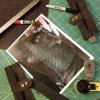
Star Lord Build from scratch-ish...

Actually, no...you'd be surprised at how durable leather is...if you want the CLEAN FLAT look for the embossing, I'd go with some kind of rigid material, besides, theE6000 glue adheres to all the edges and protects the leather from the other side. If it makes you more comfortable, do what I did and file the sharp edges down on the corners. The other inherent issue with using leather is that it's not a smooth surface - the glue, when applied and smoothed, will translate what ever contours that are present in the grain, as with this example...
View attachment 520488


The size is going to be what the size is going to be on these guns and you'll just have to deal with that. I'd keep the guns you have, currently because at the end of the day, when you're at a con, people who see you wont' go "oh my god, those guns are soooo biiiig" no, they'll see you from about 15 feet and go "Heeey!!! Star Lord!!!" because they see the WHOLE THING together...jacket, helmet, walkman, boot rockets, etc....

Be Happy.

That is all.

-SLM-

View attachment 520446

I'll consider the cutting board again. How stiff are the circuits, btw? When you wear the jacket and move around is it like having something flat pressed against your arm, or do they move and bend with you?

I wish I got recognized that much at local cons. GOTG wasn't that popular in my area. I'm the only person in the area who conventions in the whole outfit regularly, one guy only wears the jacket, and the other guy hasn't been seen since last OCT. And I haven't seen anyone else do any other guardians character. I watched a video where a guy did 3 minutes of walking/dancing through Wizardcon and there were like 4-6 Star-Lords in just that little time in a single hallway......:lol

Hey, do you have another topic around here concerning charity work and how you or your group go about it? That is something else I've been mulling over.
 
Regarding the embossing board-feel...it's just a little stiff but you get used to it...once that E6000 cures, you can bend it a bit but that's kind of the style of that part of the jacket, in my honest opinion.

Regarding the Charity work, well, it's a lot of red tape...TONS of it - like government background check-type-stuff. They're pretty inundated by lots of costumed folks and they want to vet the sincere folks from the pedophiles, if you get my meaning. There are plenty of other programs one can get involved in for Easter Seals etc, but once Heroes on Call gets up and running with a 501c-3 status, I'll most definitely start a thread about it and the work I hope to achieve. I'm hoping to make it like a chapter driven thing...that way, people everywhere can participate.

I imagine there are some people who are in the 501st who could point me in the right direction, but I know that it takes a monumental amount of time, effort, people and yes...money...to get something like this off the ground.

I'm inspired by what Chris Pratt did after the shoot wrapped for GotG and want to do the same, but I don't necessarily have to be Star Lord to do it..I mean, I have a 10th Doctor outfit and I can do the accent...

If you were to jump on board doing this in your area, do, let me know how it goes!

Sounds okay with the cutting board. I might look into using other synthetics.

I understand about BG checks. My other major interest regularly demands it.

For now, me and another local I met at a recent convention are trying to get a costuming group together. Our town is just so behind concerning this kind of thing, it's tough to get anything organized.

Doctor? Doctor Who? :D
 
I started the Boot Template process a while back and never documented here. For once, I'll just say "look at the pictures" and learn from my mistakes, LOL! The original intent was to use the paper template to spray paint the shapes onto my cardboard template for when I finally decided to cut into leather.
01 Toe Cap.JPG02 Shins.JPG
04  Boot Crown cutting.JPG11 All cut out.JPG

...but it backfired a bit with the over spray...which is fine because now, the paper with all the holes in it is stronger, having been coated with a layer of paint. Guess what THIS guy is using as his template for the leather cuts *now*? Durrr...
10  Boot Crown cut.JPG13 spray to template.JPG14 overspray fail.JPG

Well, anyway, I thought I'd hand you all the measurements in case you decide to free-hand this stuff....Enjoy!
03 Boot Crown.JPG09  Boot Crown measurement-5.JPG08  Boot Crown measurement-4.JPG
07  Boot Crown measurement-3.JPG06  Boot Crown measurement-2.JPG05  Boot Crown measurement-1.JPG

I’ve also started on the pants by, first, murdering a pair of old Levi’s501 jeans that got paint on them when painting my office orange… I measured them against a more form fitting pair of jeans and cut them down a bit…
01 Deconstructed 501 Jeans.JPG02 Deconstructed 501 Jeans cutting.JPG04 laying out Jeans.JPG

Then from there, started mocking up a pattern in muslin…

05 Front Right.JPG07 Knee Center.JPG06 Gusset line copy.JPG

The front panels with the holster patterns next to them don’t look all that bad for a guy who’s never done this before…

08 Front with holster mock ups.JPG

I realized that the ones I downloaded online were too symmetrical…NO way Alexandra Byrne would have ANYTHING to do with symmetry, so, looking at the hero piece, I saw that I was right…..and started correcting my pattern before I measured a million times and cut once. Note how the gaps between the rectangular-ish shapes vary from panel to panel? Also, because of that, each one has an organically non-symmetrical feel; almost as if the person that Alexandra had working on this did it free handedly...

09 Holster Hero Piece-1.JPG09 Holster Hero Piece-2.JPG09 Holster Template CORRECTING-in process.JPG

Oh, and I also painted the belt hoops with chrome paint...
Chromed Belt Rings.JPG

01 Toe Cap.JPG


02 Shins.JPG


03 Boot Crown.JPG


04  Boot Crown cutting.JPG


05  Boot Crown measurement-1.JPG


06  Boot Crown measurement-2.JPG


07  Boot Crown measurement-3.JPG


08  Boot Crown measurement-4.JPG


09  Boot Crown measurement-5.JPG


10  Boot Crown cut.JPG


11 All cut out.JPG


13 spray to template.JPG


14 overspray fail.JPG


01 Deconstructed 501 Jeans.JPG


02 Deconstructed 501 Jeans cutting.JPG


04 laying out Jeans.JPG


05 Front Right.JPG


06 Gusset line copy.JPG


07 Knee Center.JPG


08 Front with holster mock ups.JPG


09 Holster Hero Piece-1.JPG


09 Holster Hero Piece-2.JPG


09 Holster Template CORRECTING-in process.JPG


Chromed Belt Rings.JPG
 
Last edited by a moderator:
A little advice, please...
I was knocking out some templates I got a while back for some Star Lord's boots and made the discovery that using a razor blade to cut the die-cuts out was okay for paper, but that 'cheating' with spray paint to transfer that pattern over to a more rigid medium caused over-spray,

View attachment 498161
...but that's not why I'm posting, (I've already ordered the oblong punch tool for the leather)


Can you tell me what size oblong punch you're using? I'm at the boot stage, myself. Thanks!

Great work so far, BTW!
 
Last edited by a moderator:
Sure thing, Solo - I chose the 1/2" tool because I'm cheap. I'm also steady-handed so I can create the longer die-cuts using that tool multiple times.
Tandy makes it, btw. Good luck and thanks for the compliment.

Now...a question for you....have you attempted the screen-accurate pants and do you have any pointers for me?


Can you tell me what size oblong punch you're using? I'm at the boot stage, myself. Thanks!

Great work so far, BTW!
 
Last edited by a moderator:
Sure thing, @Solo - I chose the 1/2" tool because I'm cheap. I'm also steady-handed so I can create the longer die-cuts using that tool multiple times.
Tandy makes it, btw. Good luck and thanks for the compliment.

Now...a question for you....have you attempted the screen-accurate pants and do you have any pointers for me?

Sorry to say I don't, Staar Lord. I bought some standard black motorcycle pants. Figured it was much cheaper and much less of a headache. Thanks for the tip and good luck with the rest of the build. I'll be watching for updates. :)
 
Last edited by a moderator:
Soooo.... (or just seeeeew, actually),

I murdered a perfectly good leather jacket, (Goodwill; $15.99), for pieces of my Star Lord #knapsack and discovered that I needed a longer strip for the bottom of the bag than any existing panel on this jacket could offer.

I opted to splice and in so doing, discovered that while working with buttery leather like this, it's wise to use use dress-maker pins; they're a lot easier for me to handle but owing to the grabby-nature of this leather - when pulling the pins out, the y can get a little 'decapitated'. I opted to use a pair of pliers, (my Swiss Army Knife has a pair), to pull them My pin boneyard won't be so populated, now.

Here, have a look!
01_2 strips.jpg 02_diagonal.jpg 03_diagonal.jpg 04_Pinning.jpg
05_Sewing.jpg 06_decapitation.jpg 07_Pliers.jpg


For those curious, the needle I used on my Singer 2019 wasn't a leather needle at all...it's a denim needle.
They're much sharper.


(More later on the 'scalloping' on this bag. It's a project in and of itself...)

01_2 strips.jpg


02_diagonal.jpg


03_diagonal.jpg


04_Pinning.jpg


05_Sewing.jpg


06_decapitation.jpg


07_Pliers.jpg
 
Last edited by a moderator:
Because I am NOT one to leave well-enough alone, I have decided to install a netted zipper compartment underneath the leather flap. The Goodwill leather jacket I murdered has graciously donated its' zipper for this purpose.
.
As well, I have chosen to use *suspiciously* familiar-looking unprinted maroon cotton twill fabric, *cough-JAcket-panel-cough*... for the liner behind the leather back panel and screen-printed front panel.
.
In addition, there will also be a leather-edged compartment-separator on the inside with extra storage pockets for a cell phone and a wallet...just like what was seen in all five or six frames of film from the scene where Zoe Saldana rifled the knapsack for the orb.
.
Finally, please note what the scallops are made of. Oh baby...more leather...
Alexandra Byrne, eat your heart out.

Knapsack in process.jpg

Knapsack in process.jpg
 
Last edited by a moderator:
So, I'm in the process of making the knapsack that Star Lord carries. ("It's not a purse, it's a knapsack!")

Before I started posting about this again, I had little time to dedicate to it because my office/work space had been in disaster mode for too long. One weekend of viciously rearranging the office (and parts of my house), as well as finding everything for the build and organizing THAT into one work space (....okay, three...) and BINGO we're back in business!

If the first image looks like a stack of fabric accompanied by what suspiciously looks like a beautiful buttery leather jacket cut down to it's primal parts....you'e be correct in guessing that to be the case. The brown leather jacket was sourced at the local Goodwill store in Vallejo for a low, low price of $15.00. When I told the lady who showed it to me that I was going to tear it apart for a project, she just about had a heart attack, but went all "awwwwWWWwww!!!" when I told her what it was for, so...yeah.

I set to cutting out the liner for this bag and thought I'd do a beauty shot of the textiles involved...
01 it WAS a jacket.JPG 02 cutting liner.JPG 04 tracing.JPG 03 textiles.JPG
Ever since seeing the Knapsack, I decided to go with leather placards for the scalloping on it...little did I know the oval gromets were about the same thickness of the leather in the first three or four scallops, themselves because, (and thank god), I didn't have enough to make them all that thick.
06 cross section 6 mil leather.JPG 07 hole stamped.JPG 08 hmmm too thick.JPG 09 let's fix that.JPG

11 glued.JPG 10 trimming down.JPG 12 the mess.JPG 13 oh baby.JPG
God what a mess, but through sheer GUILE I got them finished.
Scallops.jpg
Please note on these last two images that I know the leather trim looks like *****. They, indeed, reflect a 'rough sketch' moment;sewn together in a fury of stress as I was trying to get away from my day job. Yes, I work from home. You may begin hating me....now. Anyway, here's what I intend to do with the inside of the knapsack - owing to the fact that (for five or six frames in the movie), Zoe Saldana​ opens said knapsack and it is revealed that its has two compartments; one of which has a couple of pockets on the inside...I'm making that a 'thing' Hell, If I'm gonna be wearing this thing all day during what ever event I'm at...I'd like easy access to my stuff...(there will be some kind of leather flap with Velcro so as to not loos my aforementioned stuff while dancing around or running from a Ronin cosplay or worse....that Oscavarian from Nova Records....(I was trying to get information.....)
14 Rough idea.JPG 15 rough pockets.JPG
Lastly...a video on the claw rivet installation and the oval hole punch
<span style="font-family: garamond"><font size="4">


01 it WAS a jacket.JPG


02 cutting liner.JPG


03 textiles.JPG


04 tracing.JPG


06 cross section 6 mil leather.JPG


07 hole stamped.JPG


08 hmmm too thick.JPG


09 let's fix that.JPG


10 trimming down.JPG


11 glued.JPG


12 the mess.JPG


13 oh baby.JPG


14 Rough idea.JPG


15 rough pockets.JPG


Scallops.jpg
 
Last edited by a moderator:
Guess what just showed up...(firstimage) Remember that fake leather jacket that guy on eBay tried to sellme? Well...after several back and forth emails through eBay's system...where Istood my ground...I am now the proud owner of one tailored Star Lord Jacketwhich, (if I don't get my Danny Jacket before the 31st),
I willbe wearing this one with the rest of my Star Lord build...but I really really really really hope @<i><a href="http://www.therpf.com/member.php?u=76988" target="_blank">dannylopuz</a></i> comes through for me.

I must say...this guy who re-made this whole jacket from real leather did a bang-up job...possibly the most well made jacket I've gotten. He really followedthrough to be sure...he'll get a thumbs up out of me on his eBay page. (hit my zipper run up for the link, btw...just beware about the price he's got it posted for and double check that drop menu for type of leather and avoid the synthetic like the plague.
Star Lord Lapel Training.JPG

The Knapsack, ‪#‎notapurse isall cut out and ready for sewing, I just need the measurements on parts of thestrapping system. The front flap is a bit shorter and will affect the overallsize of the bag, but I'll be the only guy with a PEN POCKET on his cosplay at acon ;)
08 Pen Pocket Front.JPG 08 Pen Pocket Back.JPG 07 Flap comparison.JPG 06 Knapsack Back.JPG

05 Knapsack Back.JPG 04 Pen Pocket.JPG 03 Pen Pocket.JPG 02 Pen Pocket.JPG

01 Pen Pocket.JPG 09 Kind of assembled.JPG 10 Pen Pocket in place.JPG

At the end of the day, it went together pretty quickly and should affix to the pants pretty easily with Chicago screws, (provided by my lovely‪#‎wifeperson, @<i><a href="http://www.therpf.com/member.php?u=147564" target="_blank">TheRedWitch</a></i> - Kiss Kiss, sweetie) The last two images show the completed substrates and for scale, the Element gun...

22 With Element Gun.JPG21 Completed.JPG

Star Lord Lapel Training.JPG


01 Pen Pocket.JPG


02 Pen Pocket.JPG


03 Pen Pocket.JPG


04 Pen Pocket.JPG


05 Knapsack Back.JPG


06 Knapsack Back.JPG


07 Flap comparison.JPG


08 Pen Pocket Back.JPG


08 Pen Pocket Front.JPG


09 Kind of assembled.JPG


10 Pen Pocket in place.JPG


21 Completed.JPG


22 With Element Gun.JPG
 
Last edited by a moderator:
Sooooo....Those of you who've purchased Zippers from me sometimes have to pull a few teeth to make it fit. But there's that annoying task of pulling off the stopper and then re-installing it. it's been described here on the boards as 'a big pain in the ass'...well, I'm here to help.

I did a little prep work on my Zipper for installation on the Jacket I mentioned in the post, above. Have a look and be sure to comment below!

 
Last edited by a moderator:
Taking a small break from the multitude of other projects that *is* the Star Lord build, I went back to the manufacturing and crafting portion that I inadvertently left in the dust a long while back...the Boot Rockets. As you remember from my time with the 'Element Guns' portion of this build, I'm shooting for weighted pieces so that when a kid in a hospital bed feels the heft, he/she'll get a taste of the universe from whence these things game. The Boot Rockets will also get this treatment.

Usually, I'll wait to get the whole thing finished before posting, but to be honest, the Knapsack (( - #notapurse - )) is driving me slowly insane, so right after I hit enter on this post, I'm heading down to the bait and tackle shop to pick up a snot-load of little fishing weights to jack up the poundage of these rockets. The magnets I'm using are pretty freekin' powerful, too, and I got them at Harbor Freight for cheap!

Once installed, all I have to do is twist the rocket off the mount and the magnet's polarity will break enough for me to pull them away. I'm still working on a design in my head to make the things go *click* when i do this...

And now...the photos...

What we have here is the variable speed Dremel tool that TheRedWitch hauled-off and bought shortly after burning the motor out on the cheap 100-series model of the Dremel we used to have. #burnedoutmotor.
01 Dremel and Rockets.JPG

(Aforementioned strong magnets purchased at aforementioned cheap-ass-tool-shop-of-bliss)
02 Magnets.JPG 03 Magnets.JPG
btw, if you live in the San Francisco Bay Area and you are a musician, the Tee shirt I'm wearing is from a place owned by Billie Joe Armstrong; Broken guitars. Pop in and say hi to the other guy who owns this place (his name is also Bill).

Here, we get a real feel for what the inside of a 3D-printed Boot Rocket looks like and also....why they're so light. Honeycomb construction keeps things in place nicely-enough and I'm thankful for it because routing out a solid print of this caliber would have been a total pain in the ass...to say nothing of the contact high I'd get from all those ABS fumes. the compartment will be filled with little fishing weights encased in construction adhesive just like with the Element guns. once that sets, a liberal treatment of E6000 will hold it in and then I'll be capping the compartment off with a layer of Two Part Plumber's epoxy...again...from the Element gun build.
04 Magnet compartment.JPG 05 Magnet fit.JPG

Looking forward to your comments!
 
Last edited by a moderator:
Rather than explain everything, this time, (don't have much time...gotta work on this thing), Here is a photo-essay, (video to come...), depicting the process by which I take construction adhesive, lead fishing weights and some two part plumbers putty to make two Boot Rockets weigh in at 1 Pound and 6 and a half ounces. The Magnets are very strong but still needed a ridge into which to fit so as to avoid having the rockets slide off my ankle while walking. No shimmying here...


Looking forward to your comments!
01 Honeycomb fill.JPG 02 lead.JPG 03 install.JPG 04 install.JPG

05 install.JPG 06.JPG 07.JPG 08.JPG
15.JPG 14.JPG 13.JPG 12.JPG
11.JPG 10.JPG 09.JPG 16.JPG

01 Honeycomb fill.JPG


02 lead.JPG


03 install.JPG


04 install.JPG


05 install.JPG


06.JPG


07.JPG


08.JPG


09.JPG


10.JPG


11.JPG


12.JPG


13.JPG


14.JPG


15.JPG


16.JPG
 
Last edited by a moderator:
@Soulinertia

Done for now...got too many other things to add expansion pleats or more D rings...that and the lining is sealed.
Note the compartment divider with little pockets on it...that made this part prettty hard when I was assemblin git, go figure..

There's a lot more sentences about the making of this, but I'm about to fall on my face from lack aa Ofldsssleepp; s';Zzzzzzzzzzzzzzzzzzzzzzzzzzz
00.jpg02.jpg01.jpg03.jpg
 
Sorry for not posting anything for a while, guys, I've been steadily going crazy making all the difficult bits of my costume before Halloween and I've got, literally, no time to spend putting the detailed posts up here. So it's a good thing I found this bit of text and a crazy amount of pictures on my FACEBOOK page, hehe. Please forgive the way it reads, but ordinarily, I'll intersperse the pictures into the text, but right now....at 5:45 in the morning... (I woke up at 4:00 and still haven't had my coffee), this is as good as it gets...enjoy, and as usual, I look forward to any input.

Step one: Find the devil in the details and kick his ass. Step two: Share the spoils of war....I give you the most screen-accurate pattern for the BACK of Star Lord's Belt. The closure will ne in the front, (you know, like real belts?), done with Velcro under the buckle. Brought to you by Brilliance Laboratories; "Making life more fun one geek at a time" #alsonotapurse


Looking closer, you'll see that line with the note next to it., ('Center back Lewis')...*That* is the center for *me*.


All this was "math" to find said center. As I did this from my phone I'm not as verbose with my posts hence causing the confusion. The initial diagram was placed with the assumed knowledge that the spot on which the diagram was drawn was to be the center-back of the belt. I was off by a few inches, but this is trial and error as I pioneer my way into a one-piece Star Lord belt w/front Velcro closure behind the buckle.


Note the parchment paper pattern sitting next to it, (also with a couple lines that are not supposed to be there), and how that center chevron can be placed, pretty much anywhere that's needed. The 'swoops' may suffer some truncation based on an image I found which depict how they terminate directly after the trailing edge of the thigh holster substrates.


So, during my test run, last night at a Halloween party, (where I wore *just* the base belt with no stitching or additional details sewn-on, yet), it was revealed that the belt may, (or may not* be), too loose and that I might have to cut into the forward bulkhead shapes next to the buckle so as to accommodate for the extra strap real estate needed behind the buckle to achieve a tighter bond with the Velcro I intent to use back there. I'm actually using the hard belt loops found on the buckle to run the leather through. I am *also* discovering that had I *actually *used the 5-6-mil leather that I screwed up by not flipping the pattern while I cut merrily away into the only piece of leather big enough to use for this purpose....it would have been infeasible in the first place as it wouldn't fit through the 2-mil loop.


That....was the happy-accident that made me consider the one-piece belt that Chris Pratt used in Guardians of the Galaxy.


All said and done, there was one more piece of the costume which needs a lot more 'work'....*ME*....


I awoke, this morning, to discover that my body isn't quite as sport-tuned as it used to be, as I grunted out of bed with the aches and pains of a football player after his first game.
I was, after all, carrying a two and a half pound Knapsack, (#stillnotapurse), filled with heavy items *for* the costume totaling upwards of 10 to 12 POUNDS of stuff that would normally be distributed all over my body, (The holsters aren't finished, nor are the boots and rocket mounts.

Long response, I know, but I think I may just copy and paste this onto my wall...


This is the Star Lord Belt Mk-1. It's supposed to be about an inch or two 'taller' in the back, just like the one in the movie, (see image). It plays double duty as a stylish and iconic belt that contributes to the look and feel for Star Lord's character as well as it being a back belt...


00_Belt -in process.jpg 04_Belt -in process - back pattern.jpg03_Belt -in process.jpg01 Belt -in process_01.jpg20151025_091334.jpg20151025_091349.jpg000 Knapsack sighting.jpg000 Knapsack Belt Orb DONE.jpg000 Knapsack - Complete_01a.jpg000 Knapsack - Close Up_01.jpg04a_Belt laid out.jpg06_Belt - Complete.jpg07_Belt - Complete_Velcro.jpgBoots - toe cap template.jpgBoots - toe cap.jpgNEW PAINT Chromed Orb.jpgPANTS - knee backs_01.jpgPANTS - knee backs_02 Laied out.jpgPANTS -Back - laid out.jpg05_Belt - Complete_01.jpgPANTS Faux Pocket Fonts.jpg
 
Last edited:
Back
Top