DarkJedi1500
Well-Known Member
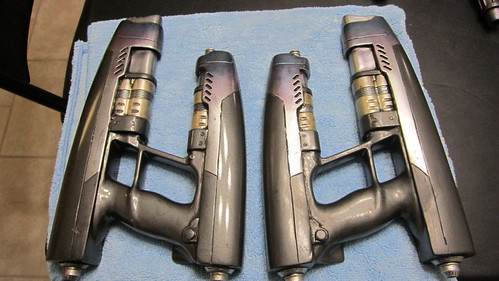
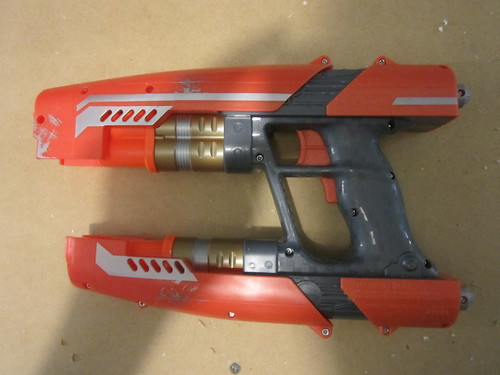
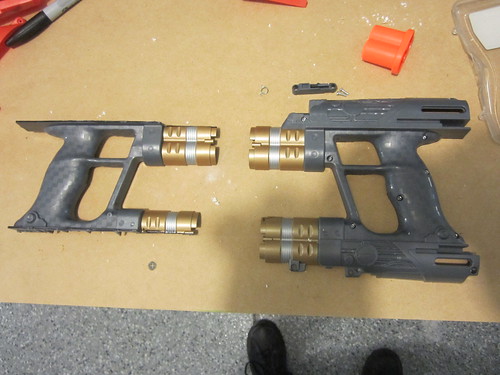
I'm juming on the Star Lord bandwagon and started with the blasters. Like may people I bought the Nerf gun, but while I was happy with the detail on the handle, the barrels were to wide and mis-shapped for my taste, so I decided to make a new sculpt.
Basically, I cut the handle out and sculpted the barrles using foam and MDF.
 IMG_1769 by 2StoryProps, on Flickr
 IMG_1771 by 2StoryProps, on Flickr
 IMG_1785 by 2StoryProps, on Flickr
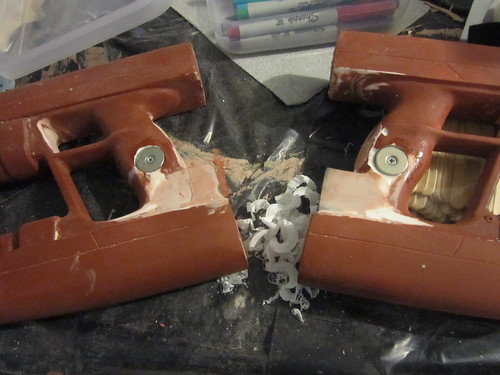
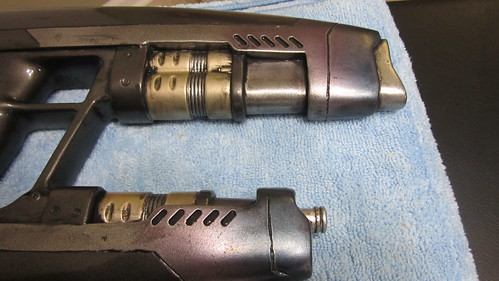
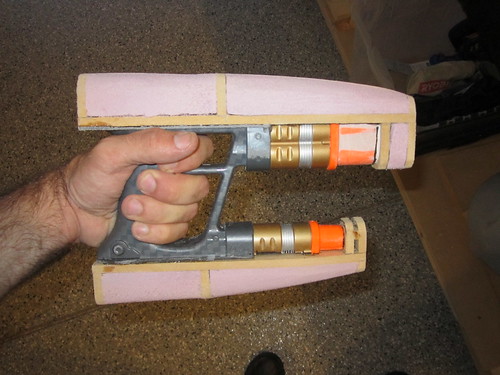
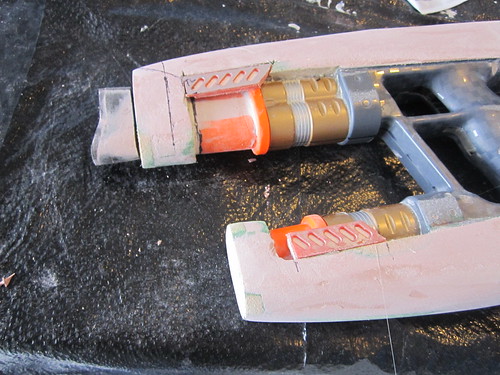
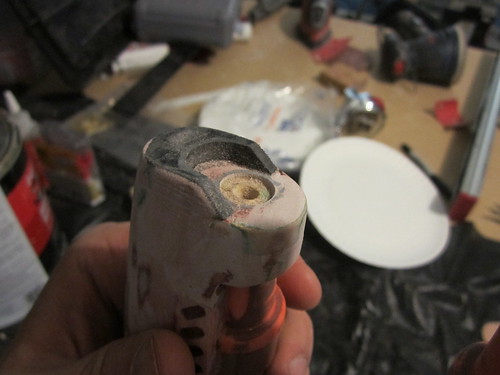
The ends were sculpted out of plastic and blended to the body with apoxy sculpt. I was also able to save the vents from the original nerf gun.
 IMG_1795 by 2StoryProps, on Flickr
 IMG_1796 by 2StoryProps, on Flickr
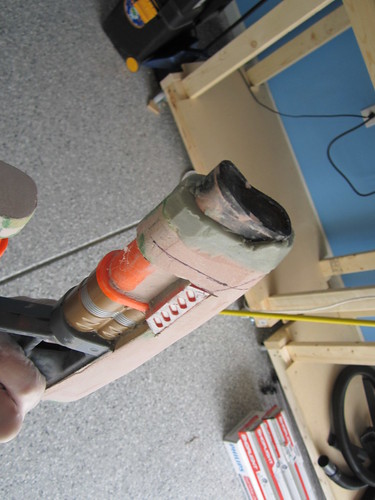
 IMG_1804 by 2StoryProps, on Flickr
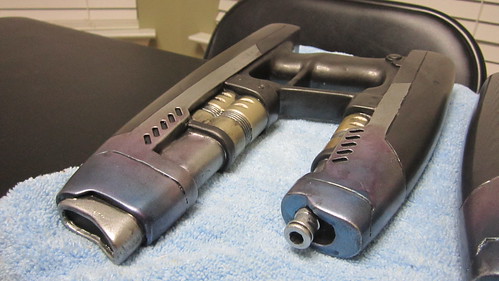
After some sanding and carving, I got to here:
IMG_1804 by 2StoryProps, on Flickr
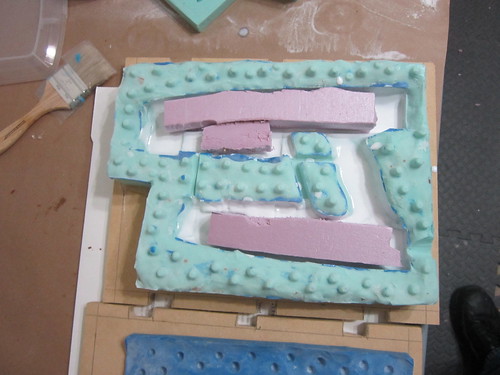
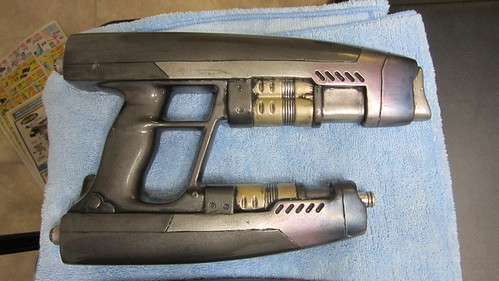
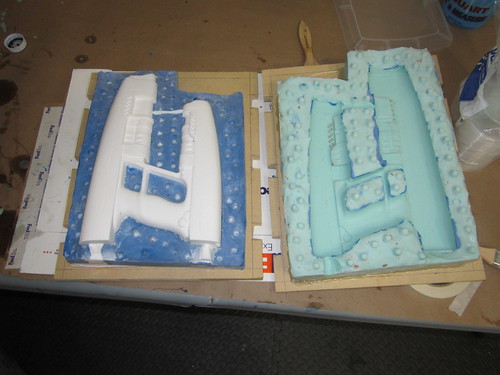
I created a two part mold with rebound 40 (one half is dyed so I could see the seam when seperating the layers. The first casting was Smooth Cast 320. I am currently tying to lighten the blaster by casting it with foam inside.
 IMG_1875 by 2StoryProps, on Flickr
 IMG_1876 by 2StoryProps, on Flickr
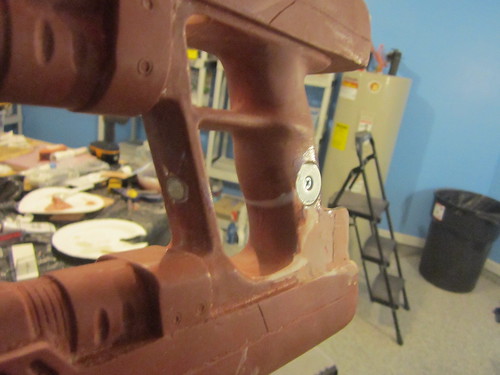
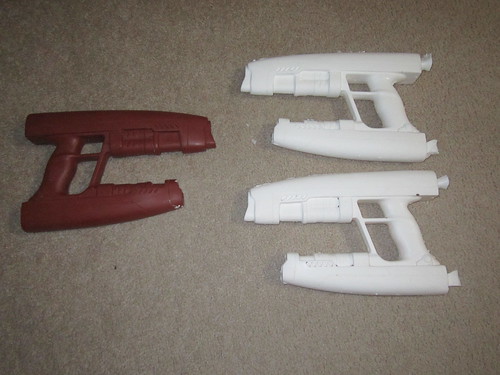
Before I can paint them I have to finalize the holster assembly and install the magnets. Hopefully this will be done in the next two weeks.
Basically, I cut the handle out and sculpted the barrles using foam and MDF.
IMG_1769 by 2StoryProps, on FlickrIMG_1771 by 2StoryProps, on FlickrIMG_1785 by 2StoryProps, on FlickrThe ends were sculpted out of plastic and blended to the body with apoxy sculpt. I was also able to save the vents from the original nerf gun.
IMG_1795 by 2StoryProps, on FlickrIMG_1796 by 2StoryProps, on FlickrIMG_1804 by 2StoryProps, on FlickrAfter some sanding and carving, I got to here:
IMG_1804 by 2StoryProps, on FlickrI created a two part mold with rebound 40 (one half is dyed so I could see the seam when seperating the layers. The first casting was Smooth Cast 320. I am currently tying to lighten the blaster by casting it with foam inside.
IMG_1875 by 2StoryProps, on FlickrIMG_1876 by 2StoryProps, on FlickrBefore I can paint them I have to finalize the holster assembly and install the magnets. Hopefully this will be done in the next two weeks.