SS Y-Wing Yea the one no one wants to make?

:behave Well I started over on the hulls decided not to vacuum
form them.....and just build them from cutting styrene and gluing
the individual parts together. It was much easier probably should
have done it this way to start .....oh well!:facepalm

154794_10200127967711699_1043545490_n.jpg


181835_10200127967871703_901405244_n.jpg


182313_10200127968351715_1656313071_n.jpg


12061_10200127968511719_76415634_n.jpg


224862_10200127970351765_1454556900_n.jpg


179593_10200127970751775_486087634_n.jpg


44417_10200127970471768_1082708263_n.jpg


380573_10200127971071783_784317901_n.jpg


6954_10200127971911804_827630931_n.jpg
 
Last edited:
Thanks guys much appreciated....:thumbsup

Some work on the recessed areas....

I just framed these in to give it a clean
look when primed.

001-3.jpg


002-3.jpg


003-5.jpg


005-5.jpg


006-5.jpg


008-4.jpg


009-3.jpg


012-1.jpg


013-1.jpg
 
I made the wings in two halves so I could run the wires for the engine
lights through and into the main hull.

154476_10200127972791826_1352270301_n.jpg


Line it up make the reference marks to cut it out......and dremel time.
149783_10200132092654820_1302876704_n.jpg


281640_10200132092614819_1369791245_n.jpg


020-2.jpg


Wing Support drilled for mounting bracket and pipe.....
035-1.jpg


036.jpg


037.jpg


76696_10200132094254860_2046606997_n.jpg
 
Last edited:
I don't want this thing to look like it should everywhere
that it could....if that makes sense? So for the droid I
used parts from a real space model, and I didn't
let the arms show either.

018-2.jpg


002-4.jpg


003-6.jpg


005-6.jpg


008-5.jpg
 
More pics! More pics! :lol

Got plenty.....LOL

Attaching the Saturn V parts.......

Something else I thought I might do different.....I mounted the engines
center line on the seam I think on the filming mini they mount above the
center line? But first I dremeled off some of the engine ......I think it should
have been more but hey......
004-6.jpg


005-7.jpg


026.jpg


027-2.jpg


029-3.jpg


030-2.jpg


031.jpg


032.jpg


033-1.jpg


Cutting off the extra on the opposite side.....
002-5.jpg


006-7.jpg


There is a small hole drilled in front to allow the wires
to run through and into the wing pylon, then enter into
the main hull.

007-5.jpg


008-6.jpg
 
Glad to see you're back at it. I have to say I agree that this build up looks much better than the vacuformed chassis. Looking forward to your progress.
How are you going to prevent the nacelles from rolling?

TazMan2000
 
Glad to see you're back at it. I have to say I agree that this build up looks much better than the vacuformed chassis. Looking forward to your progress.
How are you going to prevent the nacelles from rolling?

TazMan2000

Thanks....:thumbsup

Rolling....? There is no rolling they are a perfect friction fit
then they are glued not only to the plywood, but to the plastic
pylons on the outside of the engine where they butt up...... they are like rocks on the plywood
support bar, I would crack the engines in half before I could roll them
by hand.
031.jpg
 
Last edited:
As a big vacforming fan, myself, I gotta say I like your new direction. And, really like the cockpit up above from way back when I wasn't on much!
 
Thanks....:thumbsup

Rolling....? There is no rolling they are a perfect friction fit
then they are glued not only to the plywood, but to the plastic
pylons on the outside of the engine where they butt up...... they are like rocks on the plywood
support bar, I would crack the engines in half before I could roll them
by hand.

Well, if you're happy with the fit, then great. But I'm sure you are going to add more details and weight on there. Even though that might not be a lot, the weight is unyeilding as long as the model will be supported by the pipe, and wood, both absorbs and releases moisture over time which may cause swelling or shinking. Fixing this problem later may result in wrecking some of the beautiful work you have done, and are about to do.

Just my two cents.

TazMan2000
 
Wow,wow,wow,
Great progress Michael!
You are really cranking out to build:eek
Supporting the wing span is looking stiff.:thumbsup

I'm really happy to see you building a bigger model.:lol
I can learn a lot about the methods of your measuring.
Thanks for sharing.

BTW, in the pic of you are drilling the holes, what's the business with the numbers on the notepad??

Katsu
 
Jeez...this is incredible work! :love

I completely forgot about this build since I was out of touch for a while! Can't wait to see more! Amazing!! (y)thumbsup:thumbsup

Dave
 
Well, if you're happy with the fit, then great. But I'm sure you are going to add more details and weight on there. Even though that might not be a lot, the weight is unyeilding as long as the model will be supported by the pipe, and wood, both absorbs and releases moisture over time which may cause swelling or shinking. Fixing this problem later may result in wrecking some of the beautiful work you have done, and are about to do.

Just my two cents.

TazMan2000

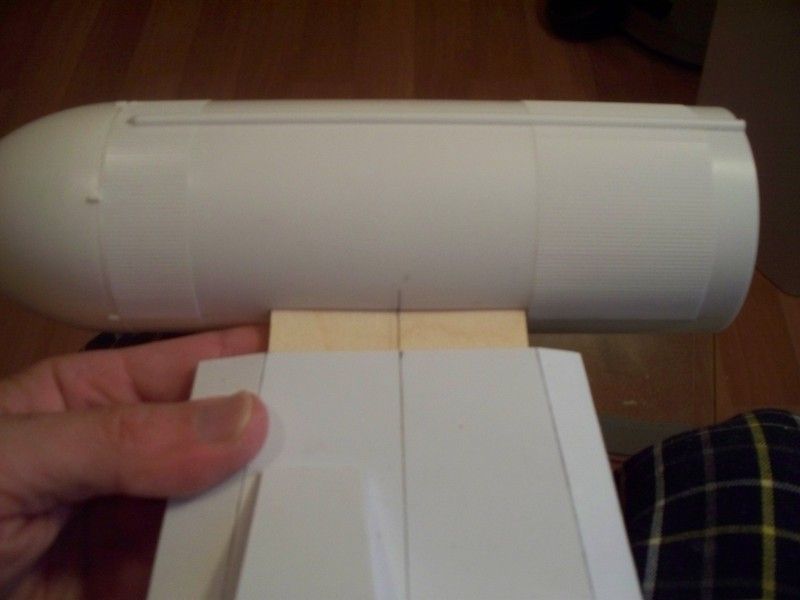
No I am still not worried the wings are made in halves so they are
hollow and they mount 13mm deep inside the model. Plus
if you notice each plastic wing strut has a ramp detail one on the top
and one that sits below that connects to the body, so it's a tank really.
The span of the plywood is pretty short so it's strong and I used good
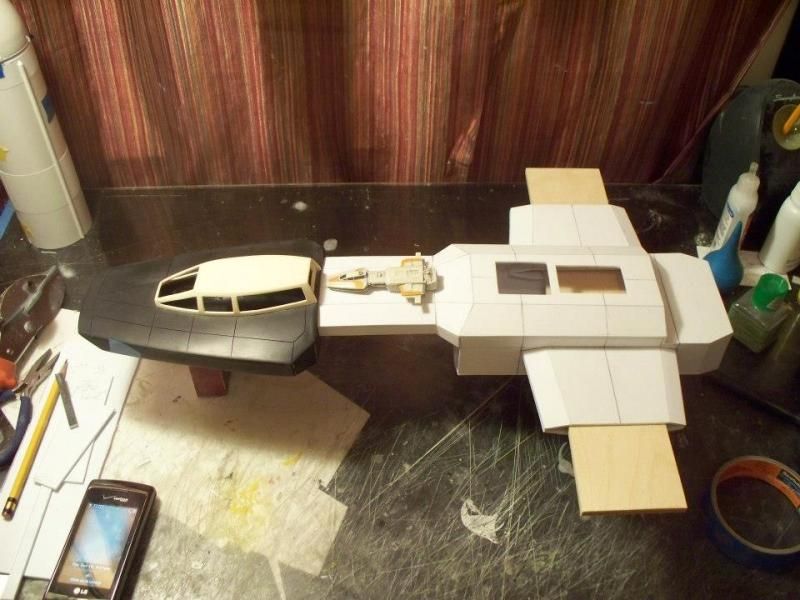
grade stuff from revelle that's 9mil thick. As far as adding more weight no
the only other weight going on the engines will be the T-stock lengths.
As far as moisture well the model is all styrene yea it's gonna absorb some (But less than resin would), not sure how much will transfer through the primer, paint, styrene, and then to the wood to warp it. I have a twin-pod car I made 4 years ago mounted it the same exact way those Pods are much heavier than these Saturn V parts even though they are still made hollow
and vac formed, and that model is still straight as a pin.:thumbsup I can't control everything like moisture but I am not in a tropical climate where I
live ........even if my avatar does have a Jamaican track star! LOL
 
Wow,wow,wow,
Great progress Michael!
You are really cranking out to build:eek
Supporting the wing span is looking stiff.:thumbsup

I'm really happy to see you building a bigger model.:lol
I can learn a lot about the methods of your measuring.
Thanks for sharing.

BTW, in the pic of you are drilling the holes, what's the business with the numbers on the notepad??

Katsu

Katsu the numbers on the pad were from a
pull up work out I was doing!:lol:thumbsup
 
Thanks for the kind words guy much appreciated......:thumbsup

Thrusters nozzles up next...... I got these from Lee way back in the day
and I am glad because the ones that come in the new Saturn V
from Revell are made up of 4 parts I think.....:facepalm I think these are
from the Arifix 1/144th scale kit?

Just using the rocket body to get the inside diameter
for the fascia disc to mount the nozzle to.
010-4.jpg


To get the ring to sit back evenly i used a caliper some solvent
and evergreen strip. I just used the caliper to keep it even as
I put the solvent down on the strip.
012-2.jpg


013-3.jpg


014-5.jpg
 
Back
Top