Solider 76 Pulse rifle foam build

Redwillow

Sr Member
Thought I would post my build up of Soldier's rifle. This was done from Hopli's build info, which is at:
https://www.therpf.com/showthread.php?t=264118&highlight=soldier+76

Super big thank you to him for all the info, which made this much easier to make!
Just FYI, this is not a weekend type project. All the cutting, gluing and wiring will take some serious time. I've worked on this piece on and off for several months.

3/4" pvc pipe with fitting and bondo to make the round end. Cut 1/4" plywood for the core shape using a circular saw and jigsaw.
Without something rigid in the middle, it will be very flimsy. Don't mind my shoes.

rifle1.jpg

Blue led testing and cut out the barrel for the lights. I did just one cut out on each side and a single LED lights it up the entire inside of the barrel when you see it from the front. Here you can see my original idea of storing the battery in the middle of the rifle, but that got moved to the rocket launcher later.

rifle1a.jpg rifle2.jpg rifle2b.jpg

Mounted a switch just above the trigger to run the lights and built up both sides with 5mm foam
rifle3.jpg

Finally decided on a 3 leg parallel circuit to run 9 LED's off of 1 9v battery.
-3 for the rocket launcher
-2 for the lower sliders + 1 for the barrel
-2 for the upper sliders + 1 for the ammo display.

I ran all the wires in the foam.
rifle4a.jpg rifle4.jpg rifle5.jpg

After some searching I found a water bottle at Walmart that is almost the perfect shape and size for the rocket launcher. Cut the top and bottom out and covered it with foam. Mounted inside is a thin pipe that holds the LEDS and the 9v battery. Easter egg half for the rocket head.
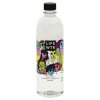
life-water.jpg rocket1.jpg rocket2.jpg


Added the next layer of 3mm foam that had all the cutouts for the grip detail, then added wood filler.
rifle6.jpg
 
Last edited:
Made the upper grip area parts from more foam layers and wood filler.
rifle7.jpg


Cut the large front layers from 1/2" foam mat and glued on both sections. Also completed the lower bumper section and used a cap to mount the rocket launcher to the rifle. Launcher is removable to access the battery and held on in front by magnets. I left the middle open so I can access the LED connections if I ever need to. It will get covered by a removable detail panel held on by magnets.
rifle8.jpg


Made the 4 rail pieces from more 1/2" foam with 3mm foam strips for the tracks. Also got the sight built and installed. I used more milk jug plastic for the back to diffuse the light, then a cut out foam section for the segmented display and covered it all with clear acrylic. It's starting to come together now and just needs the shoulder stock part and the middle pieces.
rifle10.jpg rifle11.jpg

Shoulder stock created from foam and wood filler plus the middle pieces complete except for the sliders.
rifle12.jpg

Sliders built from carefully cut foam and installed. More milk jug plastic to diffuse the LED in the middle of each slider. By some miracle all the wiring, soldering, and LED circuit worked on the first try. It looks rough now.....but wait until I hit it with primer!

rifle13.jpg rifle14.jpg rifle16.jpgrifle15.jpg
 
Last edited:
Naturally, this had to have real air hose on it.
Harbor Freight is my best friend:
https://www.harborfreight.com/1-4-quarter-inch-x-5-ft-swivel-whip-hose-98944.html

GF's old makeup containers make good hose ends! Was able to use 2 "chrome" pieces and 1 that was actually aluminum, so no painting! Just needed the finish stripped off.
Also added a 3-wire connector to the rocket launcher wires that I found on an old circuit board, Jackpot!

rifle17.jpg rifle18.jpg rifle19.jpg

Weekends are for playing Overwatch, priming props with filler primer (and picking up a few action figures).
Now the details are coming out and it's really starting to shape up.

rifle20.jpg rifle21.jpg rifle22a.jpg rifle23.jpg rifle24.jpg

After a few base colors, this is looking like Soldier's rifle, but it still needs a lot more detail paint work and all the hardware added to it.
Really happy with how the water bottle rocket launcher came out....sorry I don't have more pics of it being built.

rifle25.jpg rifle26.jpg

...more updates coming soon
 
Last edited:
Amazing!

You really put work into this one :D I'm happy I was able to help!. Are you doing the complete costume?

-hopli
 
Thanks!
My plan was to do the entire costume, but I cannot finish the belt / holster or boots before Halloween. I may get those pieces done in the future, but not sure.

I do have the visor, jacket and grenades, but I need to get the arm grenade strap done.

Arm grenades were done from empty deodorant cans and the belt grenades were done from PVC pipe with wood dowels on the ends.
grenades2.jpg grenades4.jpg grenades1.jpg grenades3.jpg

I made a small template to try to get the lettering onto the rifle. Also added the yellow arrow and the emblem.
rifle28.jpg rifle30.jpg

Painted some rivets black and also used some zinc hardware on it.

rifle32.jpg rifle31.jpg rifle27.jpg rifle29.jpg

Now I just need to get the large hose on and add the couplings where it attaches.
 
I really wish this game had caught on more with me personally, from a gameplay perspective, because there's so much cool stuff to be made form it, but I just can't bring myself to cosplay as something I'm not able to have a conversation about with people. LOL.

I love your rifle. Great work.
 
DUUUUUDE. This rifle is freaking awesome. If you were to sell one, how much would you charge? Did you make the mask too, or did you buy one? I love the character designs from this game. Soldier is one of my favorites to play.
 
Thx for the comments!
I made the visor from foam also. You can see it in 1 of the finished pics and I will try to put up some more of it.

I definately will not be making another one of these. Just too much work and too time consuming. I did see a place on etsy selling foam Diy kits for about $200. I think it's made to take an led to light up the barrel part.
Search "soldier 76 eva prop" to find it.
 
Cut the visor shape out of eva foam, heated it and bent it into shape.
visor1.jpg

Added the details to it with more foam pieces and coated it with plastidip.
visor2.jpg

Basic paint work.
visor3.jpg

visor4.jpg

Used hose pieces on the sides with metal crimp connectors and shaped wood dowel pieces for the ends. For the visor I Tinted some plastic red using red idye poly and hot glued in place.

visor5.jpg

Added a 2nd plastic layer with mirror window film behind the tinted lens, to make it reflective from the outside. Also had to add about 3ft of wire to extend the switch for the light, so it could reach my pocket. Used wide black elastic around the back with Velcro to hold it on one side.

visor6.jpg visor11.jpg

Unfortunately, my chin section is a little too small and does not stick out enough. I will probably re-make that part later on to get it a little more accurate.
visor7.jpg visor8.jpg visor9.jpg visor10.jpg
 
Last edited:
Back
Top