Marthony
Well-Known Member
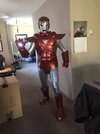
Greetings armored ones! Time for another retro build!
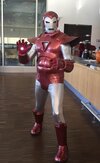
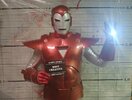
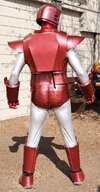
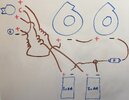
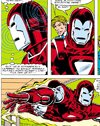
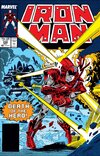
I’ve decided to follow up on my Golden Age Iron Man with Silver Centurion, canon chosen as issues 210-230 of Iron Man. This will be an EVA foam build plus silver body suit, unibeam & repulsor lights. I’ve a pepakura file for the helmet only, but that’s the only one I really need. =) EVA to be 1/4” for helmet, shoe covers & details, and regular thickness (>3/8”?) floormats for torso/codpiece, forearms & shins.
While my G.A.I.M. (yeah, I just did that. This is all for fun anyway!) project gave me most of the techniques I expect to need here, I see some challenges:
1. Helmet. It looks like the helmet is a faceplate plus a shell, tapered at the forehead center. The pepakura file lacks the ridge between the silver & red of my reference pics; this tells me I should produce a faceplate plus overlap tab from the ‘fitted’ pepakura file. Then I should make a 2nd version of the pepakura file, sizing it up as if it were to sit on top of the first version; this would be a width increase of 1/2” total for example, as using 1/4” foam. I see S.C.I.M. as being a slightly beefier armor to GAIM in general. (back of helmet will be tapered close to bottom of band for mobility) Editing of file to be done via Armorsmith. I could either run with a slightly larger helmet, or just heat-shape same-sized faceplate & helmet-shell to ‘work’; might make for a slightly bent-in faceplate.
2. Torso. For my GAIM the chest & stomach were separate pieces with an iffy Velcro/elastic connector at the solar plexus. Both had concealed Velcro or zipper at the left side. While that did give some mobility the gap was sometimes evident in pics; tempted to make them a 1 piece?
Customs for helmet:
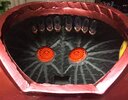
- Band will be 45 degree angle-cut on inside bottom & helmet shell will have concealed cutaway behind most of band for ventilation.
- Detail for band where covering ears will be used with creative license; 3 pieces of nylon window mesh will cover holes for hearing & ventilation. Mesh will get base coat paint spray; worked to my satisfaction for GAIM.
- Will look for option to add tiny fans in there, running on a 9V. I’ve two 25x25x10mm fans (smallest I could find) that may be good firing upwards, mounted at the back. Anything to cool the top of my head would be a plus when indoors.
- There won’t be material below the faceplate; bottom of faceplate will be bottom of helmet. I’ll wear metallic red fabric on my neck again. No horizontal rings, but needed for mobility/range of motion.
Customs for back shape: (not compatible with each other, but potentials)
- Create storage area with closable top (for others to access; out of my reach)
- Make holes at bottom, cut hidden holes through back and install 50x50x20mm fans & battery pack for cooling
- Rig for hydration system
- Be able to pull out a Negator Pack of course
Customs to forearms & lower legs: Spaces may be created by using 1/4” foam exterior plus ¼ or thicker ‘gasket’ on insides of ends.
- Hot-glue in nylon loops, to which lanyards, metal rings or paper clamps may be attached.
- Span across gap with nylon to create a pocket for phone
Paint job method will be a repeat: (I am anti-Plastidip)
- All black or gray EVA, heat-sealed (shade of ¼ & thicker EVA to be as similar as possible)
- Sealed with 2 coats of latex/water based contact cement, applied by foam brushes
- Base coat spray painted, silver or metallic red (used Duplicolor Perfect Match metallic red for GAIM)
- 6 coats acrylic medium, distilled water & mica powder in 40ml:10ml:7.5ml ratio, applied by foam brush in changing directions
- 3 coats glossy acrylic varnish, applied “
Once coated in acrylic the rattle-can base coat is flexible; no bending before acrylic coats!
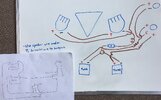
Unibeam for GAIM was a 24 LED puck light, 2x yellow acetate, bathroom window prism plastic, and wafer of Mr. Clean magic eraser. I’m hoping I can use prism plastic to adapt the puck light to the triangular shape of SCIM.
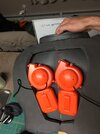
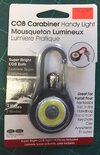
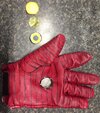
Repulsors are adapted from a COB dollar-store lights. Prism plastic is used, plus a wafer of magic eraser dyed yellow. Light is operated like spider-man web spinners as they’ve a button in the center covered by the eraser. =) These were rigged into leather gloves for GAIM.
Questions for the builders/Iron Man lovers:
1. Helmet faceplate: I haven’t converted the SCIM pep file for foam use yet, and have to wonder if I can get away with using my GAIM file for the faceplate section. Do you think there are differences in the shapes of the faceplates? Not an issue if not compatible, but would be nice to save an hour or two in editing for this once instead of twice. (will have to edit for foam regardless after up-sizing the file in Armorsmith for ridge effect)
2. Helmet: What approach would you take to get the thicker/ridge effect? Fitted & +1 thickness helmet shell, Fitted with tabs shaped into fitted helmet shell, or other?
3. Torso: I could do a single-piece torso with abs, with Velcro close on one side again. This only causes temporary wrinkling in the flexible paint job. Alternatively should I consider a joinable front & back version using magnets or Velcro? The plus of my single-piece is near-lack of seams. Curious if someone could show a good system of a clamshell however?
4. Unibeam: If I can’t adapt a puck light to light the triangle well, I could build a custom set using LED’s & a breadboard, though that would take hours to build. Might anyone have a link to a triangular battery powered light I could adapt for a white unibeam?
5. Gloves: How can I get the same paint color on the gloves as on the EVA foam? For GAIM they were ‘close enough’ stained & sealed with Angelus red leather paint. For SCIM the backs of the gloves will be covered with EVA so less will be seen, but would be ideal to match color. I don’t think the acrylic would work on such flexible parts, and the base coat alone would crack badly. I’d like to avoid attaching EVA to the fingers, to retain dexterity.
I may reach out to Angelus regarding how to get closer colors with their leather paints if I use white leather gloves again. Perhaps paints could be layered for better matching?
6. What would you like to see here? Any retro or functional bits you think would set it off?
Thanks for any comments! Please number match any answers.
Attachments

Last edited:
")