JCalhoun
Well-Known Member
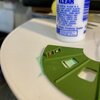
Thank you. The parts coming out of the 3D printer are given an alcohol bath to remove excess resin. But then they get a UV light tanning, and I do handle them after. Perhaps a degreasing dish soap (and careful handling after) is what I need.Can I give you some masking tips for airbrushing?
The blue tape peeled your paint off (probably) because there was an oil on the surface that prevented the primer from adhering. You can avoid this in the future by washing your parts before you paint them. Some people use rubbing alcohol, but I scrub all my parts with degreasing dish soap and a soft toothbrush. Once it's washed, try not to handle it with your fingers, or wear gloves, so you don't get oil on it again.
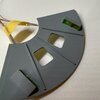
Another trick you can use is to stick the tape to the back of your hand a couple times to remove some adhesive before you stick it to your model.
Do both of these things, and you shouldn't have any paint coming off with your tape ever again.
That said, your paint job looks great. I'm enjoying watching this come together.
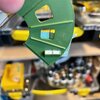
Also "de-sticking" is a good idea. I have not had problems with the Tamiya yellow masking paint so it is easy for me to swear off the blue tape in favor of Tamiya. But I really need my vinyl for masking ... and there was one occasion (visible above on the left closet door frame) where the vinyl bit me.
Note to self: also de-stick the vinyl before applying as a mask.