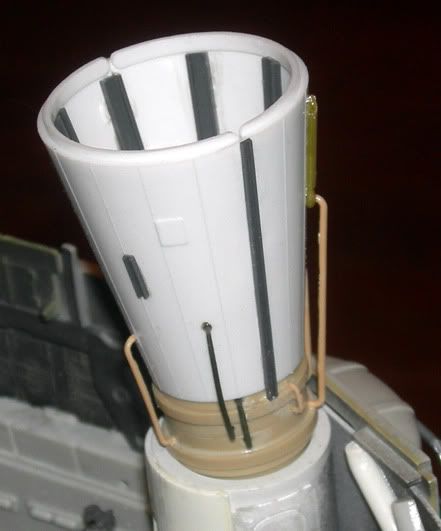
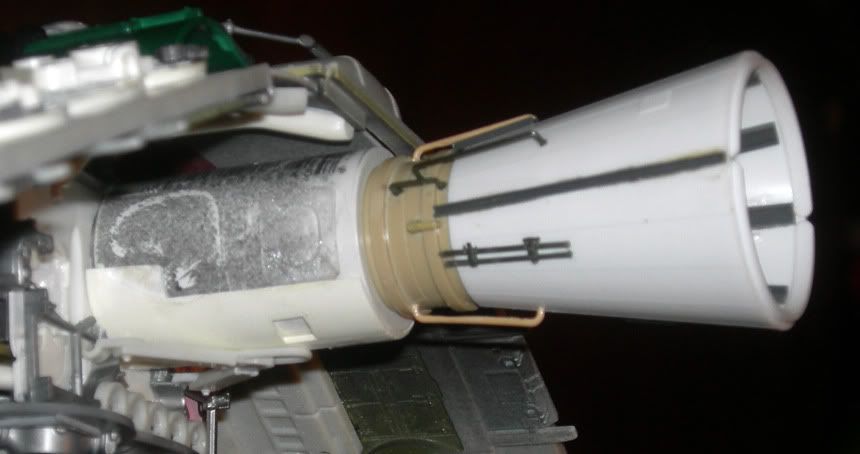
Rag-Tag Fleet custom build

Treadwell

Legendary Member
RPF PREMIUM MEMBER
After years of researching, planning, buying kits for but as yet still NOT BUILDING several Studio Scale models, I recently had the yen to just jump in and make a custom scratch build/kitbash from the ground up, with only a vague idea of where it's going. No accuracy to worry about = FREEDOM!

I am determined to make this as fun as possible, which means I'll be doing as little cleanup, puttying, sanding and uber-fine finishing as possible. ;) My rationale is I'm working at Apogee in 1979 and they don't need the model perfect, they need it NOW. If it meets that standard I'll be happy and able to move on to finer work on other stuff.

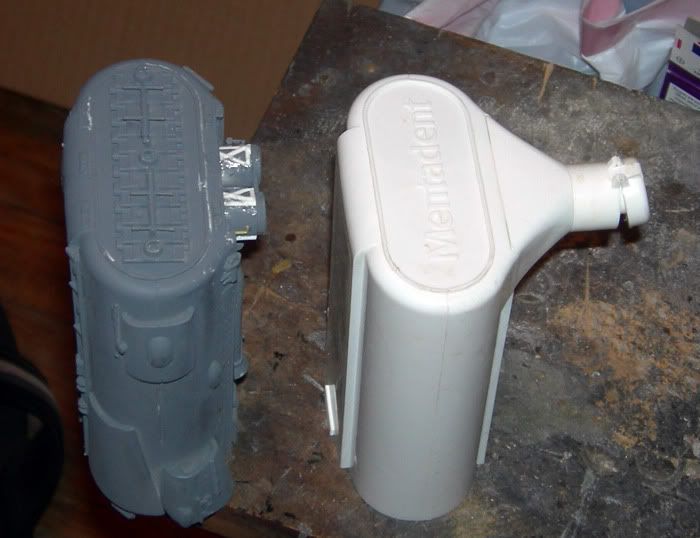
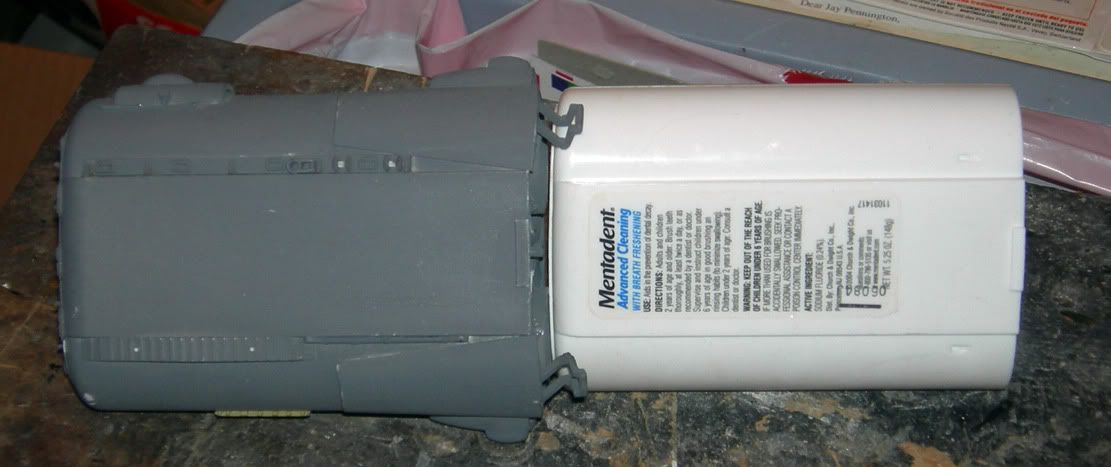
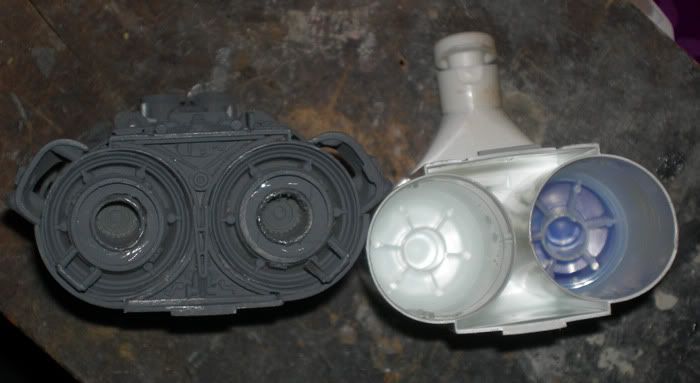
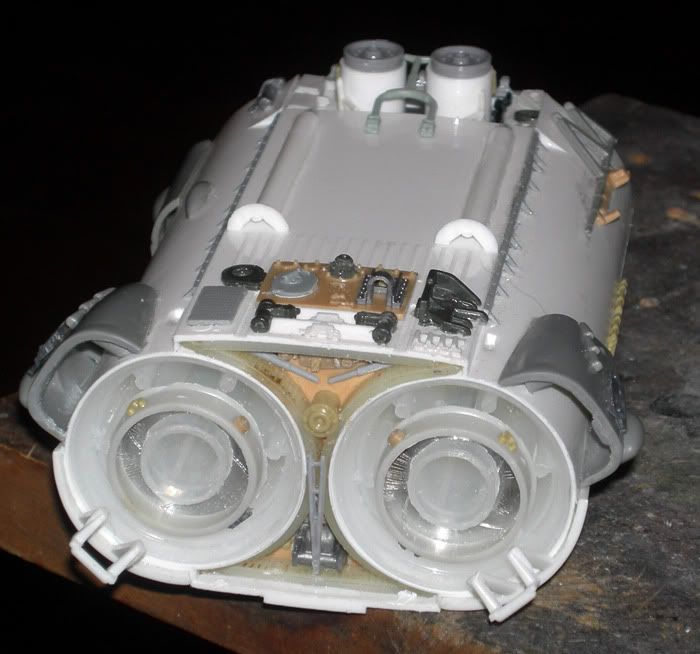
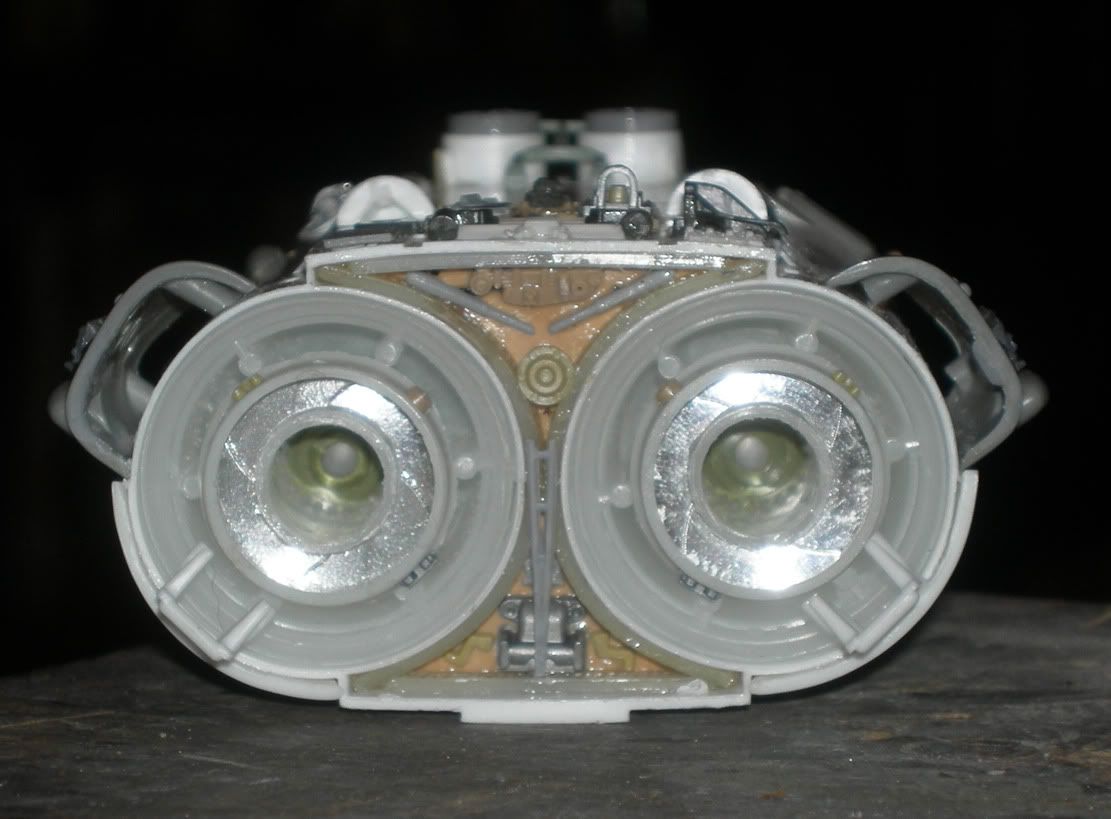
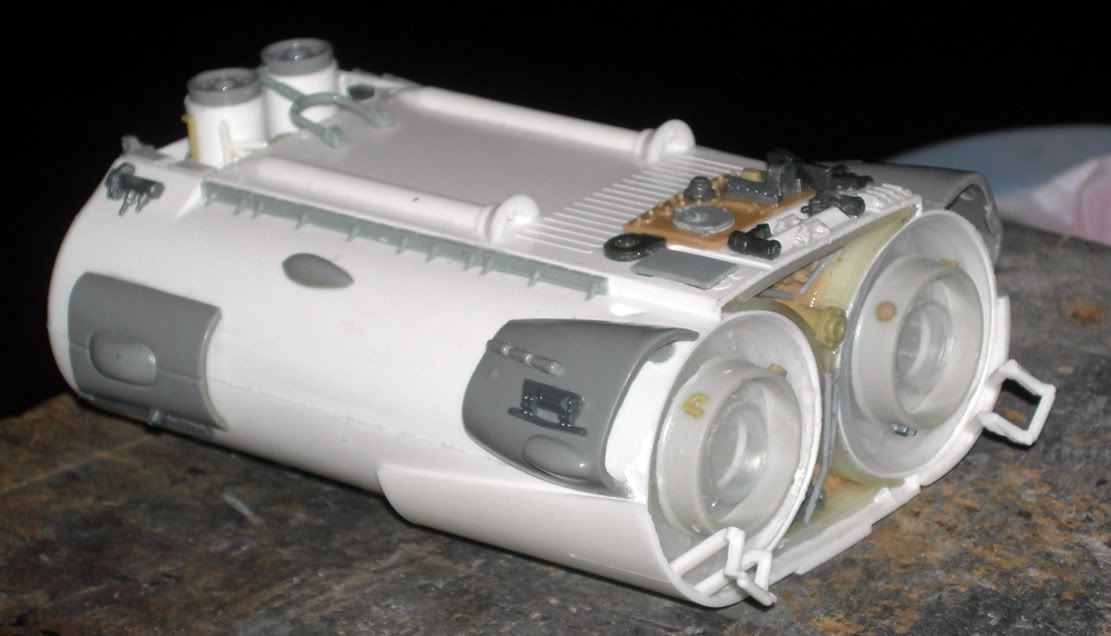
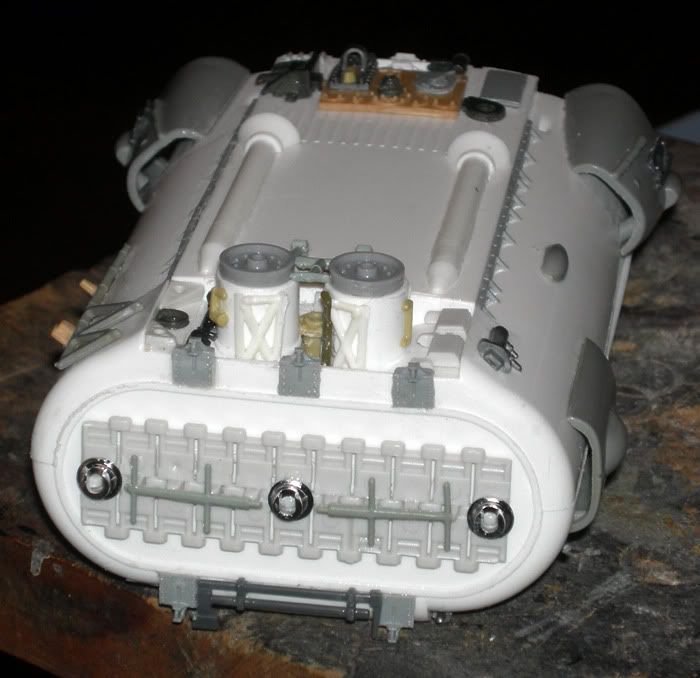
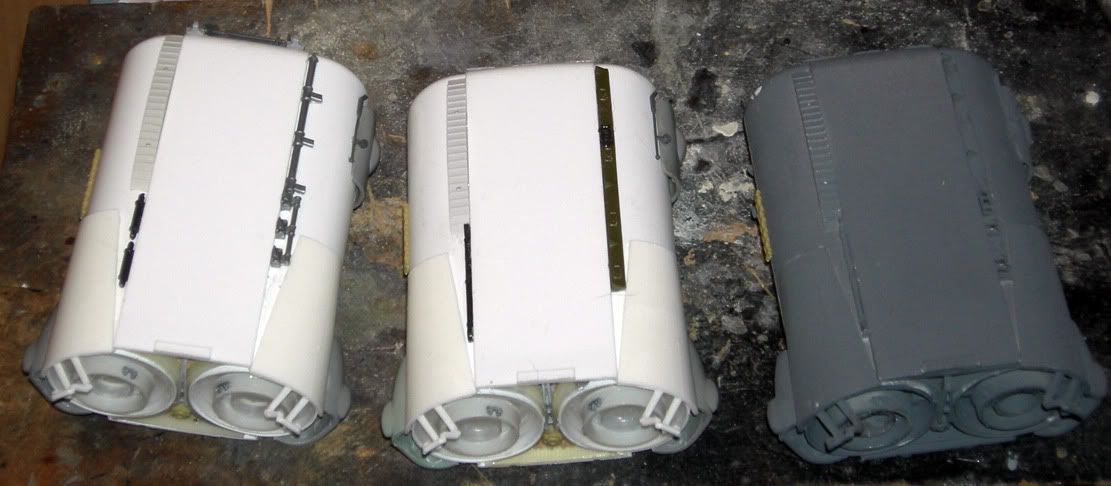
I'll post more in the coming days, but here's a sneak peek at my progress. This is one of three engine pod thingies. See if you can guess the donor part for the main structure!
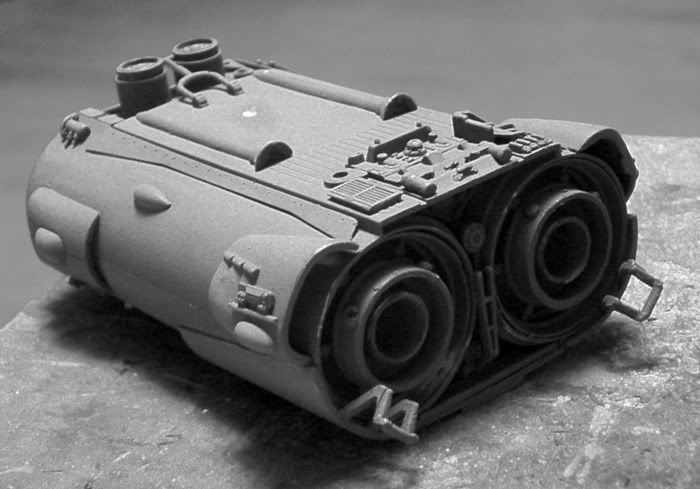
DSCN2372_sm.jpg


http://i77.photobucket.com/albums/j54/Treadwell_Jay/RTF/DSCN2370_sm.jpg
http://i77.photobucket.com/albums/j54/Treadwell_Jay/RTF/DSCN2367_sm.jpg
http://i77.photobucket.com/albums/j54/Treadwell_Jay/RTF/DSCN2365_sm.jpg
http://i77.photobucket.com/albums/j54/Treadwell_Jay/RTF/DSCN2373_sm.jpg
http://i77.photobucket.com/albums/j54/Treadwell_Jay/RTF/DSCN2374_sm.jpg
http://i77.photobucket.com/albums/j54/Treadwell_Jay/RTF/DSCN2377_sm.jpg
http://i77.photobucket.com/albums/j54/Treadwell_Jay/RTF/DSCN2382_sm.jpg
http://i77.photobucket.com/albums/j54/Treadwell_Jay/RTF/DSCN2383_sm.jpg
http://i77.photobucket.com/albums/j54/Treadwell_Jay/RTF/DSCN2384_sm.jpg
 
Last edited:
It's the pump from one of those two-part toothpastes, isn't it? The name escapes, but I recognize the double-barelled body and little ridges on the side.
 
I was going to say Italeri fuel tanker... but whatever you used, it looks awesome!!

298.JPG
 
Looking forward to seeing this grow Jay, and i love the engine body donor, but, you got found out :lol So many eagle eyed members here lol.
Have to say, ive mot much time for BSG, all 'cept for the big girl, but some of these Ragtagger's.....very cool indeed and something i keep saying i must try one day, keep it coming for sure!

lee
 
Anubis wins the fresh breath award! I just hope it doesn't seem too obvious to the masses once it's part of the ship. ;)

DSCN2400sm.jpg

DSCN2401sm.jpg

DSCN2402sm.jpg

DSCN2387sm.jpg

DSCN2390sm.jpg

DSCN2391sm.jpg


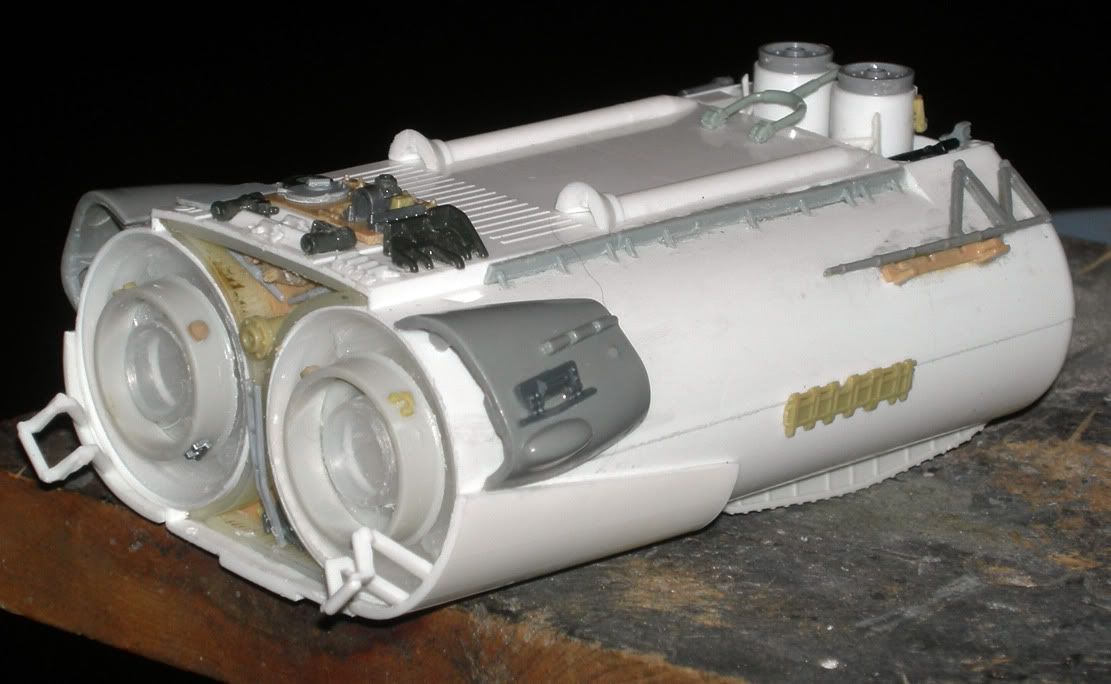
Yeah, a shiny mess of CA slop. And I need to put something inside those cowlings that you can see right through.

DSCN2392sm.jpg

DSCN2393sm.jpg

DSCN2394sm.jpg


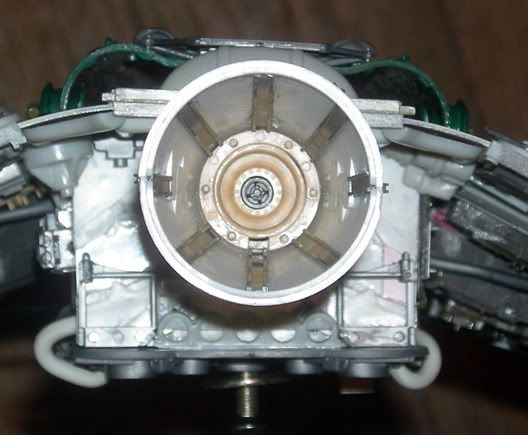
After I was underway I almost regretted deciding on three engines, because it's a LOT harder finding sets of three identical parts on kit trees than it is two! As it is, I still had to make one engine a little different in its detailing. I figure they bought a replacement engine from the same supplier and there had been improvements during the production run. ;) Therefore I shall weather that one less than the others. Thanks to PHArchivist, though, I got enough Monogram Saturn V parts (the parts with the things that protrude into the engine exhaust) for all of them.

DSCN2397sm.jpg


I don't know what kind of plastic the pump refill is made of, but it sure ain't styrene. Slick as hell. The "welding" stuff just won't work on it. I try to avoid using CA but it was necessary this time.


The clearish inserts inside the tubes are another weird soft plastic, and I'm still struggling with cleaning up the rough edges from trimming them. It just won't sand, and trimming always leaves slivers pointing out everywhere. I said I didn't want to do too much cleanup, but this part is pretty rough.

It also looks like I'm going to have to end up airbrushing the primer and basecoat to get into all the nooks and crannies, which is not the fun part for me. The painting is okay, but the prep and cleanup are a PITA.

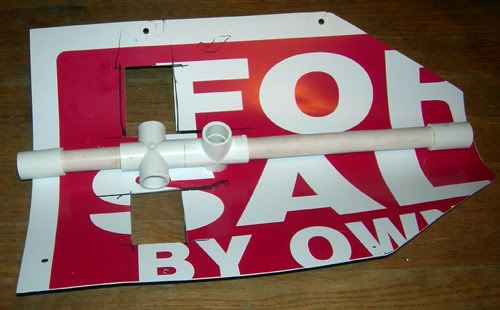
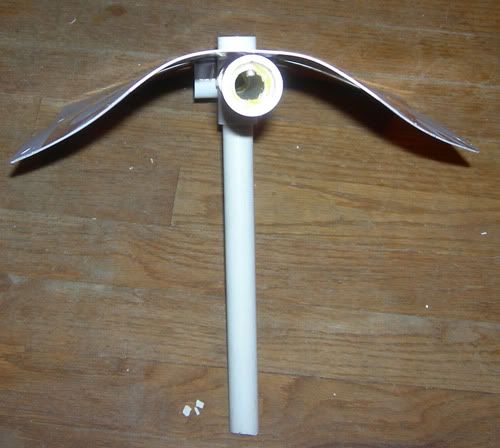
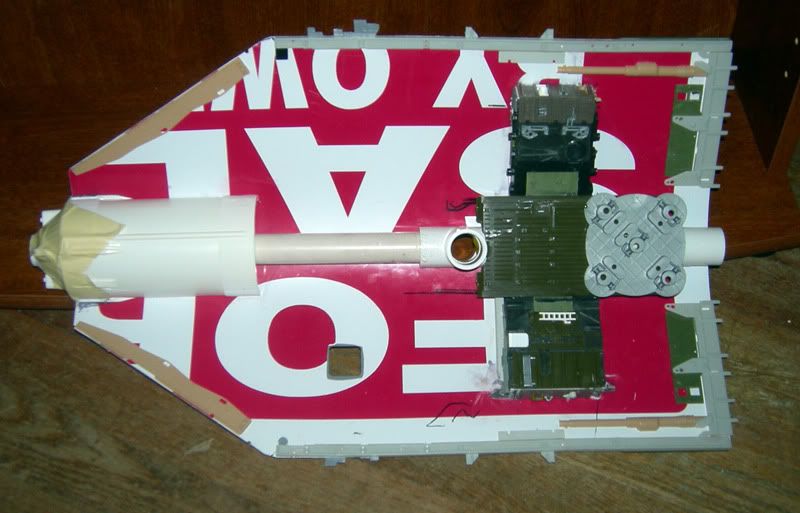
As for the main body of the ship, all I have so far is its mounting framework:
DSCN2398.jpg


1/2" PVC pipe, six mounting points, using joiner adapters. Five of them will probably never be used, but I figured why not go quasi-SS style. The rear adapter is not yet attached because I need to first figure out how I'm attaching the engines.

Here's a doodle of a very rough idea of what I have in mind. This would be looking straight at the ship from the front:
front.jpg

Kinda-sorta a Rebel Transport with nacelle engines out on struts.

Unlike that drawing, I thought I'd mount the engines to radiate at equal distances and angles out from the mounting pipe, like so:

enginemounting.jpg


But I don't know how. Ideally, I'd locate some sort of premade three-strut doodad that already had a 1/2" diameter hole in the middle that I could just slide over the PVC pipe and secure in place. But what?

Alternatively, I could mount them more like that first doodle, NOT radiating about a central axis, and just attach them with some kind of support right to the hull.


Link to the entire gallery:
http://s77.photobucket.com/albums/j54/Treadwell_Jay/RTF/
 
Last edited:
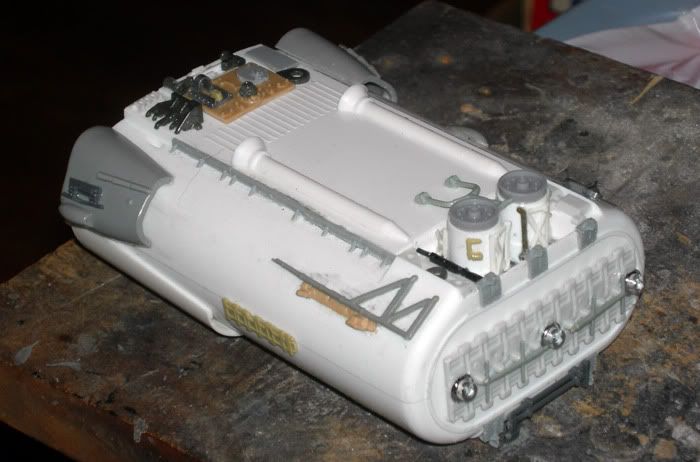
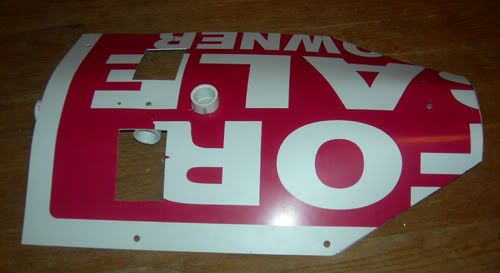
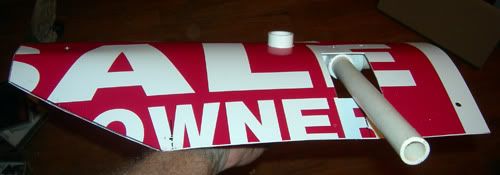
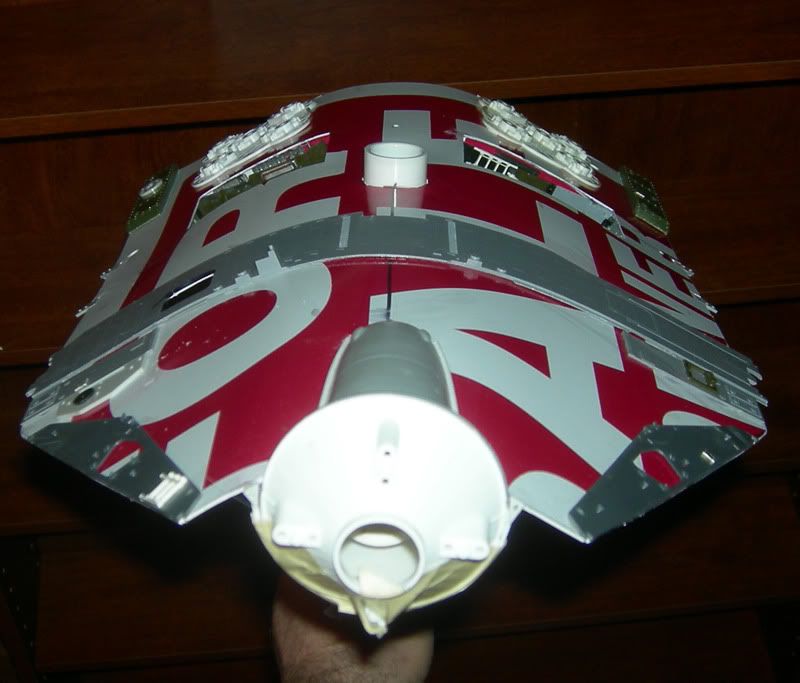
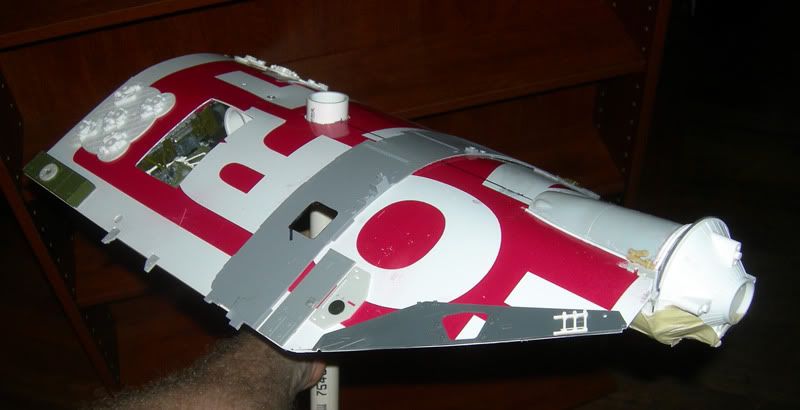
Got the main hull attached to the pvc frame:
DSCN2407sm.jpg

DSCN2406sm.jpg

DSCN2408sm.jpg

DSCN2409sm.jpg


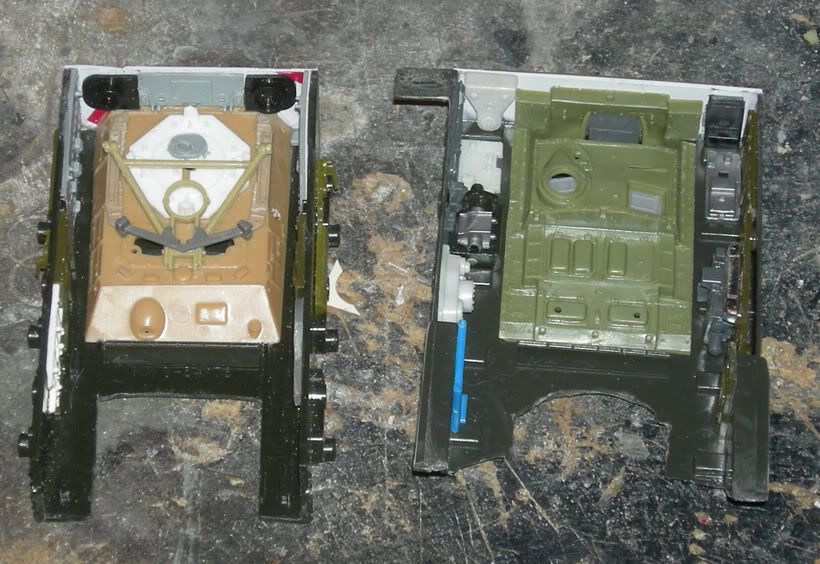
Note the cutouts for mounting point access. Recessed into those cutouts will be equipment bays (or whatever you want to call them), which I have begun detailing:
DSCN2411sm.jpg

http://i77.photobucket.com/albums/j54/Treadwell_Jay/RTF/DSCN2412sm.jpg
http://i77.photobucket.com/albums/j54/Treadwell_Jay/RTF/DSCN2413sm.jpg
http://i77.photobucket.com/albums/j54/Treadwell_Jay/RTF/DSCN2414sm.jpg

The boxes are lower hulls from 1/35 armor kits.
The ends with the rough cuts will be covered by the detailed mounting point plugs, which I have not made yet.

I should note that while I'm pretending I'm at 1978 Apogee, I am not limiting myself to kits available at the time. I can appreciate the purity of such an approach, but greeblies are greeblies, and this is a custom, after all.
 
Last edited:
Heated it in the oven! I looped wires through the holes at the edges and tightened them until I got the curve I wanted (actually a bit past it). It did spring back a little after heating but I decided to go with the curve I got rather than risk ruining it.

Again. 'Cuz that was actually attempt #2. I left it in too long the first time, resulting in a very rag-tag hull indeed. I learned that I just needed to let the oven get to the minimum "preheat" temperature, then immediately turn it off and open the door.

Just another of my ghetto approaches...I have no vaccuforming machine or other such equipment that would be quite handy.
 
wouldn't using the oven contaminate it from then on? Doesn't the plastic release some chemicals or is it pretty safe?
 
I think it would be unsafe to cook food in it at the same time, but once it airs out (and no plastic went liquid and pooled into the bottom of the oven) I assume it's safe. I'm no expert, though. Not a conventional approach, I fully admit.
 
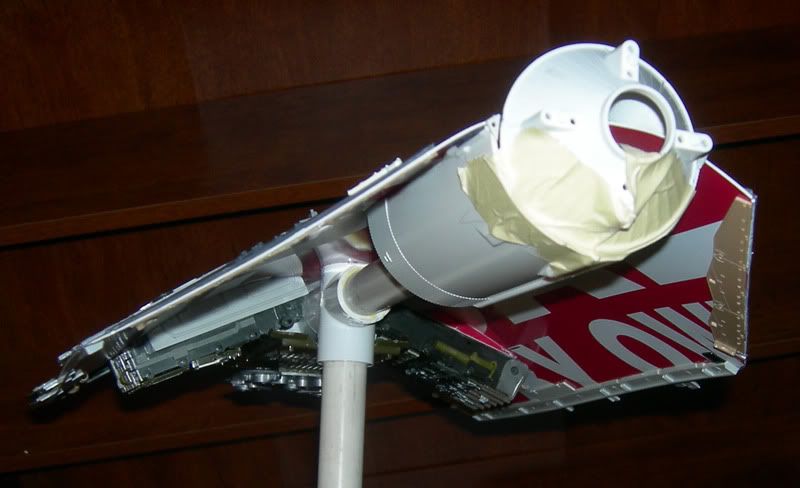
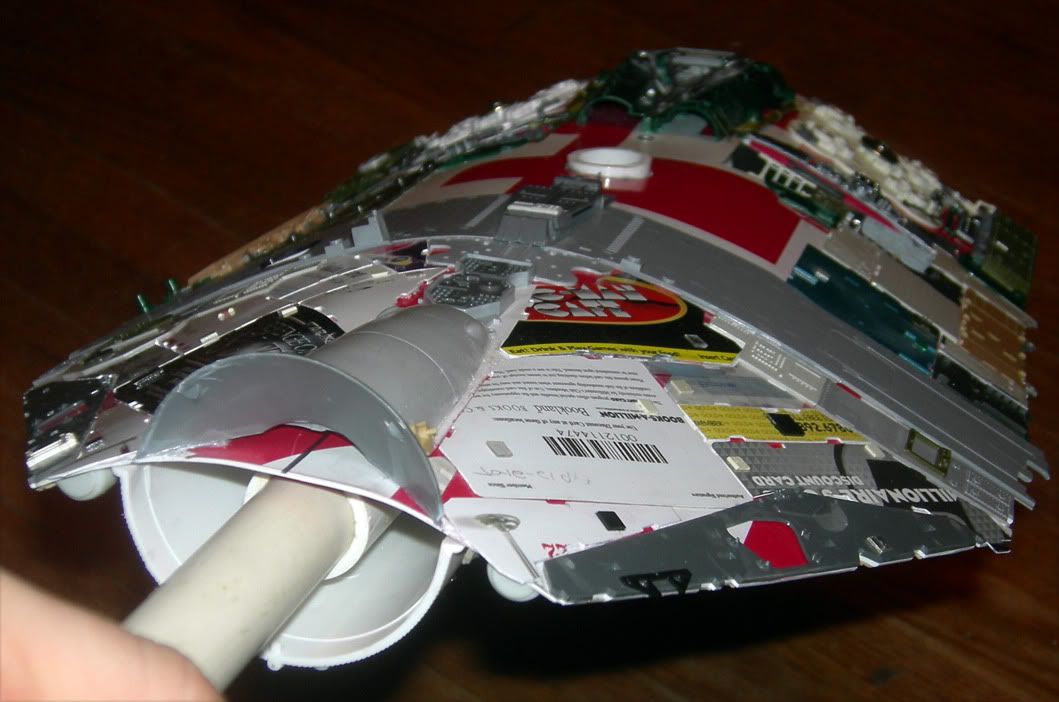
Still have some plating to do, and more details and mounting plugs to install, but couldn't resist priming it. Not the greatest pics, though...gonna have to take some in sunlight.

Picture017sm.jpg

Picture019sm.jpg

Picture027sm.jpg

Picture022sm.jpg


Shot one equipment bay with white over the black, being careful not to cover it fully. I like how some of the black still shows through in the recesses. There will be more weathering, though.
stbdbay.jpg


compare to:

stbdbayunpainted.jpg


more:
http://i77.photobucket.com/albums/j54/Treadwell_Jay/RTF/Picture009sm.jpg
http://i77.photobucket.com/albums/j54/Treadwell_Jay/RTF/Picture020sm.jpg
http://i77.photobucket.com/albums/j54/Treadwell_Jay/RTF/Picture021sm.jpg

I fear it's too busy on the back underside. Got a bit carried away.

gallery:
http://s77.photobucket.com/albums/j5...dwell_Jay/RTF/
 
Last edited:
I love this!! These are the best kinds of builds, period. Really shows a modeler's personality and creativity.
 
:eek:eek I've just seen the pumpkin turned out to be A state of the art star ship.
That's a real magic:lol
Yeah, this is the real pleasure of kitbash build:love
Great work:thumbsup

Also I'm impressed that you were working at Apogee:eek.
Firefox is the one of the best SFX movie in my life.

All the best,

katsu
 
Back
Top