Polar Lights 1/350 Refit Enterprise interiors

wayouteast

Sr Member
After several years of procrastination due to feeling a bit daunted by the sheer scale of the project (as well as the fantastic final results that other people have accomplished) I've finally made a start on my Polar Lights 1/350 USS Enterprise kit. I've been incentivised by the recent release of their 1/350 USS Grissom, which I'm also working on.

With the Enterprise, I decided to work from the inside out, so I've spent the last couple of weeks building, detailing, assembling and lighting the main interiors that will be visible when the kit is finally put together - the arboretum, shuttle/cargo bay and the senior officers' lounge. I will probably also do the rec deck and maybe the lower saucer hatch, but these will be far less visible and consequently less detailed.

Work in progress pics. Apologies for the blurry nature of some of these - it's really hard to get decent depth of field with such small items!

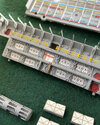
Arboretum - with temporary lighting in place:

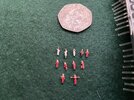
The plastic parts were enhanced with some photoetch detail from Paragrafix, painted and then detailed with flock and fine sand. Tiny 'rocks' were also added. The crew people are 1/350 resin naval figures from a French company called L'Arsenal and are a lot more realistic than the flat photoetch ones that you can get. I decided that my Enterprise is going to be the original 'no bloody A, B, C or D' ship, after the events of the Motion Picture but before its downgrading to a training vessel in The Wrath of Khan. The crew clothing has therefore changed from the rather bland jumpsuits of the first film to the more eye-catching uniforms of the later ones, and I painted the crew in three variants - enlisted crew in the red jumpsuits with the beige yoke, officers in the standard 'monster maroons (with different division colour collars) and engineering crew in the white/black protective suits. Very fine paintbrush and magnifying glasses required!
IMG_0410.jpeg IMG_0413.jpeg

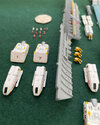
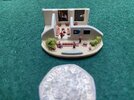
Senior officer's lounge:

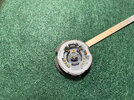
The lighting for this small unit - probably a nano SMD above each of the two areas of the lounge - will be mounted in the main saucer itself. Other than painting and the addition of a couple of screens and/or paintings, the only additions to this part were the crew figures (as above) and some more realistic foliage. The 50 pence piece is for scale!
IMG_0407.jpeg

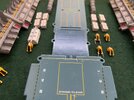
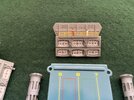
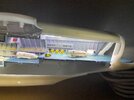
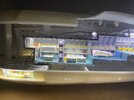
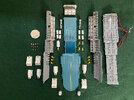
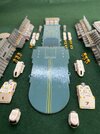
The cargo and shuttle decks - unassembled and with temporary lighting in place:

For the additional detailing on the shuttlebay and cargo deck I mostly used the Paragrafix photoetch set, with a few elements of the PNT photoetch set too - mainly the struts and braces on the walls, railings, perpendicular corridor walls and replacement window frames. I added more lighting along the walls and in the workbee bays with short lengths of fibre optic. These will hopefully transmit the main hull window lighting - which will be between the outer hull and the walls of the shuttlebay - and look a bit like spotlights. The bay itself is lit from above with LED strips mounted immediately above the supplied transparent parts of the kit. There are also nano-SMDs mounted at the tops and bases of the two turbolift shafts to illuminate them.

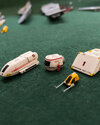
For the equipment and craft I used the supplied shuttles and workbees from the kit as well as some more accurate resin travel pods and cargo containers acquired from Pendragon/Don's Light and Magic some years ago before Don's sad passing. The travel pods come with some really nice detailed decals too. In the end I opted to use only the more modern Type 4 shuttles as the older 'wedge-shaped' shuttles take up a lot of room and wherever you end up placing them they tend to block the (very limited) view of the bay. I might display the unused vehicles on the base of the finished kit perhaps. I bought two kits originally (to use one as a 'test-bed' for the more complex paint or construction processes, so I ended up with four of each type of shuttle.

The photoetch kit comes with some manipulator arms for the workbee and a 'cargo train' grabber, so I used these to create a flying workbee with a cargo train in the rear cargo bay, simply glued to the back wall of the bay.

More crew on the walkways really bring the scene to life, and there are even crew behind the observation windows on either side of the main shuttle deck! I am waiting for another set of figures to arrive from France, and will add some maintenance and utility personnel in the cargo bay and on the main shuttle deck eventually.

These photos were taken before I matt-coated the floor and the walls are a bit dusty and needed a quick clean!
IMG_0392.jpeg IMG_0395.jpeg FC79D076-935F-48EF-9481-F892D3C3D7D8.jpeg IMG_0398.jpeg IMG_0399.jpeg 2E9D9F1B-37D1-40FC-A35E-C727685CB1C8.jpeg 185CDA7B-5583-4A71-A1DD-9F6B9F172E65.jpeg IMG_0406.jpeg

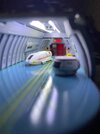
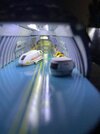
I experimented with lighting the cargo deck in red as a homage to the red-lit hangar you can see in Andrew Probert's original concept paintings. It made the lit turbolift shafts stand out nicely but was too dim to really see the detail at the back of the area, so in the end I opted for white light. In the final build, the windows of the viewing room above the main shuttle bay are still red-lit, though, as a small gesture towards the original art!
IMG_0432.jpeg IMG_0437.jpeg

Lighting finalised and loose-fit test:

Once I'd settled on exactly how the two main internal elements were going to be lit I wired them up, ensuring that the lighting took as little space as possible - not only is the fit tight to begin with, but I also need to leave room in the hull for the various circuit boards that will run the timed spotlights, navigation lights and strobes, impulse to warp drive deflector and nacelle effects and phaser and photon torpedo effects. The main control board and sound module will hopefully be located in the base, along with all the control buttons.

Once the lighting was in place on the ceilings of the arboretum and the shuttlebay I finalised the placement of the various elements of the scene and fixed them in place. Then I did a quick loose-fit test to make sure that both internal structures fitted into the hull of the ship as I hoped. Of course, once the main hull is painted and assembled the only view of the interior will through the shuttlebay door, so you'll not be able to see the full layout as well as you can here!

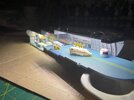
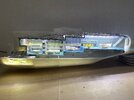
It is an amazing piece of futuristic industrial design on Andrew Probert's part. I like that seeing it like this makes the shuttle hangar space on the deck under the shuttle bay itself obvious, and the function of the two lifts that convey the shuttles from storage to the main deck itself. Very clever, and something that the smaller, more closed-off shuttle bay in the later films loses. I also like seeing the relative locations of the arboretum and the cargo decks.

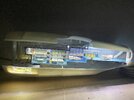
I couldn't resist taking a few pictures of this 'cutaway' view. Note that none of the external hull parts have been light blocked in any way so there's lots of bleed through from the arboretum.
IMG_0448.jpeg IMG_0451.jpeg IMG_0454.jpeg IMG_0458.jpeg IMG_0459.jpeg IMG_0461.jpeg

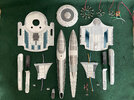
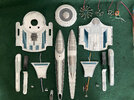
With these completed, I'm going to hopefully finish up my (much simpler) Grissom in the next few days before gritting my teeth and starting the daunting task of assembling and painting the various components of the Enterprise itself! Here are a couple of pictures of the Grissom parts, painted and waiting for lighting to be installed and final assembly!
IMG_0380.jpeg IMG_0383.jpeg
 
Last edited:
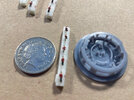
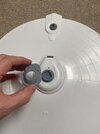
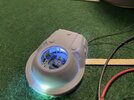
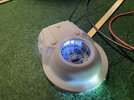
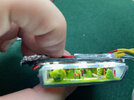
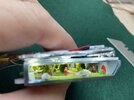
I must be bonkers. I decided I wanted to add a bridge to the USS Enterprise, viewable by lifting the top dome off the model. I had some store credit from Modelwerx for an order that fell victim to their swap from printed products to digital. So I used some of it to purchase the STL's for their Enterprise refit upgrade parts. One of these is a bridge interior with clear inserts for the wall screens, designed to fit inside a more accurate bridge module with a removable dome. The bridge interior is about the size of a 10p coin (24mm diameter)

The parts were printed on my Elegoo Mars resin printer in Elegoo standard grey resin and Anycubic clear.

The lighting is only temporary in these pictures. I've still got to work out the best way to cram the bridge and its lighting, spotlight(s) and strobe light that will all have to fit into a space only 30mm x 30mm x 14mm. I've also still got to add the bridge crew and print out decals for the displays on the illuminated viewscreens and consoles at the crew stations.

Still, it's already looking quite cool, I think! :)

IMG_0592.jpeg IMG_0599.jpeg IMG_0601.jpeg IMG_0615.jpeg IMG_0612.jpeg IMG_0613.jpeg

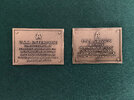
While I had the resin printer up and running, I also spent some time in Blender creating a couple of dedication plaques to go on the bases of the USS Grissom I've just completed and eventually the Enterprise. Again, printed in resin at about 6cc x 4cm, and then painted.

IMG_0606.jpeg
 
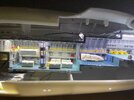
Getting there... After much eye-strain and swearing, the bridge is now inhabited, the station displays are installed, and it's starting to look more like... well... the bridge! Just got to add two more SMDs and permanently fix the lighting, and then work out a way of illuminating the helm/navigation console if I can. :unsure:

IMG_0646.jpeg


IMG_0645.jpeg


IMG_0643.jpeg


The exterior of the bridge is only loosely placed at the moment, and is slightly misaligned. That won't be the case once everything's assembled!
 
Very nice build I have to dig mine out I have all the photo etched stuff and all the lighting kits for it just getting it started is the next thing Your build is Bar None Super job can't wait to see more.
 
The bridge is now pretty much finished, I think. The display and console lights may be a little bright now that all the SMDs are in place. But as they are the only things lighting the whole bridge - given the space available and the lack of a ceiling once the dome is removed, it's a compromise between the subdued lighting that would be most accurate and actually being able to see the bridge as a whole! If they are too bright once the whole thing is in context with the rest of the ship, it'll be an easy matter to add a resistor later to dim them down slightly.

Top dome in place (parts are just placed roughly at the moment and no proper light blocking has been done):
IMG_0707.jpeg


Dome removed:
IMG_0708.jpeg


In slightly dimmer lighting...
IMG_0689.jpeg


Looking forward towards the main viewscreen. There's Klingons on the starboard bow!
IMG_0697.jpeg


Looking back towards the Master Situation Board and Tactical displays. The science station is on the right and Communications on the left:
IMG_0677.jpeg


Port side turbo-lift door with the Environment and Propulsion Systems stations to the right:
IMG_0686.jpeg


Starboard turbo lift door with the Science station to the right and Mission Ops to the left:
IMG_0685.jpeg


Bird's eye view from directly above:
IMG_0687.jpeg
 
You've done absolutely stellar work, and I don't want to be That Guy, but... As you said this is the refit 1701 circa 2278 (when we know for sure the uniforms had changed), I should make sure you know that's the Enterprise-A bridge from TUC you put in there:

1662877972439.png


Not the refit bridge in either of its configurations:

1662878015700.png

1662878034814.png


I'm still crying over the fact that I so badly want to build this model. It was mastered for Polar Lights by the late Tom Sasser, who I flatter myself to have been able to call a friend. He was so excited to put everything he'd learned from years of making accurizing parts for the mess that was the 1:537 AMT kit to use on this large-scale masterwork. And it was the last thing he did before he died...

But he -- and the vast majority of us -- didn't realize just how bad the scale problems were, going all the way back to TOS. Matt Jefferies set that ship at 947' when they were working on "The Cage". When the ship had a complement of just over two hundred. By the time it got to production and the crew had more than doubled, additions like the shuttlebay required a larger ship, but the size never got changed. When the refit ship was designed, Andy set it at an even thousand feet, making it a bit bigger than its prior configuration... but the details, as set (thickness of the saucer rim, size of the docking ports versus the full-size travel pod, etc.), require a larger ship also.

People with more time and skill to do the 3D modeling and overlays and match camera angles and lens types have determined that both need to be upsized by about 15% to make them agree with the interiors and known external scaling referents. And the Excelsior needs to be upsized even more than that. (In the same process, it was also discovered that the Reliant has a saucer that is very slightly smaller in diameter than the refit Enterprise. So any conversions starting with the latter and adding the former's unique bits on will be inaccurate.)

I got some accurately-sized 1:350 workbees, based on Andy's blueprints, and they are visibly bigger than the ones that come with the PL kit, which are scaled to fit in the alcoves, which are part of an accurately-depicted shuttlebay wall... Just smaller than it would all need to be for the interior to truly be 1:350.

It's frustrating as hell. I can use the TOS kit (with alterations) to make a Pike version of the ship, when it was smaller, but to make the ship as it was under Kirk and Decker, I need to print my own, with all the work that involves, in addition to then putting the kind of superdetailing into it as you are here. It's not a huge size difference. At this scale, it should come out to just under 39½", as opposed to this kit's 34¼". But that's enough to visibly matter, and, in the end, I couldn't bring myself to just ignore it. That's had a huge impact on my 1:1000 scale fleet and the Excelsior-era portions of my 1:1400 fleet. So when I see such amazing work as yours, on a kit I know is an inaccurate foundation to start with, I am so conflicted. It's as gorgeous as my David Kimble TMP cutaway poster, that I cannot throw away, undersized ship be damned. But underneath the superb work, I can see the undersized bones. Like anything involving the Millennium Falcon.

I do not say any of that to dissuade or discourage you. I just feel knowledge and insights should be shared, however disrupting they may be to accepted dogma. If you do interiors behind the saucer rim windows, I recommend not using the rec deck we saw in TMP -- the set was intended to be below and abaft the bridge superstructure (those two turboshafts were supposed to be coming down from the bridge), and very much does not fit in the saucer rim where it's since been placed -- 1,000-foot ship or upsized. Those turboshafts would come from nowhere and go to nowhere, and the lower level cannot be accessed from the central saucer, due to the undercut.

And I applaud the notion of doing the ventral saucer airlocks. If the shuttlebay doors are open and the passthrough doors to the cargo bay and its upper floor are all retracted, I would presume this is an underway replenishment -- to or from the Grissom -- and I've always liked that set.
 
You've done absolutely stellar work, and I don't want to be That Guy, but... As you said this is the refit 1701 circa 2278 (when we know for sure the uniforms had changed), I should make sure you know that's the Enterprise-A bridge from TUC you put in there:

View attachment 1615870

Not the refit bridge in either of its configurations:

View attachment 1615874
View attachment 1615875

I'm still crying over the fact that I so badly want to build this model. It was mastered for Polar Lights by the late Tom Sasser, who I flatter myself to have been able to call a friend. He was so excited to put everything he'd learned from years of making accurizing parts for the mess that was the 1:537 AMT kit to use on this large-scale masterwork. And it was the last thing he did before he died...

But he -- and the vast majority of us -- didn't realize just how bad the scale problems were, going all the way back to TOS. Matt Jefferies set that ship at 947' when they were working on "The Cage". When the ship had a complement of just over two hundred. By the time it got to production and the crew had more than doubled, additions like the shuttlebay required a larger ship, but the size never got changed. When the refit ship was designed, Andy set it at an even thousand feet, making it a bit bigger than its prior configuration... but the details, as set (thickness of the saucer rim, size of the docking ports versus the full-size travel pod, etc.), require a larger ship also.

People with more time and skill to do the 3D modeling and overlays and match camera angles and lens types have determined that both need to be upsized by about 15% to make them agree with the interiors and known external scaling referents. And the Excelsior needs to be upsized even more than that. (In the same process, it was also discovered that the Reliant has a saucer that is very slightly smaller in diameter than the refit Enterprise. So any conversions starting with the latter and adding the former's unique bits on will be inaccurate.)

I got some accurately-sized 1:350 workbees, based on Andy's blueprints, and they are visibly bigger than the ones that come with the PL kit, which are scaled to fit in the alcoves, which are part of an accurately-depicted shuttlebay wall... Just smaller than it would all need to be for the interior to truly be 1:350.

It's frustrating as hell. I can use the TOS kit (with alterations) to make a Pike version of the ship, when it was smaller, but to make the ship as it was under Kirk and Decker, I need to print my own, with all the work that involves, in addition to then putting the kind of superdetailing into it as you are here. It's not a huge size difference. At this scale, it should come out to just under 39½", as opposed to this kit's 34¼". But that's enough to visibly matter, and, in the end, I couldn't bring myself to just ignore it. That's had a huge impact on my 1:1000 scale fleet and the Excelsior-era portions of my 1:1400 fleet. So when I see such amazing work as yours, on a kit I know is an inaccurate foundation to start with, I am so conflicted. It's as gorgeous as my David Kimble TMP cutaway poster, that I cannot throw away, undersized ship be damned. But underneath the superb work, I can see the undersized bones. Like anything involving the Millennium Falcon.

I do not say any of that to dissuade or discourage you. I just feel knowledge and insights should be shared, however disrupting they may be to accepted dogma. If you do interiors behind the saucer rim windows, I recommend not using the rec deck we saw in TMP -- the set was intended to be below and abaft the bridge superstructure (those two turboshafts were supposed to be coming down from the bridge), and very much does not fit in the saucer rim where it's since been placed -- 1,000-foot ship or upsized. Those turboshafts would come from nowhere and go to nowhere, and the lower level cannot be accessed from the central saucer, due to the undercut.

And I applaud the notion of doing the ventral saucer airlocks. If the shuttlebay doors are open and the passthrough doors to the cargo bay and its upper floor are all retracted, I would presume this is an underway replenishment -- to or from the Grissom -- and I've always liked that set.
Thanks for the lovely, detailed and very interesting reply! And I envy you your friendship with Thomas Sasser - his work was always an inspiration.

I did know that the bridge model I used in the end was the configuration from The Undiscovered Country (almost) and therefore accurate to 1701-A rather than the original Enterprise. I had a bit of a conflict, since that's always been one of my favourite bridge layouts and looks and yet I knew I wanted to build and paint the kit as the original Enterprise with its gorgeous pearlescent finish before it was dulled down. There are also other aspects of the original ship I wanted to keep too. I hummed and hah-ed for ages - at one point I was going to be strict with myself and make it The Motion Picture version in every respect (including the crew pyjamas!), especially since that film is, in my view, hugely underappreciated and misunderstood. But in the end I decided to make it 'my' idealised Enterprise and incorporate all those aspects I liked from the various movies - the original finish and registry, maroon uniforms, TUC bridge, TMP shuttle bay configuration (though updated shuttles rather than the original 'wedges') - plus a couple of non-canon things too; I love the UV/purple glows of the warp nacelles in TMP but they're an anomaly when set against the blue of every other movie (and ship) in the later ST universe. So mine will have a 'stand-by' UV glow even when powered down (along with the amber deflector/impulse crystal) and then brighten to blue, along with the defector and crystal) when warp is activated.

So the finished model won't be fully accurate to any specific incarnation, I'm afraid, not just in scale but also in details. But it will be accurate to the idealised image of the ship I've always carried in my head.

I completely agree with your point about what's behind the 'rec-deck' windows, and I've already made the room(s) to go there. They'll be barely visible once the windows are in, but should give the impression of an inhabited working space that better matches the deck height and feasible size of the space there.

IMG_0715.jpeg


Thanks so much again for the reply and the kind words!
 
Excellent approach. Almost a showpiece of all the elements of all the versions of that ship(s)that work best. My favorite bridge is the TFF one, speaking of underappreciated Trek films. And I agree with you on TMP -- though if I were doing a straight TMP refit, I'd go with TOS uniforms (the TWOK uniforms are a lot like cleaner versions of the first pilot tunic and field jacket, and I could almost see that being the throughline, with the series and TMP uniforms being failed attempts to introduce new uniforms before reverting) and less desaturated colors on the bridge (more like TWOK). I miiiiiight even go so far as to pre-emptively put the round graphics in the round displays.

Regarding the "rec deck" windows, I almost feel like the TMP Director's Edition, with the new CG insert in the lounge screen/window where Kirk talks to Spock after the latter comes aboard, is indicating that room is behind a couple of those windows, with a view of the starboard nacelle.

I also wildly appreciate your lighting approach with the engines and main sensor. (Treknology Nerd Hat: The navigational deflectors are actually the three bumps flanking the dish -- in both TOS and TMP ships. The systems weren't integrated until the Ambassador class.) I got Hachette's 60-issue subscription series of the 1:350 Andromeda and I am so going to wade into that thing. They wanted to give cruising and "parade" options for the lighting, but the latter was too complex and fiddly, so they reined it in a lot. I am more ambitious. Plus, I know about electroluminescent paint, so I can get all the spots they couldn't figure out how to run optic fiber or whatever. Here's how the ship normally runs:

Andromeda_2202_port_forward.png


It's largely automated, compared to the Yamato. Dim lighting on the main bridge. Sometimes the Captain's quarters are lit. Flashing red formation lights and some self-illumination on the nomenclature when running in a fleet...

But its first appearance is pretty dramatic. The surviving crew of the Yamato's run to save Earth are having a reunion of sorts at the statue of their dead Captain, when the wind suddenly picks up and, with a whine of downspooling engines as it comes in to land, the new flagship, Andromeda, does an overflight of the statue on approach, with all running lights on:

Andromeda_2202_Okita_statue.png


572a05.jpg


I'm-a do that. Plus upgrading the main guns with working brass irises and laser diodes to give more of a "blast" effect on "firing". And, like you, one of the things I need to do is design and 3D print the bridge, so I have something behind those windows. This will ultimately be displayed alongside my 1:350 U.S.S. Cygnus from The Black Hole, my "Enterprise Evolution" of NCC-1701 from April through Pike, Kirk, and Decker -- her original configuration and all three ten-year refits, and a 1:350 Millennium Falcon for some context. I'd love to build a 1:350 Excelsior, but I'll need a bigger living space for that... But you see why I need to sort out my TOS and TMP Enterprises -- need to line 'em up next to the earlier versions.

I have to say, I'm happy with my conjectural retro-designing of the "as-launched" configuration, under April. Enterprise-the-show feels so much, to me, like it should have been the early voyages of NCC-1701 under April. So I'm taking the 1:350 NX-01, using the (altered) saucer bottom as the new saucer top, using the saucer bottom of the NCC-1701 (even more altered), using the fourth-season refit secondary hull as a starting point, and using the details of the "WNMHGB" Enterprise miniature -- the dark stripes flanking the port and starboard running lights, the impulse deck, the rear nacelle endcaps, etc.

I also may make the saucer rim one deck, at least on April's version, but possibly also Pike's. Inspired by this problematic cross-section Jefferies did:

jefferies-prise_51289918037_o.jpg


He forgot the saucer undercut. The lower deck of the saucer rim doesn't communicate with the core. Also, note that angle at the edge. Definitely going to do something with that...
 
Excellent approach. Almost a showpiece of all the elements of all the versions of that ship(s)that work best. My favorite bridge is the TFF one, speaking of underappreciated Trek films. And I agree with you on TMP -- though if I were doing a straight TMP refit, I'd go with TOS uniforms (the TWOK uniforms are a lot like cleaner versions of the first pilot tunic and field jacket, and I could almost see that being the throughline, with the series and TMP uniforms being failed attempts to introduce new uniforms before reverting) and less desaturated colors on the bridge (more like TWOK). I miiiiiight even go so far as to pre-emptively put the round graphics in the round displays.

Regarding the "rec deck" windows, I almost feel like the TMP Director's Edition, with the new CG insert in the lounge screen/window where Kirk talks to Spock after the latter comes aboard, is indicating that room is behind a couple of those windows, with a view of the starboard nacelle.

I also wildly appreciate your lighting approach with the engines and main sensor. (Treknology Nerd Hat: The navigational deflectors are actually the three bumps flanking the dish -- in both TOS and TMP ships. The systems weren't integrated until the Ambassador class.) I got Hachette's 60-issue subscription series of the 1:350 Andromeda and I am so going to wade into that thing. They wanted to give cruising and "parade" options for the lighting, but the latter was too complex and fiddly, so they reined it in a lot. I am more ambitious. Plus, I know about electroluminescent paint, so I can get all the spots they couldn't figure out how to run optic fiber or whatever. Here's how the ship normally runs:

View attachment 1615912

It's largely automated, compared to the Yamato. Dim lighting on the main bridge. Sometimes the Captain's quarters are lit. Flashing red formation lights and some self-illumination on the nomenclature when running in a fleet...

But its first appearance is pretty dramatic. The surviving crew of the Yamato's run to save Earth are having a reunion of sorts at the statue of their dead Captain, when the wind suddenly picks up and, with a whine of downspooling engines as it comes in to land, the new flagship, Andromeda, does an overflight of the statue on approach, with all running lights on:

View attachment 1615913

View attachment 1615914

I'm-a do that. Plus upgrading the main guns with working brass irises and laser diodes to give more of a "blast" effect on "firing". And, like you, one of the things I need to do is design and 3D print the bridge, so I have something behind those windows. This will ultimately be displayed alongside my 1:350 U.S.S. Cygnus from The Black Hole, my "Enterprise Evolution" of NCC-1701 from April through Pike, Kirk, and Decker -- her original configuration and all three ten-year refits, and a 1:350 Millennium Falcon for some context. I'd love to build a 1:350 Excelsior, but I'll need a bigger living space for that... But you see why I need to sort out my TOS and TMP Enterprises -- need to line 'em up next to the earlier versions.

I have to say, I'm happy with my conjectural retro-designing of the "as-launched" configuration, under April. Enterprise-the-show feels so much, to me, like it should have been the early voyages of NCC-1701 under April. So I'm taking the 1:350 NX-01, using the (altered) saucer bottom as the new saucer top, using the saucer bottom of the NCC-1701 (even more altered), using the fourth-season refit secondary hull as a starting point, and using the details of the "WNMHGB" Enterprise miniature -- the dark stripes flanking the port and starboard running lights, the impulse deck, the rear nacelle endcaps, etc.

I also may make the saucer rim one deck, at least on April's version, but possibly also Pike's. Inspired by this problematic cross-section Jefferies did:

View attachment 1615925

He forgot the saucer undercut. The lower deck of the saucer rim doesn't communicate with the core. Also, note that angle at the edge. Definitely going to do something with that...

Gosh! Those are some very ambitious goals! My hat is doffed to you! I confess not to be very knowledgeable about the Space Battleship Yamato series (have I got that right?!) but that shot of the other ship all lit up is gorgeous - that will look amazing as a model I think. A 1/350 scale Excelsior! Good grief! :eek: I had the old Lunar Models 1/537 vac-form kit at one point, and that was HUGE. I can't even imagine the space needed to display a 1/350 version! :D I'll settle for a 1/350 ReliantI never finished that build - the sheer amount of work needed to build it, let alone accurise it to something even approaching correctness was too much for my skills (and patience) at that time.

I've always believedthe edge of the Enterprise saucer could only take one deck sensibly, with the lower part of the edge (outside the undercut) being either storage or machinery space, accessible if needed through hatches in the floor of the full deck above but otherwise non-habitable. It's the only configuration that makes sense.

This cutaway picture shows it well, in my opinion.
Enterprise-saucer-cutaway-partial.jpeg
 
Most excellent project! Can't wait to see it completed.

So, Modelwerks has switched to selling files, hey? Must have been too many customers like myself who complained about receiving unacceptable, sub-par physical prints. :rolleyes:

lO6QpdG.jpg

OJMzyKn.jpg

X985lDy.jpg

LMIUTeq.jpg
 
That would be the Kimble cutaway I love so well. :) And, actually, that made me think of something... I think I may do some geometry on that thing... If I presume those mannikin figures are 5'10" and extrapolate the size of the ship form there, see if he made it the official 1,000 feet, or bumped it a bit bigger to make the corridors and decks and such actually fit.

Here are all the problematic depictions I've run across. Everyone forgets that undercut...

drex-prise.jpg

That's Doug Drexler...

Jackill-prise.jpg

Erik Christiansen/Jackill...

tumblr_3afc7240c81d4c28f4706aba248e662f_ccb48470_1280.jpg

That one I can allow a certain amount of liberty, if it's just an infographic depicting the whole of the two saucer rim decks as a pressure compartment, rather than any sort of deckplan...

E-B MSD no undercut.jpg

And even the Excelsior does not escape this oversight.

Excelsior undercut.jpg

Do you see that?! That! Right there! Yeesh.

But yeah, the coreward portions of the deck are likely more involved with primary ship's functions, where the bit at the outside was likely expansion to crew quarters and QOL (lounges replimats, etc.), and accessible only from the deck above, by turbolift or gangway. With the Constitution and Enterprise classes, the space between made a good spot to house equipment that didn't need full deck height. Can make some reasonable-sounding explanation about subspace field and such to necessitate the undercut. The Excelsior is big enough it doesn't need that space for equipment and just has a straight-walled separation between core and rim.

One of the things I've thought of doing with this Polar Lights kit is to butcher it and scratch-build interior components inspired by that poster to show the Enterprise at an earlier stage of her refit. But that, at this point, is just a "maybe maybe maybe".

And yeah, Space Battleship Yamato. The original version still holds up, even if the animation is a little rocky by contemporary standards. The revamped version (Space Battleship Yamato/Star Blazers 2199) that came out a few years ago is, I feel, I fitting updating of the original. Not sure if I prefer it, but it's solid and deserves a watch. The Andromeda is introduced in the second series (2202).
 
Most excellent project! Can't wait to see it completed.

So, Modelwerks has switched to selling files, hey? Must have been too many customers like myself who complained about receiving unacceptable, sub-par physical prints. :rolleyes:

View attachment 1616023
View attachment 1616024
View attachment 1616025
View attachment 1616026
Oof! My goodness. Those do look rough. It looks like some support issues during printing (e.g. the layer delamination on the Excelsior neck cutouts) and little or no post-print clean-up - or dirty isopropanol. A pity, because the STL files are really very good and detailed. They print and clean up well with careful slicing, orientation and supports.
 
I've taken on more and more 3D printing myself, but getting the equipment is slow going. I have a ~350mm square Y-translation Ender for smallish, simplish things, like my SE-44C blaster:

SE-44C parts.jpg

SE-44C test assembly.jpg


That's with about an hour of post-processing. The support remnants in the trigger guard took a bit longer. You can see from the banding on the flash hider, some minor filling is needed, and I had to order a couple of other pieces from Shapeways (the aluminum "holster bracket" plate and the fiddly main sight piece), but I was able to monitor the prints and make sure everything went well. Also, because I'm doing it for me and not for profit, I use PET-G instead of PLA or liquid resin, dial the layer thickness down to 0.2mm, and run it low and slow to minimize the chance of misalignment.

I have an Orange30 for small high-detail pieces. I'm still calibrating it. And I'm building a modified Vulcanis Max negative-Z-translation, dual-extruder, heated and pressurized enclosure, with a 540mmx540mmx1500mm build volume printer. That I am definitely taking my time and being careful with. I want a bigger SLA printer to handle larger pieces with fine surface detail... And a DLSM printer that can print everything up to steel, titanium, and ceramic.

I really do like that they are selling the models instead of the prints. If one has decent tools and know-how, controlling the result is much easier -- and more satisfying.
 

Your message may be considered spam for the following reasons:

If you wish to reply despite these issues, check the box below before replying.
Be aware that malicious compliance may result in more severe penalties.
Back
Top