Mr Mold Maker
Master Member
Hey folks, it’s that time once again where I slap up a few bad photos and way over explain them with a long write up. This time, the subject is the one and only PREDATOR!
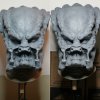
This casting originates from Stan Winston molds. A cast of a cast of a cast, I’m sure, but the detail is all there.

This is how the head came to me. The mouth was a separate piece which needed to be mounted on. The seams were blended away with Apoxie Sculpt. The first thing that stands out to me are these rather poorly sculpted and warped eyes. The story behind this head is that Morris Costume Company got the rights to release a statue, as well as a few other pieces, and they were loaned pieces from Stan’s original molds. The eyes in that piece, being sculpted on Kevin Peter Hall’s lifecast, were closed, as you can see in the photo below. The story as I understand it is the eyes were quickly sculpted by Morris Costume Co, as well as the inner mouth and potentially the mandibles. Some people point to the discrepancy between the lower mandibles and the screen used piece, but others argue that the shapes were altered slightly by the mechanisms beneath for movement. I am a fan of the second theory.

So first order of business for me was dremeling out those wonky eyes and sculpting a new set. This is very old resin, 10+ years at least if I had to guess. On top of that, it was quite poorly foam filled with both polyfoam and expanding spray foam. The resin and the foams had become very brittle with age, so dremeling them out was a tad difficult, but in the end with a lot of patience, I was able to open a cavity large enough to accept eyeforms. From there I used reference photos of KPH to sculpt his eyes into the piece with Apoxie Sculpt as best as I could. I just couldn’t picture any other eyes in the piece. There were a few flaws I had to go around and fix, remove the seam, patch a few holes and a dent here and there. After all that careful clean up, Dremel, and sculpture work, I was finally able to start on painting!

Let me first off apologize about my horribly messy workspace. I usually work on the table behind me and the mess is hidden, but the lighting was coming across much better from this side. I’ll have to clean, rearrange, and organize ASAP. Anyways, on to the paint.
To start the paint job, I based the whole piece in a cheap acrylic. The color was “Antique White” I believe from Apple Barrel.
I wanted to try my best to go in the order it seemed like Steve Wang would have gone, mapping out the brown spotting made the most sense to me. The shape of the spots are completely random, however, they do follow a general direction. Coming across the crown, down into a point at the middle of the brow. The color here was Decay from Tim Gore’s Bloodline. All colors from here out will be Bloodline unless otherwise noted.

My next step was filling in the crown with some color. Now, some people like to paint this area a dark brown. There is nothing wrong with that, it is just not to my personal tastes. I see a little red when I look at the real piece so I wanted to replicate that, but also take it a step further. My idea was to transition from a hot yellow to an orange, to a bright fire red. I mottled around somewhat randomly in the crown and focused the fade a little more carefully towards the cheeks and eyes. The colors used were Injury Ochre (yellow) Rust (Casey Love Paints) and Blood Red.
I also started to establish the skin tone of the piece, and mist back the brown spots a little towards the face. I used a Casey Love Color here, either Warning Yellow or Yellow Oxide mixed with a flesh color from Tim Gore’s Lifeline. I also started mapping out the black spotting with FW inks Black, thinned with just a touch of 99% alcohol.

Continuing the slow process of painting every spot. I mapped out the center of the crown and painted a line down the center with Antique white. I blended off the sharp edges by lightly airbrushing my fleshtone mix.

We are nearing completion of the spotting on the crown. I gave some attention to the mouth, blocking in with a Blush Tone from Lifeline. Subtle veining was done with a muddy reddish purple. It was at this point that I starting gently shading with Golden Acrylics Shading Grey. Hitting the creases in the brow, and very lightly mottling over the flesh areas.


To be continued in the next post.
This casting originates from Stan Winston molds. A cast of a cast of a cast, I’m sure, but the detail is all there.

This is how the head came to me. The mouth was a separate piece which needed to be mounted on. The seams were blended away with Apoxie Sculpt. The first thing that stands out to me are these rather poorly sculpted and warped eyes. The story behind this head is that Morris Costume Company got the rights to release a statue, as well as a few other pieces, and they were loaned pieces from Stan’s original molds. The eyes in that piece, being sculpted on Kevin Peter Hall’s lifecast, were closed, as you can see in the photo below. The story as I understand it is the eyes were quickly sculpted by Morris Costume Co, as well as the inner mouth and potentially the mandibles. Some people point to the discrepancy between the lower mandibles and the screen used piece, but others argue that the shapes were altered slightly by the mechanisms beneath for movement. I am a fan of the second theory.

So first order of business for me was dremeling out those wonky eyes and sculpting a new set. This is very old resin, 10+ years at least if I had to guess. On top of that, it was quite poorly foam filled with both polyfoam and expanding spray foam. The resin and the foams had become very brittle with age, so dremeling them out was a tad difficult, but in the end with a lot of patience, I was able to open a cavity large enough to accept eyeforms. From there I used reference photos of KPH to sculpt his eyes into the piece with Apoxie Sculpt as best as I could. I just couldn’t picture any other eyes in the piece. There were a few flaws I had to go around and fix, remove the seam, patch a few holes and a dent here and there. After all that careful clean up, Dremel, and sculpture work, I was finally able to start on painting!

Let me first off apologize about my horribly messy workspace. I usually work on the table behind me and the mess is hidden, but the lighting was coming across much better from this side. I’ll have to clean, rearrange, and organize ASAP. Anyways, on to the paint.
To start the paint job, I based the whole piece in a cheap acrylic. The color was “Antique White” I believe from Apple Barrel.
I wanted to try my best to go in the order it seemed like Steve Wang would have gone, mapping out the brown spotting made the most sense to me. The shape of the spots are completely random, however, they do follow a general direction. Coming across the crown, down into a point at the middle of the brow. The color here was Decay from Tim Gore’s Bloodline. All colors from here out will be Bloodline unless otherwise noted.

My next step was filling in the crown with some color. Now, some people like to paint this area a dark brown. There is nothing wrong with that, it is just not to my personal tastes. I see a little red when I look at the real piece so I wanted to replicate that, but also take it a step further. My idea was to transition from a hot yellow to an orange, to a bright fire red. I mottled around somewhat randomly in the crown and focused the fade a little more carefully towards the cheeks and eyes. The colors used were Injury Ochre (yellow) Rust (Casey Love Paints) and Blood Red.
I also started to establish the skin tone of the piece, and mist back the brown spots a little towards the face. I used a Casey Love Color here, either Warning Yellow or Yellow Oxide mixed with a flesh color from Tim Gore’s Lifeline. I also started mapping out the black spotting with FW inks Black, thinned with just a touch of 99% alcohol.

Continuing the slow process of painting every spot. I mapped out the center of the crown and painted a line down the center with Antique white. I blended off the sharp edges by lightly airbrushing my fleshtone mix.

We are nearing completion of the spotting on the crown. I gave some attention to the mouth, blocking in with a Blush Tone from Lifeline. Subtle veining was done with a muddy reddish purple. It was at this point that I starting gently shading with Golden Acrylics Shading Grey. Hitting the creases in the brow, and very lightly mottling over the flesh areas.


To be continued in the next post.
Last edited:


