You are using an out of date browser. It may not display this or other websites correctly.
You should upgrade or use an alternative browser.
You should upgrade or use an alternative browser.
Oblivion Drone Scratch build
- Thread starter niart17
- Start date
So are you going to be offering this as a resin kit for sale? Would definitely be interested if you do.
Thanks, and great work!
Chris
I'm not really set up for doing quality mass produced (or even limited produced ) models. Not ruling it out mind you just never thought about it. I may have to look in to what it would take to set that up.
Bill
- - - Updated - - -
I know that you want to save material/money for some parts...but roto-casting those little piece is not really worth it; specially those thin arms. Solid Alumilite should do the trick.
Thanks joberg. The other alternative would be to 3d print them hollow. I'm laying that out now to check pricing.
Bill
tech49
Member
Fantastic work. Looking the goods. Can't wait for an update. A few have tried to replicate these but the quality n detail just weren't there. Apparently Randy Cooper is doing one. He produced the bubble ship and it turned out really well. Just a little pricey for me. Keep up the great work.
Great work! The design of the drones was pretty cool. I agree that rotocasting such a small part is probably not worth the hassle unless you really want or need it to be a hollow shell. If you do go that route, spinning the mold (slowly) by hand works fine, I've done it lots of times. And you only need to spinning it for a minute or two until the resin starts to gel.
Which of the Shapeways materials did you use for the 3D prints?
Which of the Shapeways materials did you use for the 3D prints?
Great work! The design of the drones was pretty cool. I agree that rotocasting such a small part is probably not worth the hassle unless you really want or need it to be a hollow shell. If you do go that route, spinning the mold (slowly) by hand works fine, I've done it lots of times. And you only need to spinning it for a minute or two until the resin starts to gel.
Which of the Shapeways materials did you use for the 3D prints?
Thanks guys. For the parts I've printed so far they have been frosted ultra detail. I didn't feel the extra cost for extreme was worth it in this case. I've priced the gun pods in white strong flex and I think I'm going to go that route. Much easier than trying to resin cast or scratch another to match. Should order those this weekend. Hope to have more progress soon.
Bill
My parts finally came in, a little late but they are in. Pretty happy with them. I know I'll have quite a bit or work to smooth it out but shouldn't be too too hard. Starting to look like a drone now.
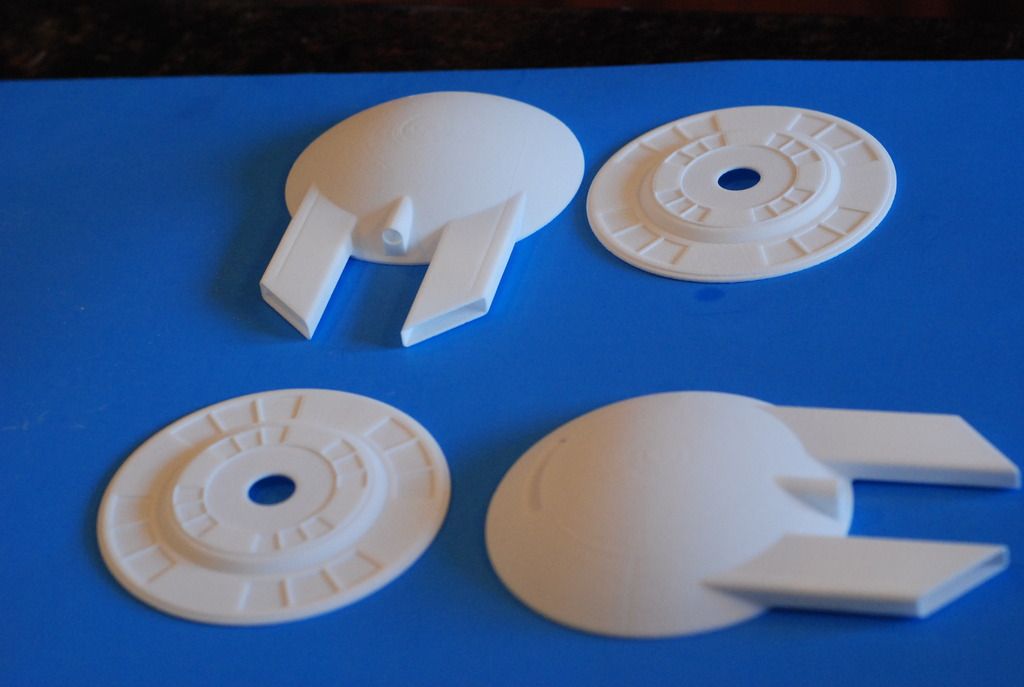
The brackets fit perfectly. That's the big advantage of printing from the same model.
Bill
The brackets fit perfectly. That's the big advantage of printing from the same model.
Bill
")
Thanks guys!
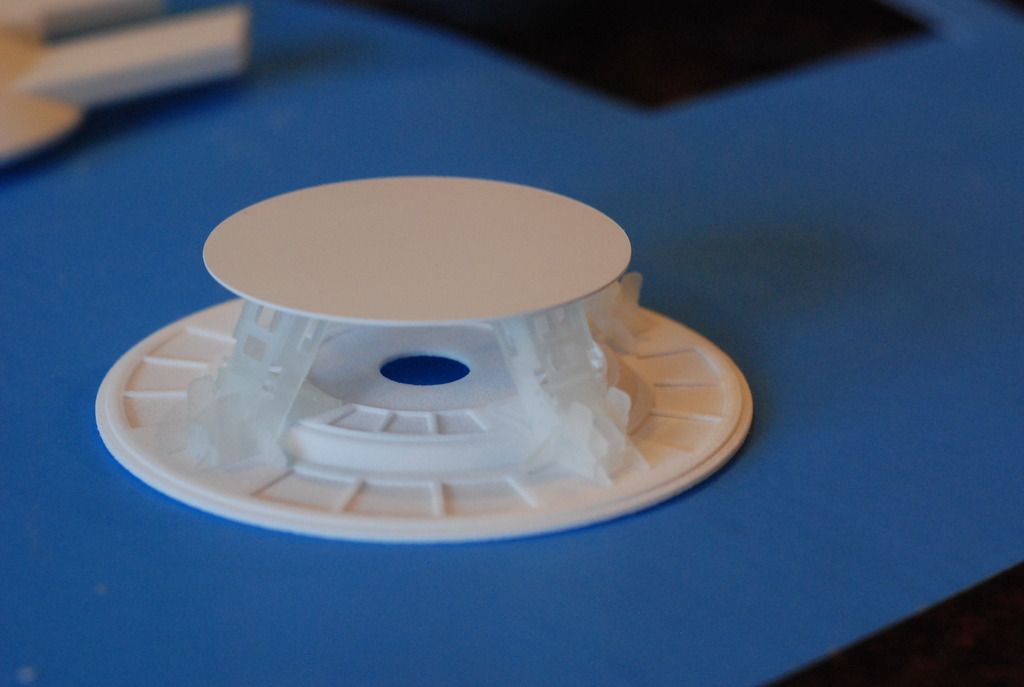
Back with a small update. I temporarily attached one of the turrets on it's bracket assembly to see how it looks. I think the distance is about right. Now I just need to work up the system of making it easily removable but look complete with little to no seam once it's attached.

Thanks for checking it out.
Bill
Back with a small update. I temporarily attached one of the turrets on it's bracket assembly to see how it looks. I think the distance is about right. Now I just need to work up the system of making it easily removable but look complete with little to no seam once it's attached.
Thanks for checking it out.
Bill
Sergiotron
Well-Known Member
Amazing!
What a great work you did! How big is your fine detailed model? Do you share or sell the 3D files? It looks so good you have to put light in it (red eye, nozzles...). How big is it? Is it the same size as the Oblivion Drone Model kit from goldenarmor.com? http://goldenarmor.com/oblivion/2013/9/5/oblivion-drone-model-kit.html?SSScrollPosition=0
Obviously your drone looks much more detailed!
Obviously your drone looks much more detailed!
Last edited:
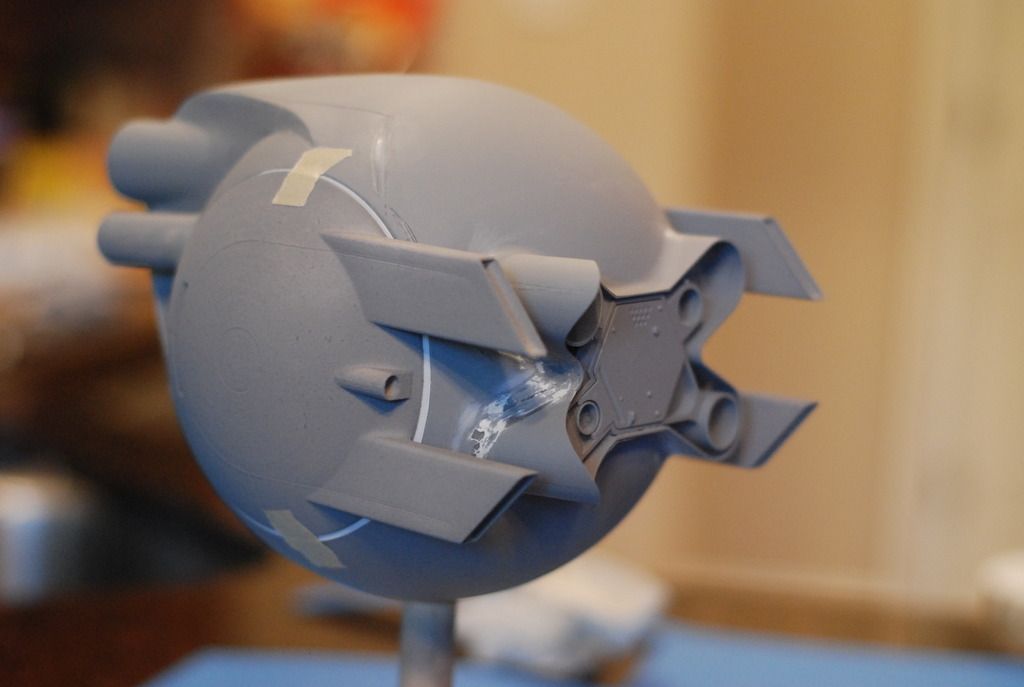
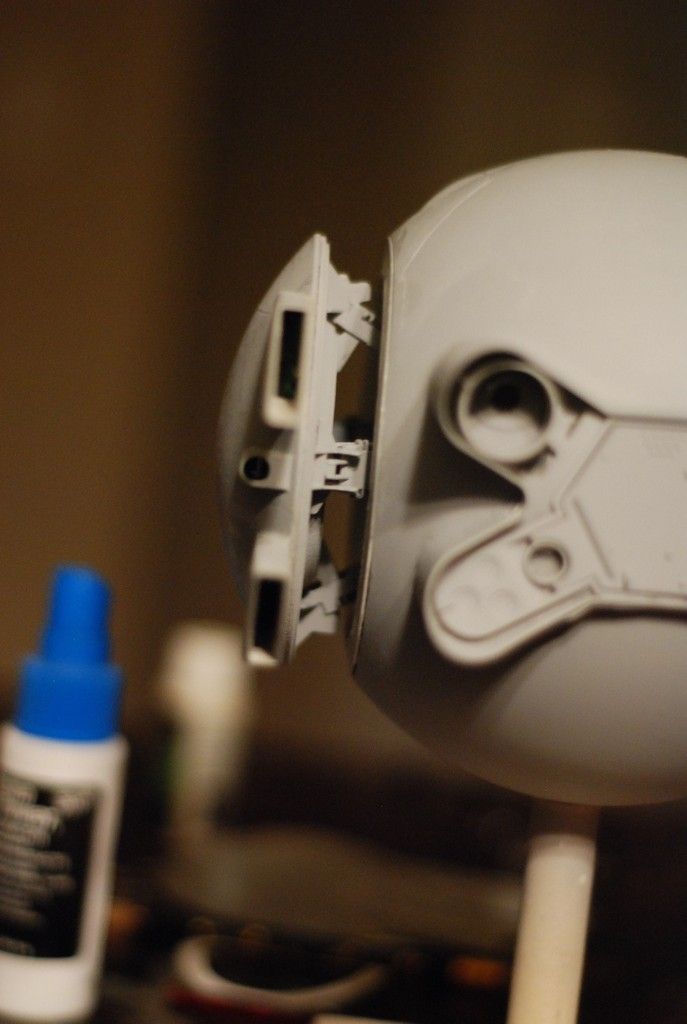
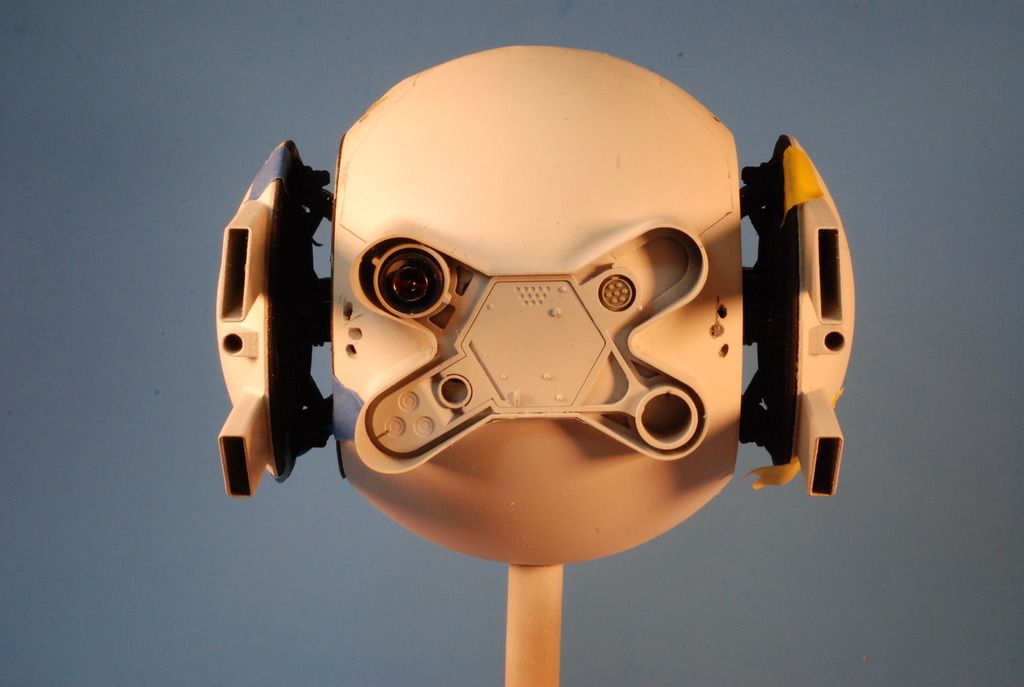
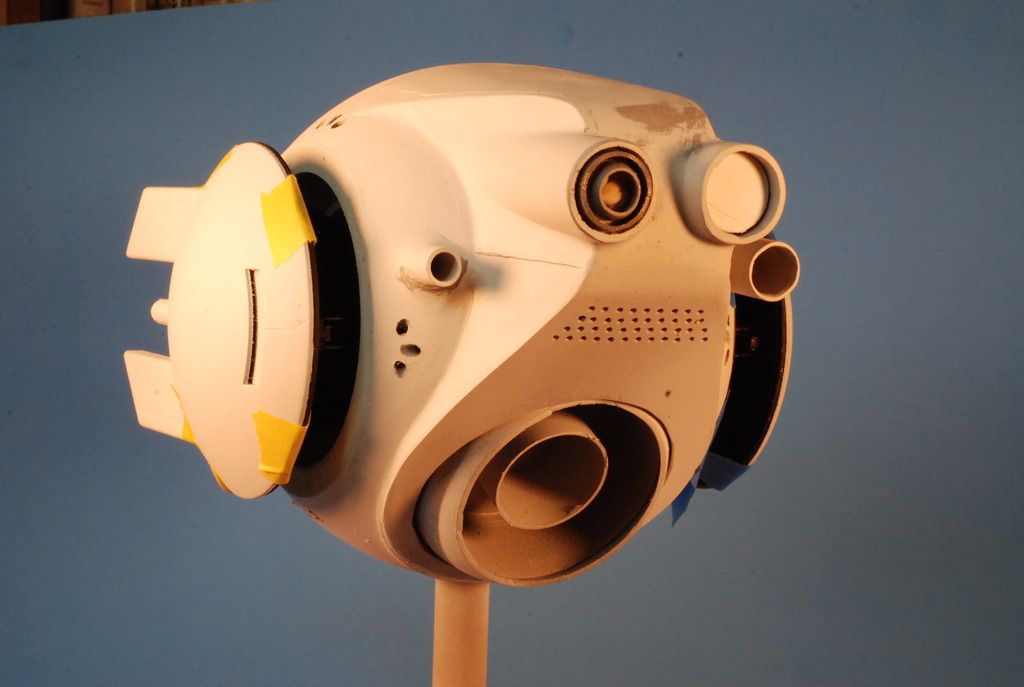
I decided to go with the small rare earth magnets to hold the gun turret assembly in place. They would normally be too strong but the way I've mounted them on the backsides of the mating plastic pieces, the force works out perfectly. They are strong enough to hold but pull apart relatively easy. I think I'm only going to make one side removable if I can make everything accessable from one side. I've also worked a rather crude mount system for the main engine bell (ball). I used a small funnel to hold the ball in place with the top part puttied in holding it in place. Not pretty inside but it works.
Anyway, here are a few pictures of where it stands today. The black ring and inset piece are roughly painted, I will sand it down and smooth it all out before final paint. I still have to put the actuator strut mounting pieces and struts.
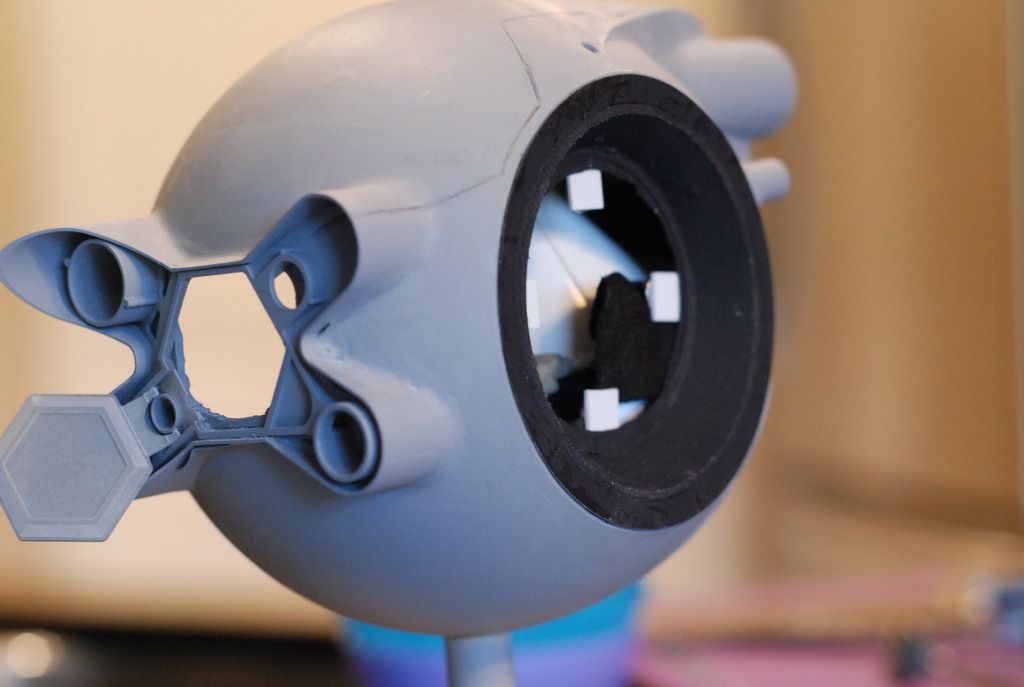
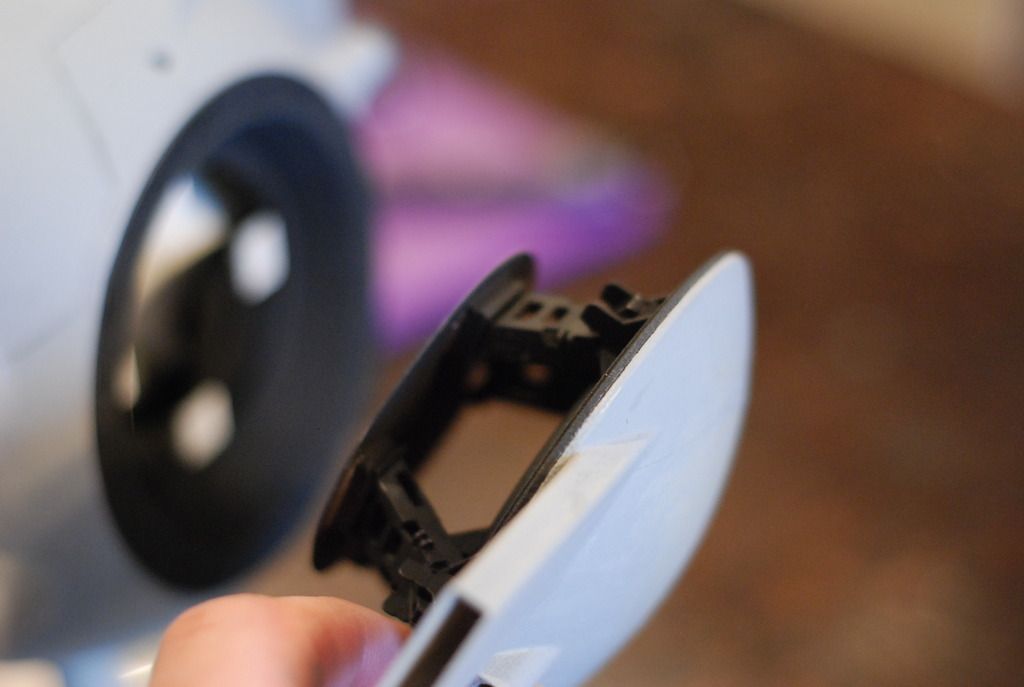

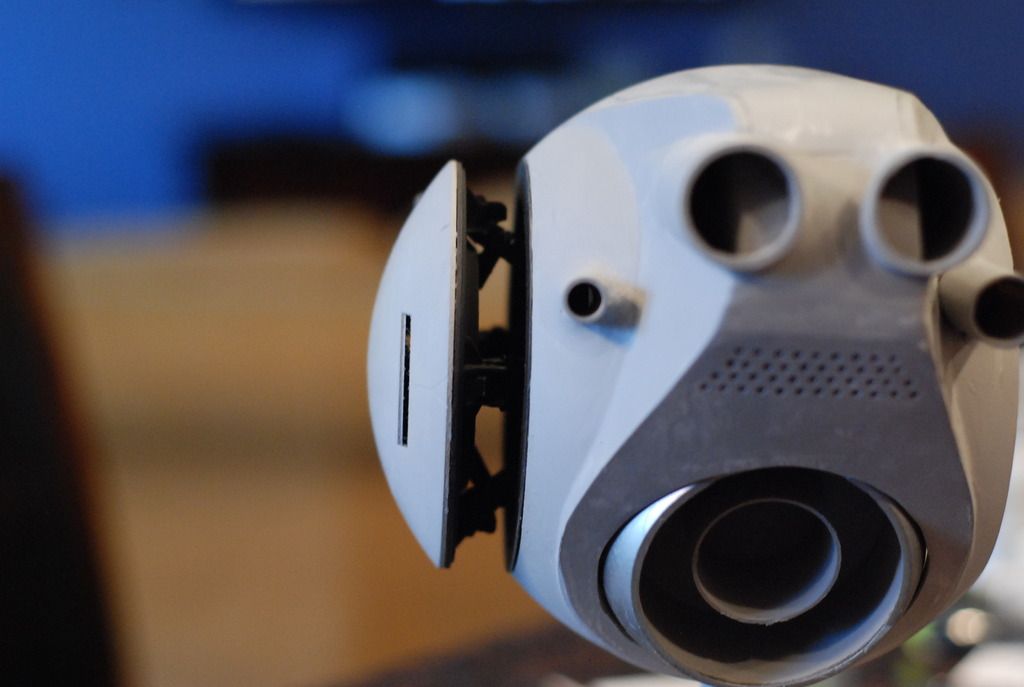
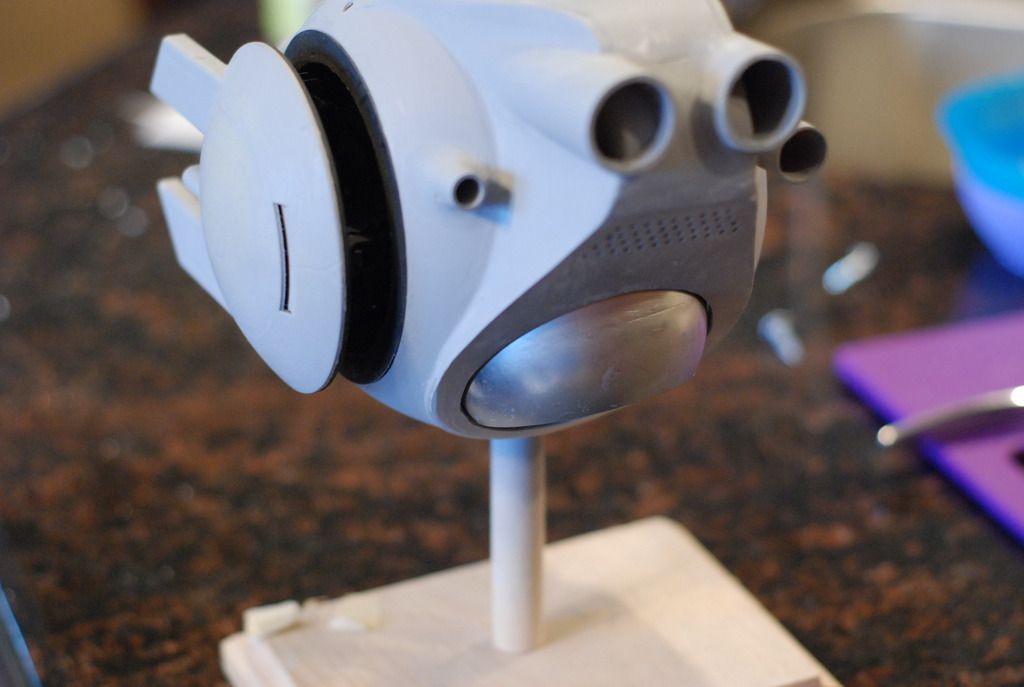
Thanks for looking. Comment, critiques and suggestions are welcome.
Bill
Anyway, here are a few pictures of where it stands today. The black ring and inset piece are roughly painted, I will sand it down and smooth it all out before final paint. I still have to put the actuator strut mounting pieces and struts.
Thanks for looking. Comment, critiques and suggestions are welcome.
Bill
What a great work you did! How big is your fine detailed model? Do you share or sell the 3D files? It looks so good you have to put light in it (red eye, nozzles...). How big is it? Is it the same size as the Oblivion Drone Model kit from goldenarmor.com? http://goldenarmor.com/oblivion/2013/9/5/oblivion-drone-model-kit.html?SSScrollPosition=0
Obviously your drone looks much more detailed!
Thanks for compliments. As far as size, it's built around a 6" diameter sphere. I don't know what scale that works out to be but I think it's slightly smaller than the goldenarmor kit. He list his as 6.5" but he says that it's 1:5 scale but I don't think that's correct. That would make the overall diameter of the real drone as only 30". I don't know the actual drone size but it looks much bigger than just 30".
Bill
Last edited:
Still working on this between waiting for Millennium Falcon parts. I think I'm going to tone down the plan and not light it up YET. I can always go back and retrofit lighting, but I really want to get this finished enough to at least show.
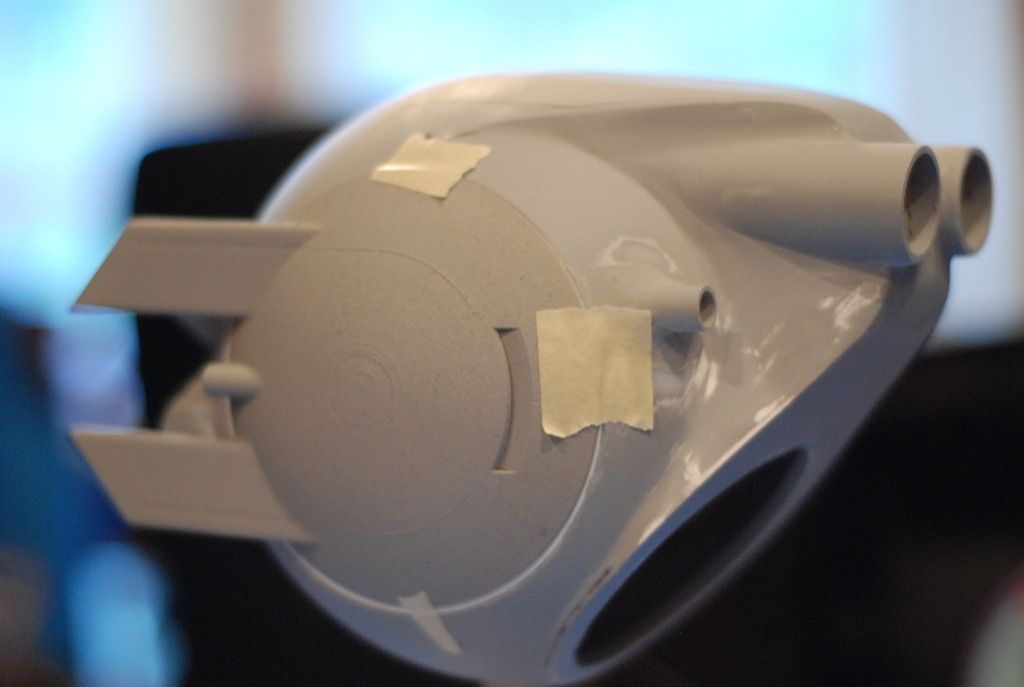
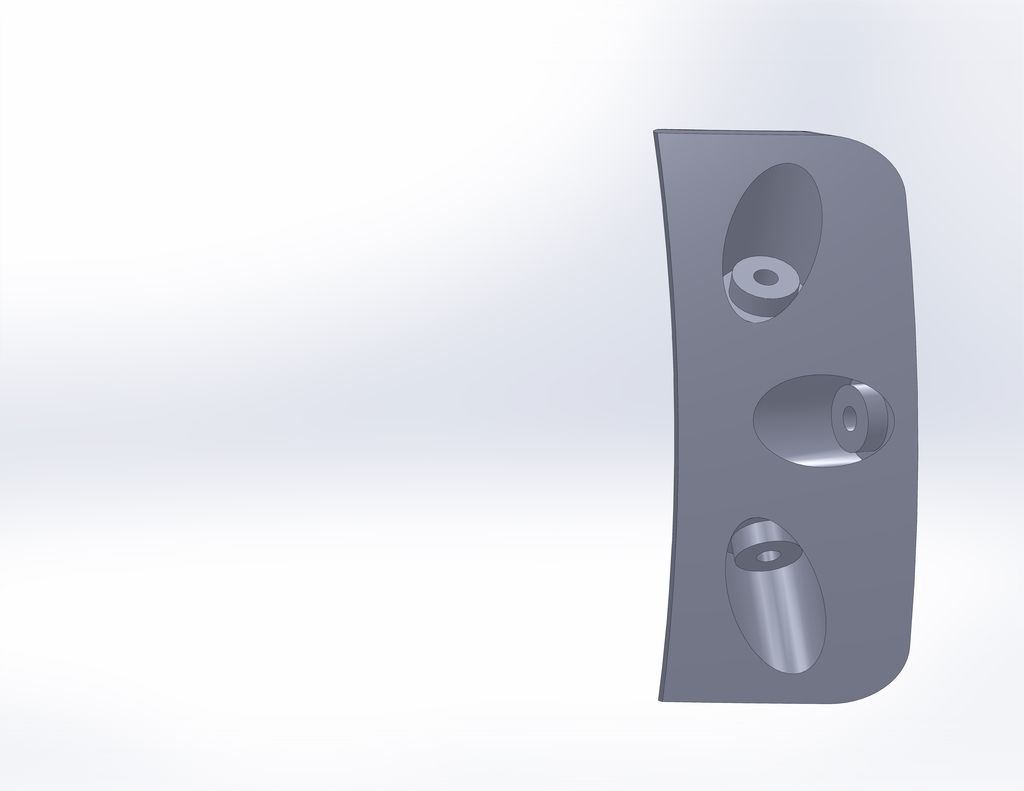
I have most of the main structure all figured out but the areas that are giving me grief are the small RCS nozzle cut-outs on the sides. I tried making a small template to get the cutouts lined up and even and still with that have messed up several attempts. I believe my plan of attack now will be to 3D model a small insert with the nozzles built into it and just print 8 of them to glue in and blend with the body.
Anyway, here are a few mock up shots of where it stands now. Starting to really look like a drone. Can't wait to start slapping paint on this thing!

The rear left engine is just tacked in place to try out my technique. I think it's convincing enough once I add a few details.
Here is a rendering of the nozzles. Should have them in a couple of weeks and I can proceed with this build.
I hope to have more progress soon.
Bill
I have most of the main structure all figured out but the areas that are giving me grief are the small RCS nozzle cut-outs on the sides. I tried making a small template to get the cutouts lined up and even and still with that have messed up several attempts. I believe my plan of attack now will be to 3D model a small insert with the nozzles built into it and just print 8 of them to glue in and blend with the body.
Anyway, here are a few mock up shots of where it stands now. Starting to really look like a drone. Can't wait to start slapping paint on this thing!
The rear left engine is just tacked in place to try out my technique. I think it's convincing enough once I add a few details.
Here is a rendering of the nozzles. Should have them in a couple of weeks and I can proceed with this build.
I hope to have more progress soon.
Bill
Similar threads
- Replies
- 3
- Views
- 902
- Replies
- 1
- Views
- 1,230
- Replies
- 6
- Views
- 1,664