Hi guys,
I posted this today at TDH forum, but I am a big fan of this site and always lurking here so I thought some peeps here might find interesting my build progress.
yepp this fett thing is an expensive project so like many here needed to save some funds an make my own jetpack.
so let start by thanking wizardofflight's at TDH forum for awsome templates, you are the man!!.. and many other scratch build threads at the TDH a must read if you are planning to make your own fett jetpack as they provide great pics and advice to understand how to put this think together.
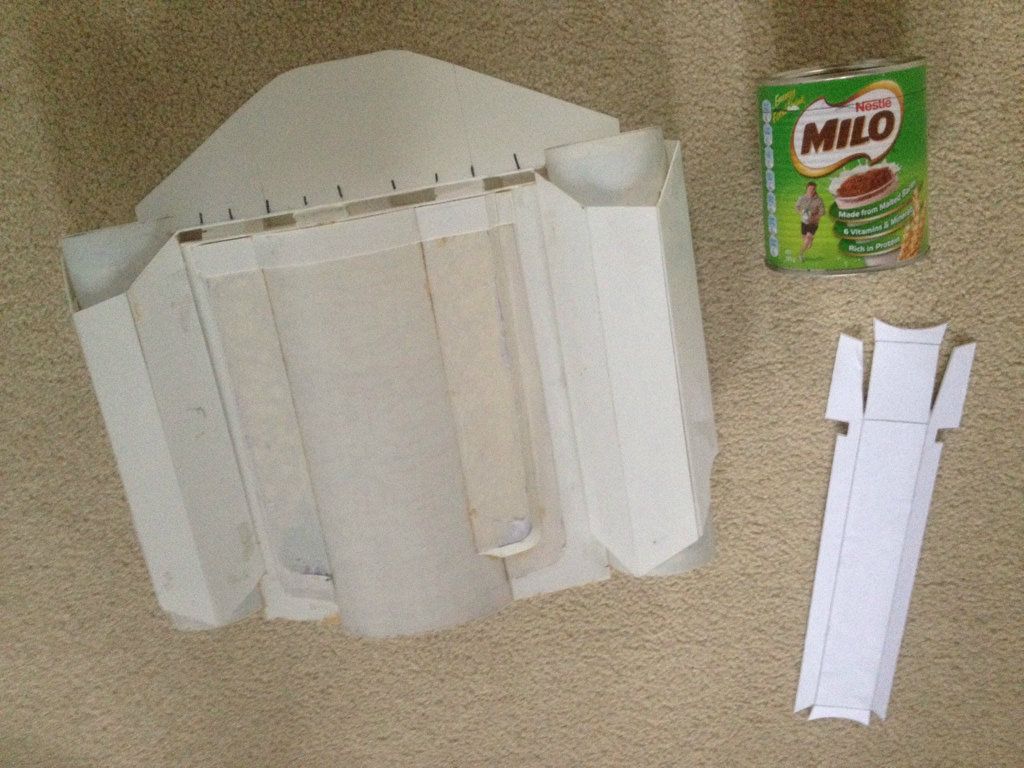
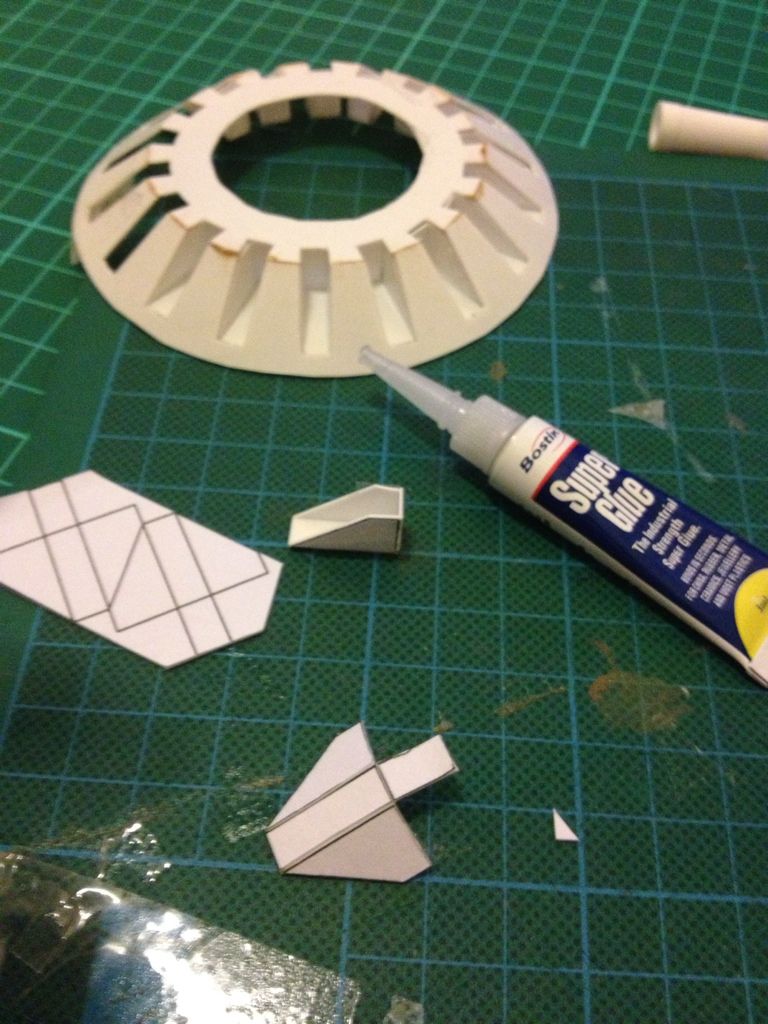
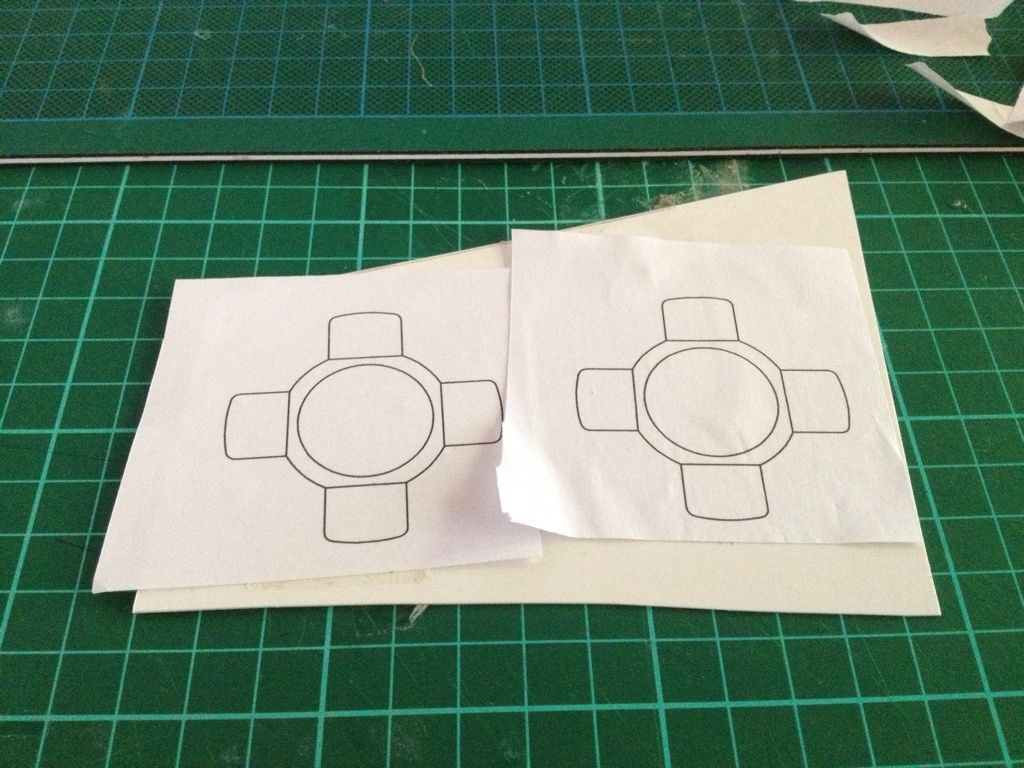
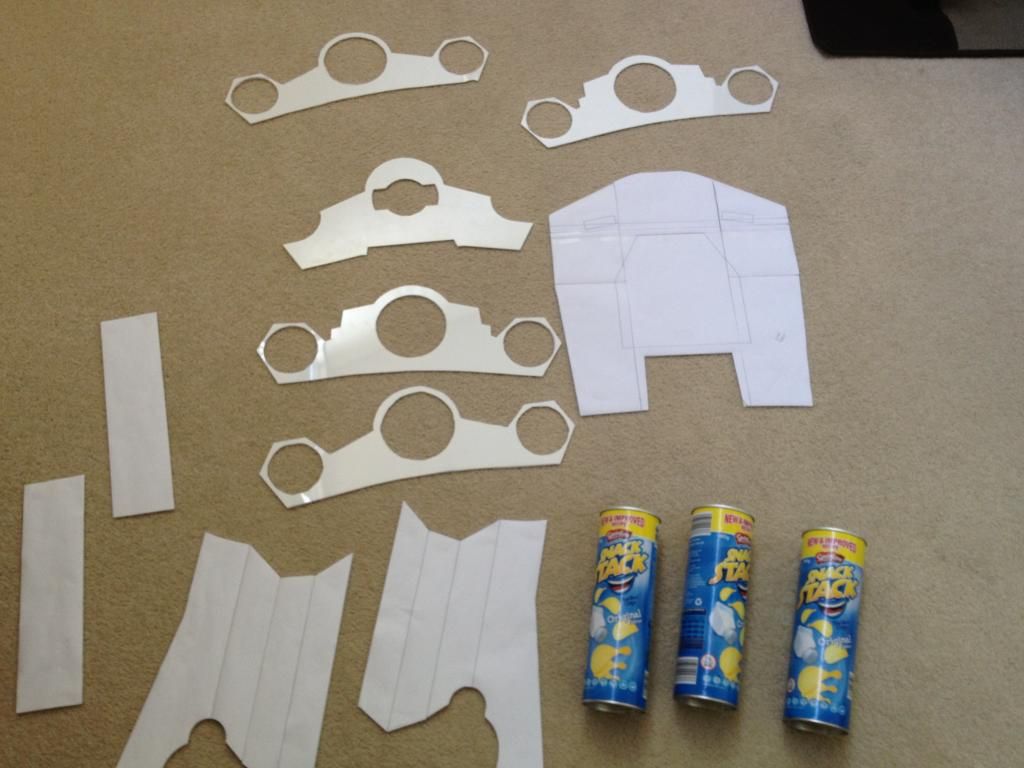
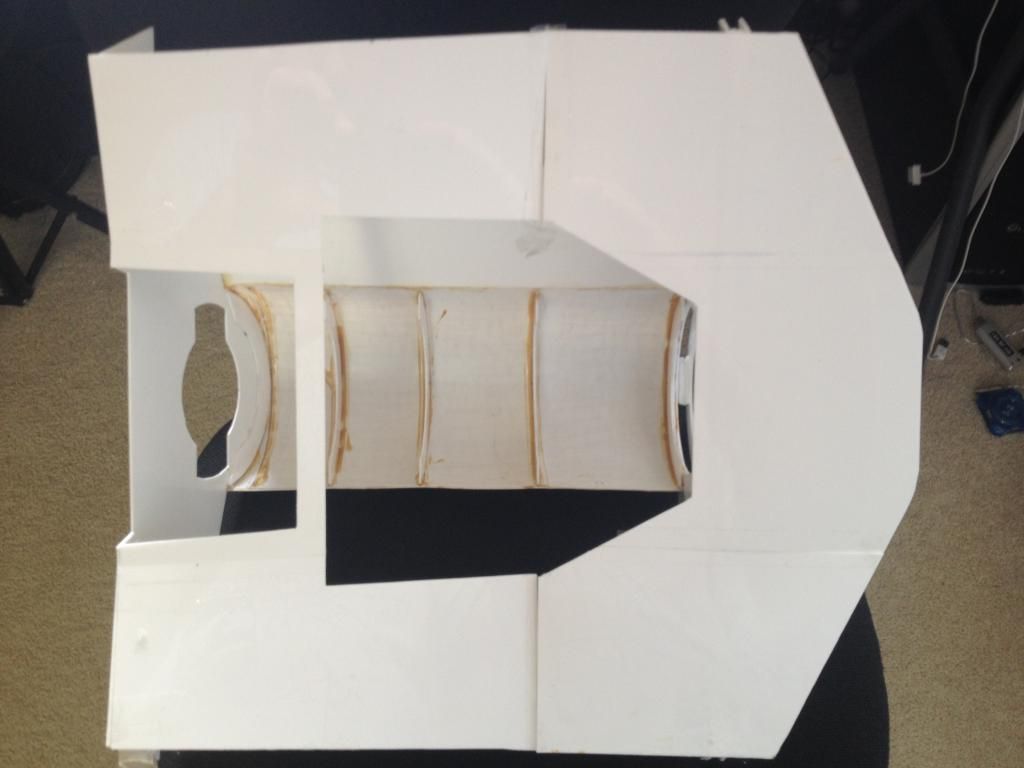
ok so the first step was to print this baby and start cutting out the parts. I used styrene plastic sheets about $ 20.00 work of plastic. 1.5mm thick and .5mm.
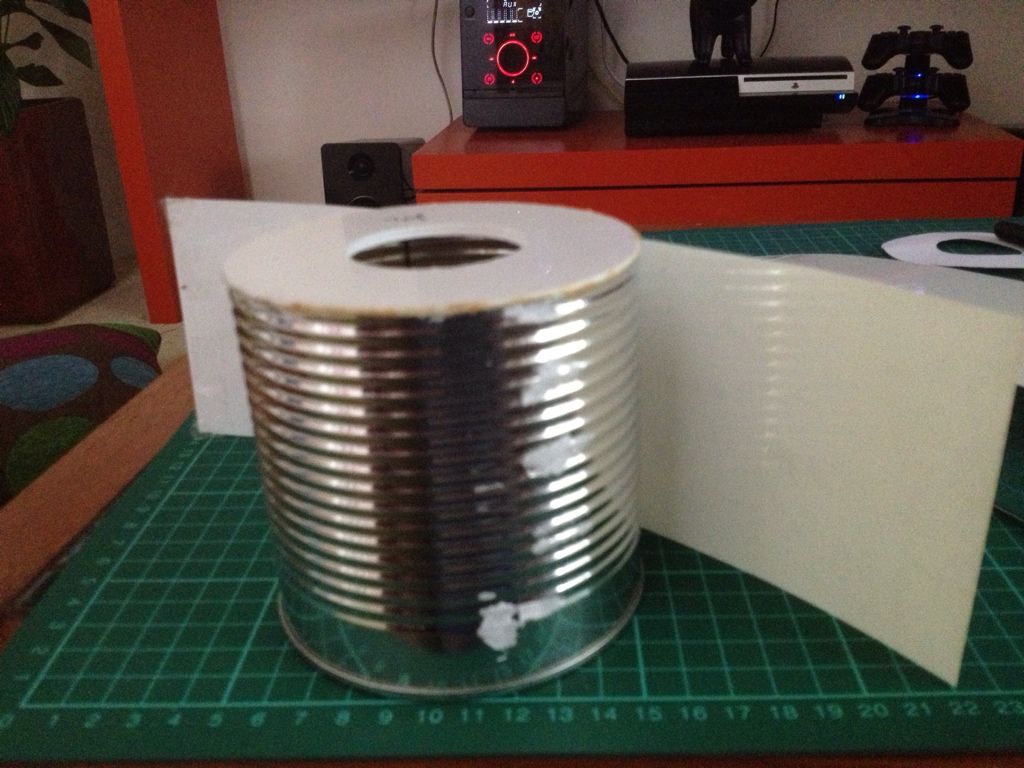
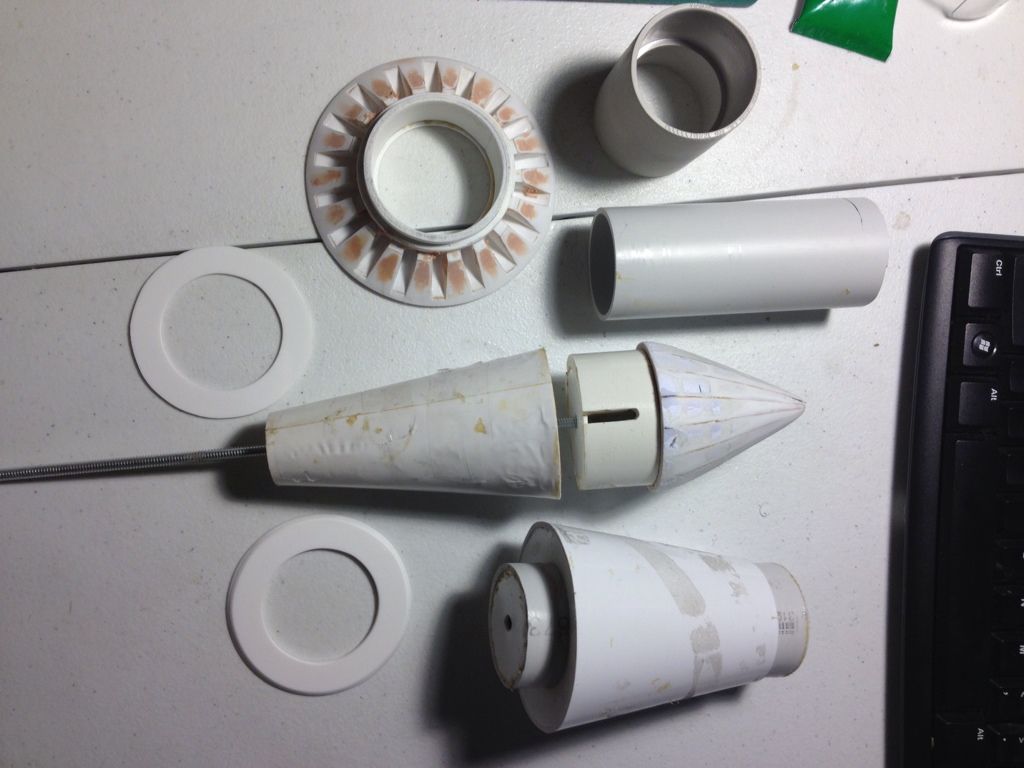
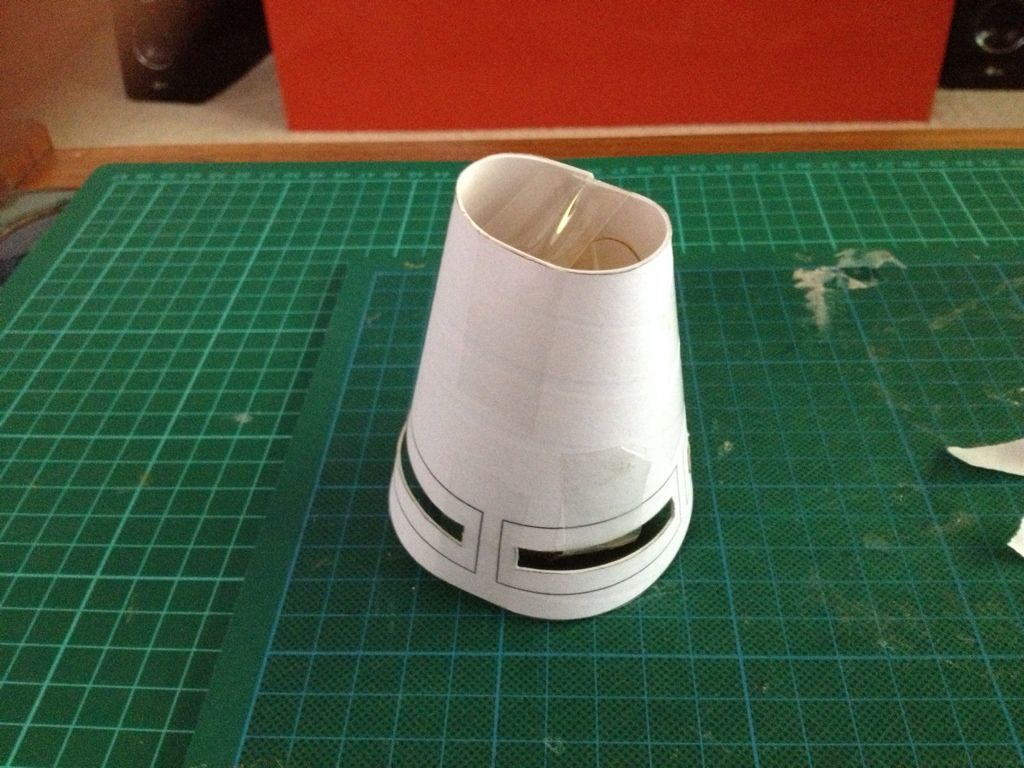
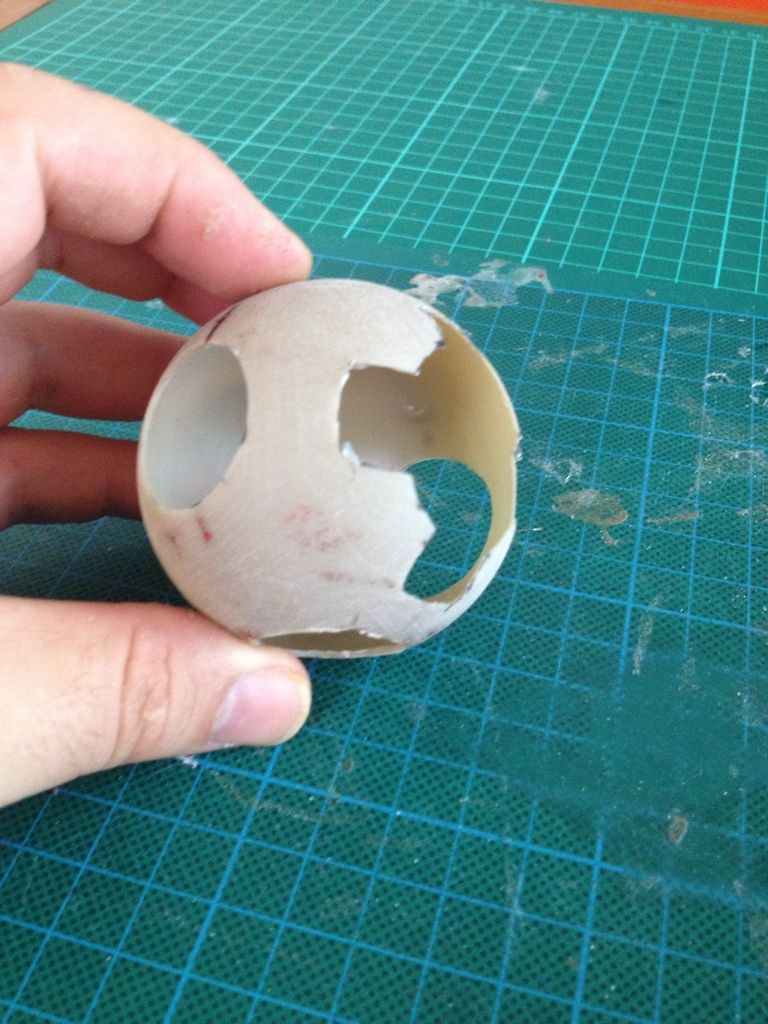
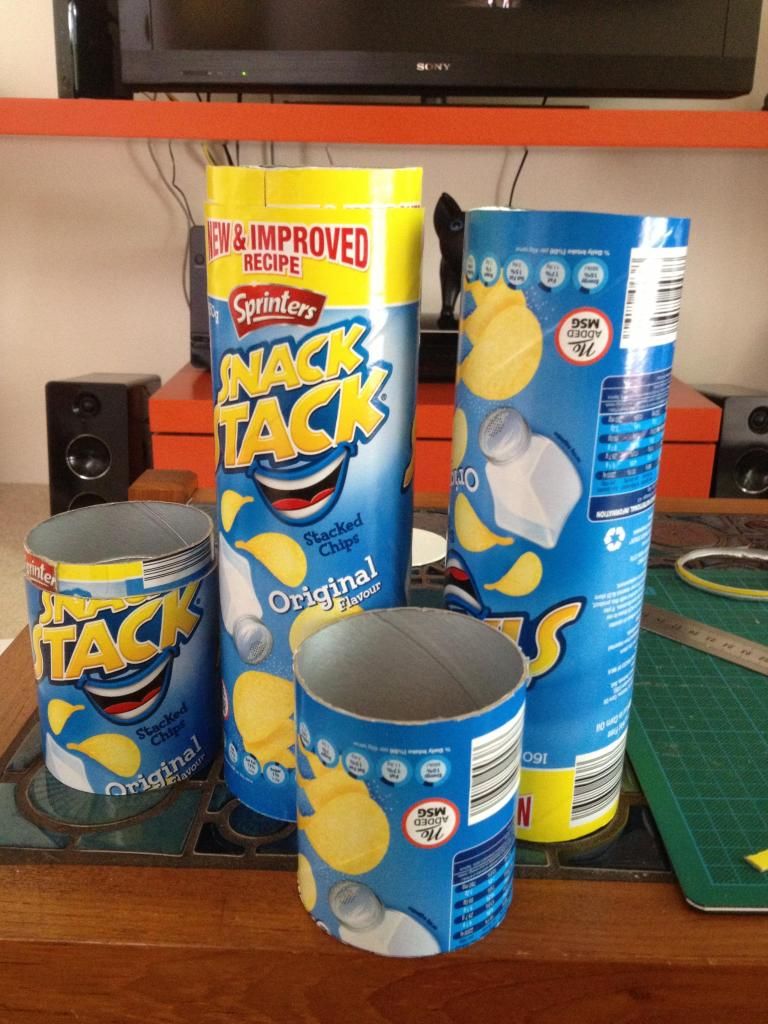
I had bougt some PVC plubing tubes but realized they would be too big so I decided to look for some alternatives, which came out to be cheaper and more rewarding. potato chips
 , yes the chip tube was the perfect diameter and I could stuff myself while working on this.
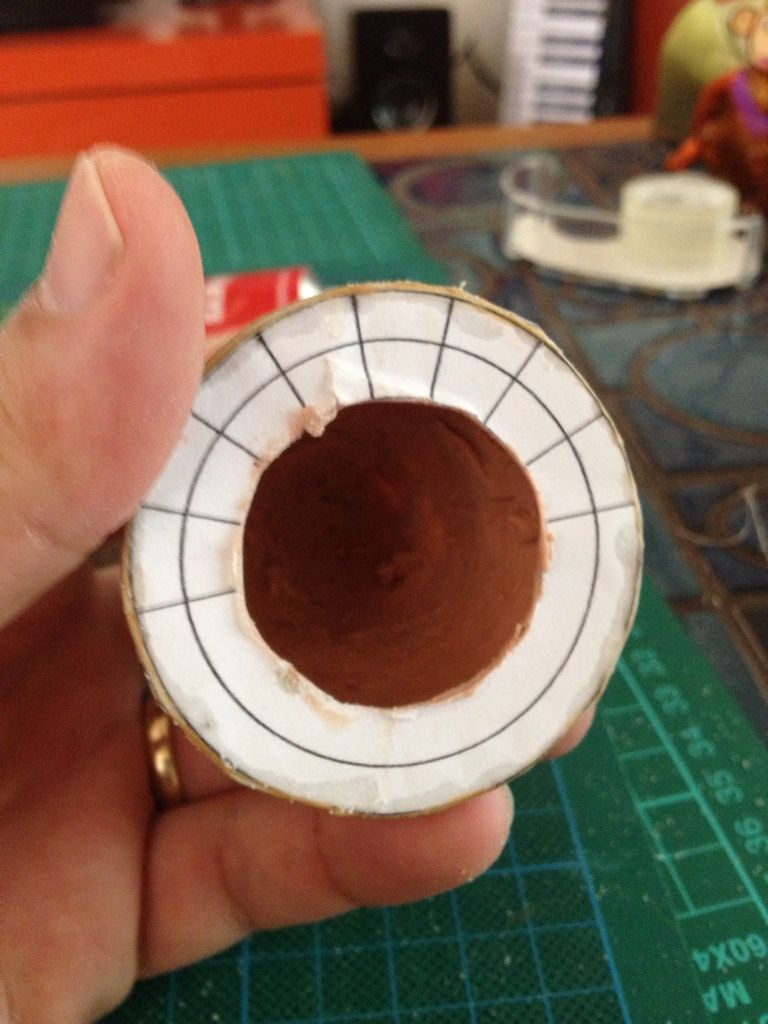
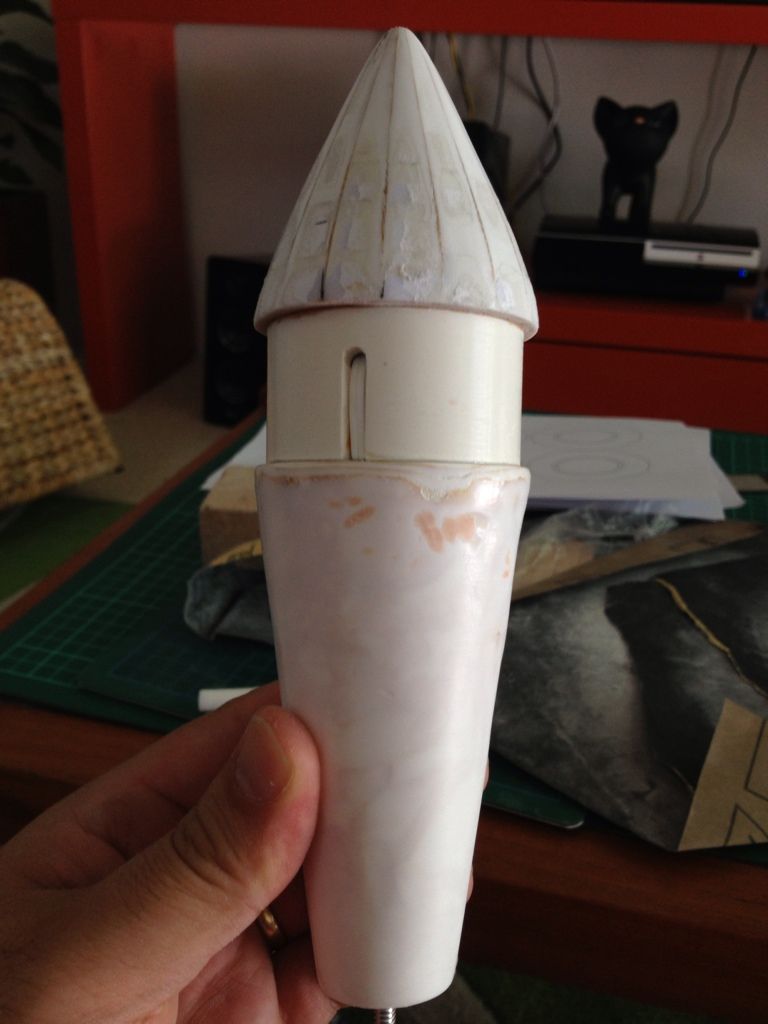
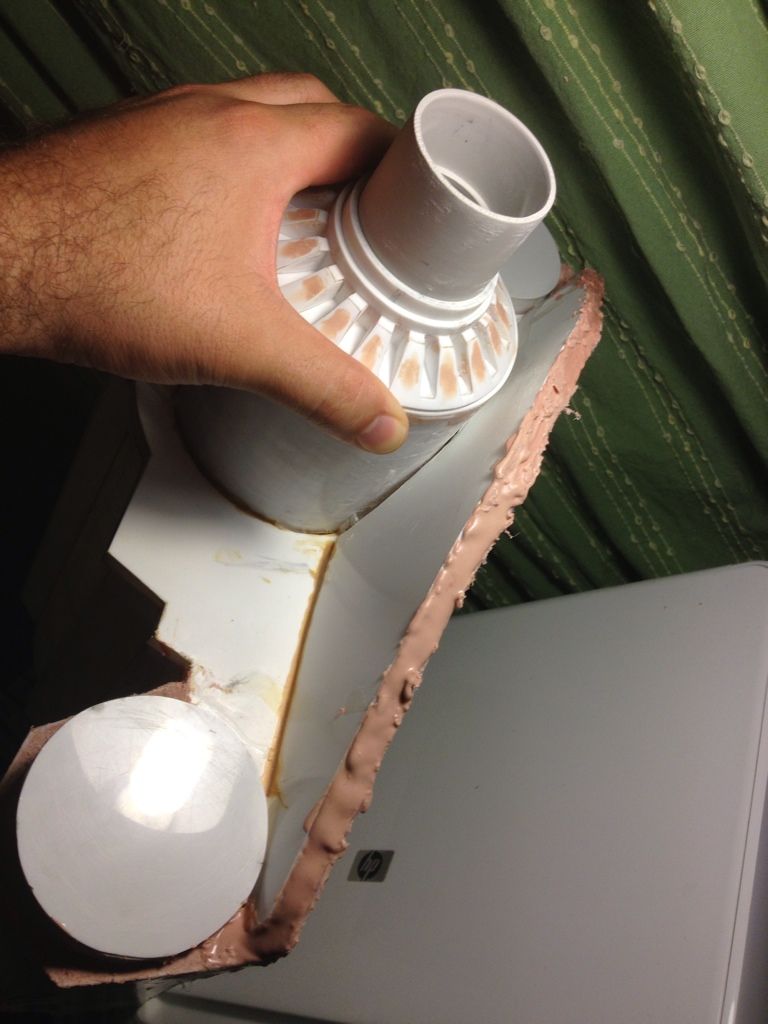
I warped the canisters with thin 0.5mm styrene which made them stronger and perfect fuel tanks. I found that using brown shoe/leather glue though a bit messy was perfect as it allowed me to stick quickly and unstick if i made a mistake and once dried completely was very strong.
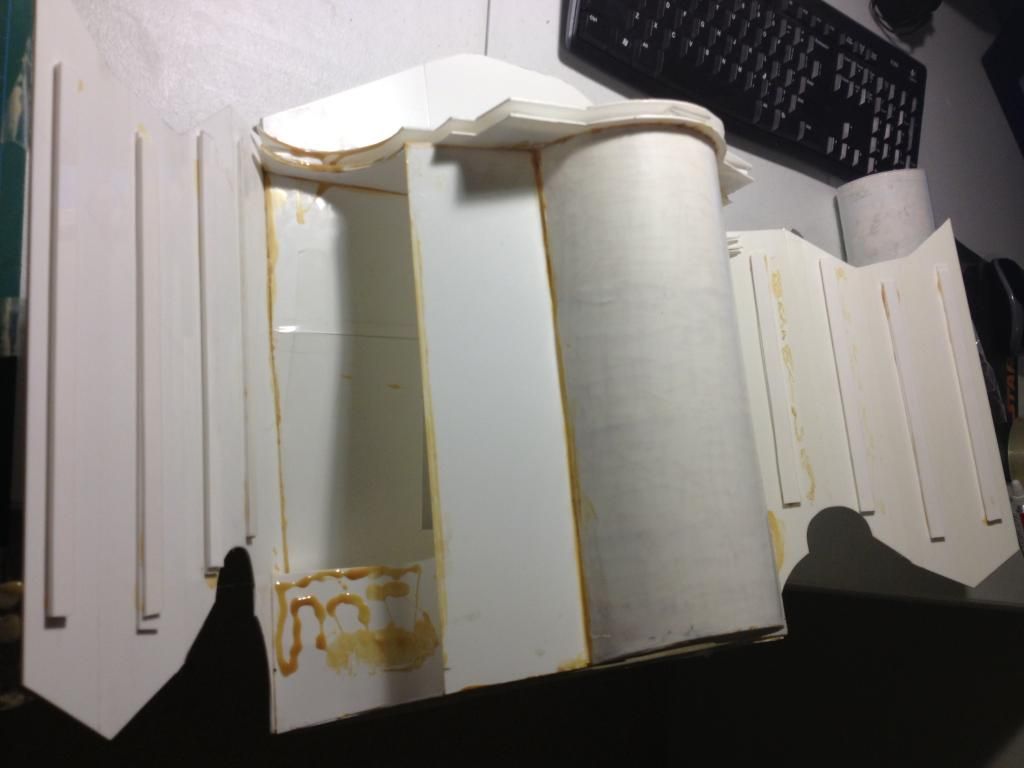
I was worried that the angles around the back would not work but I found out that if you test fit these with sticky tape and made a few adjustments the whole thing stated to come together nicely
 .
.
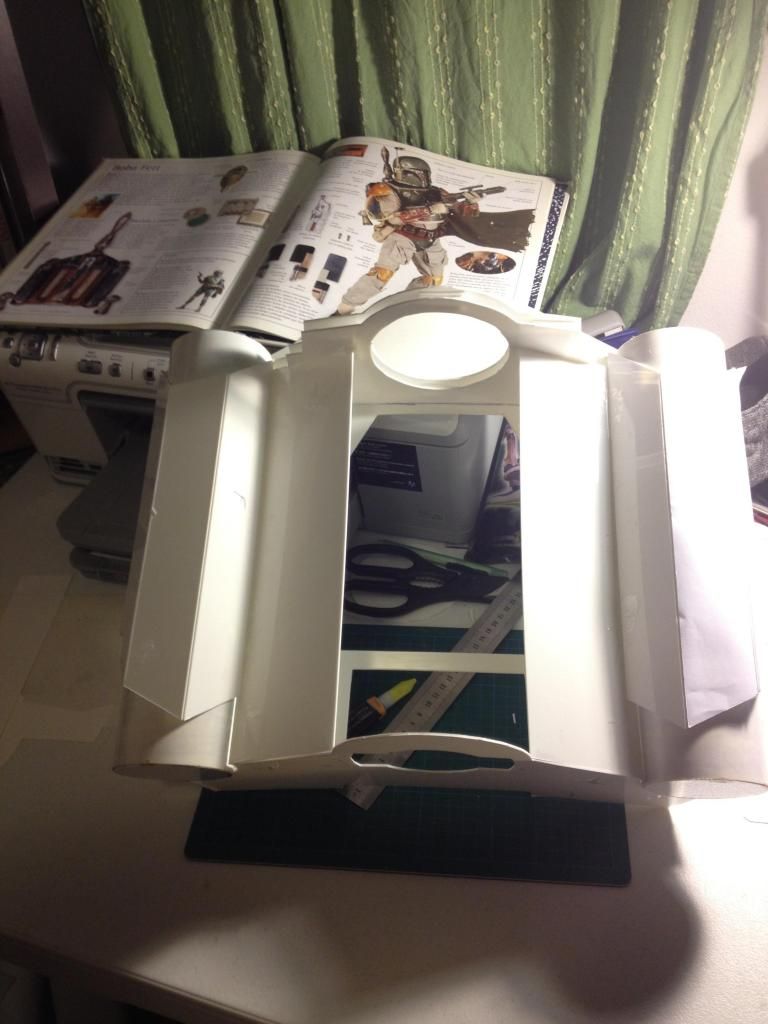
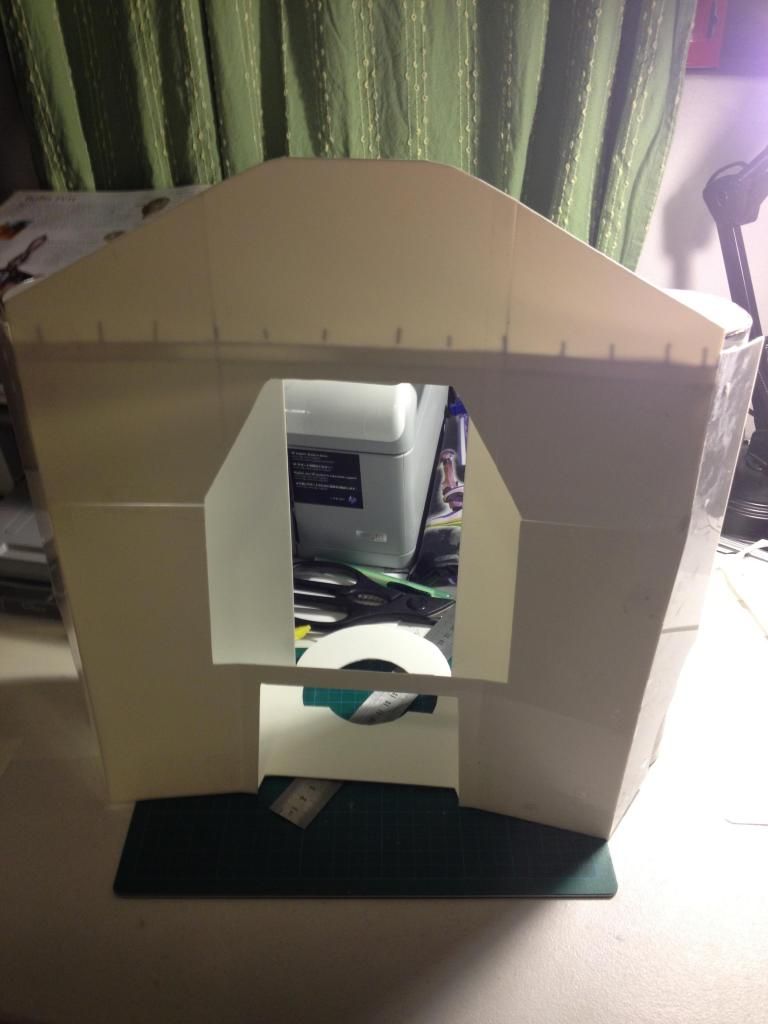
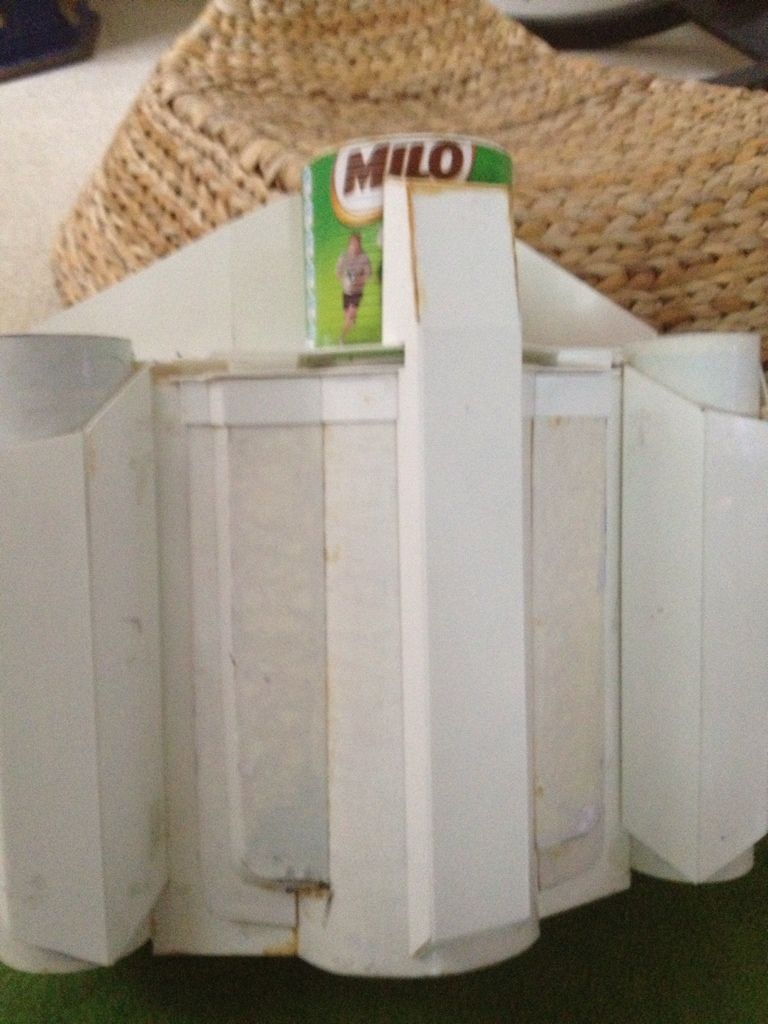
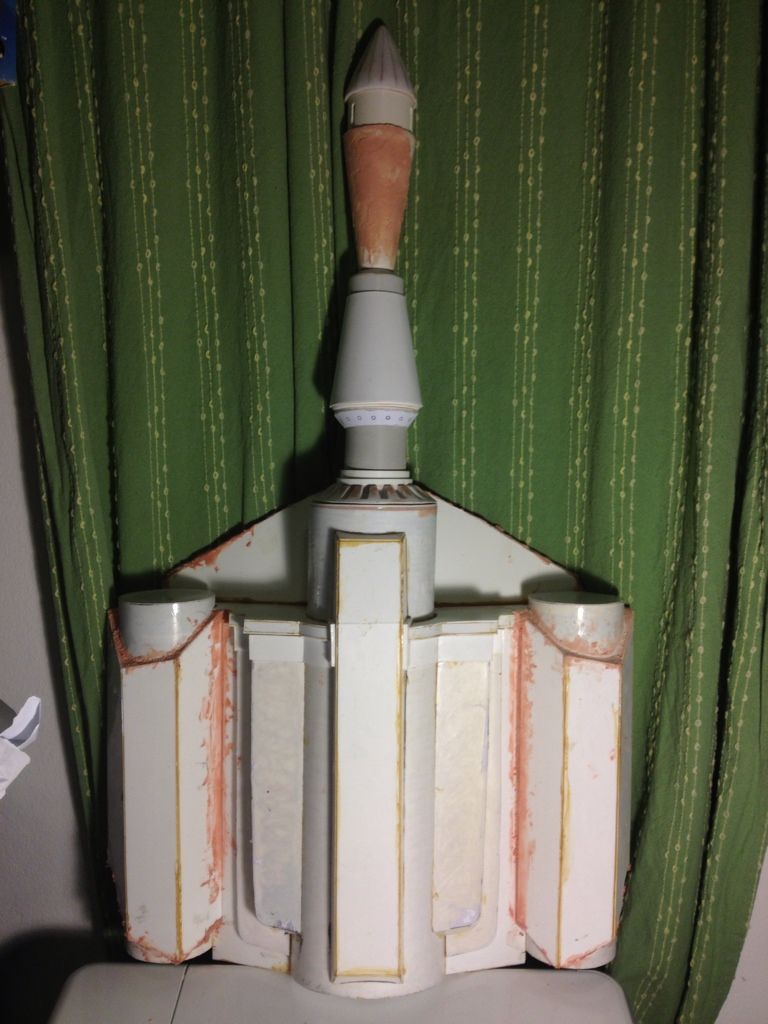
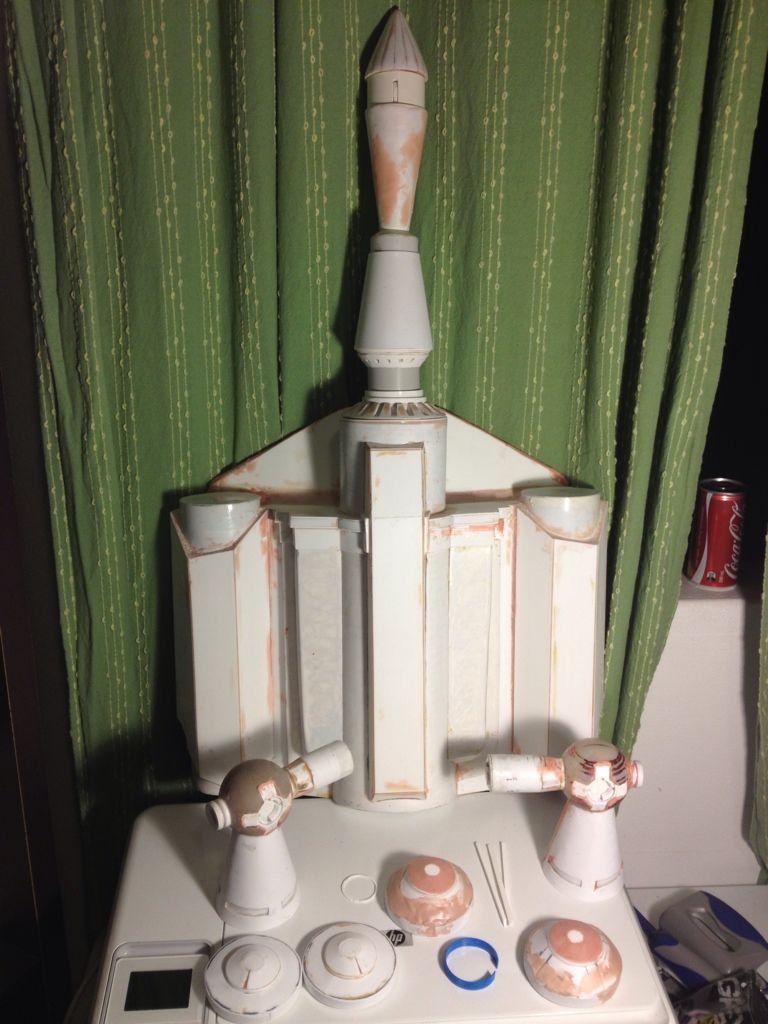
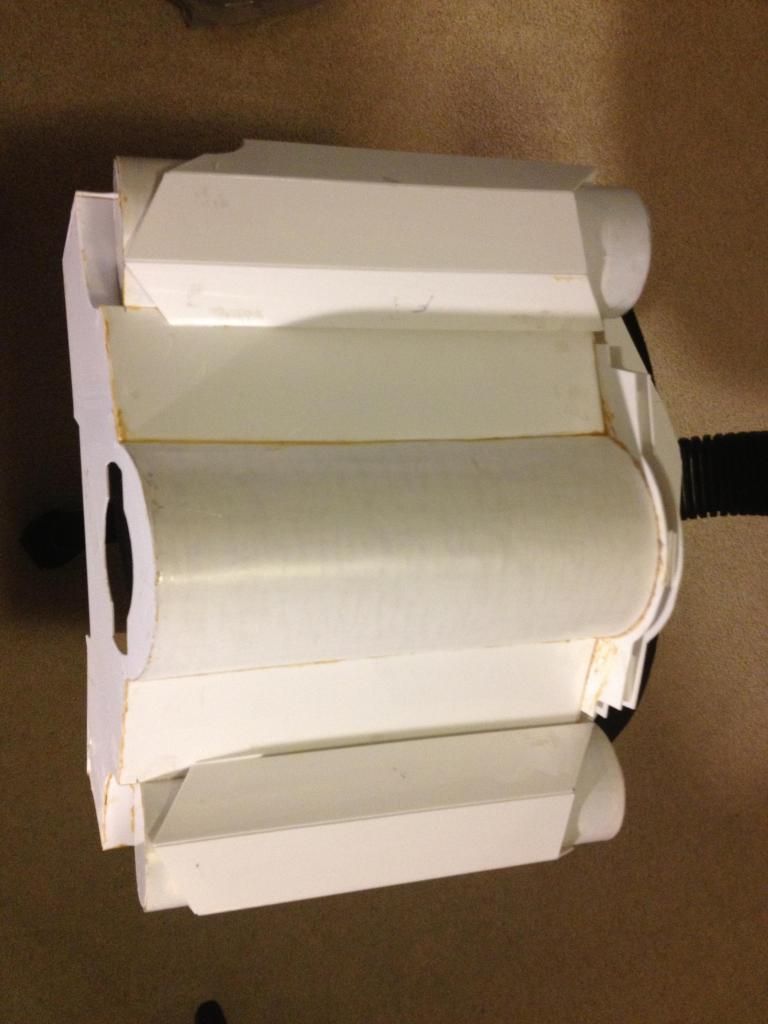
Ok so after I test fitted with tape and was happy with the parts I needed to start gluing, again the pvc plumbing tube was not going to work so I just made a circle template and with 2 layers of the 0.5mm styrene I made the main body cylinder, this cylinder was essential to give my jet pack the correct shape of the body. The main cylider must hit perpendicular at the top and at the bottom gives you the slanted angle of 10 degrees were it meets with the base of the jetpack, then once you glue the side pannels that go over the fuel tanks you get the concave shape of the Backrest of the jetpack. I was amazed how the templates worked and how gluing these pieces the jetpack started to get the proper shape, compared to my reference pictures of the real prop I felt that this thing was really going to work. very cool!!

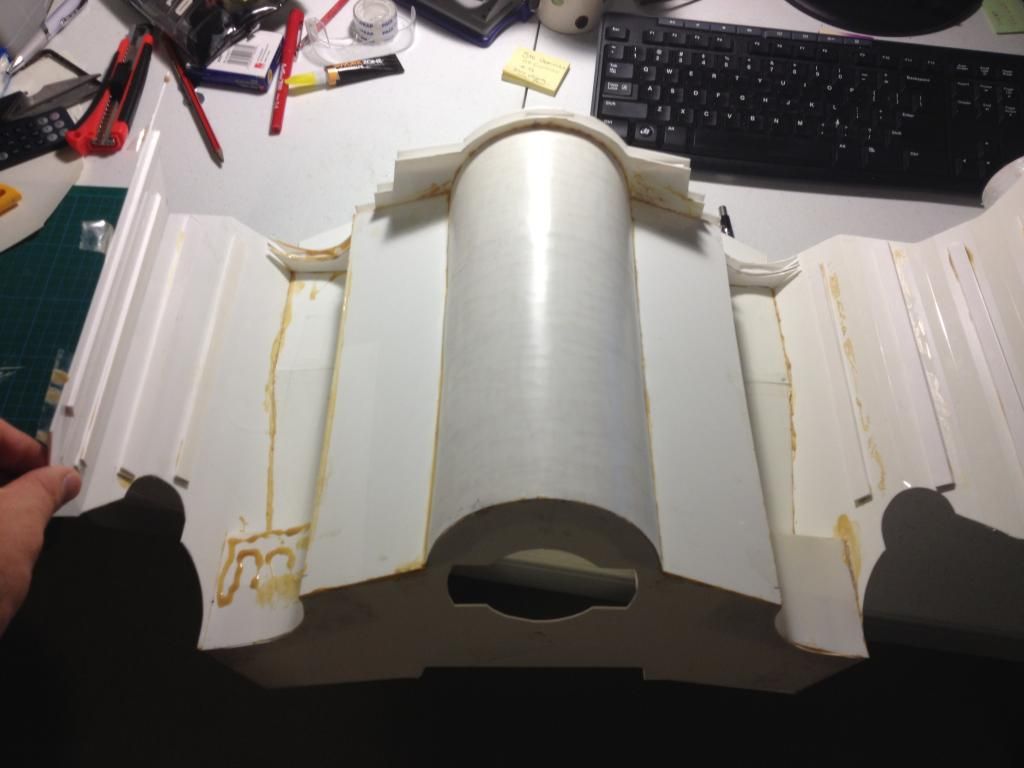
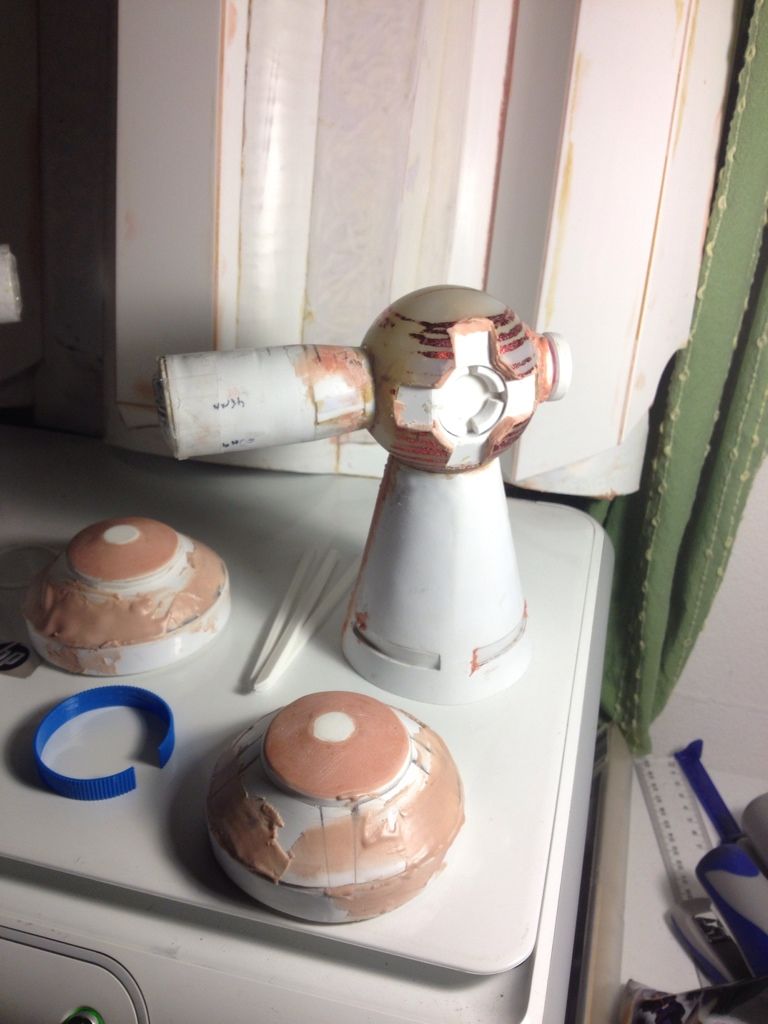
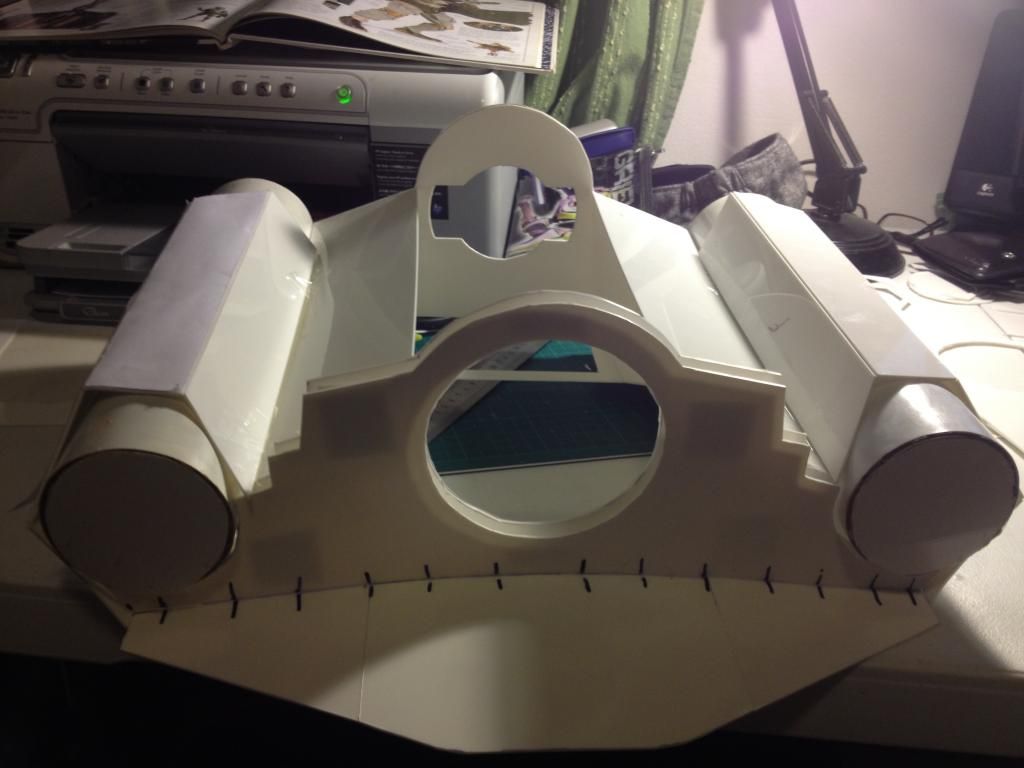
Next step I glued the fuel tanks in place, then the pieces that wrap around the fuel tanks.

I don't know why the pictures show the edges a bit wobbly maybe its the glue stains but I handling the jetpack it looks more strait in person but I will have to use car putty later on to touch up some parts.
so I hope you guys like this post and for those thinking of making there own I recommend it its a lot of fun and I bet once finished you will be very proud of what you can accomplish I know I am. and besides it a lot cheaper too for those budget fetts.
I'll work on it a bit more this weekend and post some more progress pics.
Cheers.
I posted this today at TDH forum, but I am a big fan of this site and always lurking here so I thought some peeps here might find interesting my build progress.
yepp this fett thing is an expensive project so like many here needed to save some funds an make my own jetpack.
so let start by thanking wizardofflight's at TDH forum for awsome templates, you are the man!!.. and many other scratch build threads at the TDH a must read if you are planning to make your own fett jetpack as they provide great pics and advice to understand how to put this think together.
ok so the first step was to print this baby and start cutting out the parts. I used styrene plastic sheets about $ 20.00 work of plastic. 1.5mm thick and .5mm.
I had bougt some PVC plubing tubes but realized they would be too big so I decided to look for some alternatives, which came out to be cheaper and more rewarding. potato chips
I warped the canisters with thin 0.5mm styrene which made them stronger and perfect fuel tanks. I found that using brown shoe/leather glue though a bit messy was perfect as it allowed me to stick quickly and unstick if i made a mistake and once dried completely was very strong.
I was worried that the angles around the back would not work but I found out that if you test fit these with sticky tape and made a few adjustments the whole thing stated to come together nicely
Ok so after I test fitted with tape and was happy with the parts I needed to start gluing, again the pvc plumbing tube was not going to work so I just made a circle template and with 2 layers of the 0.5mm styrene I made the main body cylinder, this cylinder was essential to give my jet pack the correct shape of the body. The main cylider must hit perpendicular at the top and at the bottom gives you the slanted angle of 10 degrees were it meets with the base of the jetpack, then once you glue the side pannels that go over the fuel tanks you get the concave shape of the Backrest of the jetpack. I was amazed how the templates worked and how gluing these pieces the jetpack started to get the proper shape, compared to my reference pictures of the real prop I felt that this thing was really going to work. very cool!!
Next step I glued the fuel tanks in place, then the pieces that wrap around the fuel tanks.
I don't know why the pictures show the edges a bit wobbly maybe its the glue stains but I handling the jetpack it looks more strait in person but I will have to use car putty later on to touch up some parts.
so I hope you guys like this post and for those thinking of making there own I recommend it its a lot of fun and I bet once finished you will be very proud of what you can accomplish I know I am. and besides it a lot cheaper too for those budget fetts.
I'll work on it a bit more this weekend and post some more progress pics.
Cheers.
Last edited:
")