Hi, my name is Kostas and i live in Greece. The last month and a half i started scale modeling again and my goal is to finish some old scale models (among a couple of other i bought recently) i started when i was a kid. Among those scale models is an MPC/ERTL circa 1989 Millennium Falcon that i started building in the early/mid 90's and never finished it, actually the build was complete but never painted the whole ship. So after searching the Internet i found this forum and i am gathering info/materials for the build/upgrade, also note that i am still a beginner at scale modeling but i think i will master some modeling techniques along the way. The ship was in a disregarded condition gathering dust at my parents' house and with bits falling off (luckily my mother didn't throw anything).
The first thing to do was to completely dismantle the ship after a good wash and it was easy enough since many parts had started to fall off, the majority of the parts were removed easily with a couple of precision knives i have while some required the use of a dremmel and a precision saw. At the pictures below you will see the status of the model as well as some damaged parts over the course of years and questions i have for the build. So let the ''carnage'' begin...
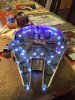
The Falcon after dismantling it


1. You can see that the hinges from these hatches broke, how can i repair them, if possible

2. How would you suggest to unglue the rotating base of the radar, i tried using a small drill but the plastic was getting stressed and i didn't want to damage anything, the reason to remove this is to remove the paint from the radar base and maybe upgrade it. If things come to worse i will just leave it as is since i can scratch the paint easy with a dull modelling knife


3.This is the status of the clear parts, the cockpit clear part was fused at the cockpit and i had to use a dremmel very careful in order to remove the clear plastic so i can use it in the future. My question is, is there any source for the clear plastic of the cockpit in order to buy/make a new one? Also the clear part does not sit well and it can leave a gap at the cockpit,i had noticed this when i built the model and that's why i used this much glue.


4. At the engine clear plastic when i made the model there is this ugly seam at the middle. For the new build i am thinking to replace/cover it with a grill, but my main question which applies and at the cockpit clear part is if there is some sort of filler that is clear after it's application (i said i am still a beginner so please forgive the ignorance)


5. This is one of the landing gear, clearly one of the feet broke but the main problem is that the right ''ear'' of the square base is broken and i believe this this will compromise the strength of its placement once i install it. I am thinking in gluing some spare sprew and maybe reinforce it some tiny metal nails, is this idea sound? Also i will remove the landing legs and rebuild them with metal pipes for extra strength.

6. This is the cockpit corridor which has an alignment issue, i read at some builds that there is a way to fix this but i have no idea on how to do this, any pointers would be helpful.

7. You will have noticed some orange patches at all the parts of the model. This is clearly from the liquid cement glue i used when i built the model. My question is how this will affect the new build? I will try to sand as much as possible of this stuff
These are my first questions that i had while dismantling the model. So far i have gathered some metal tubes, wires to replace the ''2D'' pipes at the fuselage and i managed to find two 1/72 panzer I and II in order to scavenge for parts in order to decorate the hull. I am thinking in replacing the entire cockpit with a shapeways 3D printed one, the gun nests and maybe the Haystack Hair kit which is about to release. This is going to be a very long build and i will come for advice and opinions in this forum so i can get this build right because this is my favorite sci-fi ship
The first thing to do was to completely dismantle the ship after a good wash and it was easy enough since many parts had started to fall off, the majority of the parts were removed easily with a couple of precision knives i have while some required the use of a dremmel and a precision saw. At the pictures below you will see the status of the model as well as some damaged parts over the course of years and questions i have for the build. So let the ''carnage'' begin...
The Falcon after dismantling it
1. You can see that the hinges from these hatches broke, how can i repair them, if possible
2. How would you suggest to unglue the rotating base of the radar, i tried using a small drill but the plastic was getting stressed and i didn't want to damage anything, the reason to remove this is to remove the paint from the radar base and maybe upgrade it. If things come to worse i will just leave it as is since i can scratch the paint easy with a dull modelling knife
3.This is the status of the clear parts, the cockpit clear part was fused at the cockpit and i had to use a dremmel very careful in order to remove the clear plastic so i can use it in the future. My question is, is there any source for the clear plastic of the cockpit in order to buy/make a new one? Also the clear part does not sit well and it can leave a gap at the cockpit,i had noticed this when i built the model and that's why i used this much glue.
4. At the engine clear plastic when i made the model there is this ugly seam at the middle. For the new build i am thinking to replace/cover it with a grill, but my main question which applies and at the cockpit clear part is if there is some sort of filler that is clear after it's application (i said i am still a beginner so please forgive the ignorance)
5. This is one of the landing gear, clearly one of the feet broke but the main problem is that the right ''ear'' of the square base is broken and i believe this this will compromise the strength of its placement once i install it. I am thinking in gluing some spare sprew and maybe reinforce it some tiny metal nails, is this idea sound? Also i will remove the landing legs and rebuild them with metal pipes for extra strength.
6. This is the cockpit corridor which has an alignment issue, i read at some builds that there is a way to fix this but i have no idea on how to do this, any pointers would be helpful.
7. You will have noticed some orange patches at all the parts of the model. This is clearly from the liquid cement glue i used when i built the model. My question is how this will affect the new build? I will try to sand as much as possible of this stuff
These are my first questions that i had while dismantling the model. So far i have gathered some metal tubes, wires to replace the ''2D'' pipes at the fuselage and i managed to find two 1/72 panzer I and II in order to scavenge for parts in order to decorate the hull. I am thinking in replacing the entire cockpit with a shapeways 3D printed one, the gun nests and maybe the Haystack Hair kit which is about to release. This is going to be a very long build and i will come for advice and opinions in this forum so i can get this build right because this is my favorite sci-fi ship