You are using an out of date browser. It may not display this or other websites correctly.
You should upgrade or use an alternative browser.
You should upgrade or use an alternative browser.
Moonraker stack in 1/72 (Finished!)
- Thread starter JMChladek
- Start date
JMChladek
Sr Member
Re: Moonraker stack in 1/72
Minor update: Well, my primary system is back up and running. So I spent the better part of the night cropping and printing off photos. I am still amazed at how much detail is visible in these blu-ray screen caps. With a little contrast adjustment in photoshop, I can see even more stuff. It is perfect timing too as I'll begin painting the orbiter soon.
I went ahead and removed the original hatch location as my own photo analysis confirmed Jon's that the side hatch is located further back on the Moonraker shuttle. So I'll use a decal for that (although I might punch a new hole in the side for a window).
I'll post some more photos soon.
BTW Jon, tell us about your newly posted photo on your site. I see you have finished adding the side hatch and are putting some tile detailing on your model. How are you doing that?
Last edited:
Re: Moonraker stack in 1/72
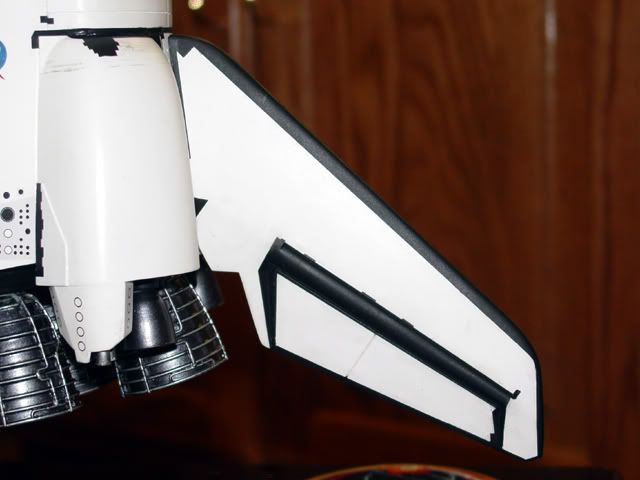
You mean this?
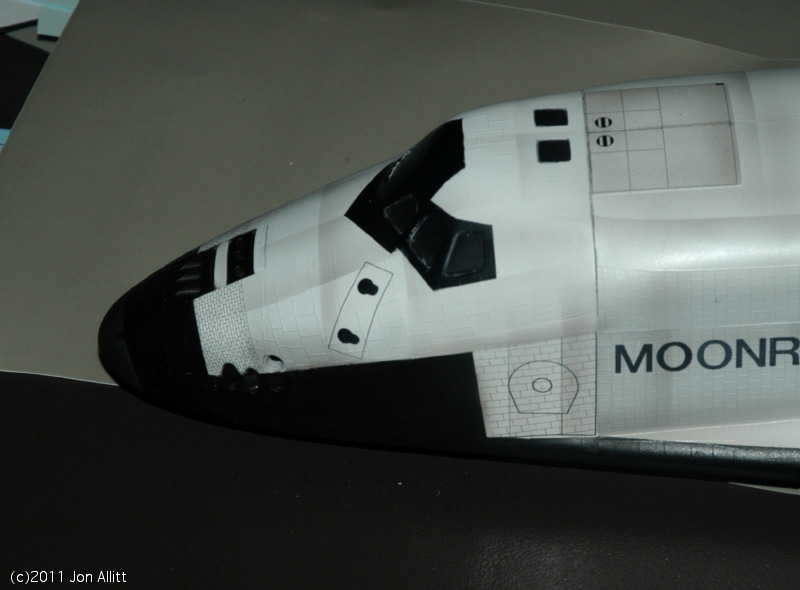
decals printed on an Alps printer. The hatch area is a bit of an experiment. I'll probably tone the lines down with a white overspray until they're barely visible then reapply the hatch decal. The small tiles at the front worked pretty well though. I also added some similar tile decals on the outer elevons and rudder.
BTW Jon, tell us about your newly posted photo on your site. I see you have finished adding the side hatch and are putting some tile detailing on your model. How are you doing that?
You mean this?
decals printed on an Alps printer. The hatch area is a bit of an experiment. I'll probably tone the lines down with a white overspray until they're barely visible then reapply the hatch decal. The small tiles at the front worked pretty well though. I also added some similar tile decals on the outer elevons and rudder.
JMChladek
Sr Member
Re: Moonraker stack in 1/72
Those tile decals actually turned out quite well! I have an ALPS myself, so I might be borrowing this idea for some of the tile elements on my build. Of course, some of the areas would probably utilize drawn on tiles instead, but I like the potential for spots where the surface is relatively featureless, meaning the tile markings could be done easily enough without too many potential distortion problems. I'll run a couple tests after I put the first paint coats on.
Those tile decals actually turned out quite well! I have an ALPS myself, so I might be borrowing this idea for some of the tile elements on my build. Of course, some of the areas would probably utilize drawn on tiles instead, but I like the potential for spots where the surface is relatively featureless, meaning the tile markings could be done easily enough without too many potential distortion problems. I'll run a couple tests after I put the first paint coats on.
JMChladek
Sr Member
Re: Moonraker stack in 1/72
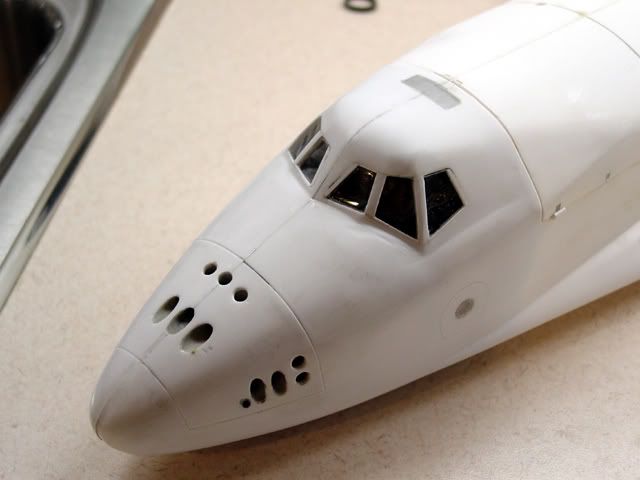
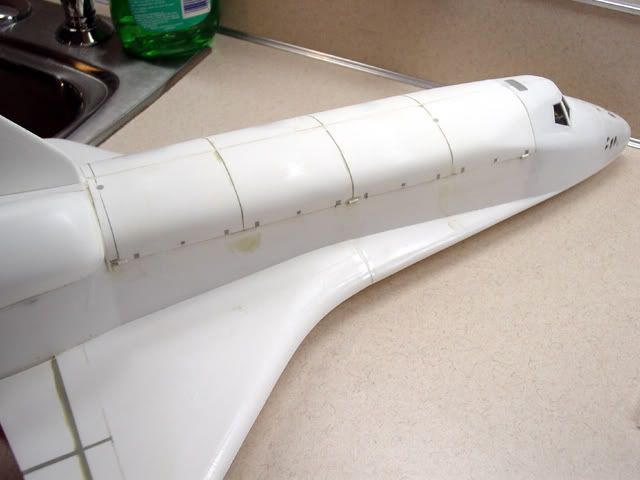
Things are progressing slowly, but at least they are progressing. The fuselage has been closed up and the doors are in now. I am in the process of filling and sanding seams, as well as exterior modifications to the model. For starters, here are the new cockpit windows:
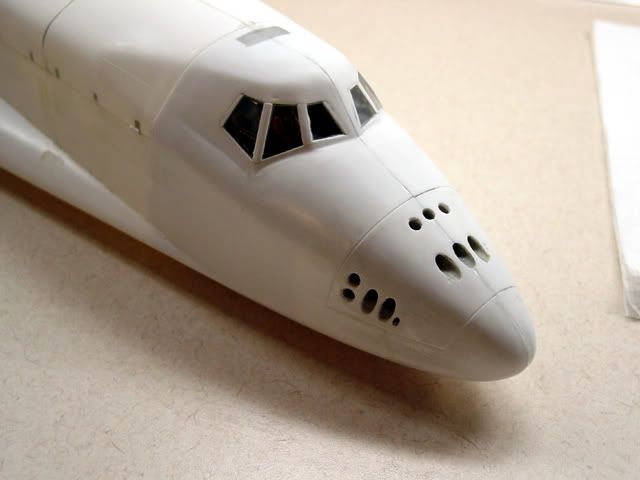
The Monogram windows don't need much work as they are already oversized for actual shuttle windows as it is. But I did make new exterior borders for them. I also angled out the split between the inner and center windows a little bit to more closely match the launch configuration studio model(s). Here are the original Monogram windows for comparison:
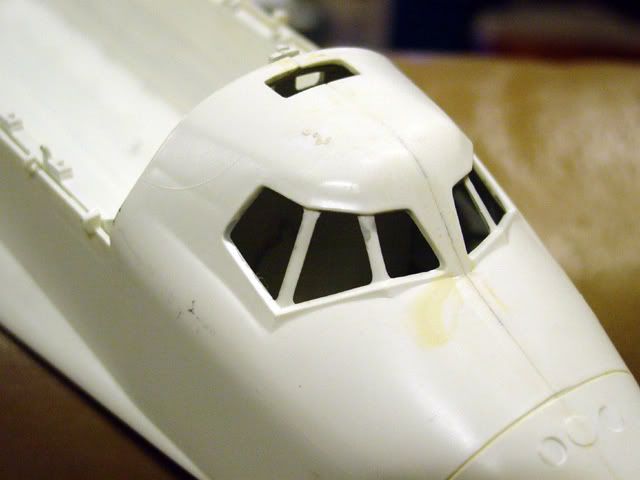
I also filled the hole for the side hatch and the door seam as well.
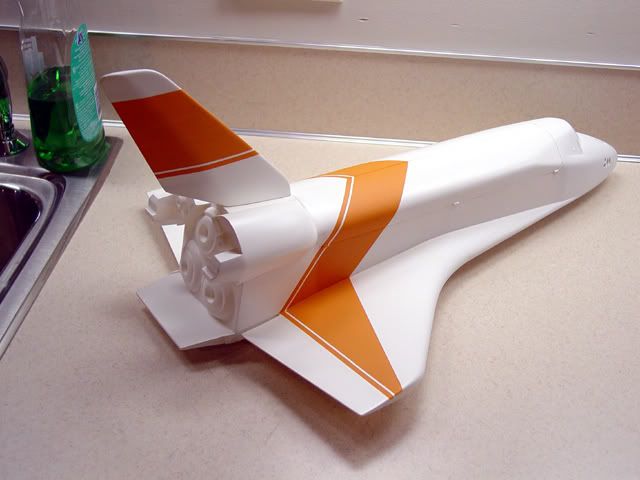
The biggest modification to date has been to the wings:
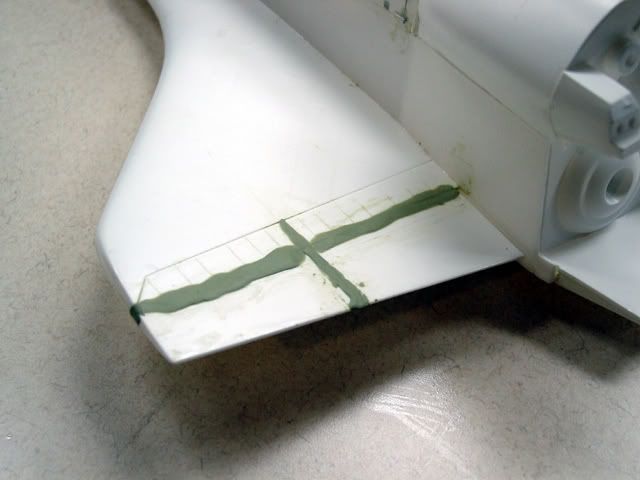

I filled the control surface splits and seams with Milliput and sanded them smooth to create a nice blank surface. New details in more proper positions will be painted on later. I am doing the same for the tail rudder/speedbrake as well.
And here we have the payload bay doors with some new hinges:
To date, the doors have been the most troublesome. Reason being is I removed the hinges and filled the resulting openings in the doors. As such, even with the payload bay itself installed, the sides of the fuselage bow in a little on this particular kit (I don't recall this being as bad with my STS-117 build). As such, I had to stick a couple additional stiffeners in the payload bay to straighten the walls a little more. I did use some half round Plastruct strips to make three new hinges on each side of the model and this helped to align the payload bay doors a little further, while duplicating studio model appearance more. I also filled the segmented splits on the doors as well.
As it stands, the tedious work continues, but I am pretty far along. I won't be able to begin painting for another week and a half yet though. Reason being is I am going to Florida next week to watch STS-131 blast off on Easter Monday (hopefully). Now you know why I like space shuttles. :cool
Things are progressing slowly, but at least they are progressing. The fuselage has been closed up and the doors are in now. I am in the process of filling and sanding seams, as well as exterior modifications to the model. For starters, here are the new cockpit windows:
The Monogram windows don't need much work as they are already oversized for actual shuttle windows as it is. But I did make new exterior borders for them. I also angled out the split between the inner and center windows a little bit to more closely match the launch configuration studio model(s). Here are the original Monogram windows for comparison:
I also filled the hole for the side hatch and the door seam as well.
The biggest modification to date has been to the wings:
I filled the control surface splits and seams with Milliput and sanded them smooth to create a nice blank surface. New details in more proper positions will be painted on later. I am doing the same for the tail rudder/speedbrake as well.
And here we have the payload bay doors with some new hinges:
To date, the doors have been the most troublesome. Reason being is I removed the hinges and filled the resulting openings in the doors. As such, even with the payload bay itself installed, the sides of the fuselage bow in a little on this particular kit (I don't recall this being as bad with my STS-117 build). As such, I had to stick a couple additional stiffeners in the payload bay to straighten the walls a little more. I did use some half round Plastruct strips to make three new hinges on each side of the model and this helped to align the payload bay doors a little further, while duplicating studio model appearance more. I also filled the segmented splits on the doors as well.
As it stands, the tedious work continues, but I am pretty far along. I won't be able to begin painting for another week and a half yet though. Reason being is I am going to Florida next week to watch STS-131 blast off on Easter Monday (hopefully). Now you know why I like space shuttles. :cool
Re: Moonraker stack in 1/72
Outstanding! :thumbsup
Outstanding! :thumbsup
JMChladek
Sr Member
Re: Moonraker stack in 1/72
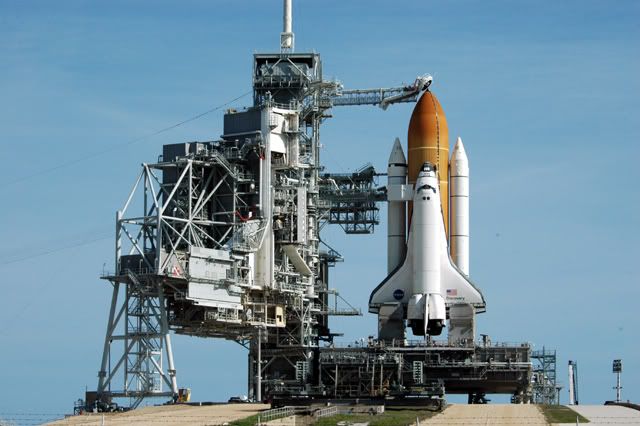
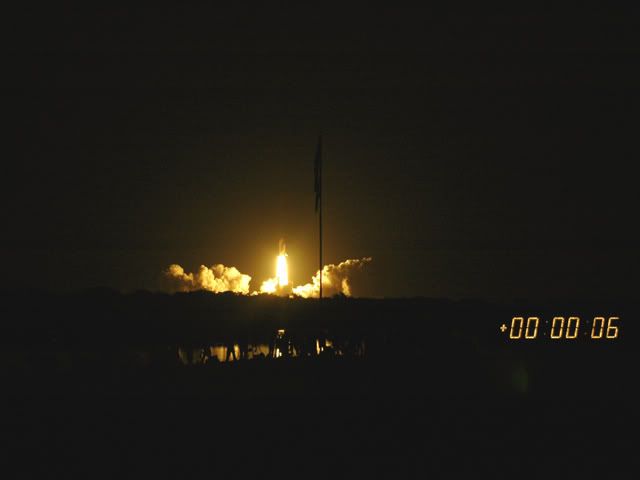
Well, I am back from Florida now. STS-131 produced quite a launch IMHO as it left me with memories that will last a lifetime. As much as I like the Derek Meddings studio models from Moonraker, nothing will top the real thing IMHO:
Anyway, this week I'll be resuming work on my Moonraker stack as I get it ready for Wonderfest. Newest bit of work was to the tail as I filled and sanded smooth the rudder speedbrake recesses. They turned out rather well. Work is also slowly progressing on the SRBs.
Any update on your Moonraker shuttle Jon? How did the white tile lines turn out?
JMChladek
Sr Member
Re: Moonraker stack in 1/72
Well, multiply the length of your 1/144 stack by two and you'll get the dimensions of a 1/72 stack.")
Seriously though, it is almost three feet tall (a little over 30 inches). It is big, but at least stacked vertically it doesn't take up that large a footprint. The size of the model can create some issues though in terms of building it to keep it from breaking later on.
Well, multiply the length of your 1/144 stack by two and you'll get the dimensions of a 1/72 stack.
Seriously though, it is almost three feet tall (a little over 30 inches). It is big, but at least stacked vertically it doesn't take up that large a footprint. The size of the model can create some issues though in terms of building it to keep it from breaking later on.
Hawaiiangb
Well-Known Member
Re: Moonraker stack in 1/72
there was a set of awesome resin detailed 1/72 scale engines for the Shuttle. I've used them on my Challenger...They make such a difference than the low detailed "bells" that came with the original kit.
http://www.starshipmodeler.com/real/rs_bell.htm
there was a set of awesome resin detailed 1/72 scale engines for the Shuttle. I've used them on my Challenger...They make such a difference than the low detailed "bells" that came with the original kit.
http://www.starshipmodeler.com/real/rs_bell.htm
JMChladek
Sr Member
Re: Moonraker stack in 1/72
I used the real space SSME engine bells on my STS-117 shuttle stack a couple years ago as they are indeed a great improvement over the stock ones. However, since Moonraker is going to be a model based on a model, I'll likely just stick with the stock engine bells since they should do the job just fine. When Derek's team built the studio models, they did some shortcuts in that area.
Here's the realspace bells on my 117 stack:
JMChladek
Sr Member
Re: Moonraker stack in 1/72
Minor update: No pictures this time. But there isn't much to see as all the bits are still plastic colored. I am trying to get all the seam work and modifications done by this weekend so I have one week and a couple days to paint the beast before Wonderfest. Hopefully that will go quicker then this slog has been going.
If I ever do another one of these, I'll either leave the external tank rough or try something different to smooth it out as it has been the most time consuming part of the build to sand a rough tank smooth! Except for a couple minor areas, I got most of the work done last night. Intertank modification goes on tonight (pics to follow soon after).
JMChladek
Sr Member
Re: Moonraker stack in 1/72
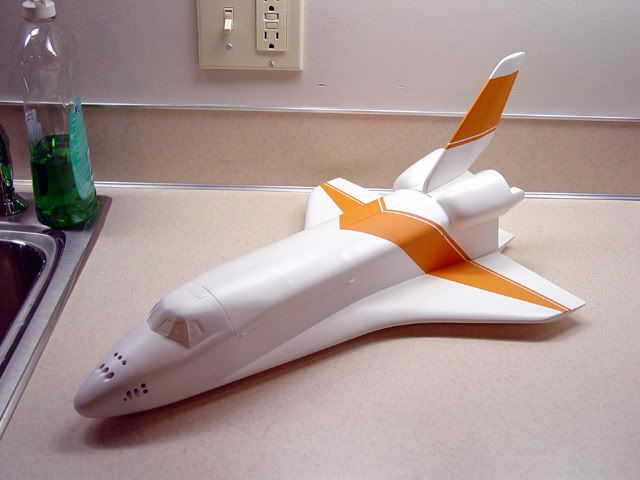
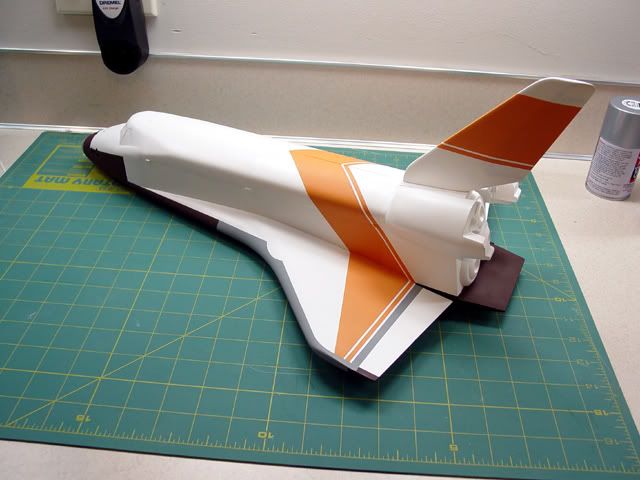
Well, after way too long a delay, Moonraker is in the paintshop now. It took a few coats of white and primer to cover up the filled areas. The orange stripe was painted with Floquil UP Light Orange. After additional research, I almost went with Medium Harvest Gold instead, but after the UP orange was down, I am glad I made this choice as it seems to have the right look to my eye.
Masking was done with both Tamiya and Aizu brand masking tapes. The tricky bit was making sure the white trim stripe was even. So to do that, I used Aizu 2.5 and 1mm width strips to make a shim from the back edge of the yellow mask and then masked the stripe with a 1.5mm strip (pulling the shim off when the stripe mask was down). I wasn't entirely sure it would work, but I am happy with the results.
Next comes the gray RCC wing panels. I will mask those tonight!
jockdeboer
Well-Known Member
Re: Moonraker stack in 1/72
Nice work!
Nice work!
JMChladek
Sr Member
Re: Moonraker stack in 1/72
Okay, got some more paintwork done this weekend. First came the gray RCC wing panels and nose cap. Those were masked with frisket templates I made on my computer. Next came the dark brown LRSI tiles for the nose and bottom:
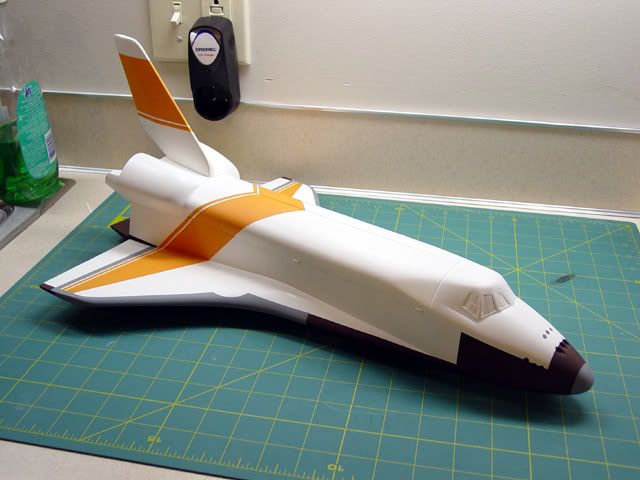
The gray shade I used was RAF Medium Sea Gray. In hindsight, it may be a little too dark, but it is about the right shade. With some drybrushing, I should be able to lighten it a little. The "black" tile areas were airbrushed with Tamiya XF-10 Flat Brown and it seems to be a very close match to what was used on the studio models. I still need to paint the tail edge in brown. Then the next step will be to shoot the cockpit window edges and a couple other spots on the model in black (such as a couple of the RCS thruster port areas and the rear section around the main engines.
There are a few minor touchups I have to do in spots, but overall it is coming along pretty well. It is looking more and more like a Moonraker shuttle everyday.
Okay, got some more paintwork done this weekend. First came the gray RCC wing panels and nose cap. Those were masked with frisket templates I made on my computer. Next came the dark brown LRSI tiles for the nose and bottom:
The gray shade I used was RAF Medium Sea Gray. In hindsight, it may be a little too dark, but it is about the right shade. With some drybrushing, I should be able to lighten it a little. The "black" tile areas were airbrushed with Tamiya XF-10 Flat Brown and it seems to be a very close match to what was used on the studio models. I still need to paint the tail edge in brown. Then the next step will be to shoot the cockpit window edges and a couple other spots on the model in black (such as a couple of the RCS thruster port areas and the rear section around the main engines.
There are a few minor touchups I have to do in spots, but overall it is coming along pretty well. It is looking more and more like a Moonraker shuttle everyday.
JMChladek
Sr Member
Re: Moonraker stack in 1/72
I also have been working on new artwork for my model. Decals have been done in the past, but I haven't been entirely happy with their results. So I went ahead and created some artwork of my own using all available references (screen captures, the DVDs, model kit decal sheets). Here is a sample of what I've come up with:

This is but a small sample. I also have loads of stenciling to stick on the shuttle, the SRBs and even the ET. So far so good.
I also have been working on new artwork for my model. Decals have been done in the past, but I haven't been entirely happy with their results. So I went ahead and created some artwork of my own using all available references (screen captures, the DVDs, model kit decal sheets). Here is a sample of what I've come up with:
This is but a small sample. I also have loads of stenciling to stick on the shuttle, the SRBs and even the ET. So far so good.
Gigatron
Sr Member
Re: Moonraker stack in 1/72
Great job on painting those stripes, Jay! I know how difficult it can be to paint a straight line on a compound curved surface and you did a fantastic job. I have problems getting straight lines on a simple cylinder :lol.
Looking forward to the progress :thumbsup
-Fred
Great job on painting those stripes, Jay! I know how difficult it can be to paint a straight line on a compound curved surface and you did a fantastic job. I have problems getting straight lines on a simple cylinder :lol.
Looking forward to the progress :thumbsup
-Fred
Similar threads
- Replies
- 5
- Views
- 778