You are using an out of date browser. It may not display this or other websites correctly.
You should upgrade or use an alternative browser.
You should upgrade or use an alternative browser.
MF-ESB Boba Fett helmet paint-up
- Thread starter superjedi
- Start date
Thanks. Yes, I base all the damage from stencils created by a member of The Dented Helmet.
I keep some good reference pics up on my laptop while I'm painting to make sure I get all the fine details.
oh my god that has to be painstaking lining that all up!
superjedi
Sr Member
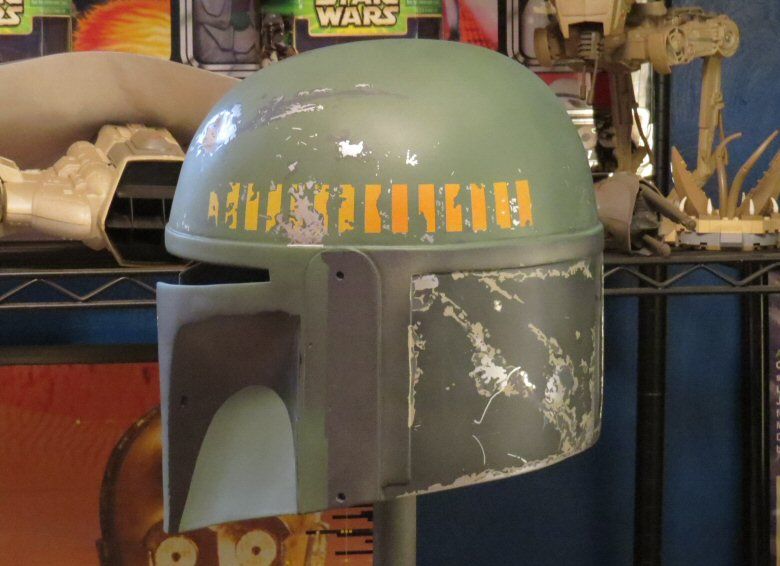
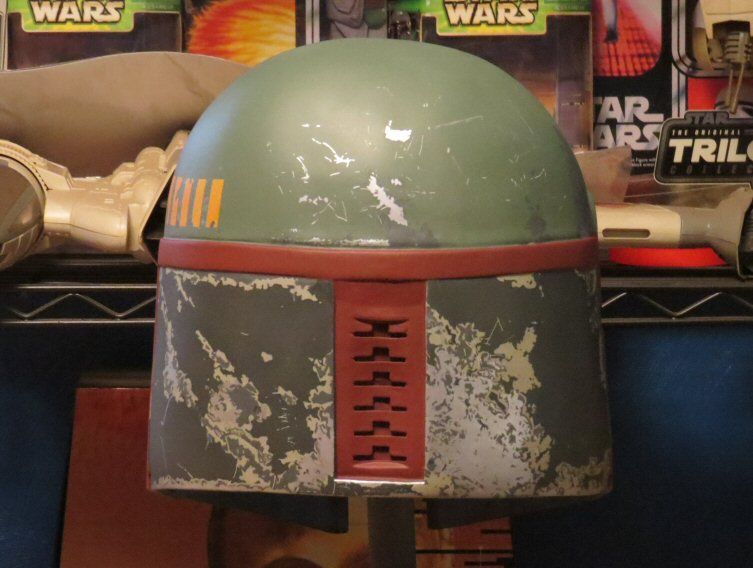
Here's the latest update. I did the small area above and between the turn signals on the front of the dome and. . .
the dent!") Probably the most recognizable feature of Fett's helmet, and my favorite to paint. There are some
Probably the most recognizable feature of Fett's helmet, and my favorite to paint. There are some
flecks of pale contrasting gray that are found inside the dent and those will be added at the end of the project.
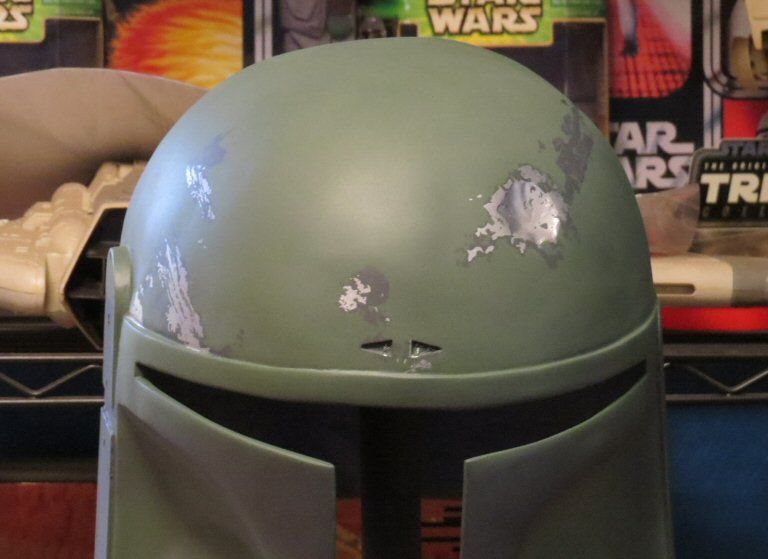
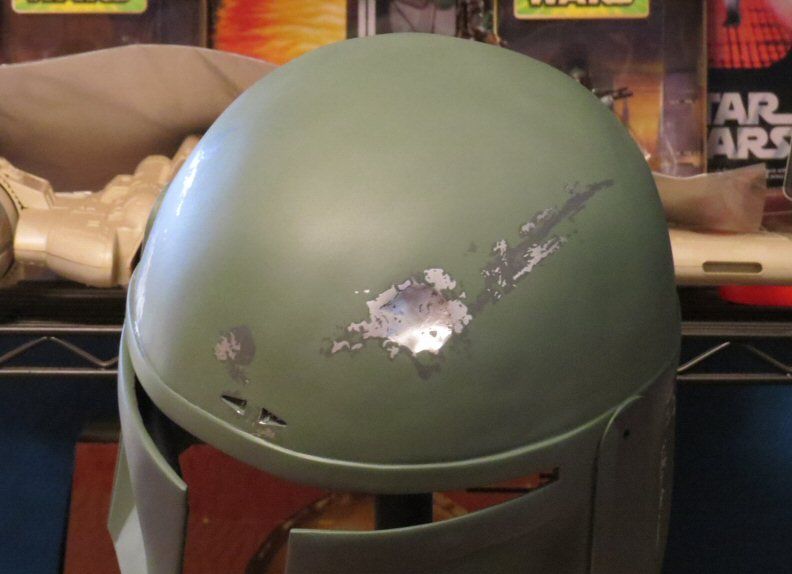
Next up will be the large scrape across the top of the dome.
the dent!
Probably the most recognizable feature of Fett's helmet, and my favorite to paint. There are someflecks of pale contrasting gray that are found inside the dent and those will be added at the end of the project.


Next up will be the large scrape across the top of the dome.
superjedi
Sr Member
Happy Thanksgiving.
I managed to get some work done on the helmet earlier before a great meal (and subsequent food coma).
Killstripes! Finally, something other than gray and silver. . . at least for a moment.
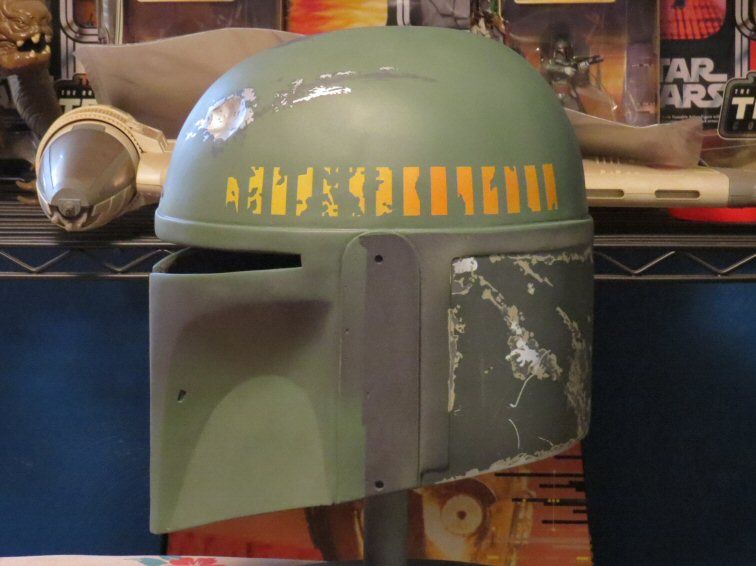
Everything was masked, then liquid masked, then airbrushed. The orangey misting was airbrushed onto the
rear part of the stripes as well. It's a subtle color shift.
Having the killstripes on the helmet gives me landmarks to complete the remaining damage on the
left side of the dome. The damage in this area is closely related to the positions of the stripes.
I managed to get some work done on the helmet earlier before a great meal (and subsequent food coma).
Killstripes! Finally, something other than gray and silver. . . at least for a moment.

Everything was masked, then liquid masked, then airbrushed. The orangey misting was airbrushed onto the
rear part of the stripes as well. It's a subtle color shift.

Having the killstripes on the helmet gives me landmarks to complete the remaining damage on the
left side of the dome. The damage in this area is closely related to the positions of the stripes.
superjedi
Sr Member
Thanks! Glad you're liking it, Al.
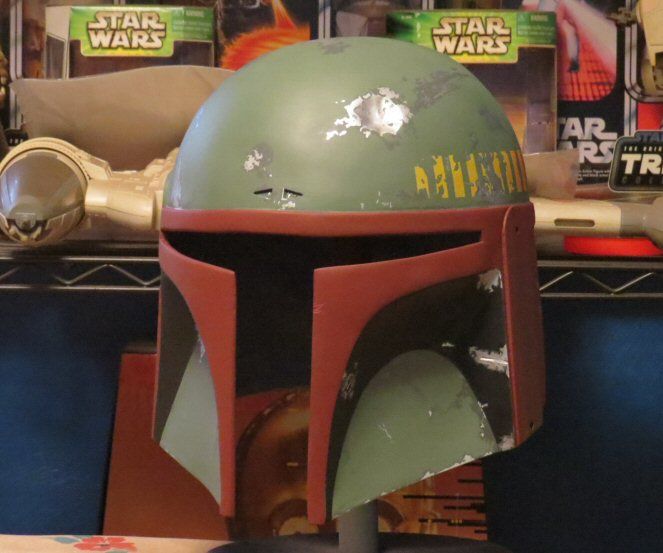
I have a nice long weekend and I'm rolling along with the helmet. I completed the remaining damage on the dome.
Lots of little flecks and chips between and around the killstripes, plus what I like to call the "Scottie dog" area just
above the stripes. :lol As with a lot of the smaller chips, they fade or brighten depending on the lighting angle.
Here are two shots to show what I mean.
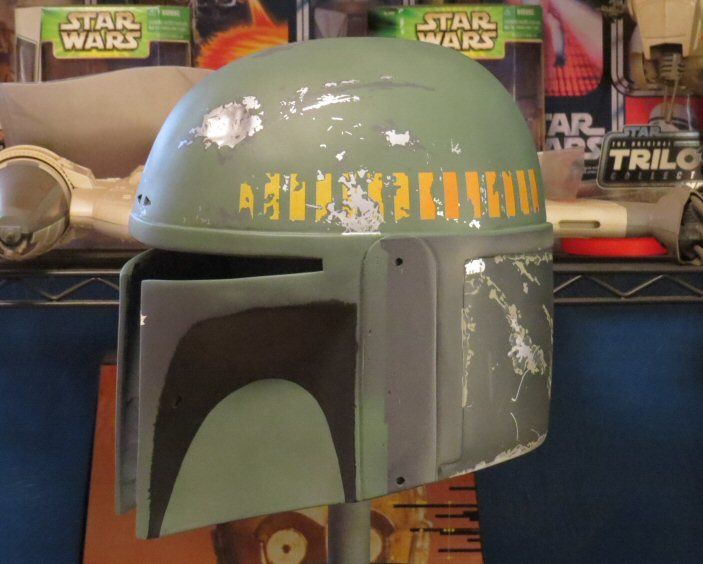
As you may have noticed in the shots above, I also blocked in the dark outer cheeks. I do these using a wide
flat brush. Polly Scale acrylics are some of the best self-leveling paints I've ever used and brush strokes pretty
much disappear with only a couple of coats. When the dark color was dry I began the detailing on the right cheek.
There's not as much going on in this area as on the left cheek. That will be next.
I have a nice long weekend and I'm rolling along with the helmet. I completed the remaining damage on the dome.
Lots of little flecks and chips between and around the killstripes, plus what I like to call the "Scottie dog" area just
above the stripes. :lol As with a lot of the smaller chips, they fade or brighten depending on the lighting angle.
Here are two shots to show what I mean.


As you may have noticed in the shots above, I also blocked in the dark outer cheeks. I do these using a wide
flat brush. Polly Scale acrylics are some of the best self-leveling paints I've ever used and brush strokes pretty
much disappear with only a couple of coats. When the dark color was dry I began the detailing on the right cheek.
There's not as much going on in this area as on the left cheek. That will be next.


superjedi
Sr Member
Thanks very much!
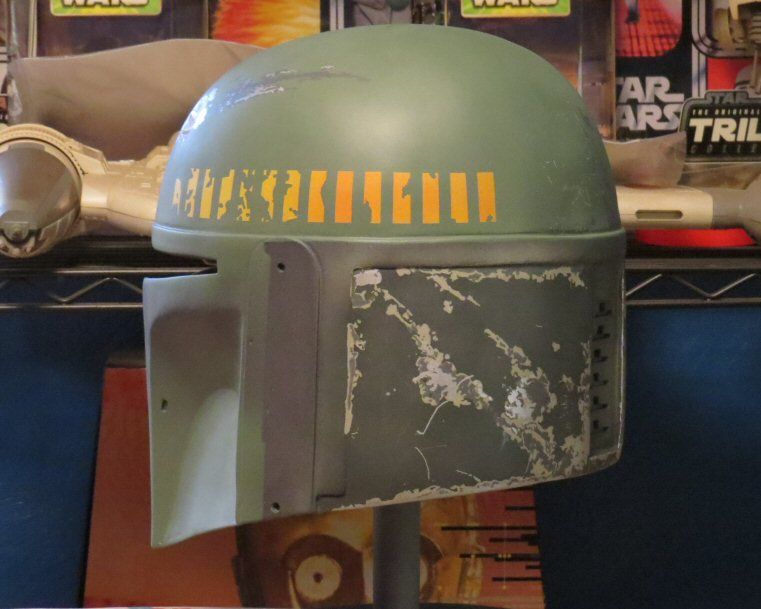
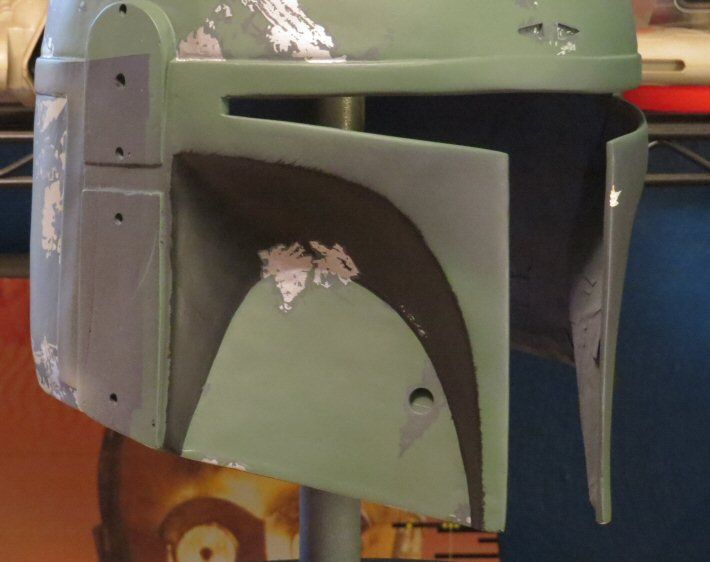
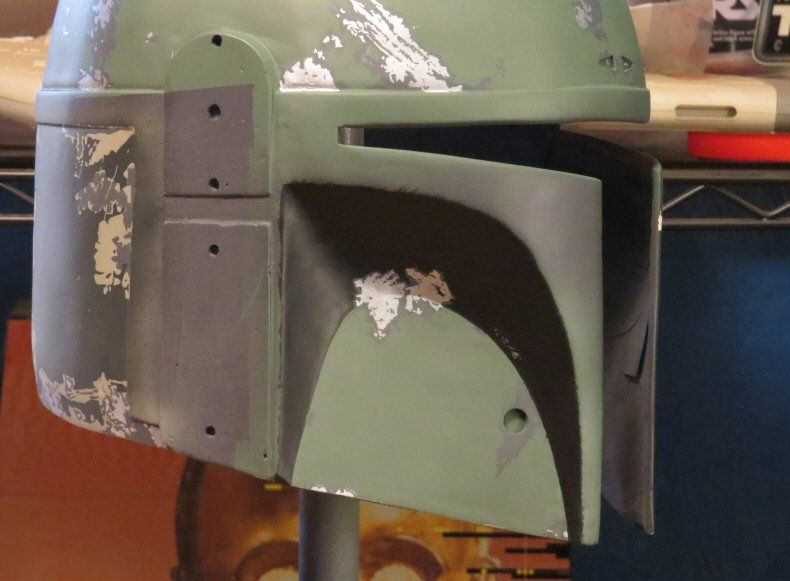
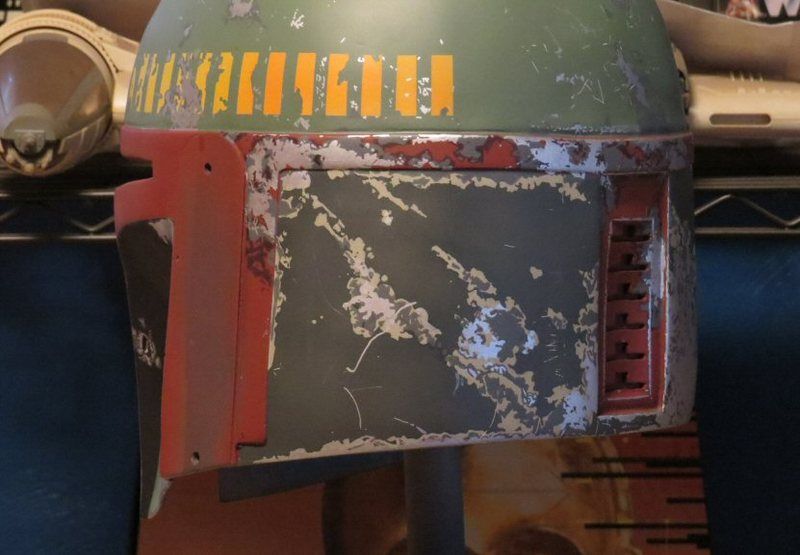
The left cheek is complete. This is another area where a custom color is used. The part that runs down
the outer edge of the inner cheek has some damage that is a little darker/greener than the standard gray.
This is the only place on the ESB helmet where this contrasting gray appears. I just mix up a shade by
eye until it provides a good contrast. It lies somewhere between the standard gray and the darker shade
on the outer cheek.
The white chip on the mandible is where I carved in the physical damage. There's another narrower spot
within the silver scrape on the dark outer cheek.
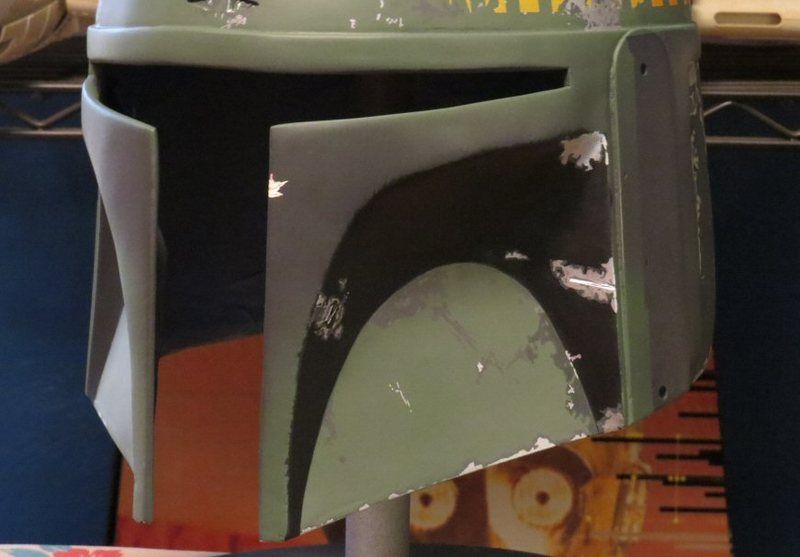
All of the damage on the green areas is done now. This sets me up for masking and airbrushing the base
red on the mandibles. Once the red is on, it will really start to look like Fett.
superjedi
Sr Member
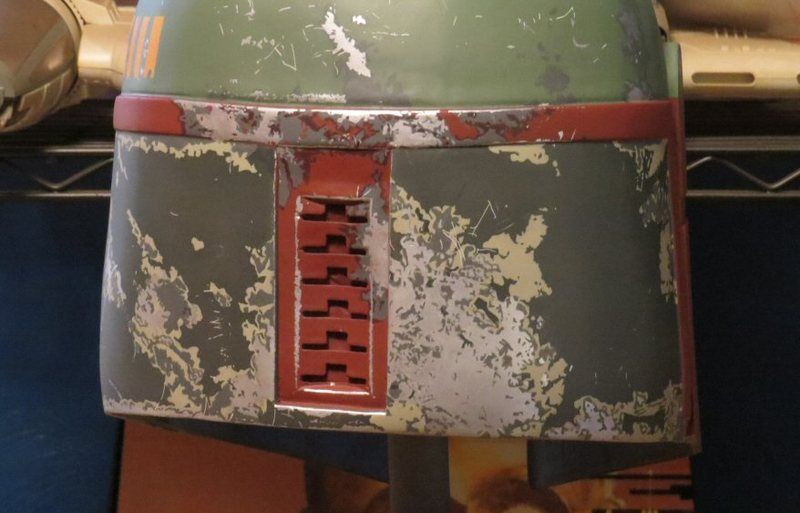
Red. . . woo hoo! Lots of masking for a relatively small amount of work, but everything has to be
protected, otherwise there's much wailing and gnashing of teeth.
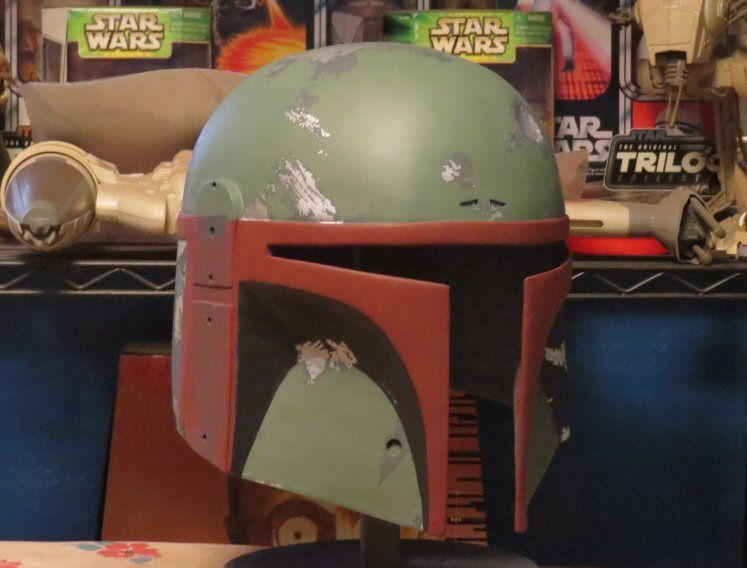
Here's the back view. The keyslots appear filled in because the inside of the helmet is still taped off.
This will dry overnight and then I'll begin the damage on the keyslot area and band on the rear of the helmet.
protected, otherwise there's much wailing and gnashing of teeth.


Here's the back view. The keyslots appear filled in because the inside of the helmet is still taped off.

This will dry overnight and then I'll begin the damage on the keyslot area and band on the rear of the helmet.
superjedi
Sr Member
Thanks, Al. It's coming along nicely.
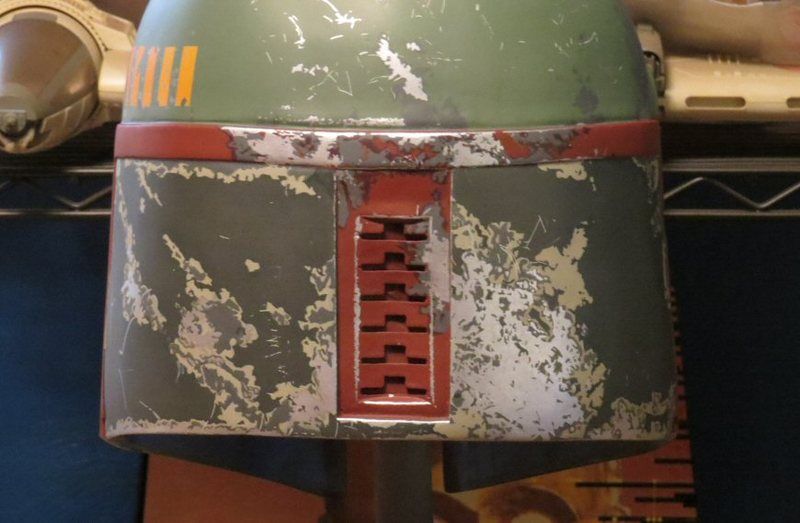
I began the damage on the red areas where I usually do--the keyslot inset. Back to gray and silver again, but now
I'm adding the maroon/purple shade too. After the keyslots were done I did the central part of the rear band.
I usually break this up into 3 sections: center, left, and right. The color breaks are well defined on the ESB so there
are good "stopping points" between the sections. Here are a couple of angles.
I was able to make some really good progress over the holiday weekend, but I think this is where I'll stop
for today. Have some errands and real life stuff to do (how boring) but I'll be back at it tomorrow.
I began the damage on the red areas where I usually do--the keyslot inset. Back to gray and silver again, but now
I'm adding the maroon/purple shade too. After the keyslots were done I did the central part of the rear band.
I usually break this up into 3 sections: center, left, and right. The color breaks are well defined on the ESB so there
are good "stopping points" between the sections. Here are a couple of angles.


I was able to make some really good progress over the holiday weekend, but I think this is where I'll stop
for today. Have some errands and real life stuff to do (how boring) but I'll be back at it tomorrow.
intwenothor
Well-Known Member
I've found myself 'liking' nearly every post you've made in the last few weeks across various boards.
Solos blaster
Sr Member
WOW, that looks fantastic! Amazing work!
superjedi
Sr Member
Thanks all.
During the week things slow down a little on the hobby front, but I finished the left section of the band.
This is the area that will receive the white thumbprints at the end of the project, so some of the silver
will wind up with a sort of whitewashed appearance.
I'll work on the right side next, then I'll move around to the front of the helmet.
During the week things slow down a little on the hobby front, but I finished the left section of the band.
This is the area that will receive the white thumbprints at the end of the project, so some of the silver
will wind up with a sort of whitewashed appearance.

I'll work on the right side next, then I'll move around to the front of the helmet.
Similar threads
- Replies
- 3
- Views
- 593
- Replies
- 0
- Views
- 143
- Replies
- 10
- Views
- 901
- Replies
- 3
- Views
- 599