Mark 3 pep iron man

Yay it fits!!!

Did some surgery today and now trying to figure out how to clean up my cut lines. Any suggestions on how to get a good smooth lined up fit. Any tips would be appreciated.

[url]http://i1081.photobucket.com/albums/j360/Tjsailosullivan/423D2B73-EFDB-4140-B2ED-28B3577FBBEB_zpsi8eiltdv.jpg[/URL]


[url]http://i1081.photobucket.com/albums/j360/Tjsailosullivan/504F945E-3EA5-4D51-A264-D9AA4753140E_zpsl0feuhfj.jpg[/URL]
Thats turning out sweet ☺

Sent from my SM-G900F using Tapatalk
 
For your cut lines I would suggest to just build up the low spots you want with bondo and then sand back down to get a more seamless look. Just a thought is all.
 
Philthy Stache - I took a peek at your Mark III you were building for your son. Looking great!

Some more progress today. Cleaned up my cut lines a little and added some edges with some epoxy'd cardstock for the faceplate to rest on, Pretty much ended up with some almost seamless edges. Haven't put the screw marks in as of yet since I'm debating having the screws 3D printed and then drilled and epoxy'd in. I still have a ways to go in cleaning up some of the other lines and edges. Want to make all of them a little sharper.

 
Thanks Kevin37.

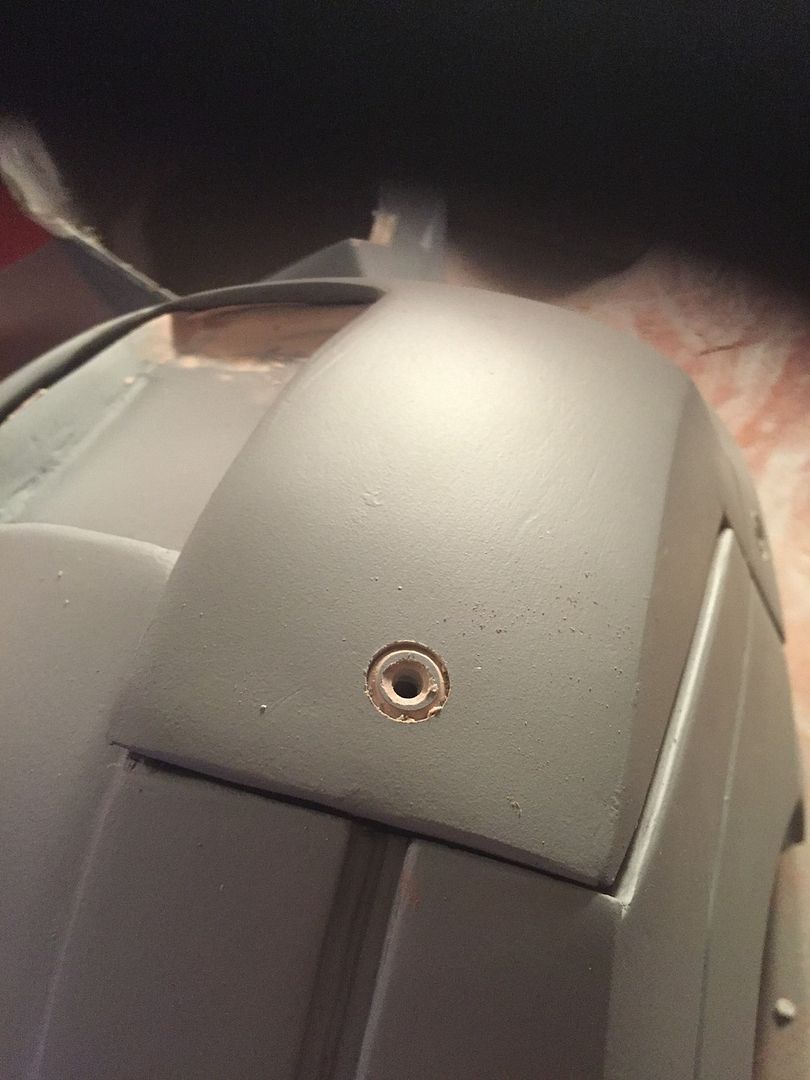
Well today I opted out of 3D printing the screw marks and finally thought of a method that seems to of worked ok. Thought I would share with the community as I couldn't find much in the way of doing this online anywhere. Let me know what you think. Im sure there are some other artists that could do this using this method much better than I did but seem to work for me. :)

1. First I used a 3/8 wood drill bit.


2. Drilled very carefully as to not drill through the helmet. Then filled small hole with professional grade 2 part spot filler. Then finally used a small jewelry screwdriver to scratch the screw driver mark and clean up the circle edges.


First coat of the ground coat. This is some cool stuff. Love that clean metal look it makes.

 
Ended up re-painting the helmet. Still need to figure out how Im gonna make my ear pods and teeth. Should be getting a 3D printer in about a month. Almost threw this one out and started over.

The paint job has a much smoother finish this time. however still have a few small defects that I notice up close but it seems to work good enough for me. Was wondering how folks do the black in the detail lines? The red is enamel paint and really nervous about messing it up by using the wrong paint. Please let me know if anyone has any recommendations.

[url]http://i1081.photobucket.com/albums/j360/Tjsailosullivan/C59901A9-3041-4DED-8AD9-37A37CADA0DC_zpschwsz6jg.jpg[/URL]

[url]http://i1081.photobucket.com/albums/j360/Tjsailosullivan/AD4D5CE5-DDA2-4B89-9ABA-52E2ED11A4D9_zpsxaa8ogdb.jpg[/URL]
Thats turned out sweet mate love color i use acrylic black for detail lines its water based so should be fine [emoji106]

Sent from my SM-G900F using Tapatalk
 
You could get a fine detailing paintbrush, like the kind you'd use on a model, and just tape off either side of the line you want and just do it that way. That way you don't have to worry about spraying it and getting droplets over the rest of the helmet.
 
Back
Top