Mark 3 pep iron man

TKCC71

Well-Known Member
Hello RPF, I wanted start a log and document the long journey of my Iron Man Mark 3 build. I am new to the hobby and this is my first build. I look forward to hearing the advice and expertise of the many masters out there (E.g. Surreal Studios) as I embark on this journey. I have been doing tons of research reading the numerous treads and learning as I go. Now that Ive started this, I've asked myself, "What have I gotten into". :)

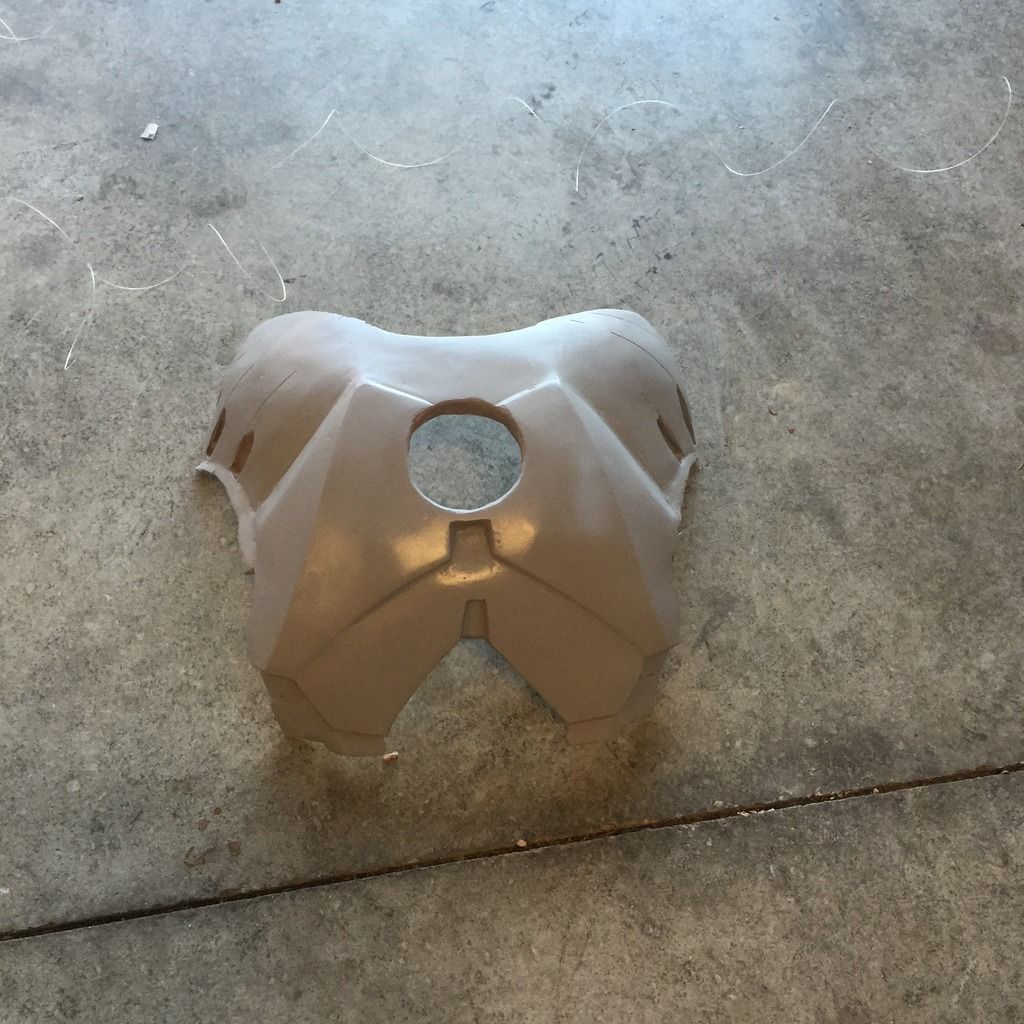
So far I've pep'd the helmet, chest and back. I'm in the process of working the chest plate (Bondo stages), still lots of more work to do on that chest (Details, sharping the edges etc). What you see on it right now is spot filler. I did the hemet but plan on going back to the drawing board and doing it again.

First off, I need to give a big thanks to those who made these files for pepakura viewer. There is no way I could do this with out them! (Dancing fool & Robo).

Here's what I have done so far. Looking forward to hearing any guidance you may have.


Last edited:
Welcome to the RPF :thumbsup
Your project is looking good already.Good luck with your build !
 
Thanks George.

Made some more progress today, added some detail lines. just a little more touch up and chest is almost ready for primer. The chest plate nuts are 3D printed and and Im planning molding them and then installing them later. The plan is to make a mold of this once its complete. Anyone have any suggestions for the inner rib details? Couldn't find the 3D print on shapeways.

 
Thanks creative. Need all the motivation I can get. :) Sanding is the devil!!

Made some more progress today. Reworked the lines with bondo on the lower chest moutain fold. Didn't like the previous lines and wanted to match up more with the reference photo's I've been using. Discovered today that using a popsicle stick with Bondo works better for making fine lines than a bondo putty knife. Still much work to do on it. Have to add a few more details, clean up some of the lines and fill in a few high and low spots.

 
I just started the pep for the helmet took a while to cut out all the pieces.im nearly finished putting it together, learned alot from it made mistakes but still was fun to do! Yours looks brilliant.!
 
Thanks creative. Need all the motivation I can get. :) Sanding is the devil!!

Made some more progress today. Reworked the lines with bondo on the lower chest moutain fold. Didn't like the previous lines and wanted to match up more with the reference photo's I've been using. Discovered today that using a popsicle stick with Bondo works better for making fine lines than a bondo putty knife. Still much work to do on it. Have to add a few more details, clean up some of the lines and fill in a few high and low spots.

[url]http://i1081.photobucket.com/albums/j360/Tjsailosullivan/E4C3CD8D-4001-4C02-81EC-5A37869077D1_zpsf3hjyzum.jpg[/URL]
Finish looks nice doing a great job on this keep going [emoji106]

Sent from my SM-G900F using Tapatalk
 
Took a break from the chest plate for a little while and decided to re-pep the helmet as the previous one was way to large. Took it down to a .95 scale. Used the cameo to cut and score (1.5 hrs to cut all 14 pages) and around 12 hrs to pep. Currently on second coat/day 2 of the resin. Learned from the last few helmets I put together and this one has come out pretty good with some really straight line. Used some cardboard on the inside the bottom of the jaw to keep it straight and it really kept a nice shape. Also didn't use the fold for the detail lines alone the side. Just used a flat sheet of 110lb cardstock since I will be etching those lines in once the bondo is applied. Cant wait!!!

 
More progress today on the hemet. Applied first coat of bondo today. Spend hours of sanding and still have much more to do. Took a break tonight from the sanding and applied a thick layer of Epoxy resin mixed with Talc powder to the inside of the hemet to add some additional strength (Made it almost like a bondo thickness). Tomorrow will probably be another day of bondo and more sanding.

 
Congratulations on all of your documentation you have been doing.
Each post yours is very detailed and well information. Very useful for those (like me) is starting now.
And it's very good wherever you put how long it took, so it's easier, get a sense of how long on average will have to spend on any parts.


------
Doubts:
- What is your height (in meters/cm)?
- You need to resize in many parts for your height?
 
Thanks Darth.

Applied first coat of primer/filler, not wet sanded yet. Feeling excited. Will probably have to wait until spring to paint. Way to cold here.

 
Well after my last post two weeks ago I decided to take the helmet back to the bench. I was too excited and couldn't see all the imperfections. So anyways I sanded it down and went back to the filler and have been focusing on attempting to make the lines a little sharper. Does anyone know what I should do for the screw marks? I tried etching one or two but didn't come out so well and I ended up covering them up with body filler and sanding them down. Any suggestions special tips to sharpen the lines would be appreciated also. Still much more work to do and won't stop until I get this right...


Last edited:
Well after my last post two weeks ago I decided to take the helmet back to the bench. I was too excited and couldn't see all the imperfections. So anyways I sanded it down and went back to the filler and have been focusing on attempting to make the lines a little sharper. Does anyone know what I should do for the screw marks? I tried etching one or two but didn't come out so well and I ended up covering them up with body filler and sanding them down. Any suggestions special tips to sharpen the lines would be appreciated also. Still much more work to do and won't stop until I get this right...

[url]http://i1081.photobucket.com/albums/j360/Tjsailosullivan/03F9541A-FDFC-4384-A3D0-D83DB2658152_zpsruzrutrt.jpg[/URL]


[url]http://i1081.photobucket.com/albums/j360/Tjsailosullivan/A8DD6BAE-B56A-4A16-9B08-DD3C56963468_zpsjxhvs9je.jpg[/URL]
I just used a needle file i can take a couple trys to get it right but does the job just go light press a little harder as you along . Helmet looks great by the way [emoji106]

Sent from my SM-G900F using Tapatalk
 
Thanks creative.

Unfortunately I just found out today that the helmet is way to small. Looks like this one is going in the bin and have to start all over. Guess I can use it for my paint tester. I pep'd this one at a .95 scale. My head is 23.5 inches. I cut the back piece and the sides around the ears and it was way to tight and could barley pull it down over my head and left no room for any hinges, padding etc.....

Man talk about the school of hard knox. :(

- - - Updated - - -

Anyone have a suggestion on what scale I should use?
 
TKCC71 hi mate all is not lost what i do if helmet is too small is (split) cut helmet in half and faceplate straight down middle then use sum card (i use 300gsm you could use any ) then add an extra 2- or 3" clue card inside one half dont have to be perfect use glue stick then glue attach the other side of helmet apply resin cloth inside when its dry apply body filler then carry on as before nothing is ever wasted and i neva throw away somthing that can saved plus beats having to pep that all over again lol

Sent from my SM-G900F using Tapatalk
 
Last edited by a moderator:
Well, decided to re-pep my helmet and really glad I did. Still a work in progress but this one is a little more refined. Just need a little spot filler here and touch up there and will be adding the details lines and screws marks etc.. Spent a little more time trying add in the eye and lip details on this one.


Yay it fits!!!

Did some surgery today and now trying to figure out how to clean up my cut lines. Any suggestions on how to get a good smooth lined up fit. Any tips would be appreciated.


Back
Top