Luigi's Mansion Ghost Vacuum

D-74-G

New Member
This is a build for my kids, they are both mad Mario fans. My son has wanted me to make the Ghost Vacuum from the Luigi's Mansion game for a while. After a couple of temporary cardboard versions, I thought it was about time to make a sturdier version. I'm building 2 of them as my daughter will want one when she sees it, so I'm thinking ahead to avoid arguments.

This is the Ghost Vacuum.


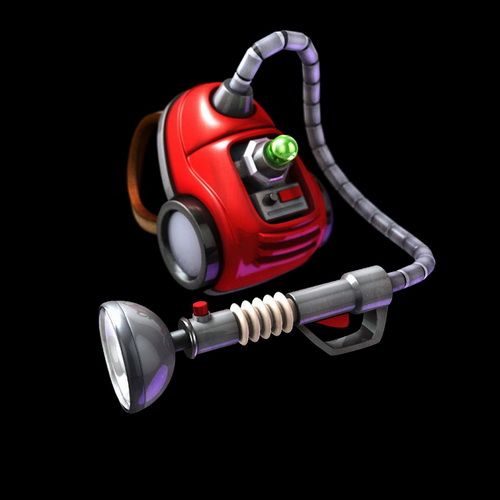
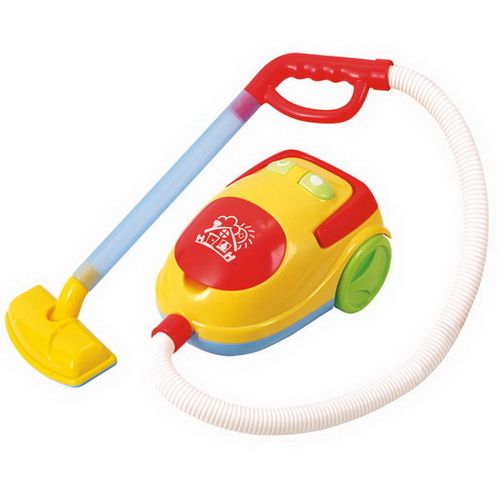
I'm not going to go for complete accuracy as I'm planning to adapt this toy vacuum. Added bonus the toy has vacuum sound effects.

 
Wow! I figured that existing pieces might only have similar shapes, not a 50% complete base. LOL. The little curvy rim that goes around the body and up and over the wheel is exact to the 3D model. I mean, the proportions on the real toy are not "100% exact Mario world proportions," but you couldn't start with a better base. Subscribed!
 
They were a great find, better than any full size vacuum's. I thought I would have to sculpt and mould the shell
but thankfully these can be adapted.
 
Managed to get some primer on the parts, then a sand then another coat of primer. You know the drill lol :D

Wish I still had the workshop, painting outside is a right pain. Spraying when the wind stops is a fine art.


Will hopefully be able to get some colour on tomorrow (weather permitting).
 
Managed to get some red sprayed, mostly on my arm due to the wind, but some did go on the parts as well :)


- - - Updated - - -

Also managed to get some black sprayed today. I masked off the black section on the main body and gave that a blast as well.


:)
 
Great subject matter, and what a lucky find you made in that toy vacuum.

Surprisingly It didn't occur to me to look for a toy one, even though I'm making them for the kids. I was looking into using a real vacuum but the size was took big, and the weight was an issue as well. I think it was a moment of pure desperation that made me look for a toy version, glad I did.
 
Very nice.
I've never seen anyone tackle this before. Good thinking using a found item to start from, scratch building or even Vacuum forming such a large piece would be costly and time consuming.
 
I think I will try and make a more accurate version with vac forming (no pun intended lol) at a later date. But these toys ones will do for the kids :)
 
I cut 3 pieces of silver funky form to make the hexagon that the green light fits on near the top of the vacuum.


Then I glued them together.


And then before the glue sets I taped them over the curved black lid from the top of the vacuum.


They should hopefully set to the curve of the lid.. Later I will cut the hexagon and also a hole in the middle to fit a push light in
:)
 
Cut the hexagon and then glued it back onto the lid. Used some more tape to help keep it in place while it sticks.


:)
 
The hexagons have glued to the lid quite good. I've managed a sneak a little time to cut out the circle for the push light as well.


I taped the bottom of the push light onto the hexagon and scored the circle. Before cutting it out.


:)
 
Decided to do something with the vacuum hose, rather than just painting it. I cut some foam strips and glued them around the hose to make it a little more bulkier and look more like it does in the original picture.


Just need to wait for the glue to dry :)
 
This thread is more than 7 years old.

Your message may be considered spam for the following reasons:

  1. This thread hasn't been active in some time. A new post in this thread might not contribute constructively to this discussion after so long.
If you wish to reply despite these issues, check the box below before replying.
Be aware that malicious compliance may result in more severe penalties.
Back
Top