Mexicutioner46
New Member
First off, this is going to be a pic heavy, long first post, as this is what I have been working on for the last 3 months. Alright, I started working on this helmet back in January, and the plan was to finish the helmet by May 4th (U.S. premiere date). Now with finals (law school :wacko) approaching, I'm racing to complete the helmet by then. Here is what I have done so far. This will be my second pep project (first being a Judge Dredd helmet), so my method hasn't exactly been refined. If any lesson is to be learned here, it is to do it the easy way, read the forums, and apply THIN layers of bondo at a time. Rushing through will only leave to future headaches...
Be warned.... It starts off rough :lol
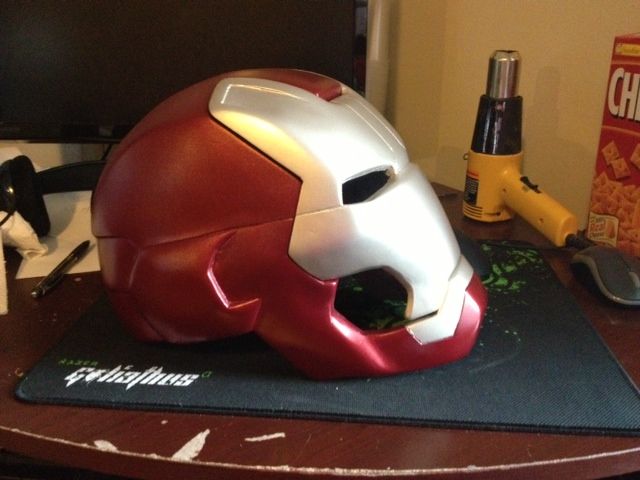
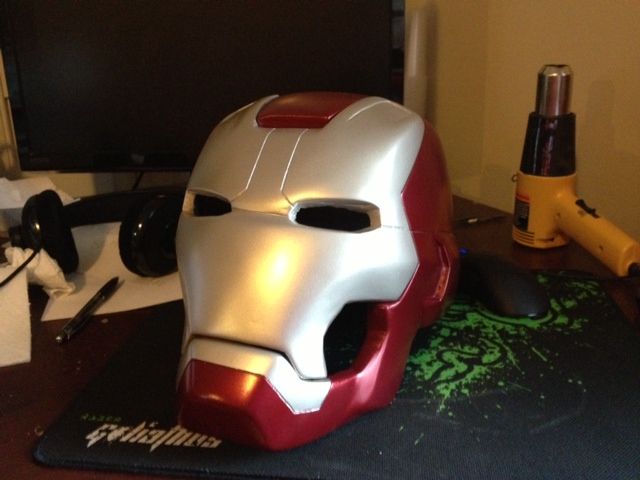
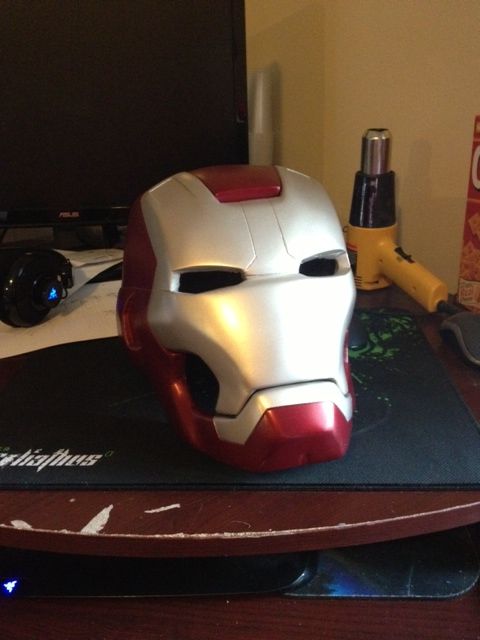
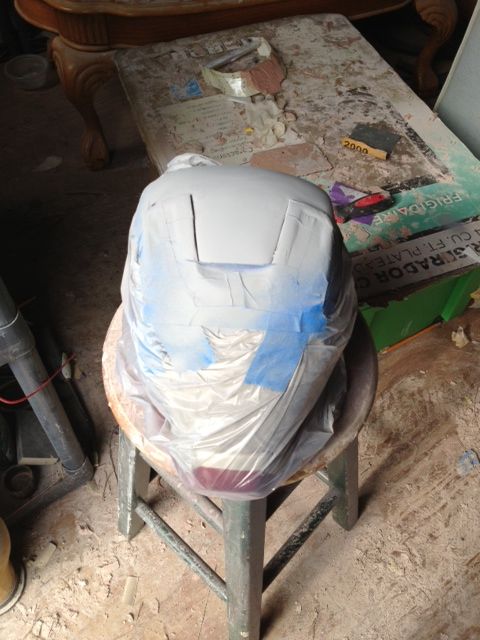
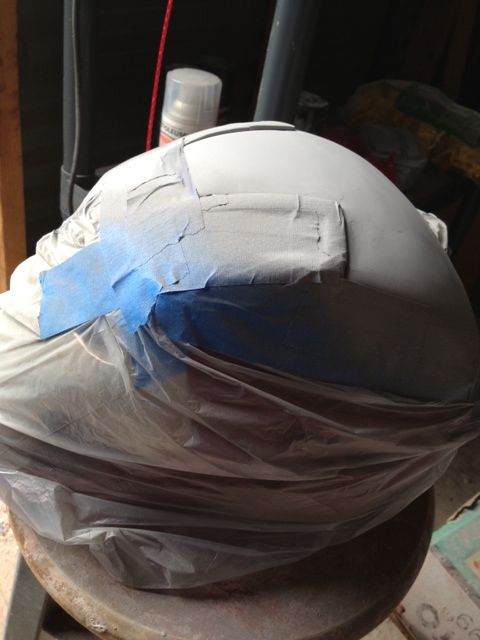
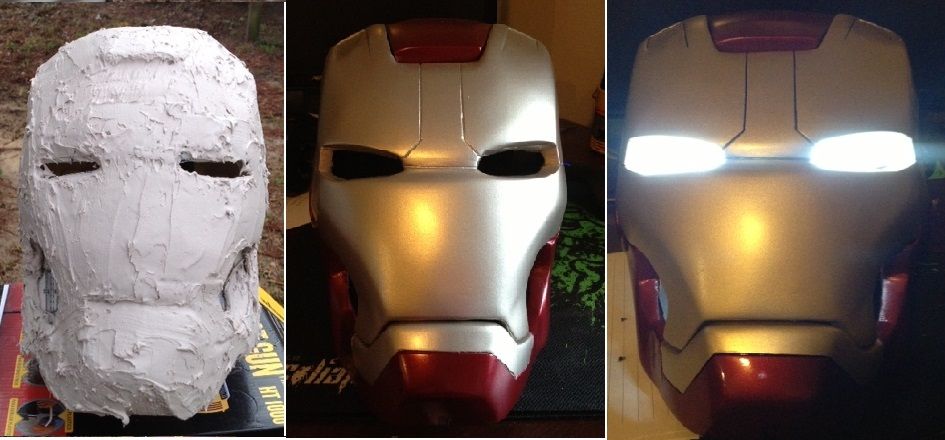
This is where I started, and where I am at now, there are more pictures posted in a later post, just updating the main thread to show where I stand as of now. Updated the progress pic!
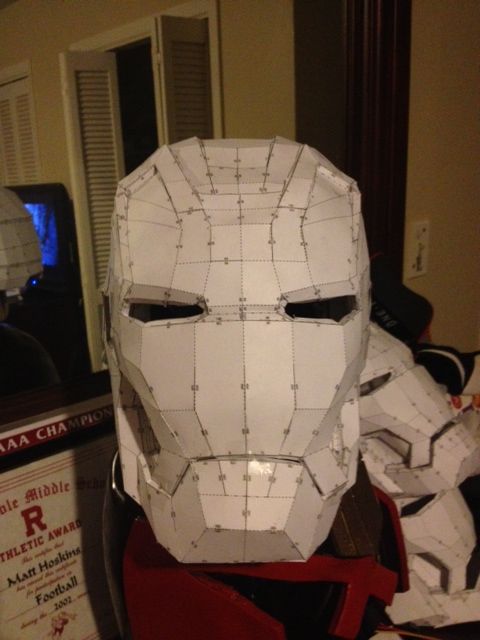
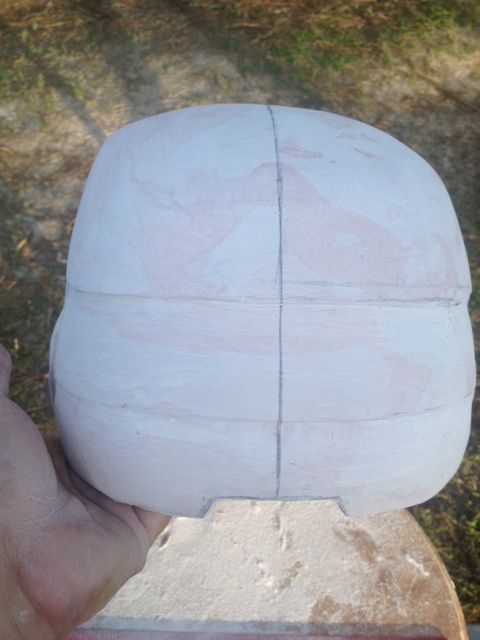
This is the pep file used, nothing special to see here.
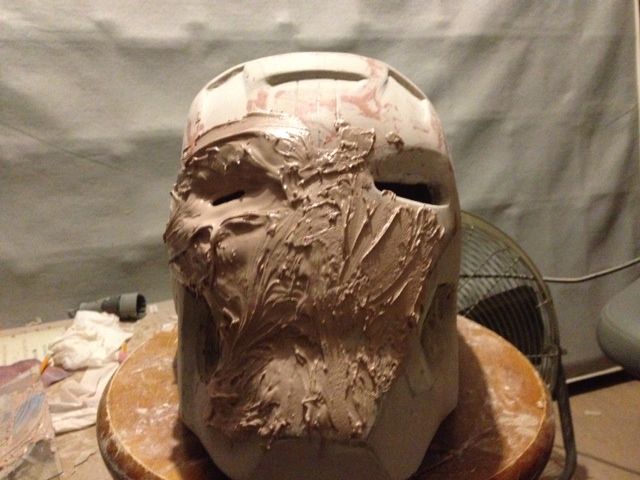
I applied the Bondo on THICK, and plentiful. I had a gallon on Bondo to work with, but that is very low as of now. I didn't take a picture of the previous step, which was using a plastic resin (EpoxAmite 101 Fast) on the pep, then reinforcing with fiberglass cloth and some more EpoxAmite on the inside. One thing I will definitely do different in the future, was I resined the facemask and the helmet SEPERATE, which was a pain. In the bondo step, I taped the facemask back to the helmet, which did not fit flush.
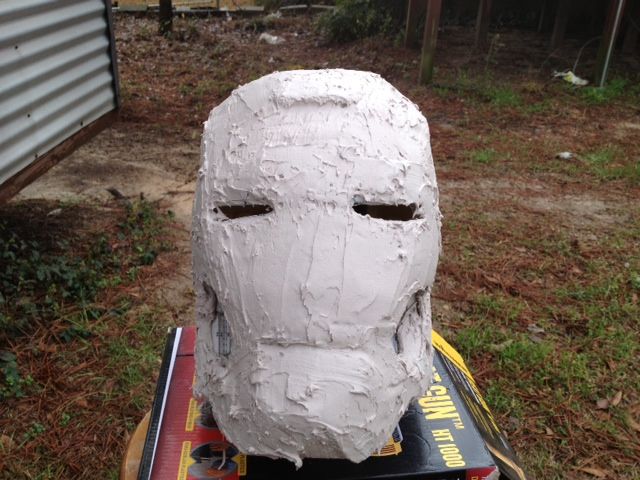
As you can see, the facemask did not sit flush to the helmet, and required adding a heap of Bondo onto the left side of the helmet, in order to make it appear flush. Also, I lost an earpod in the process.
After sanding for the first time, I realized I had my work cut out for me... I drew the lines back on with pencil. The facemask was shifted to left by a good 1/2in-3/4in. I decided to build up the bottom left jaw to make it look more proportionate.
Next step, to make the facemask flush, I covered the earpeace and built up the jaw.
More sanding to try and get the shape back to par. Then, another mistake noticed. Had to build the right cheek up to match the left cheek... back to the bondo...
And more bondo....
More and more sanding.... it never stops....
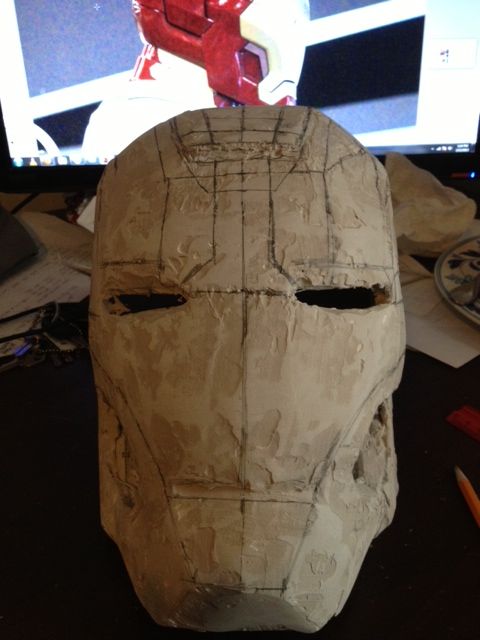
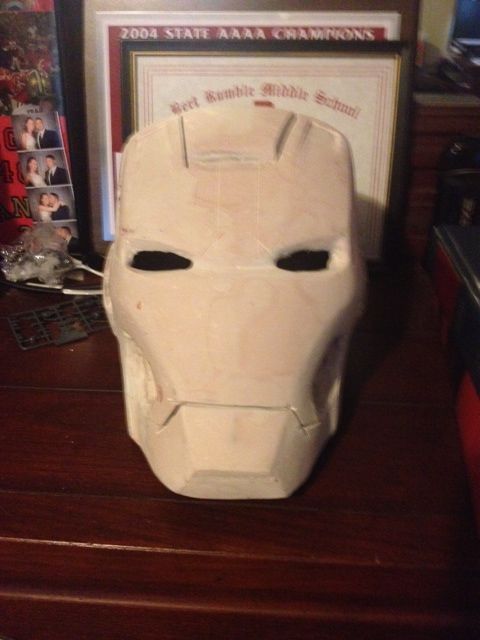
Now, I did alot of work over a couple weeks, but did not take too many pictures. You are not missing much, just lots of sanding, adding bondo, sanding bondo off, then adding bondo, rinse and repeat 100x. After repeated sanding I came out with this.
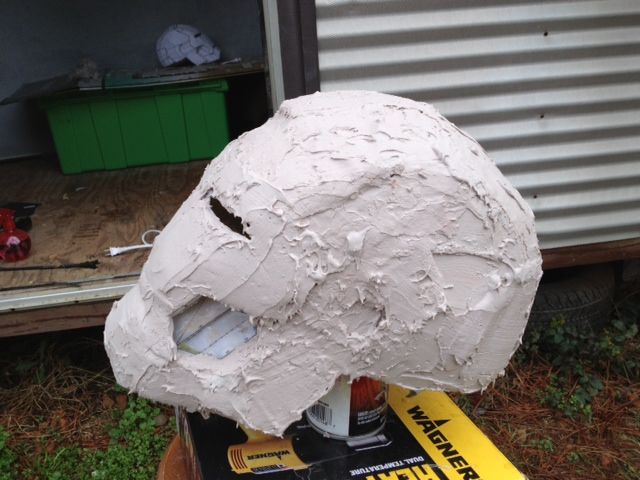
I got the face looking semi-decent and so turned my attention to the back and top of the helmet, making it round and proportionate. I had to add a good inch to the left side of the back to make it even.

Notice the difference in size haha
Next, I worked on the back of the helmet, while working on the details of the face as well. Again, I went some time in between pics.
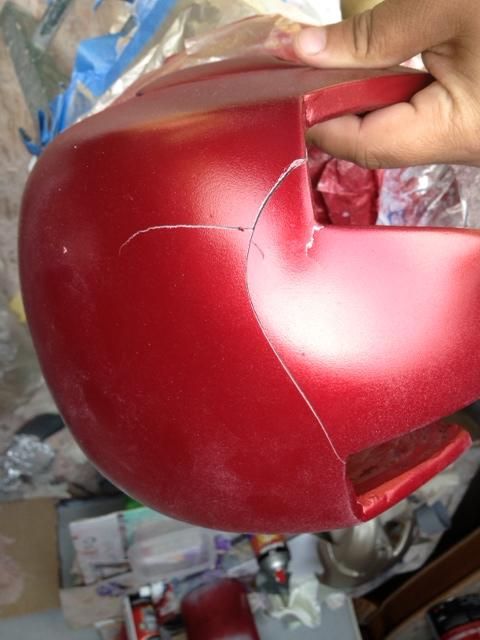
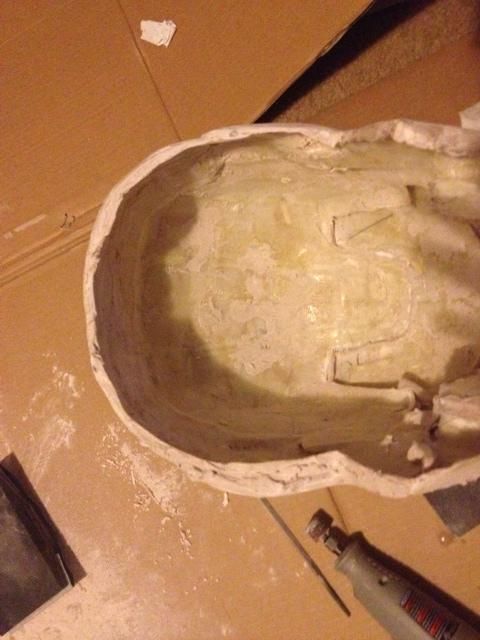
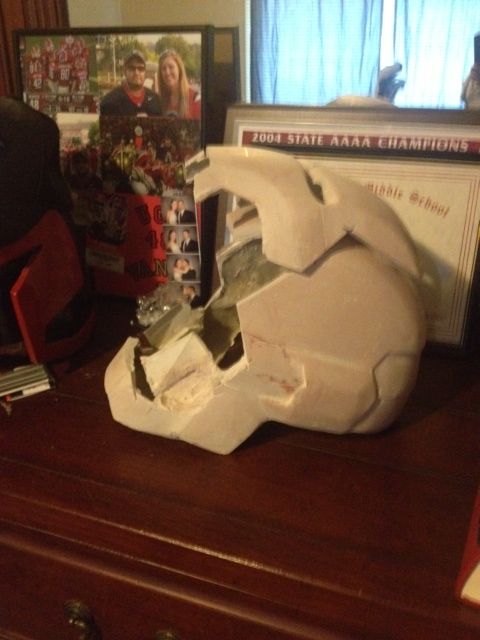
And finally seperating the facemask. I have a very bad, battery operated dremel tool. I could cut maybe 3-4 inches at a time, because the helmet was so thick (and getting pretty heavy as well). This resulted in thick, bad cuts, which all had to be painstakingly filled with bondo to make the facemask flush (enough). Also, you can see the difference in thickness on the inside of the helmet. Opened,

And closed
And side view
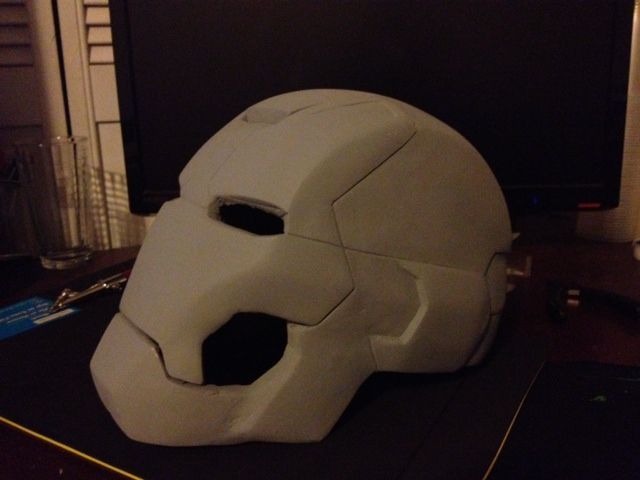
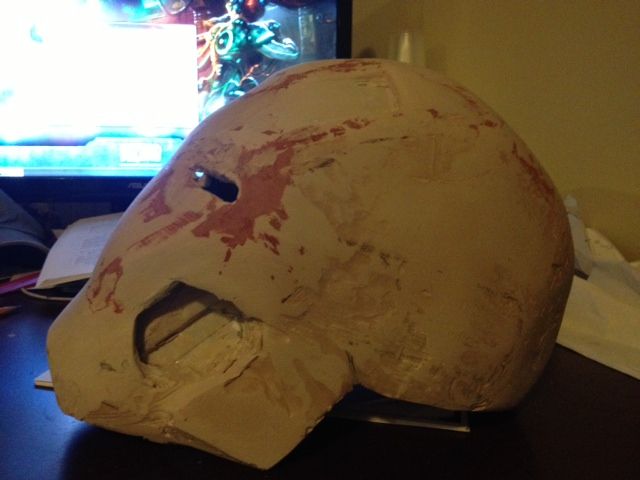
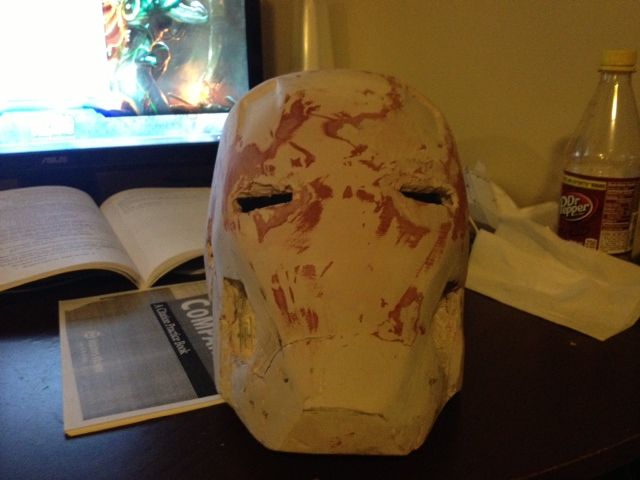
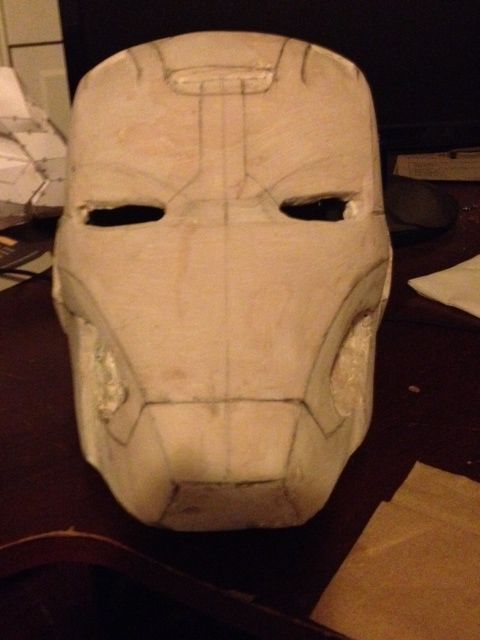
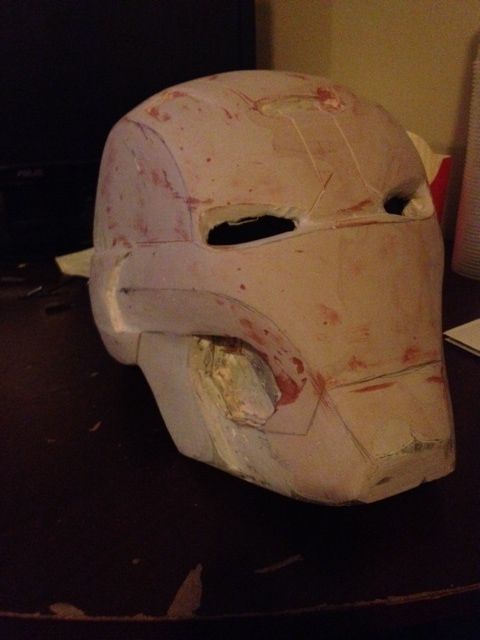
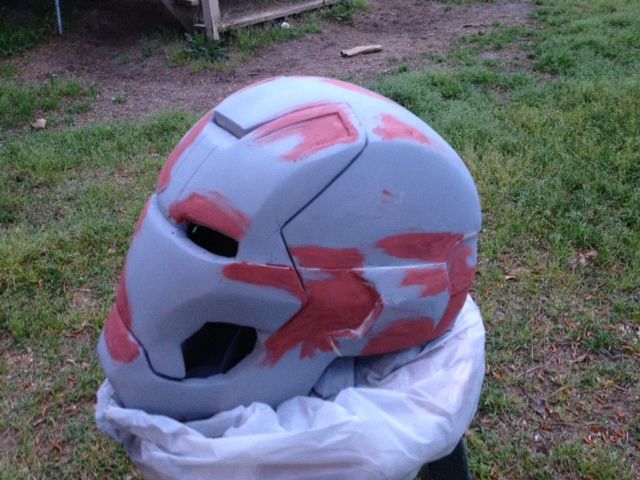
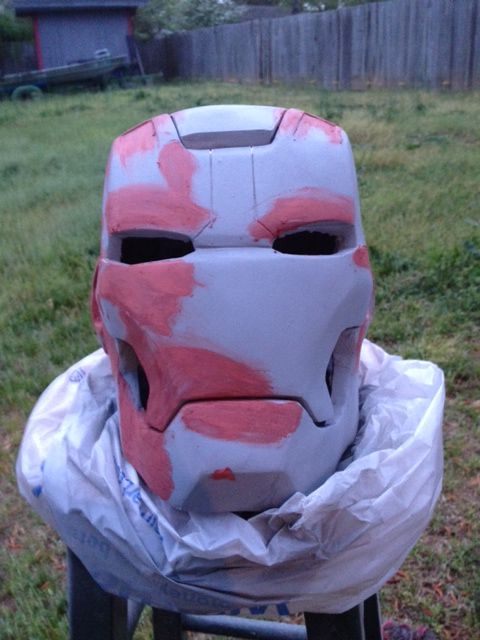
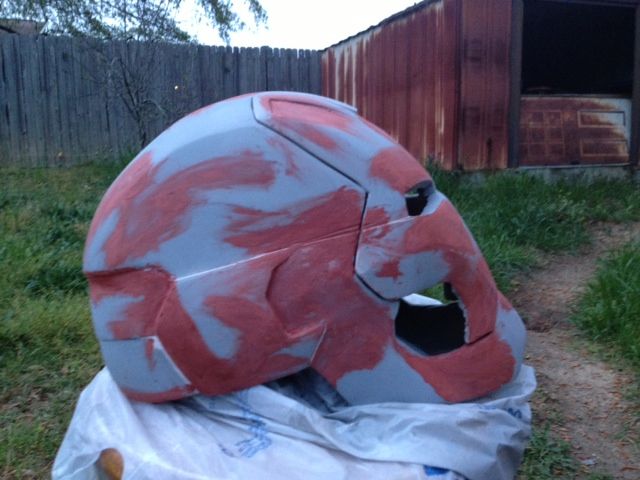
I did some work on the eyes, as well as having to fix the faceplate to make it flush. Did alot of detail work with a file, and finally threw some primer on it to find all the pinholes... which there were a lot of. Those were filled with spot putty (the red in the pic)
And...
And finally,
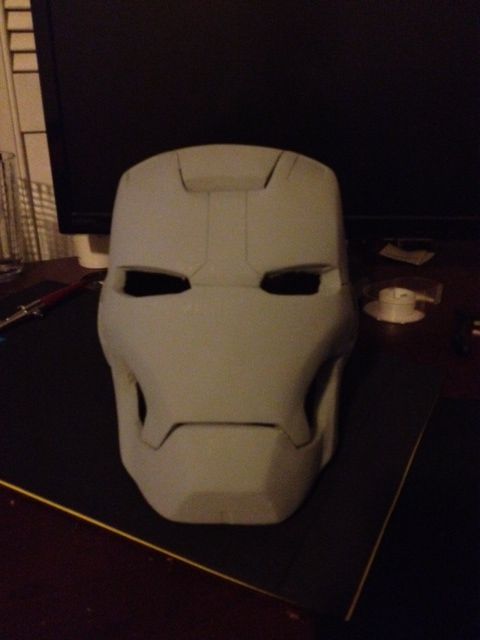
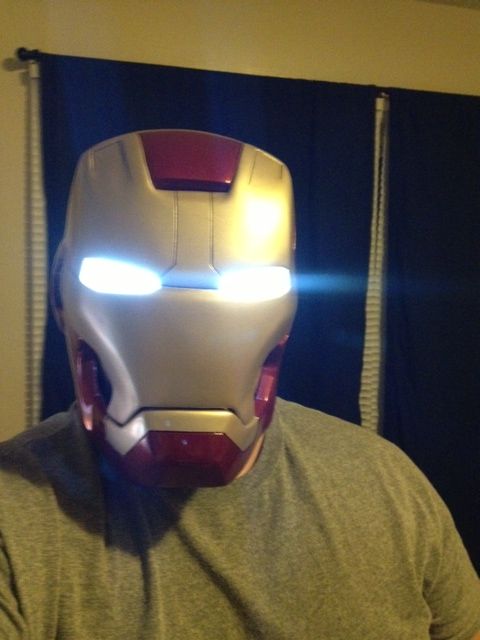
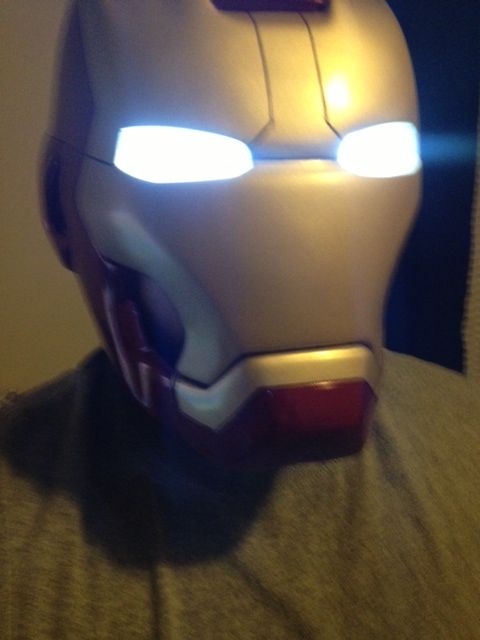
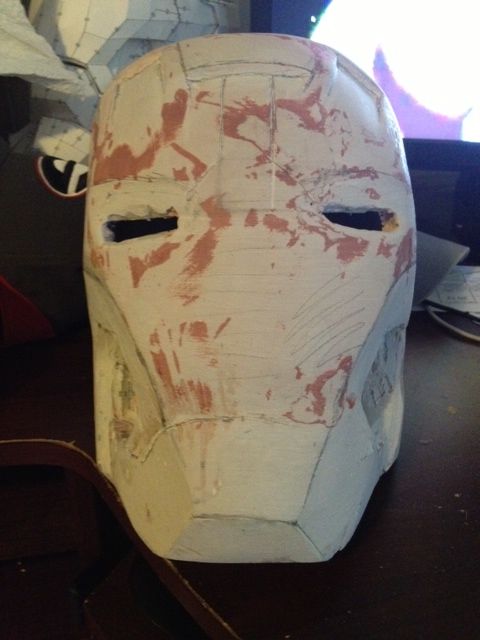
Finally, this is where I am currently at. I've resanded and re-applied a coat of primer, which is drying right now. Once I get everything smooth (oh god.... more sanding...) and get all the detail lines nice and straight, I'll be moving on to paint. This will also be my first airbrush experience (all previous projects done with spray can), because I finally decided to fork out a good chunk of change for a decent compressor and airbrush. Thinking of doing a side project first, to get used to the airbrush, then painting the helmet. Thanks for sticking through this far, I know it was a beast of a first post. All criticism is welcome and appreciated. This is my second project, but I do want it to be as good as possible. I will be updating frequently in the weeks to come, and hopefully have this bucket finished come premiere date.
Be warned.... It starts off rough :lol
This is where I started, and where I am at now, there are more pictures posted in a later post, just updating the main thread to show where I stand as of now. Updated the progress pic!
This is the pep file used, nothing special to see here.
I applied the Bondo on THICK, and plentiful. I had a gallon on Bondo to work with, but that is very low as of now. I didn't take a picture of the previous step, which was using a plastic resin (EpoxAmite 101 Fast) on the pep, then reinforcing with fiberglass cloth and some more EpoxAmite on the inside. One thing I will definitely do different in the future, was I resined the facemask and the helmet SEPERATE, which was a pain. In the bondo step, I taped the facemask back to the helmet, which did not fit flush.
As you can see, the facemask did not sit flush to the helmet, and required adding a heap of Bondo onto the left side of the helmet, in order to make it appear flush. Also, I lost an earpod in the process.
After sanding for the first time, I realized I had my work cut out for me... I drew the lines back on with pencil. The facemask was shifted to left by a good 1/2in-3/4in. I decided to build up the bottom left jaw to make it look more proportionate.
Next step, to make the facemask flush, I covered the earpeace and built up the jaw.
More sanding to try and get the shape back to par. Then, another mistake noticed. Had to build the right cheek up to match the left cheek... back to the bondo...
And more bondo....
More and more sanding.... it never stops....
Now, I did alot of work over a couple weeks, but did not take too many pictures. You are not missing much, just lots of sanding, adding bondo, sanding bondo off, then adding bondo, rinse and repeat 100x. After repeated sanding I came out with this.
I got the face looking semi-decent and so turned my attention to the back and top of the helmet, making it round and proportionate. I had to add a good inch to the left side of the back to make it even.
Notice the difference in size haha
Next, I worked on the back of the helmet, while working on the details of the face as well. Again, I went some time in between pics.
And finally seperating the facemask. I have a very bad, battery operated dremel tool. I could cut maybe 3-4 inches at a time, because the helmet was so thick (and getting pretty heavy as well). This resulted in thick, bad cuts, which all had to be painstakingly filled with bondo to make the facemask flush (enough). Also, you can see the difference in thickness on the inside of the helmet. Opened,
And closed
And side view
I did some work on the eyes, as well as having to fix the faceplate to make it flush. Did alot of detail work with a file, and finally threw some primer on it to find all the pinholes... which there were a lot of. Those were filled with spot putty (the red in the pic)
And...
And finally,
Finally, this is where I am currently at. I've resanded and re-applied a coat of primer, which is drying right now. Once I get everything smooth (oh god.... more sanding...) and get all the detail lines nice and straight, I'll be moving on to paint. This will also be my first airbrush experience (all previous projects done with spray can), because I finally decided to fork out a good chunk of change for a decent compressor and airbrush. Thinking of doing a side project first, to get used to the airbrush, then painting the helmet. Thanks for sticking through this far, I know it was a beast of a first post. All criticism is welcome and appreciated. This is my second project, but I do want it to be as good as possible. I will be updating frequently in the weeks to come, and hopefully have this bucket finished come premiere date.
Attachments

Last edited: