League of Legends: Azir's Staff

Redshirt98

New Member
My son asked me to teach him the basics of propmaking by building a League of Legends prop with him. He wanted to build a Staff of Azir to represent one of his favorite champions. There were not many attempts at building a really solid representation of this prop, so we set out to build it from scratch as the best example possible.

I think his vision featured a quick solid prop quickly finished to a quality standard.

My vision had molded fiberglass and electronic lights and animation and certain to be more costly in time and money.

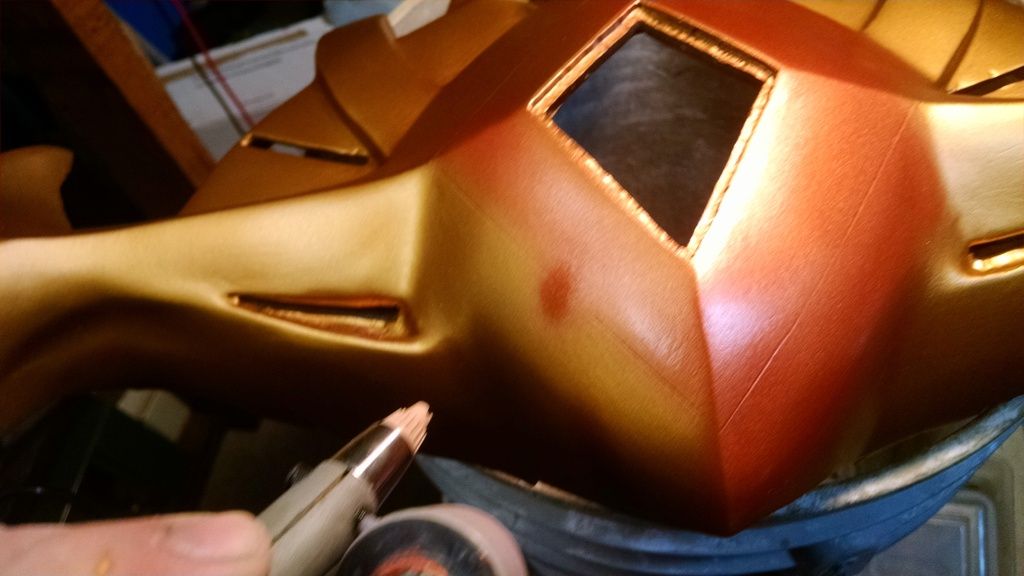
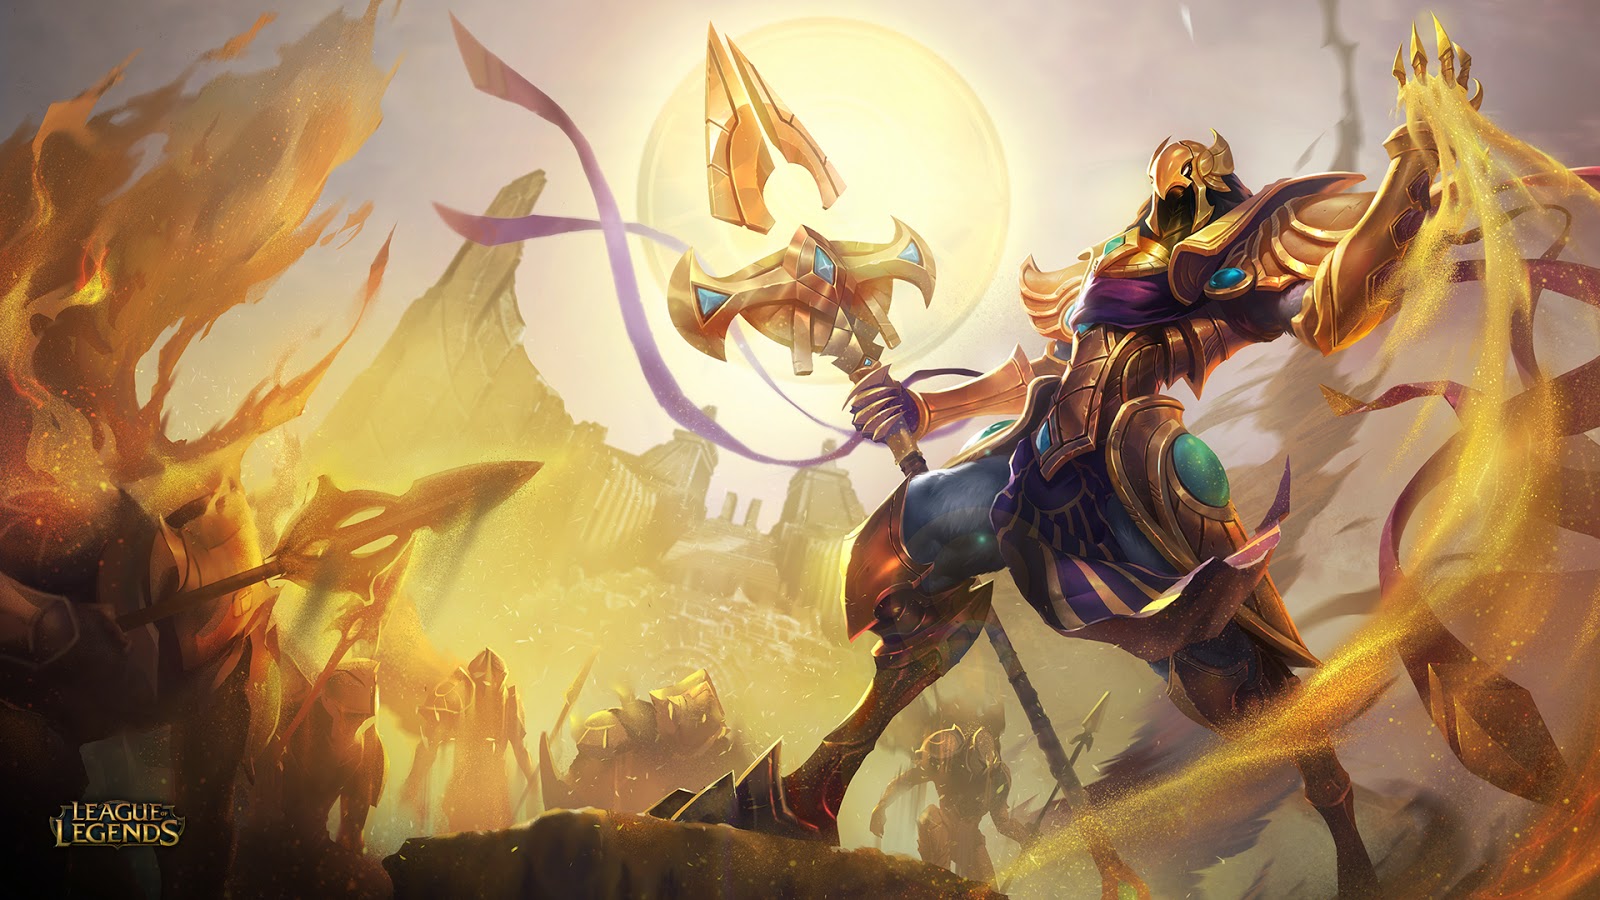
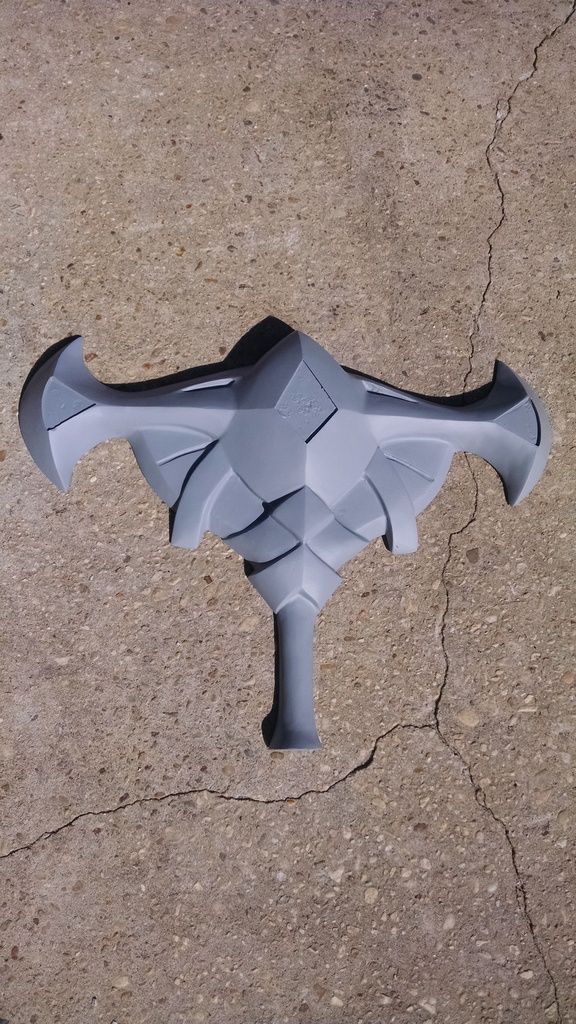
We started with a plan to sculpt solid blanks to make fiberglass molds from. The biggest challenge of this prop's design is the wide disparity of references. The staff looks different during gameplay than depicted in the official art work. In the end, we primarily used the official artwork and incorporated some modifications to include features from the game model.


Here's the official artwork.

ar-wallpaper.jpg


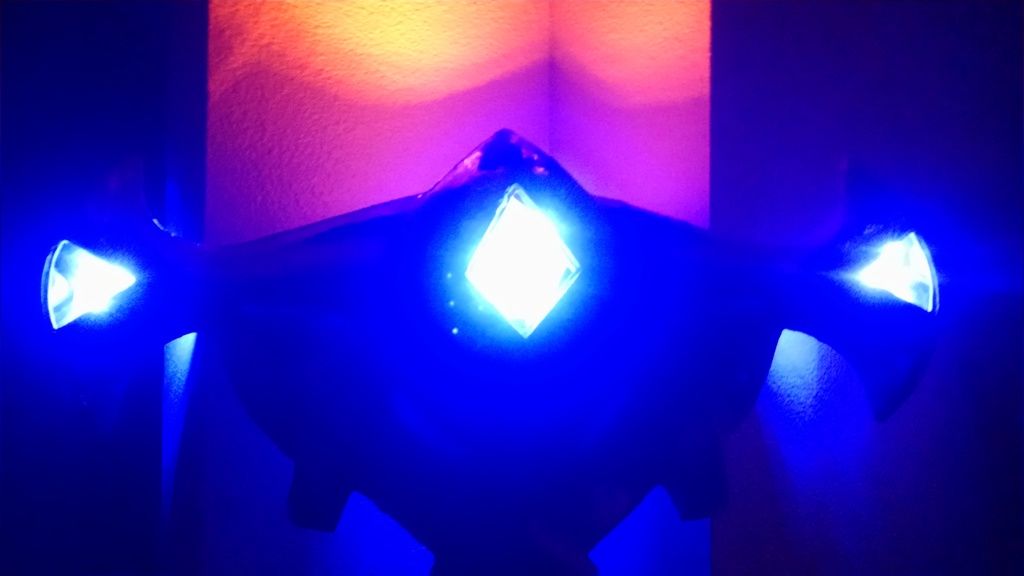
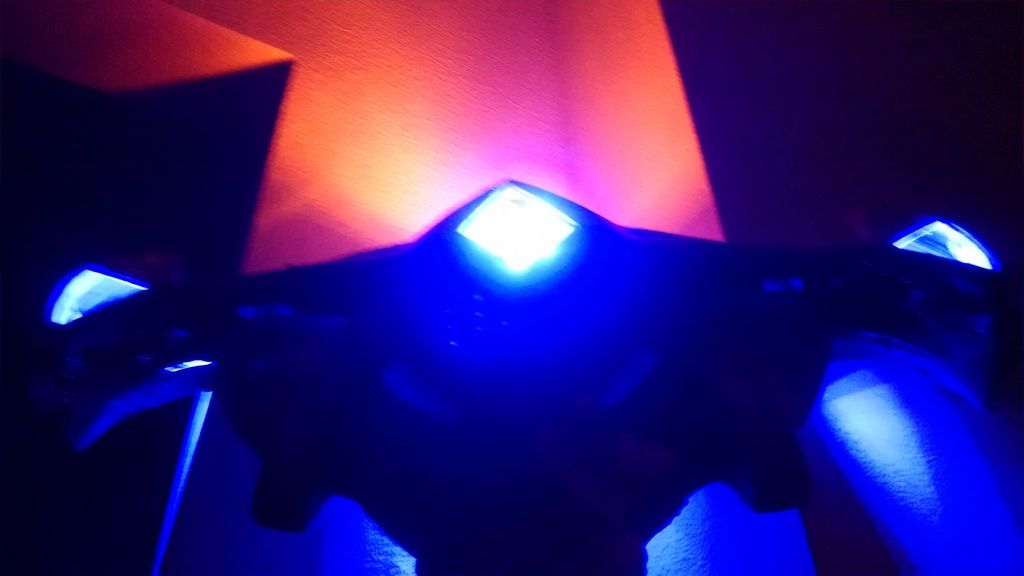
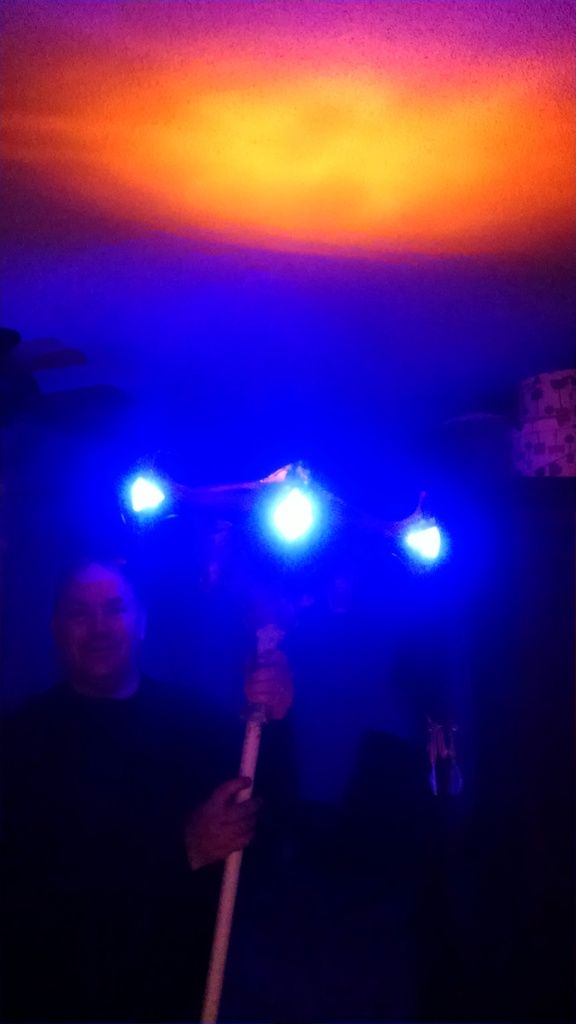
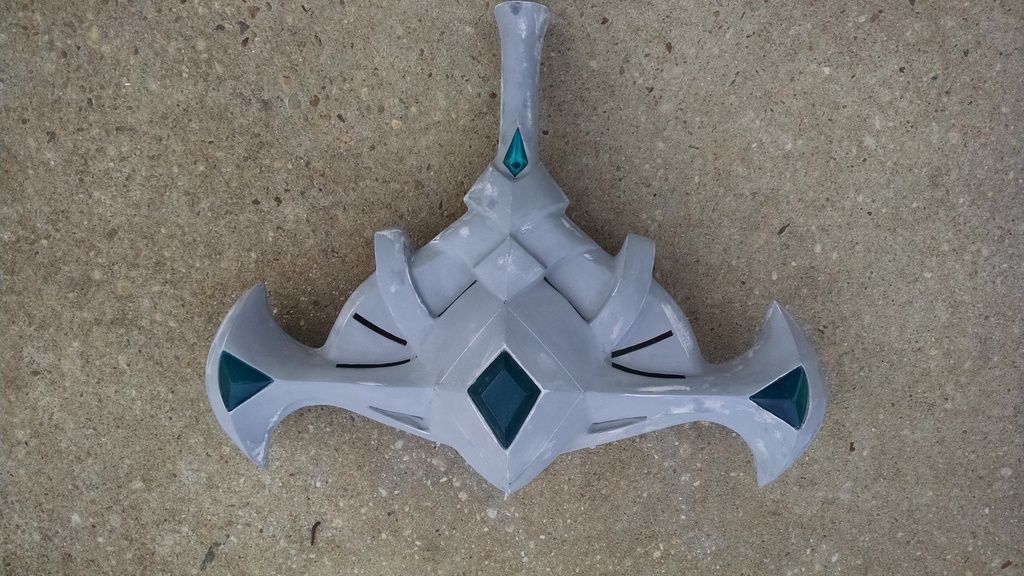
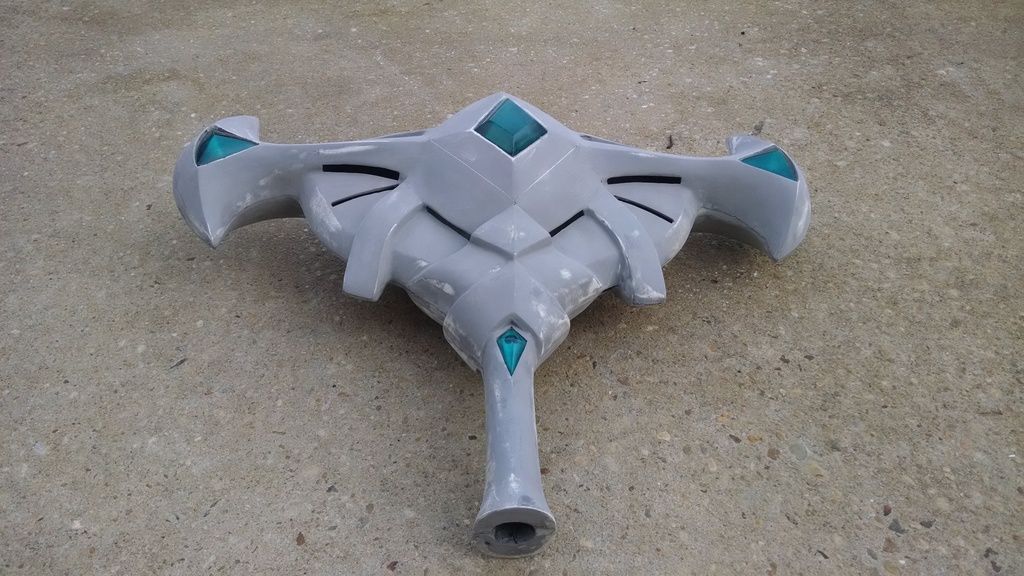
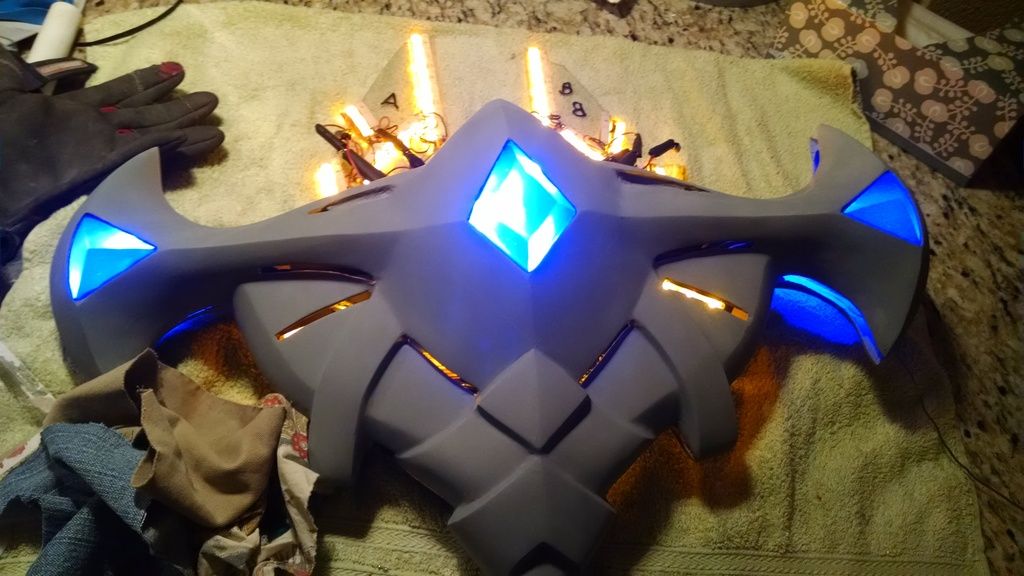
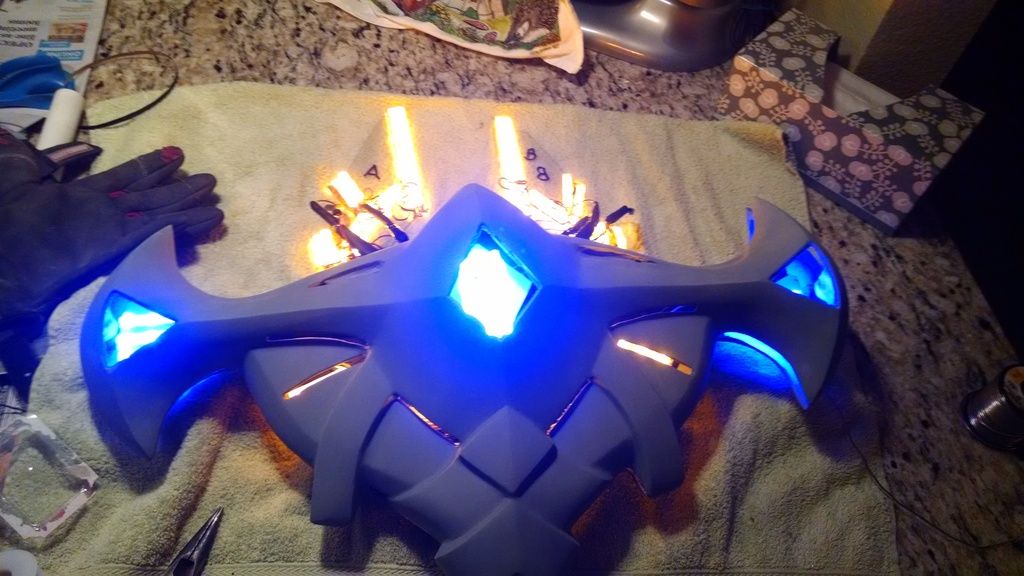
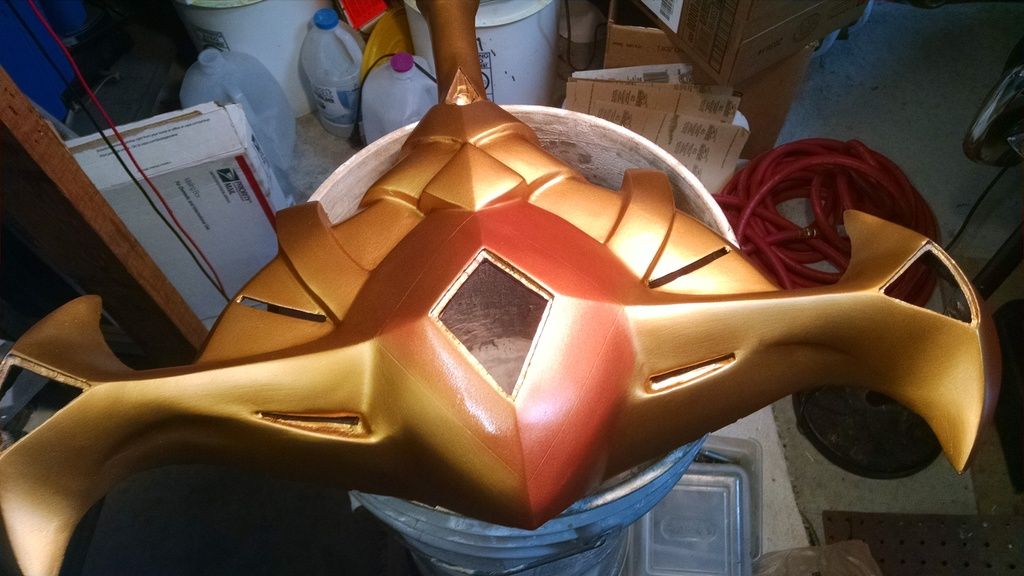
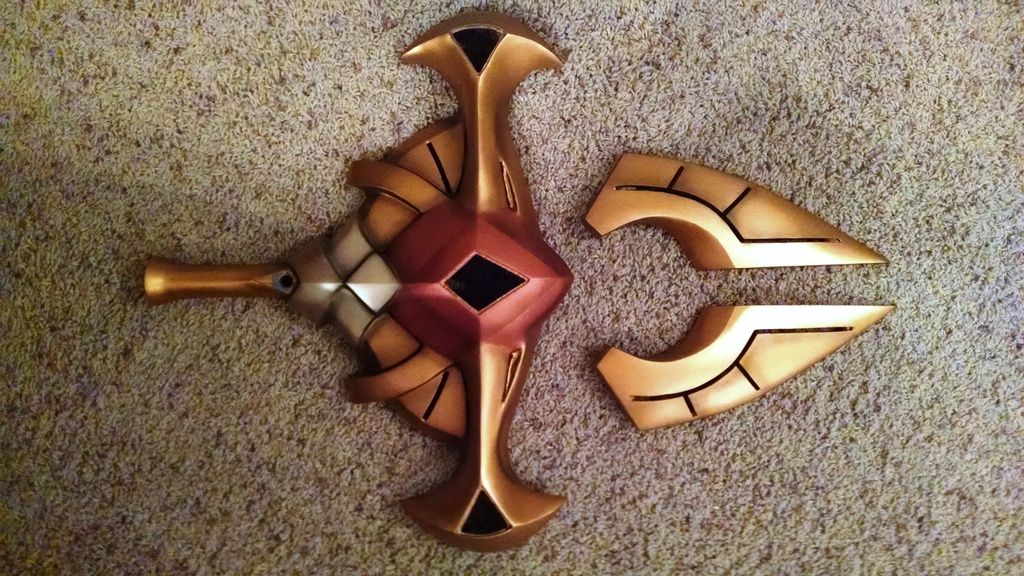
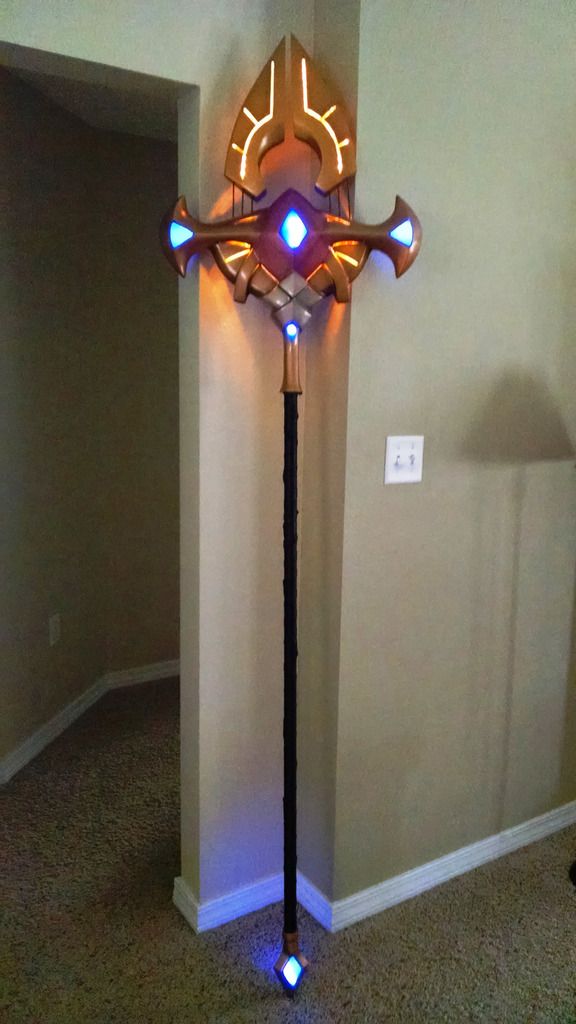
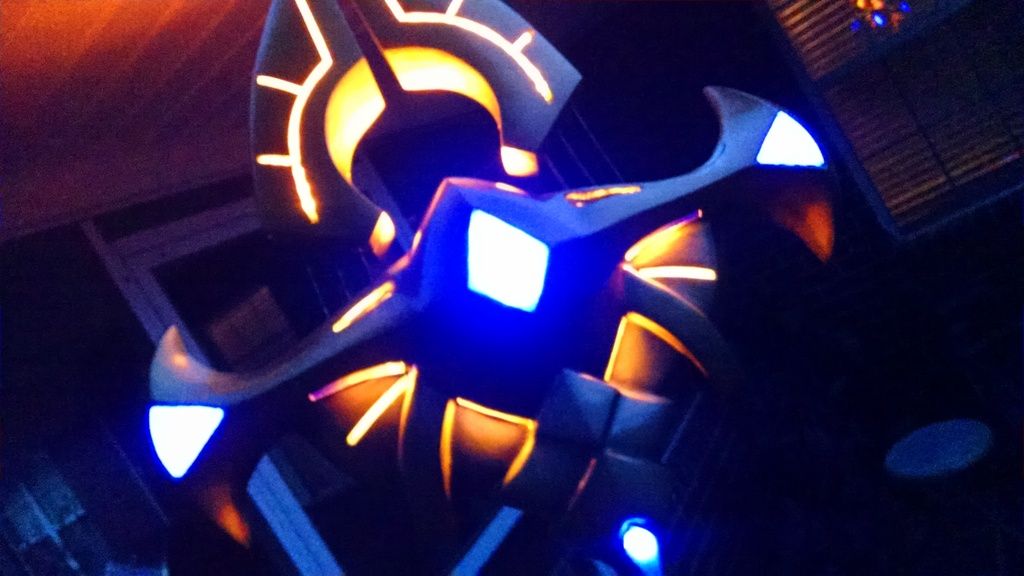
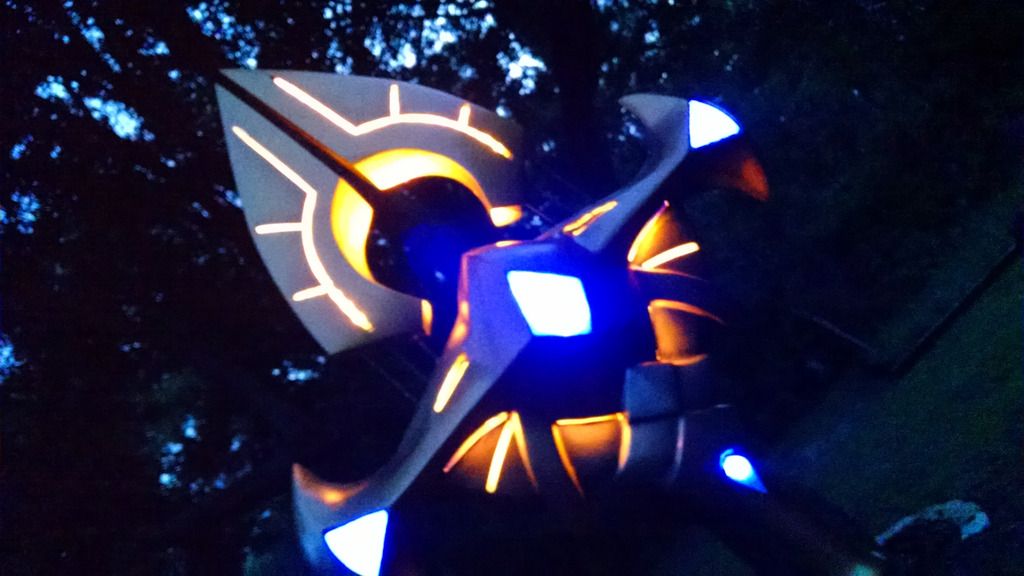
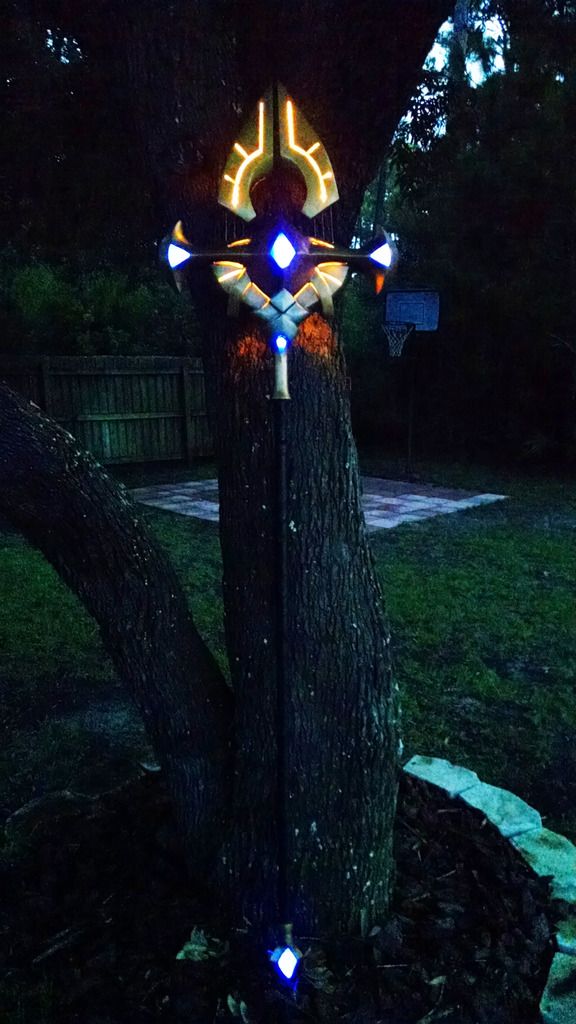
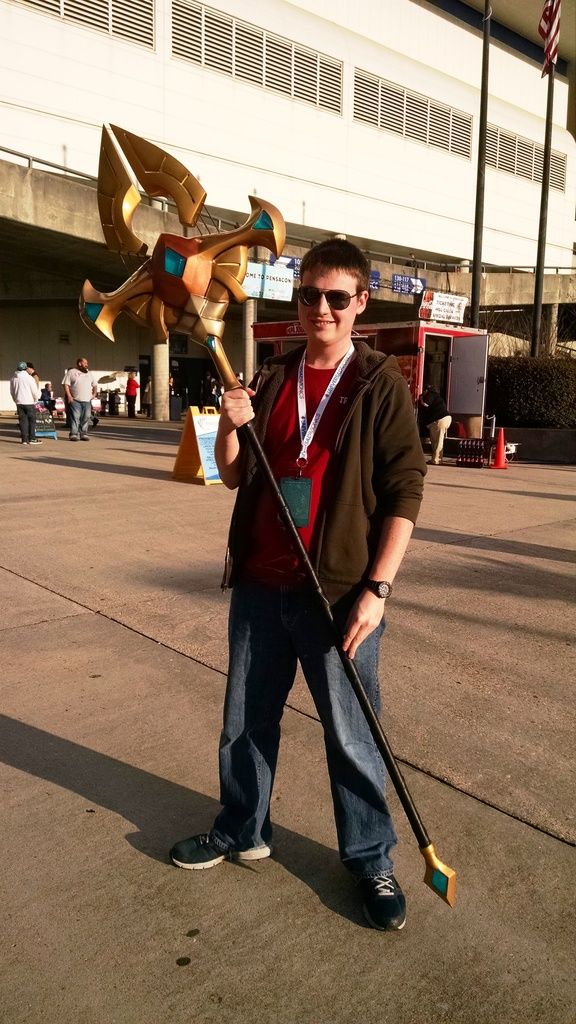
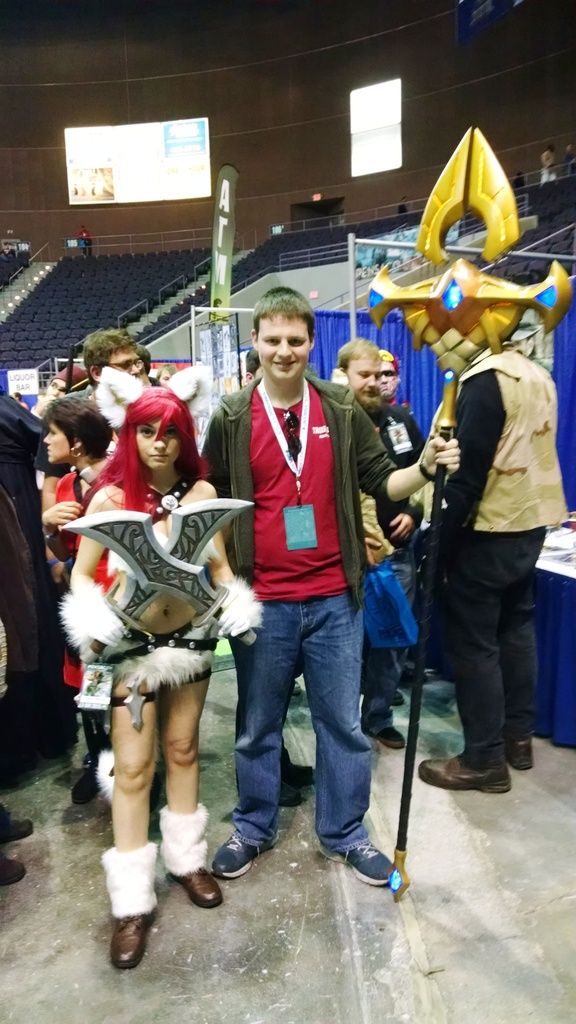
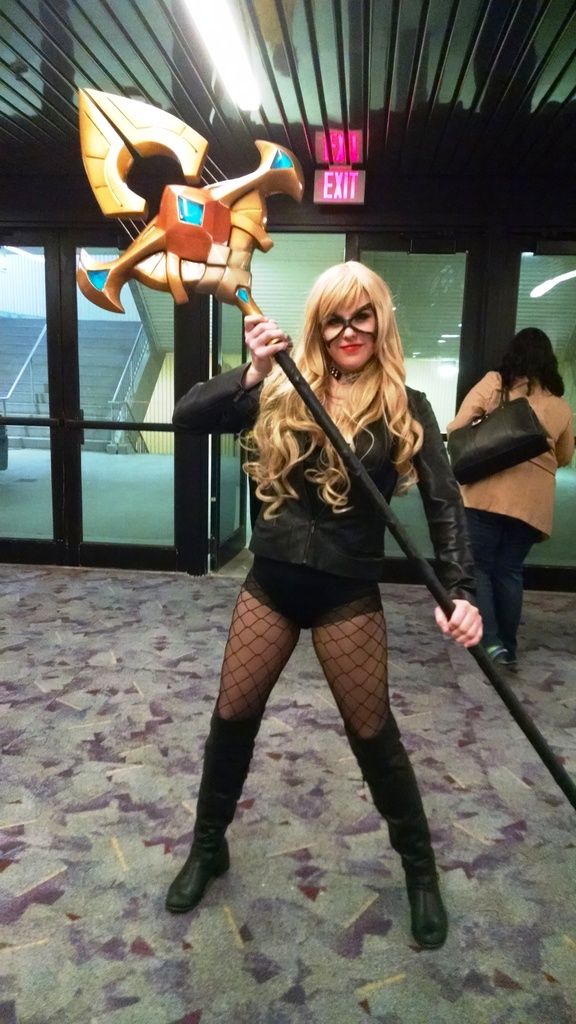
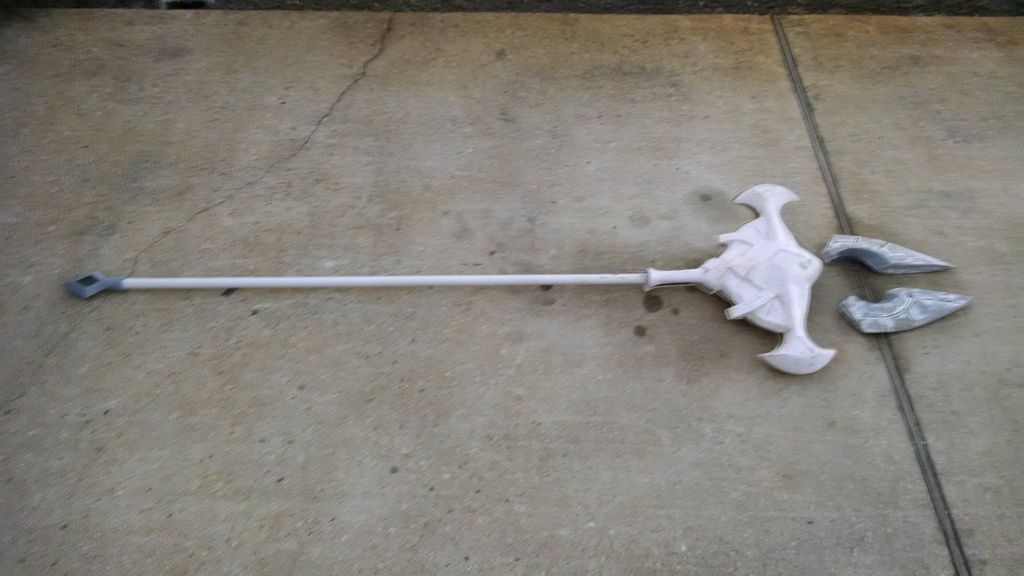
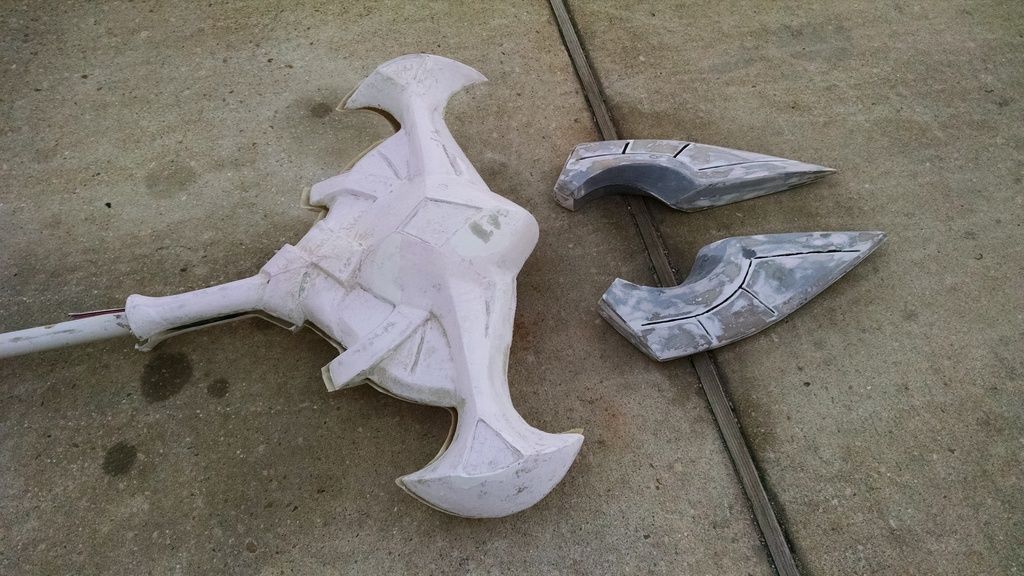
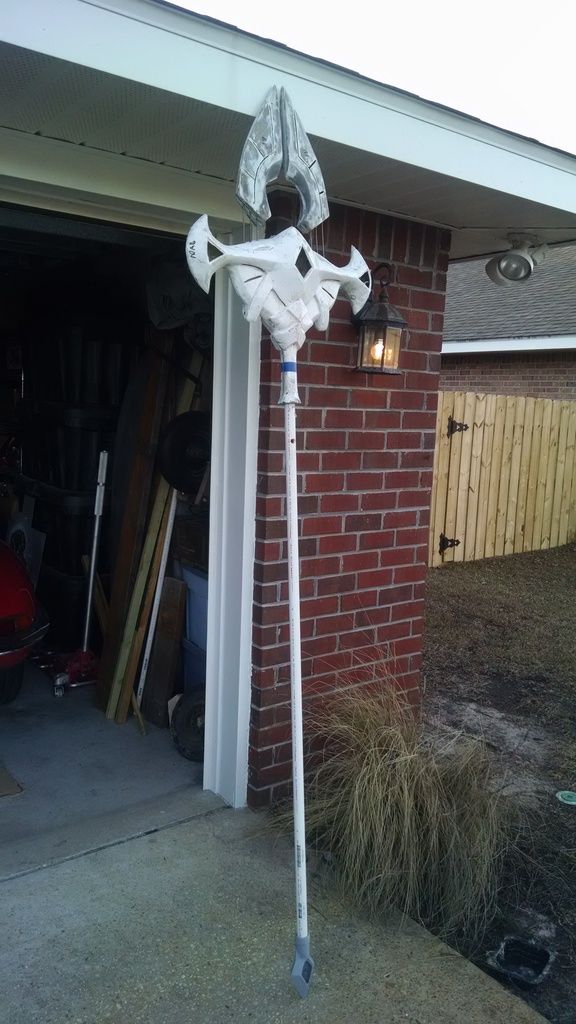
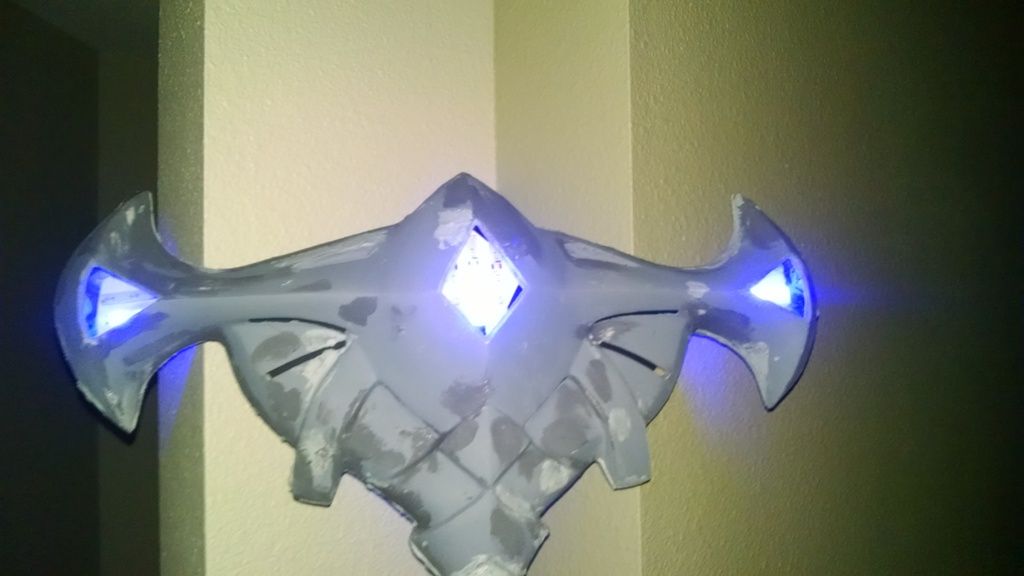
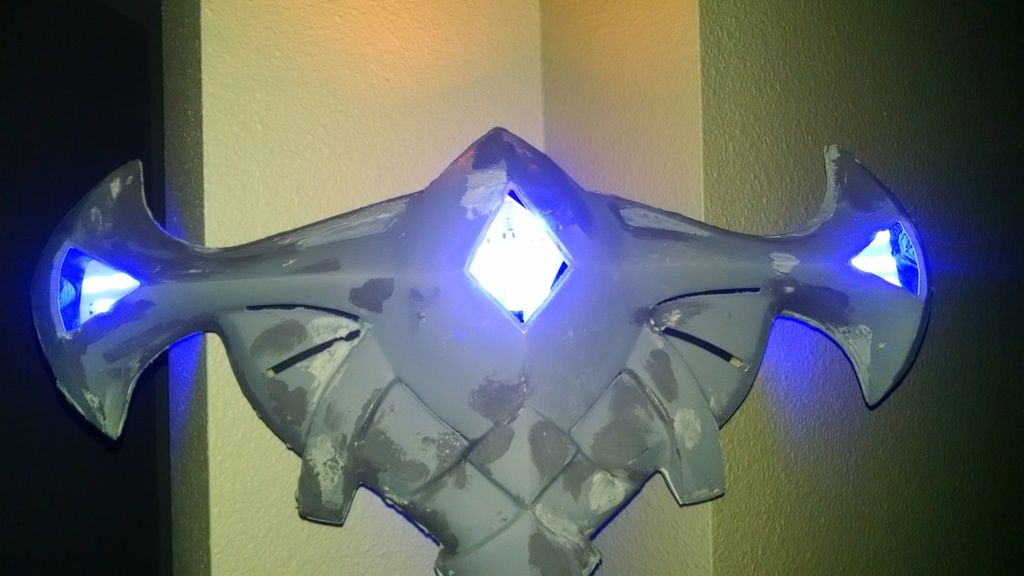
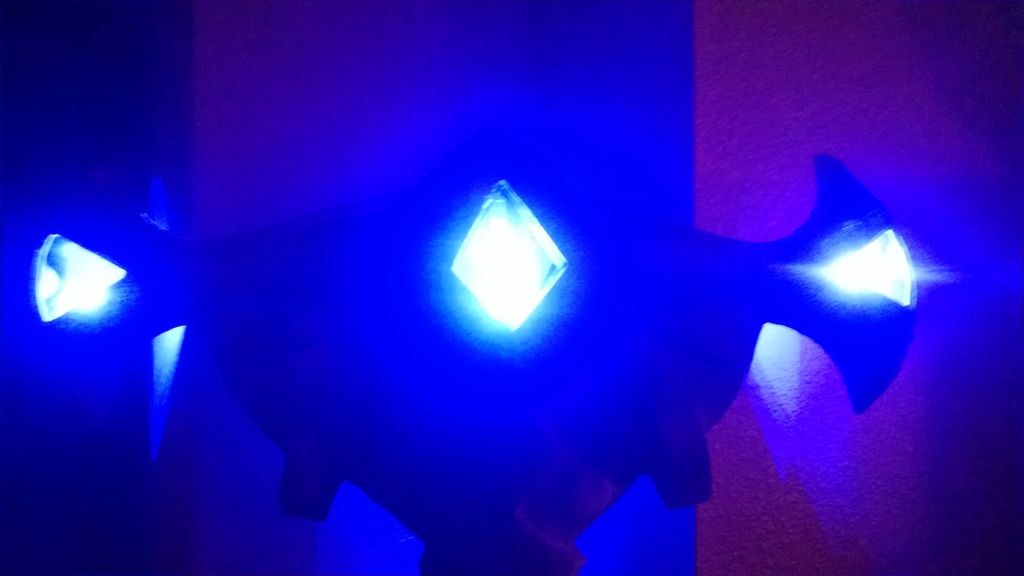
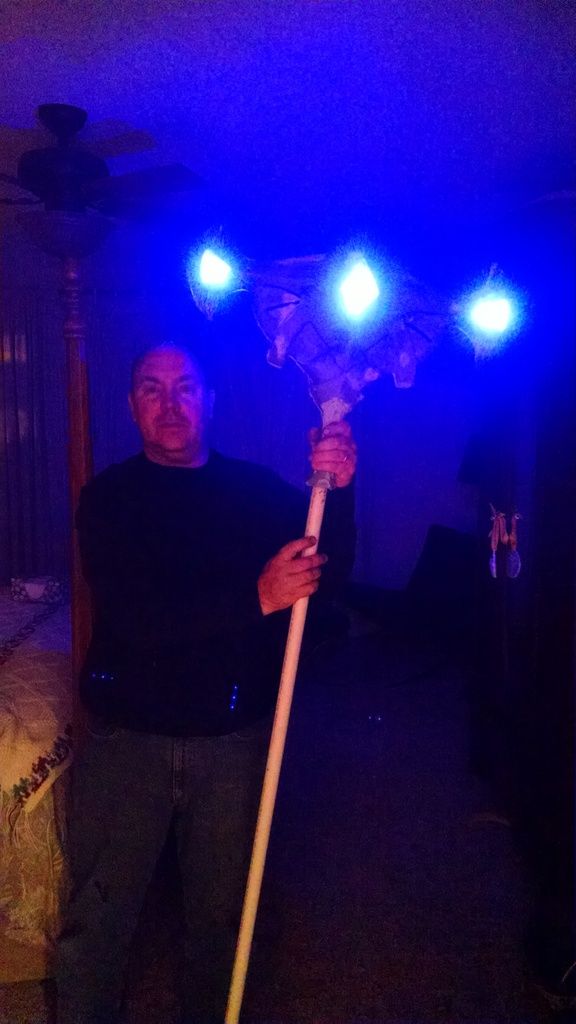
Here is the finished result!

IMG_20150816_150259622.jpg


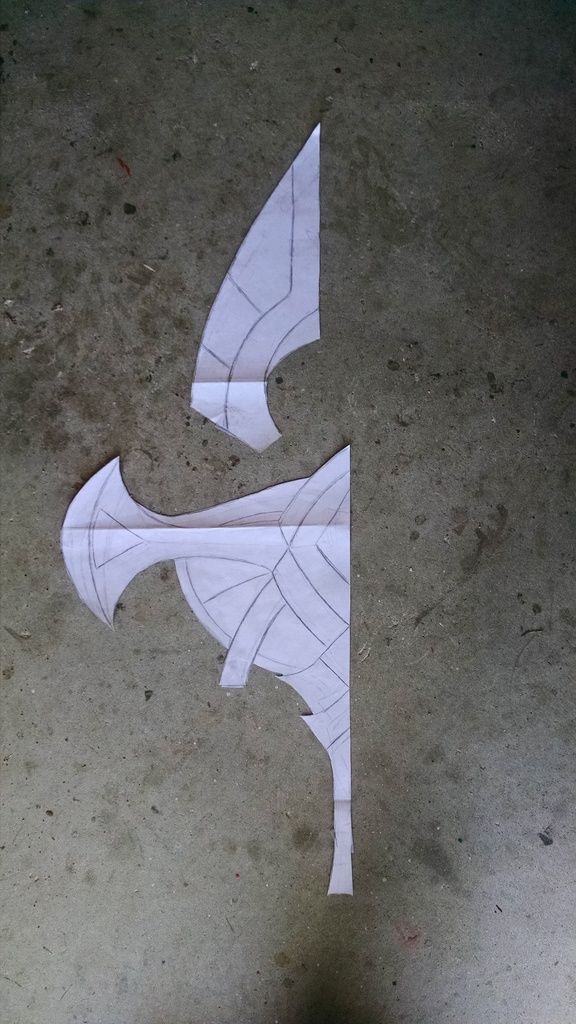
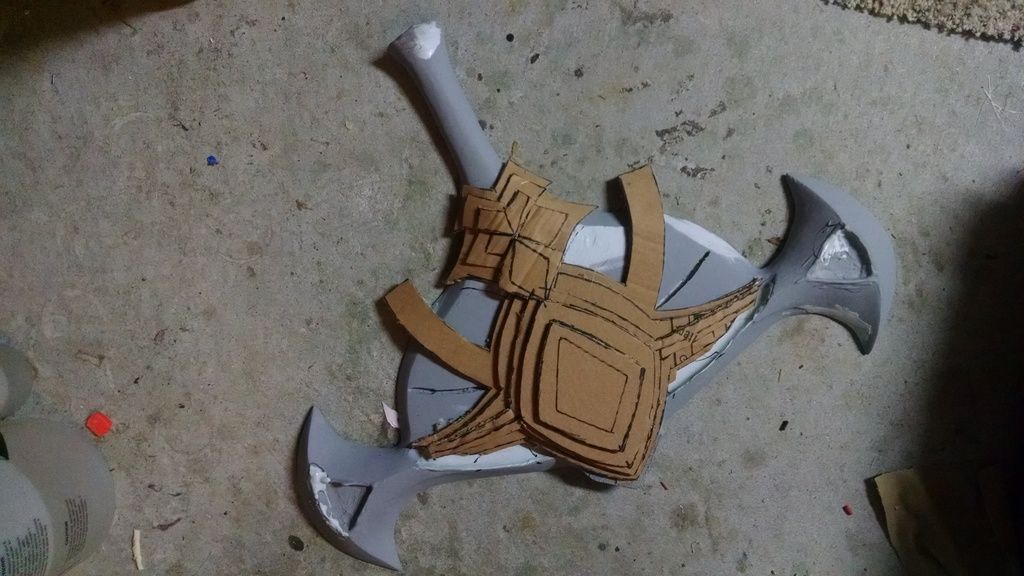
Once we had decided on the features, he made a full-size sketch to serve as the master pattern.

Azir%20Staff%20LOL%20Prop%203.jpg


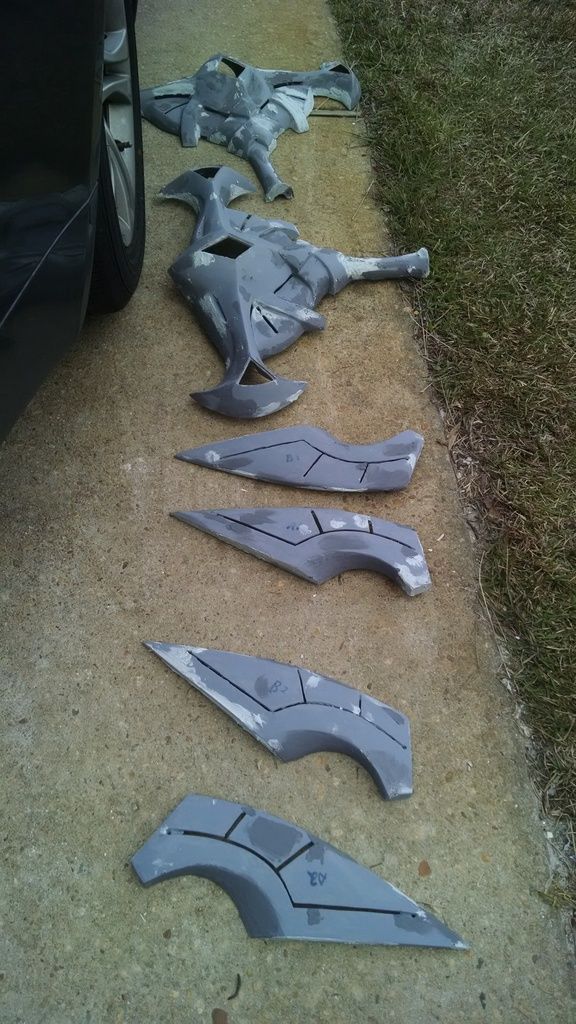
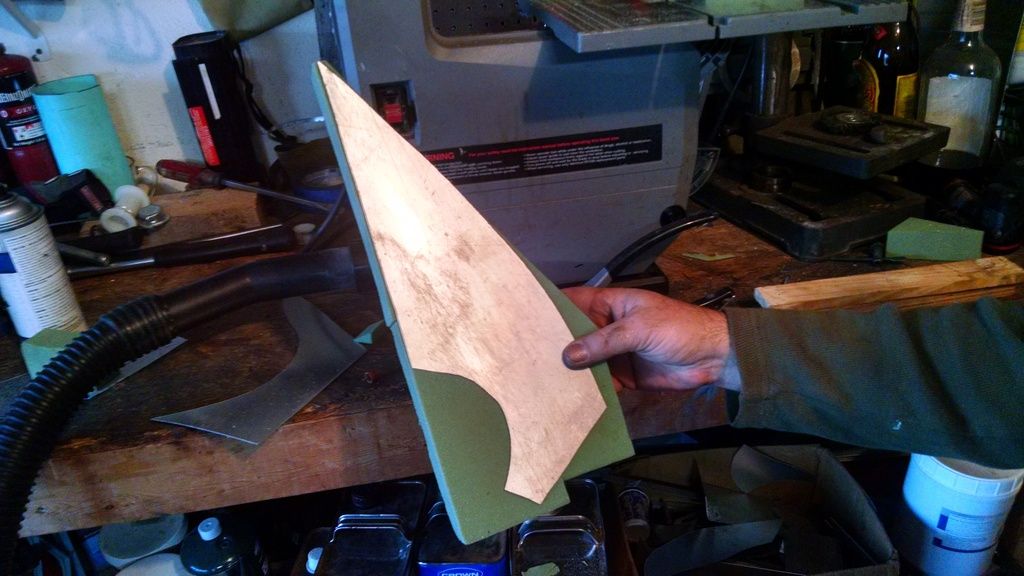
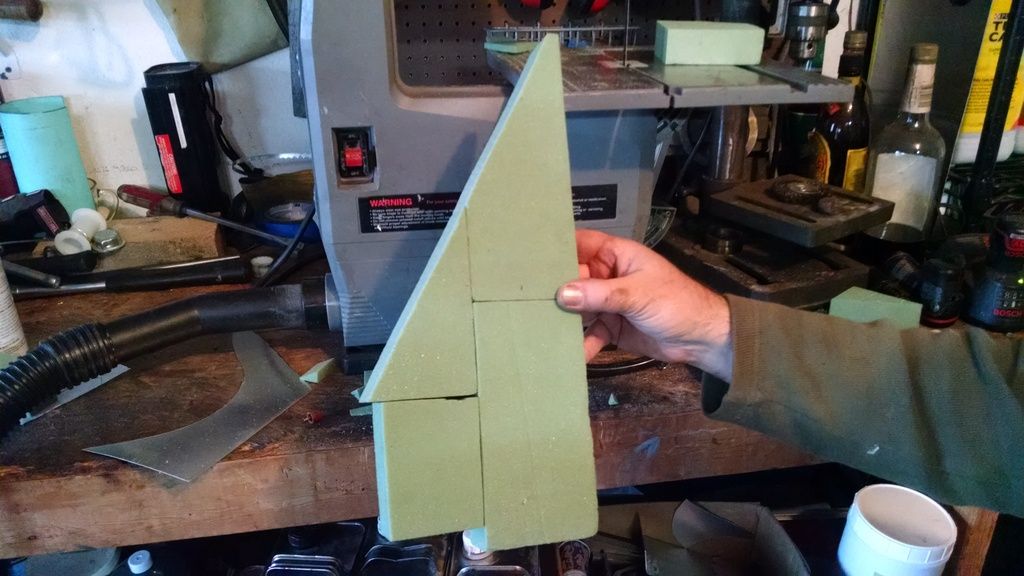
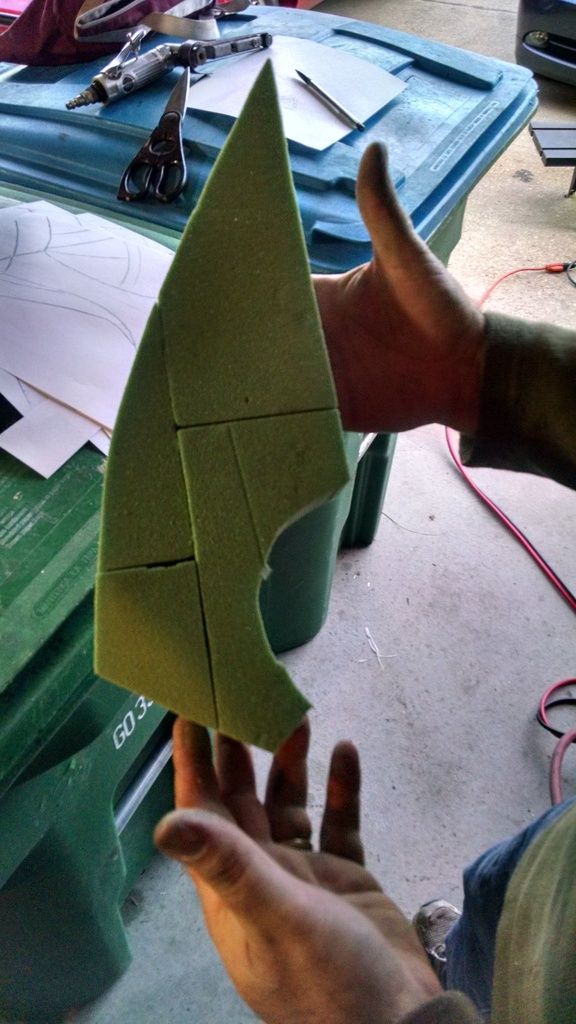
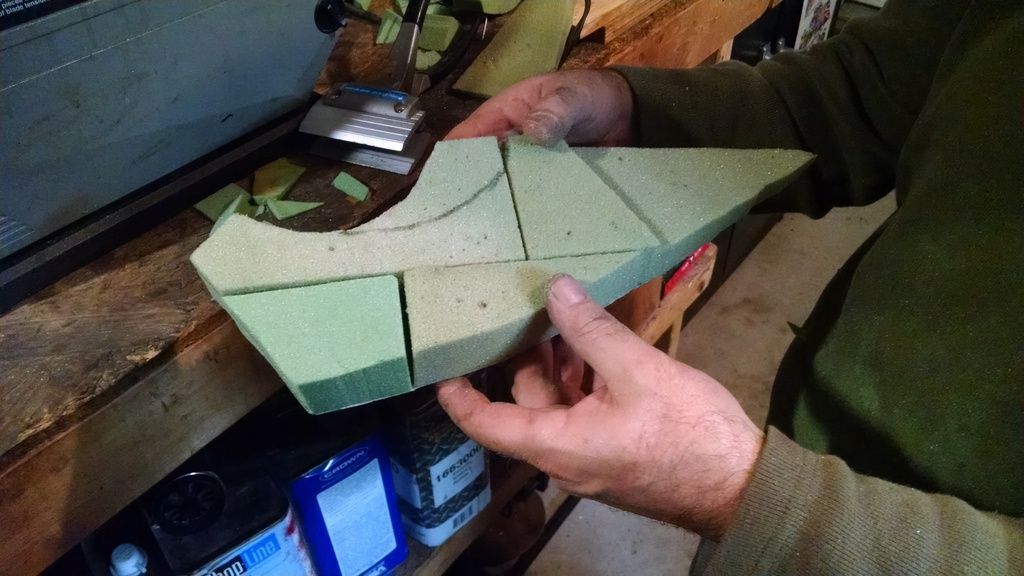
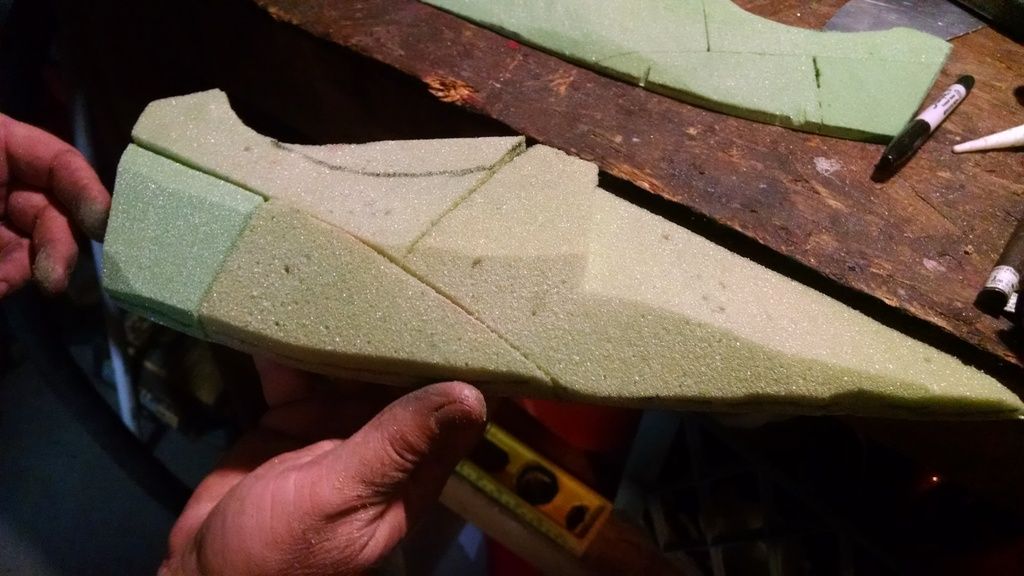
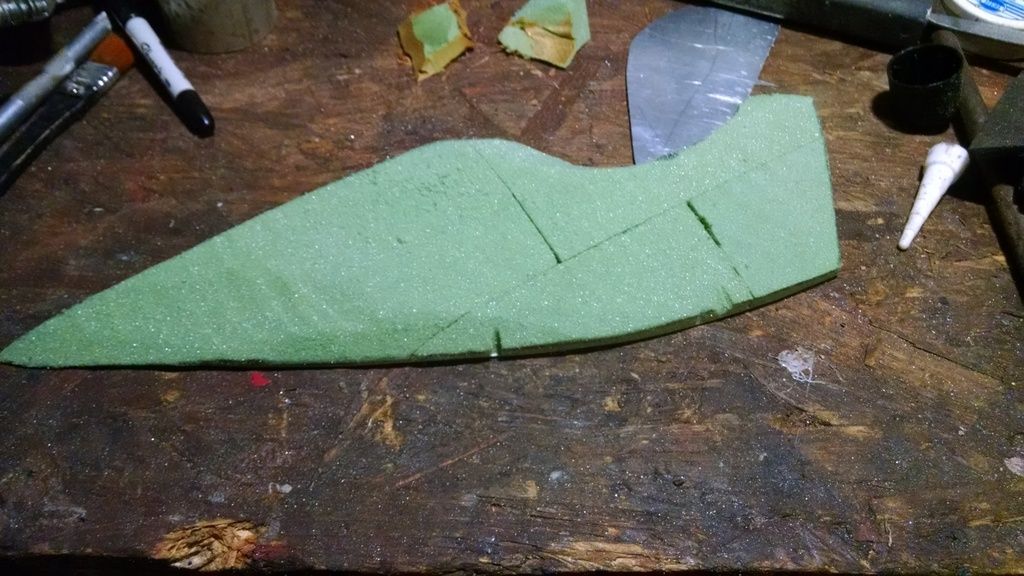
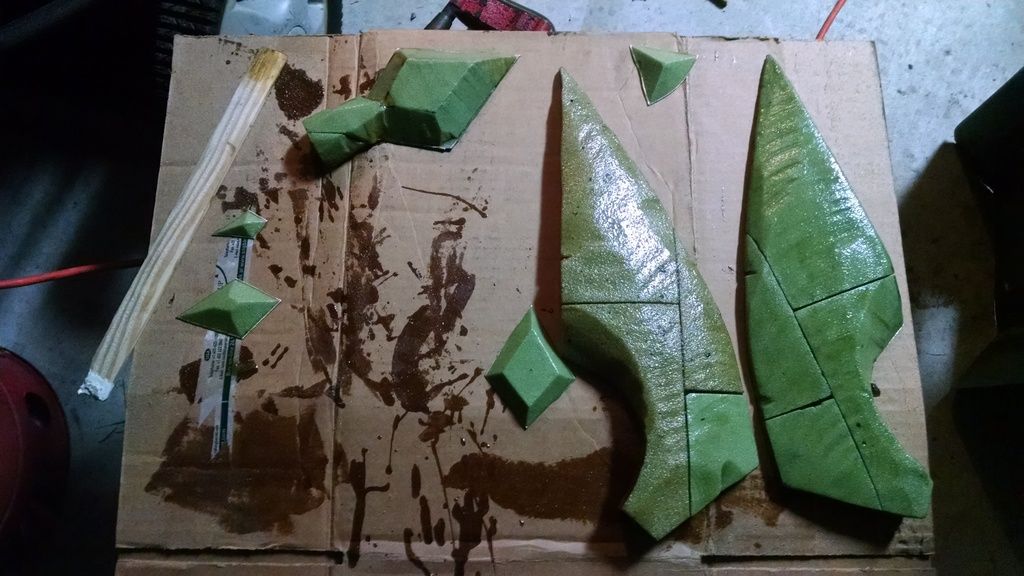
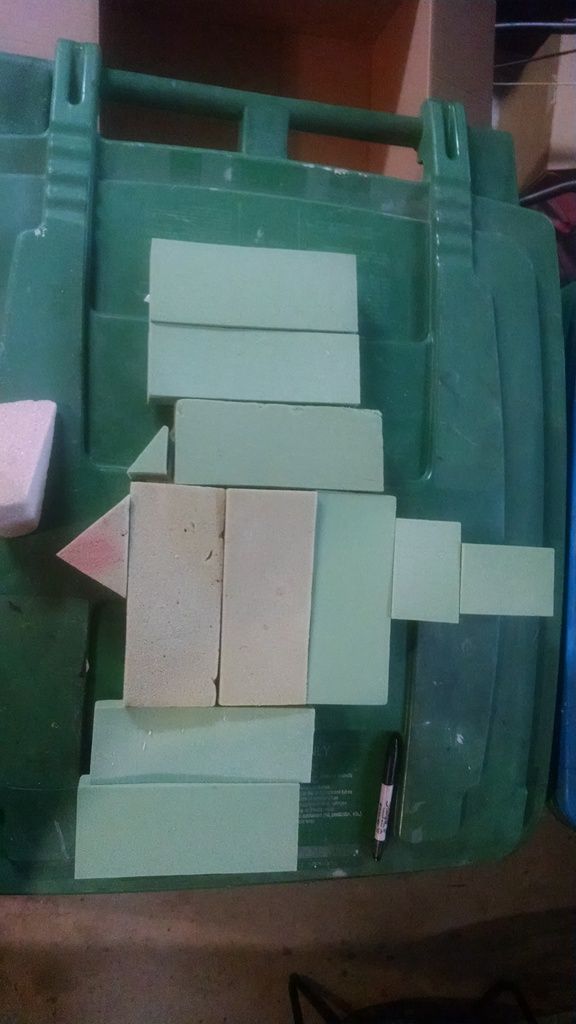
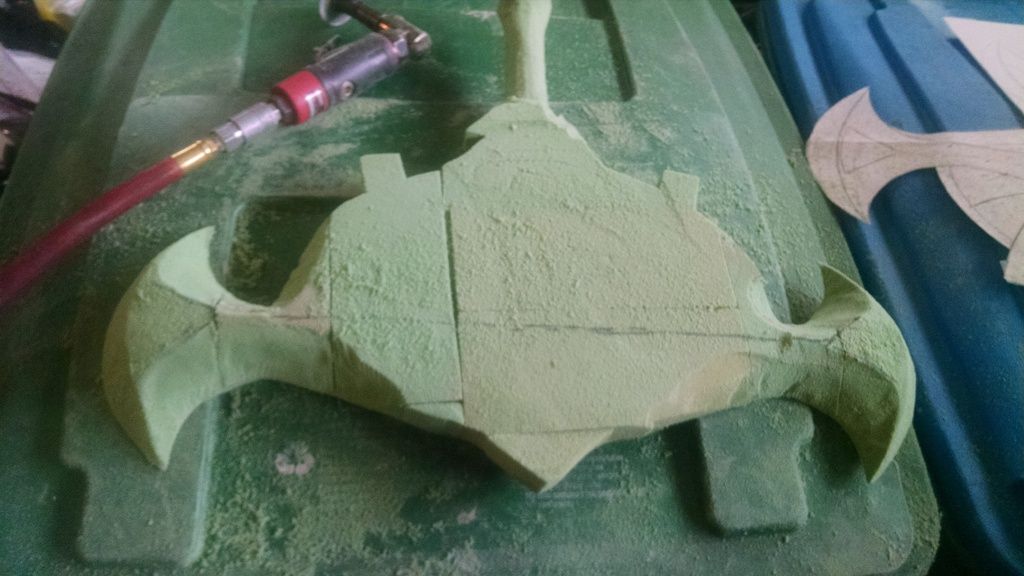
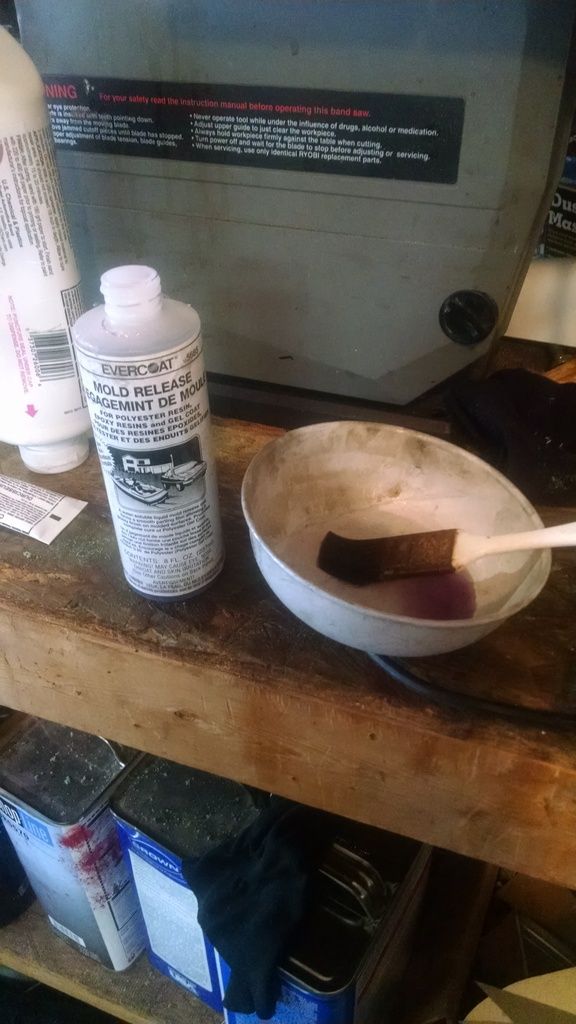
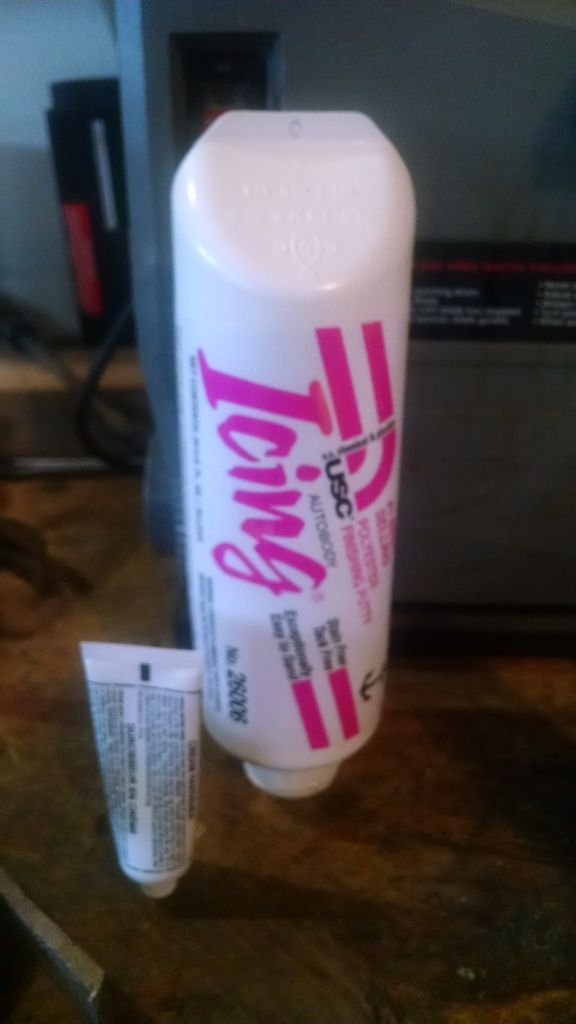
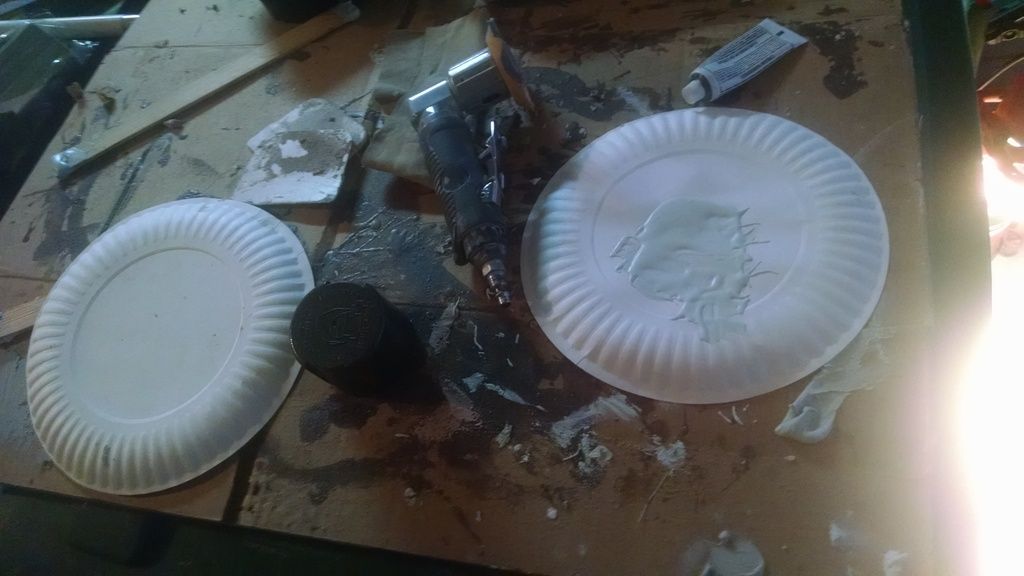
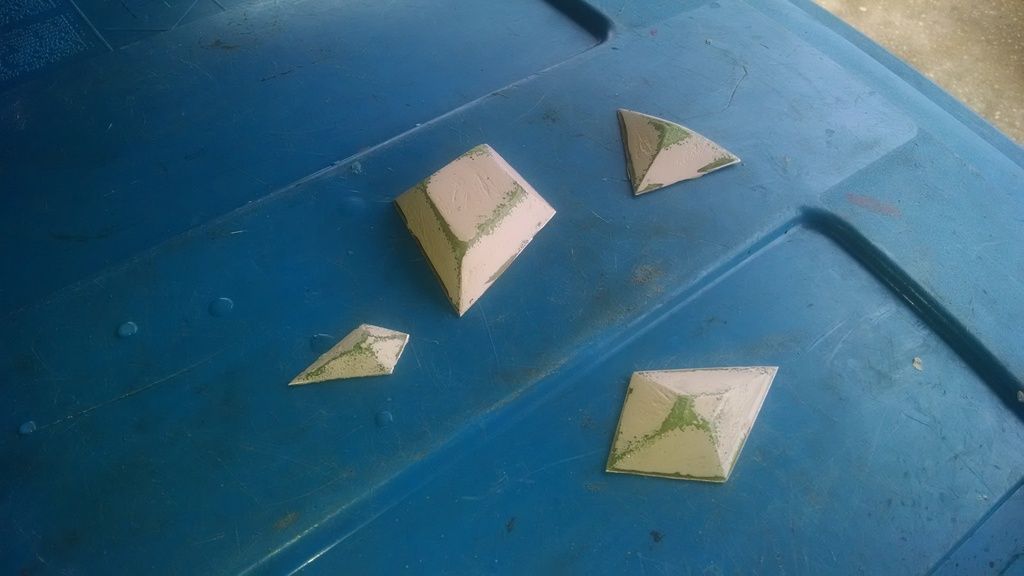
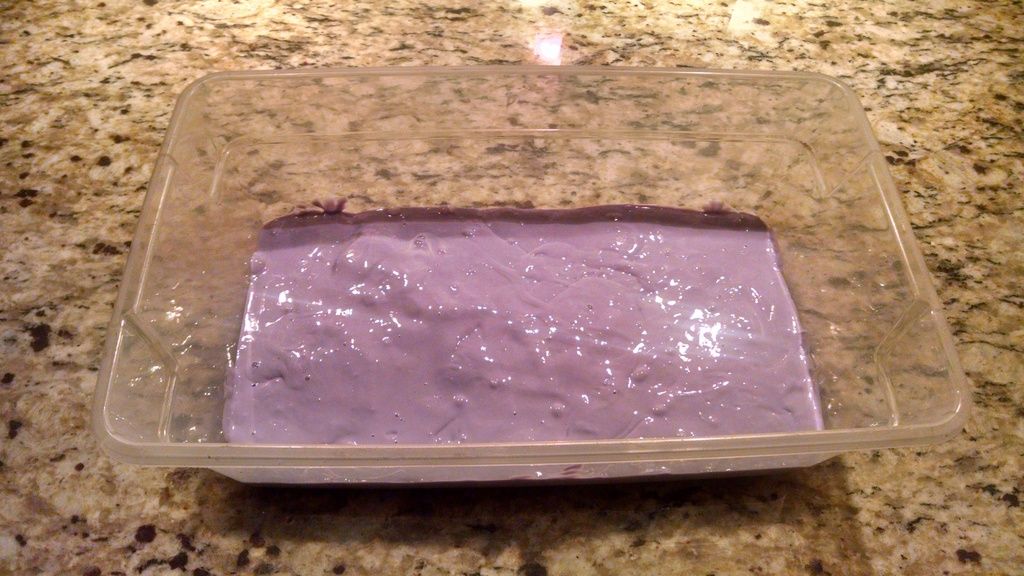
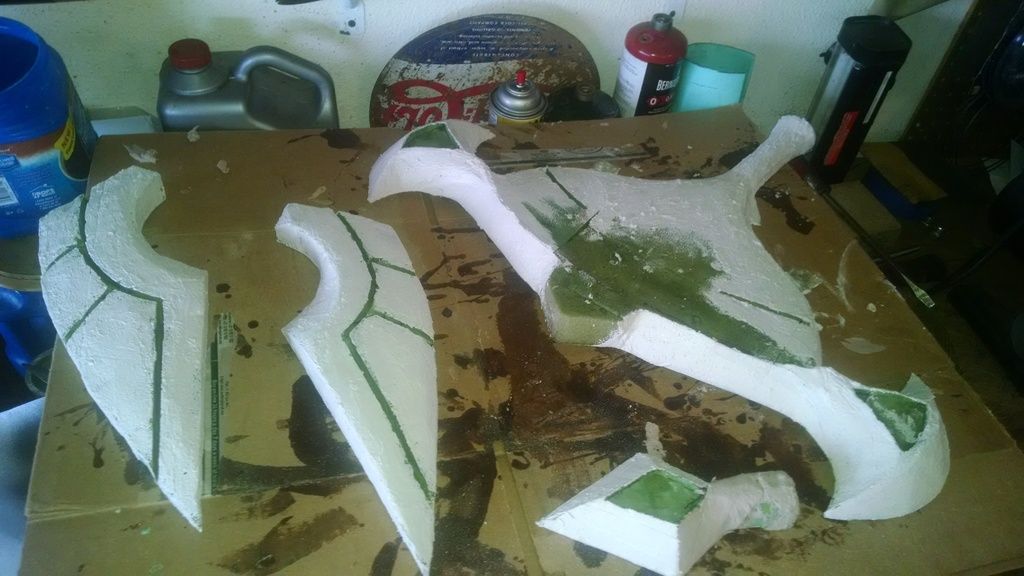
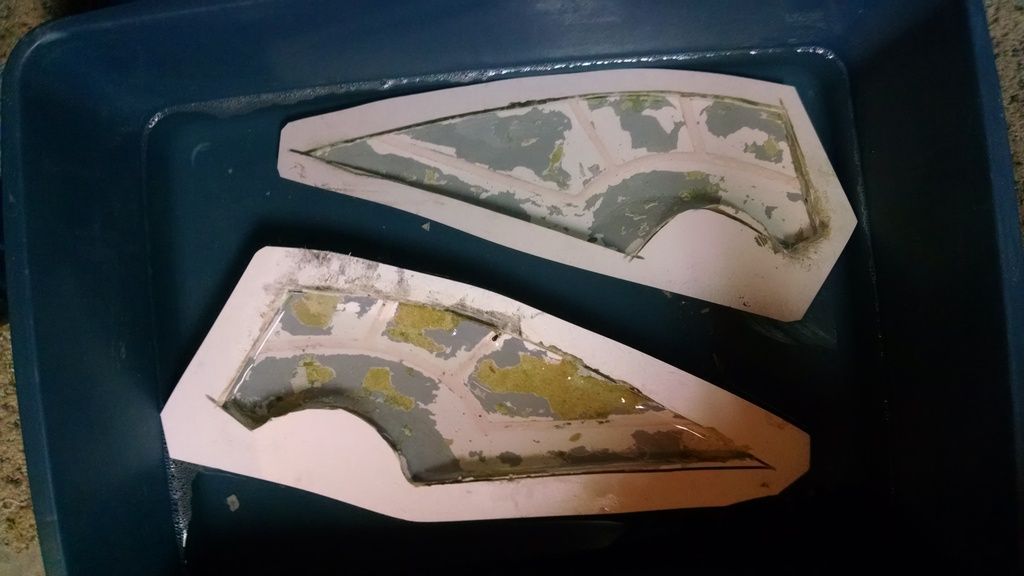
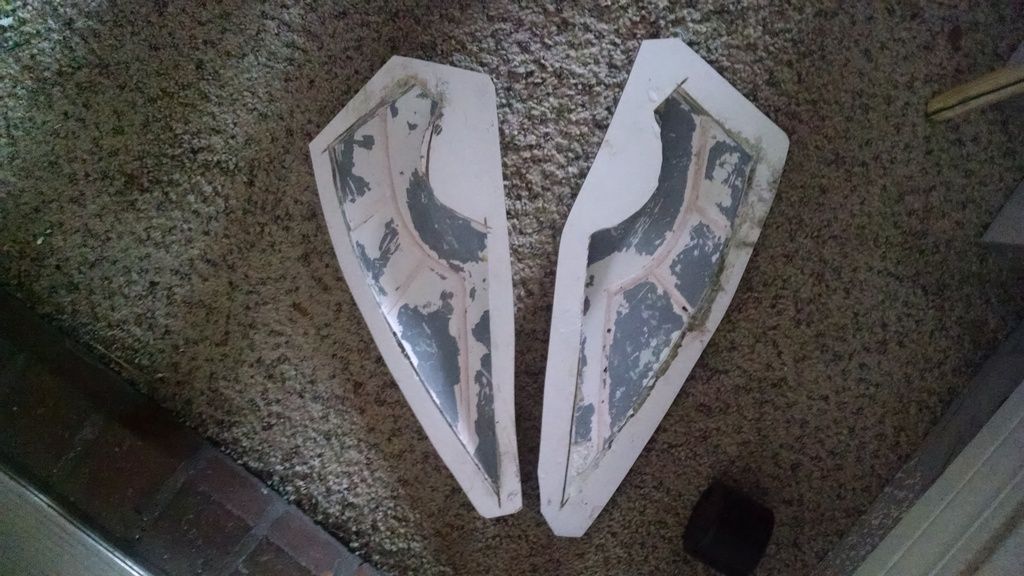
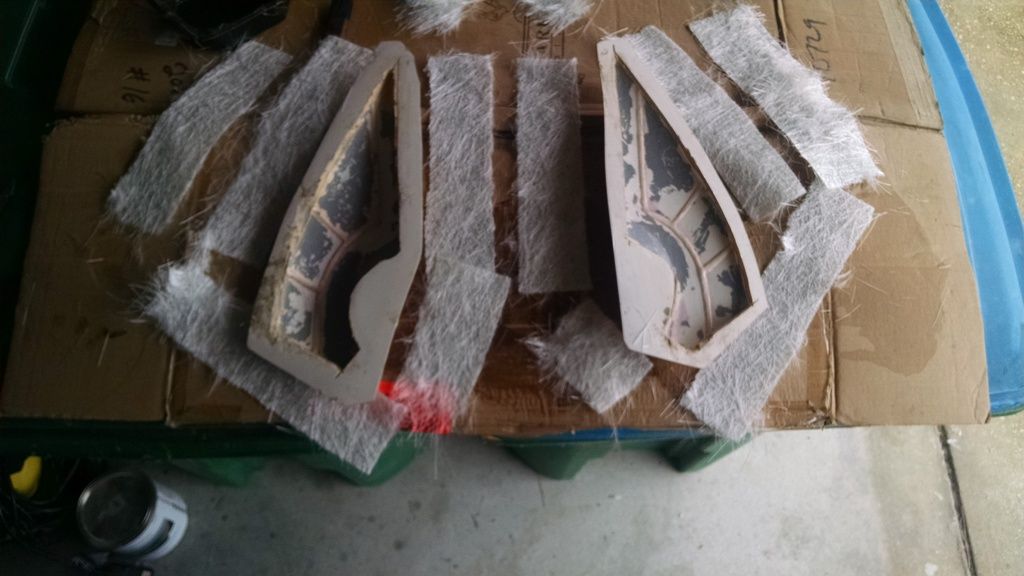
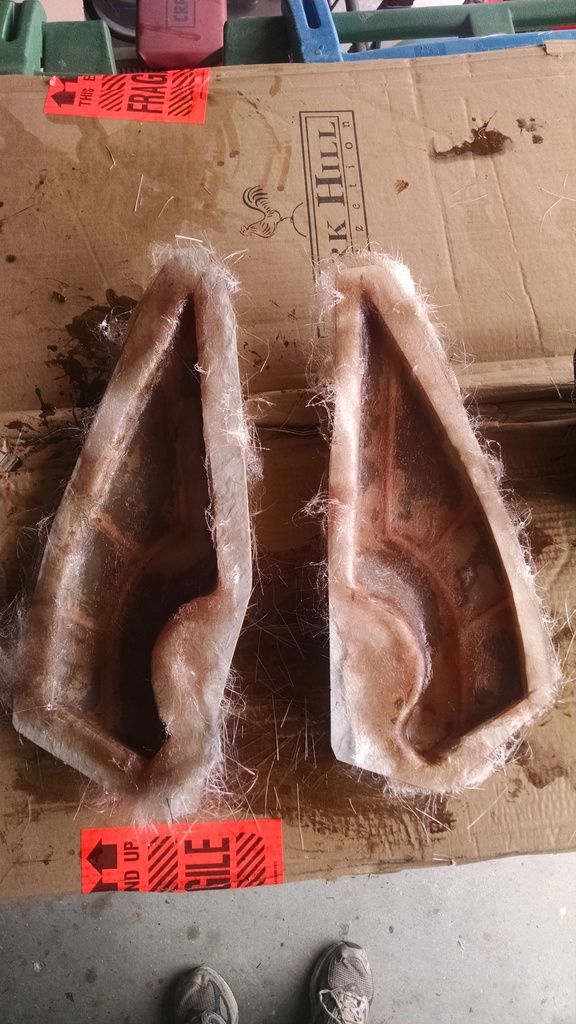
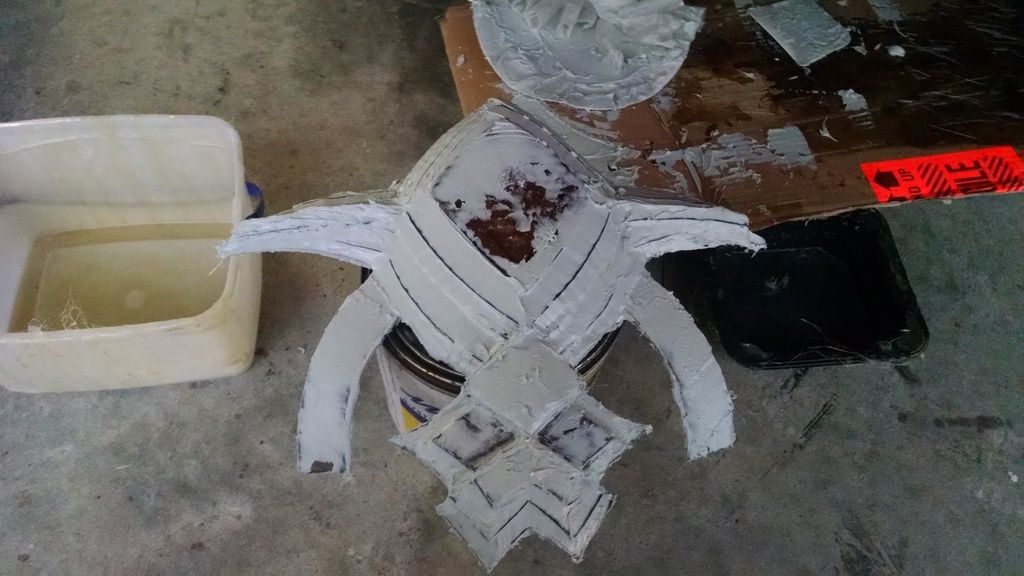
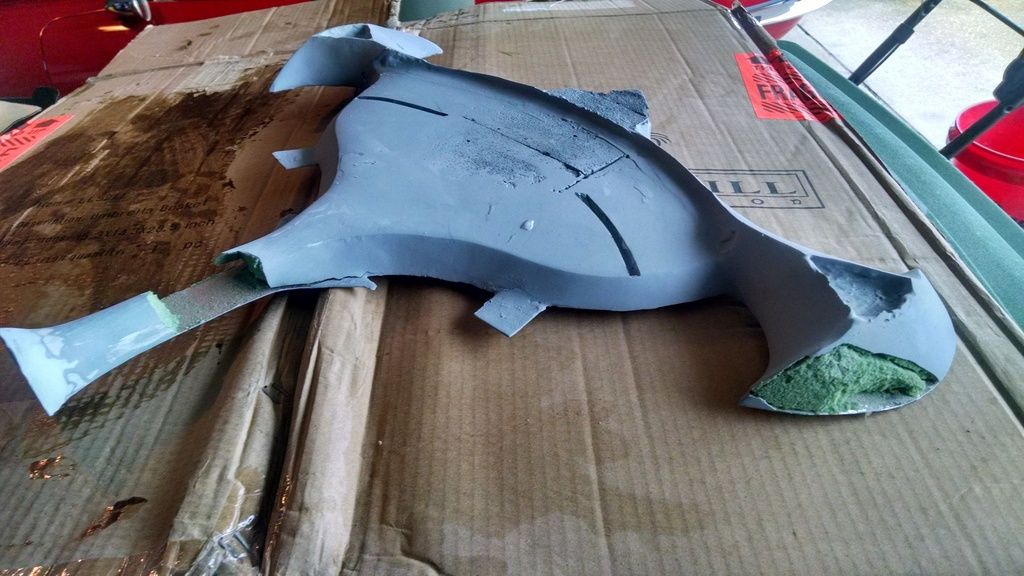
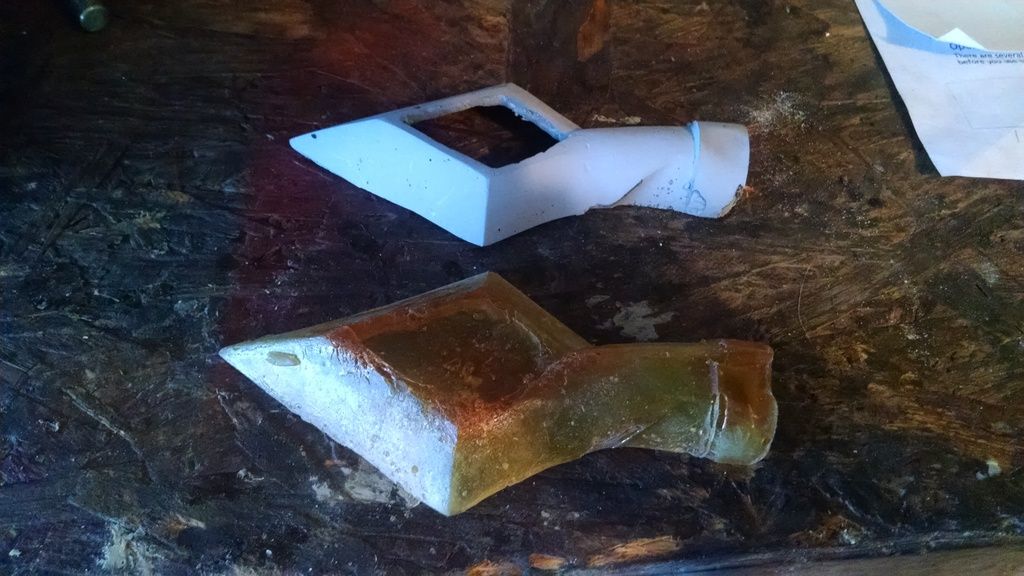
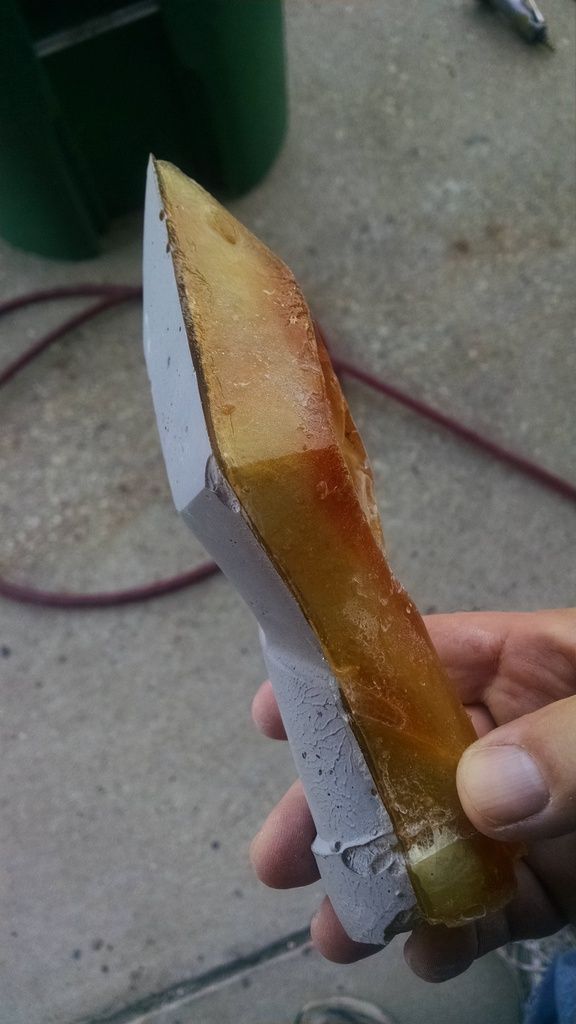
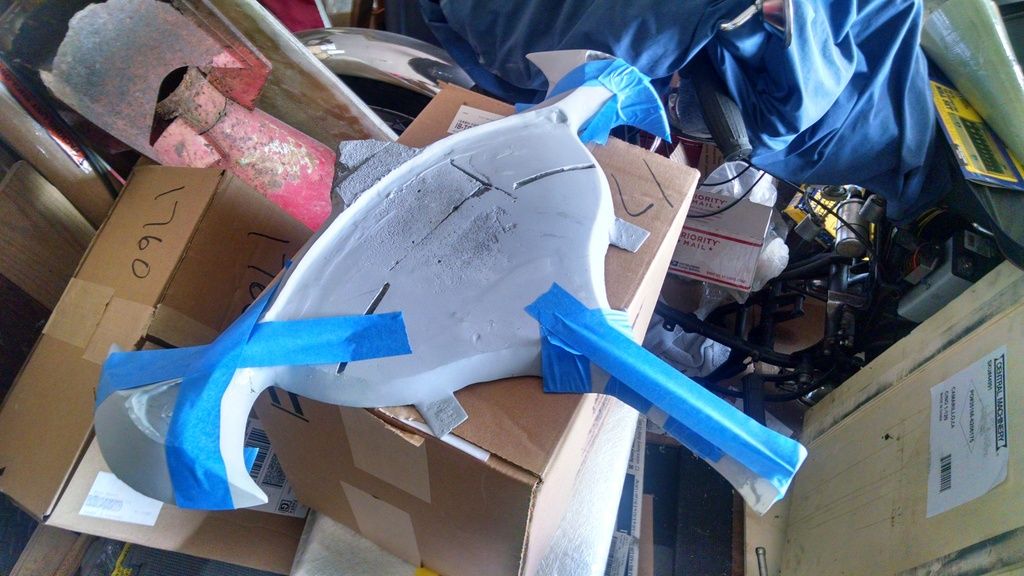
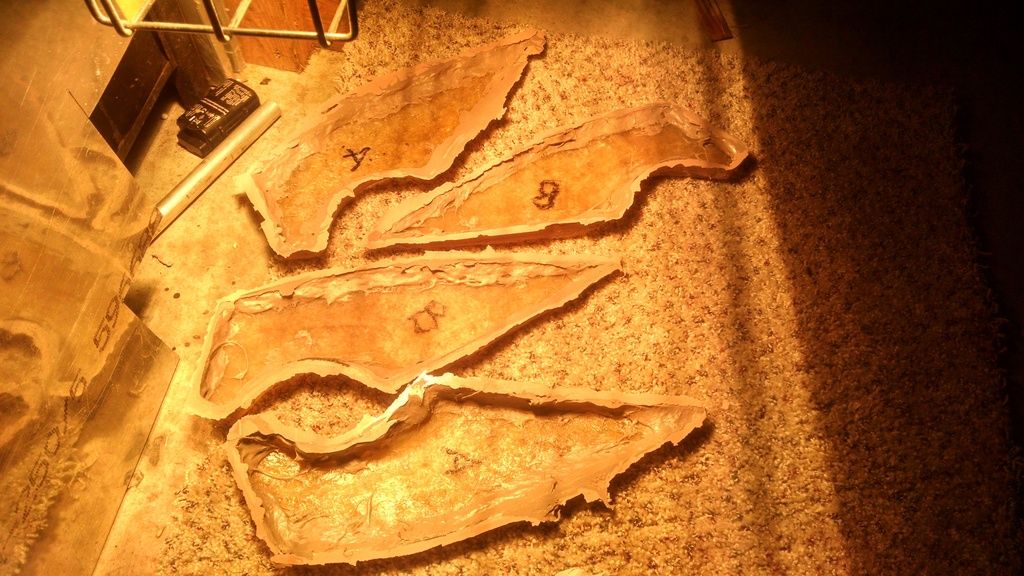
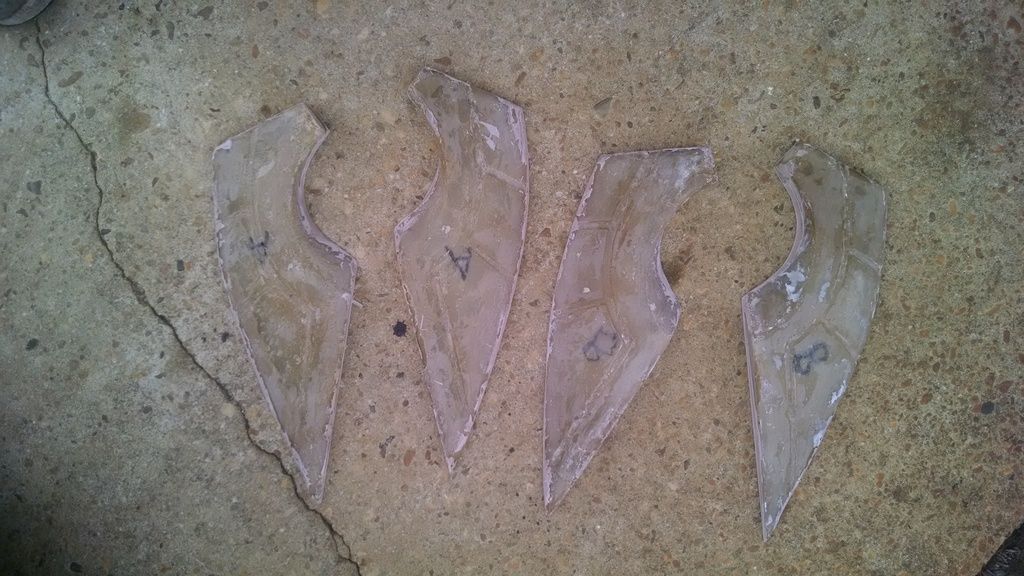
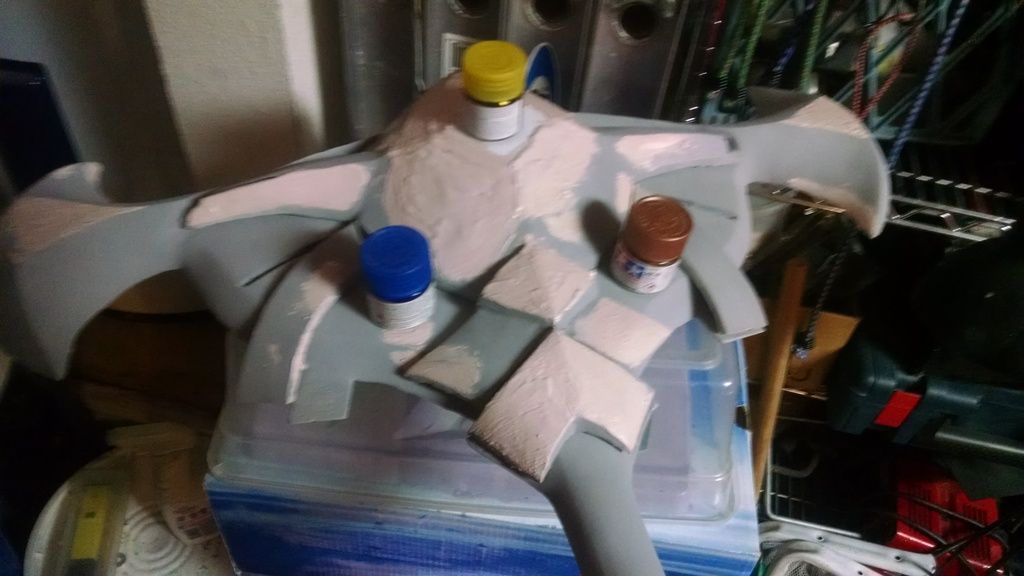
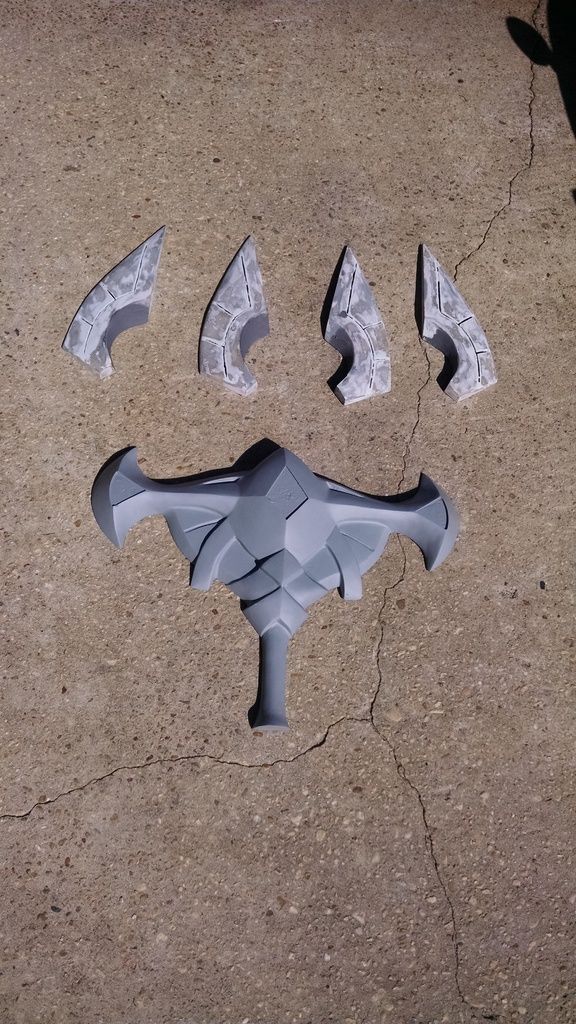
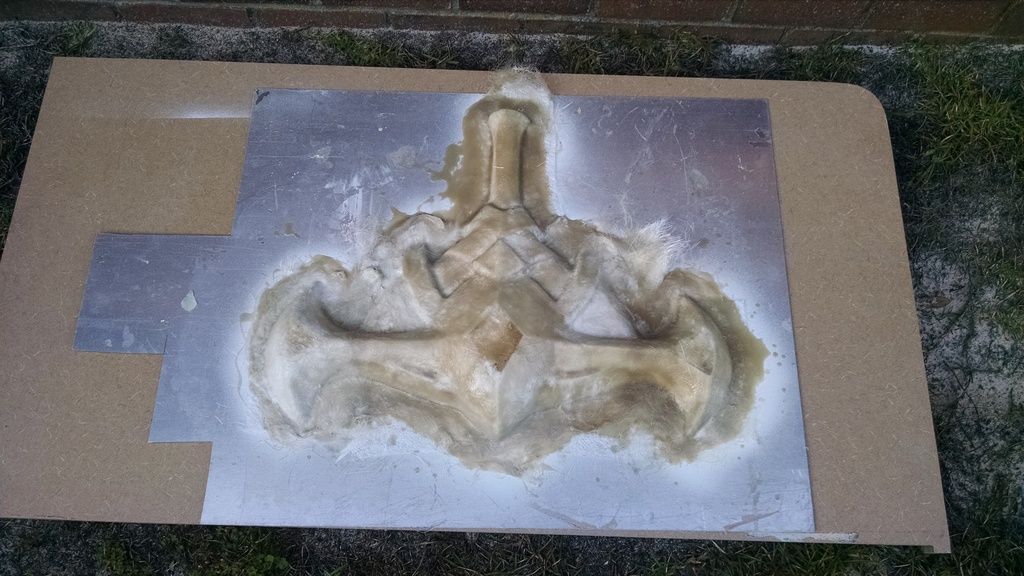
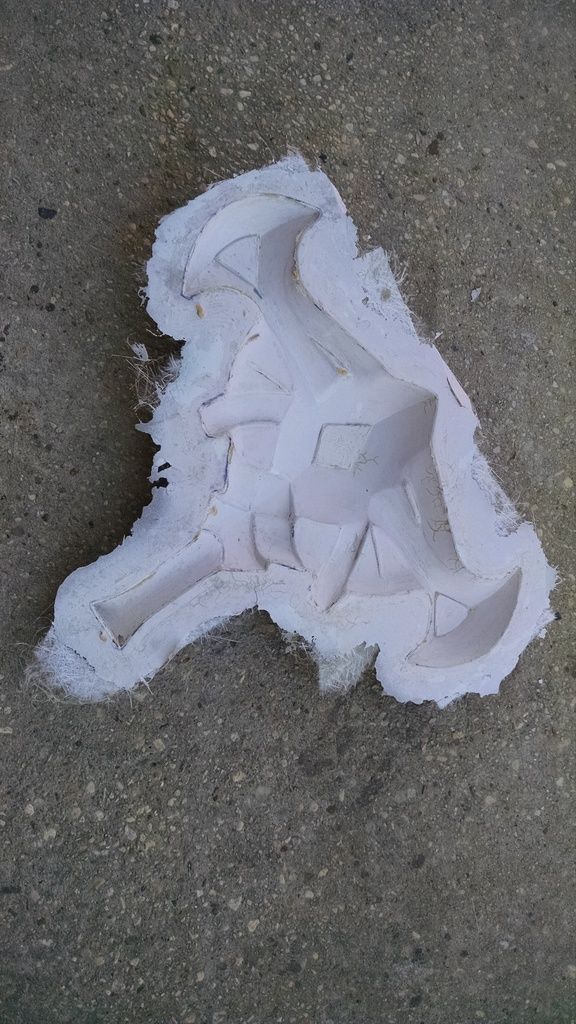
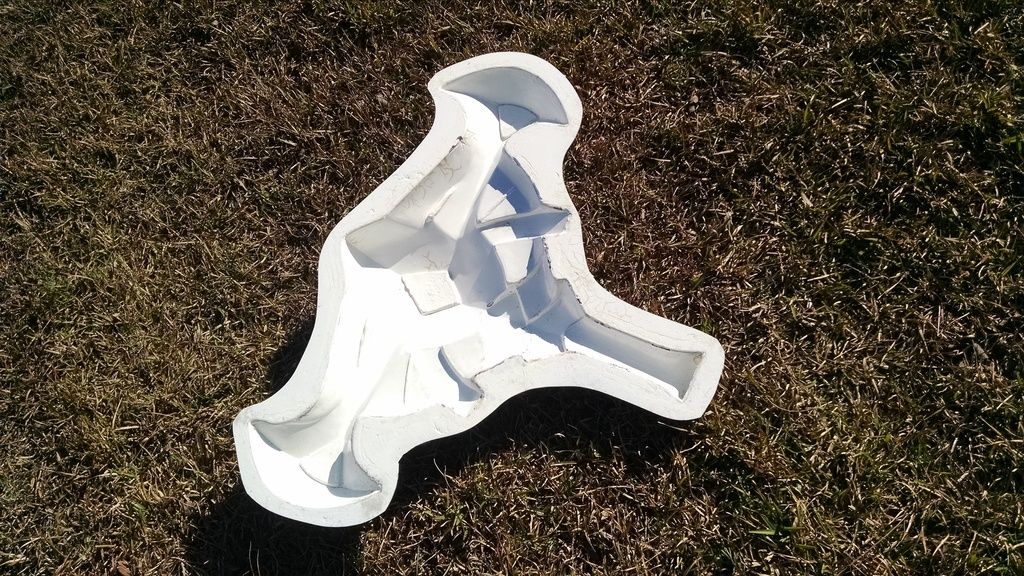
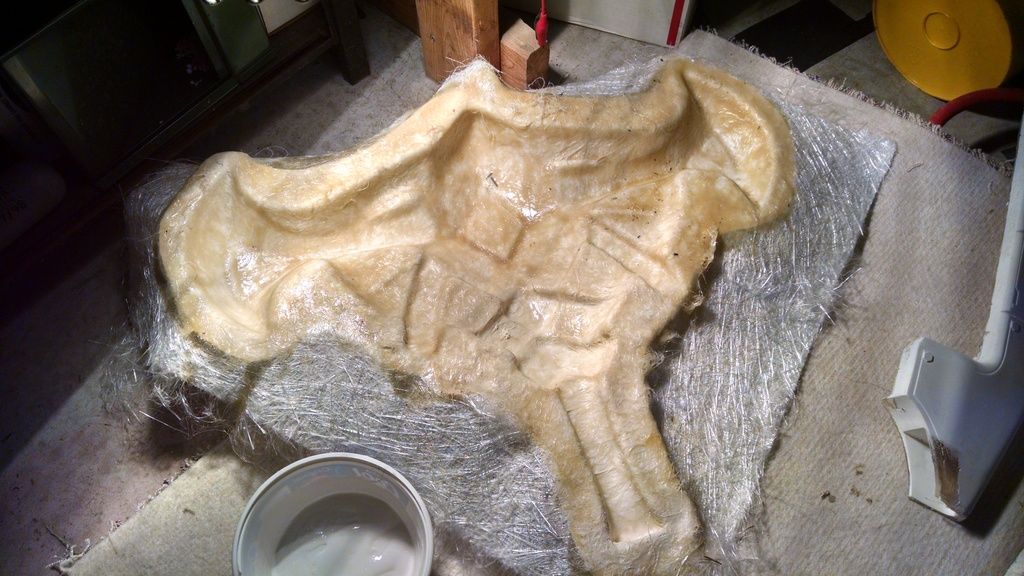
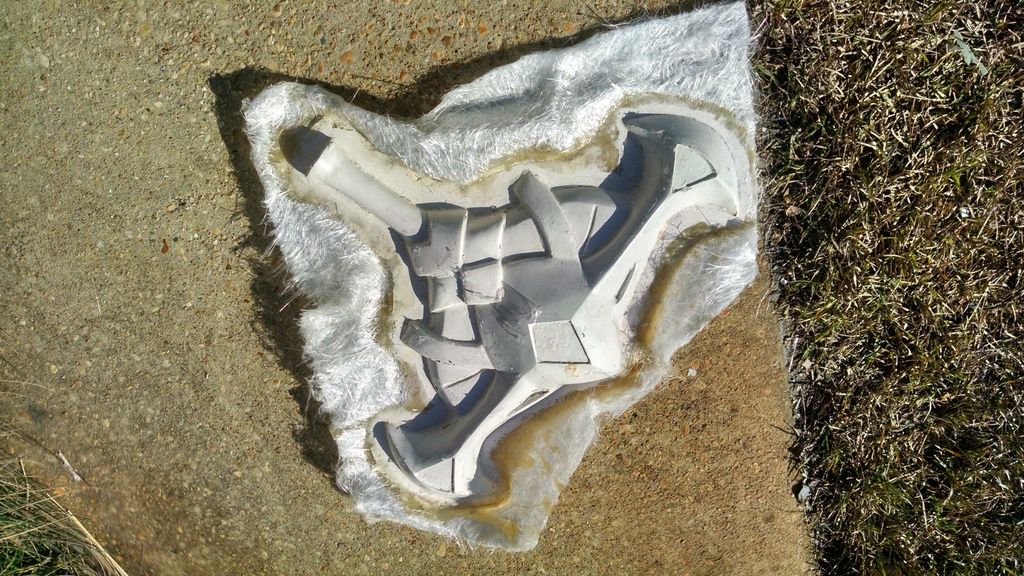
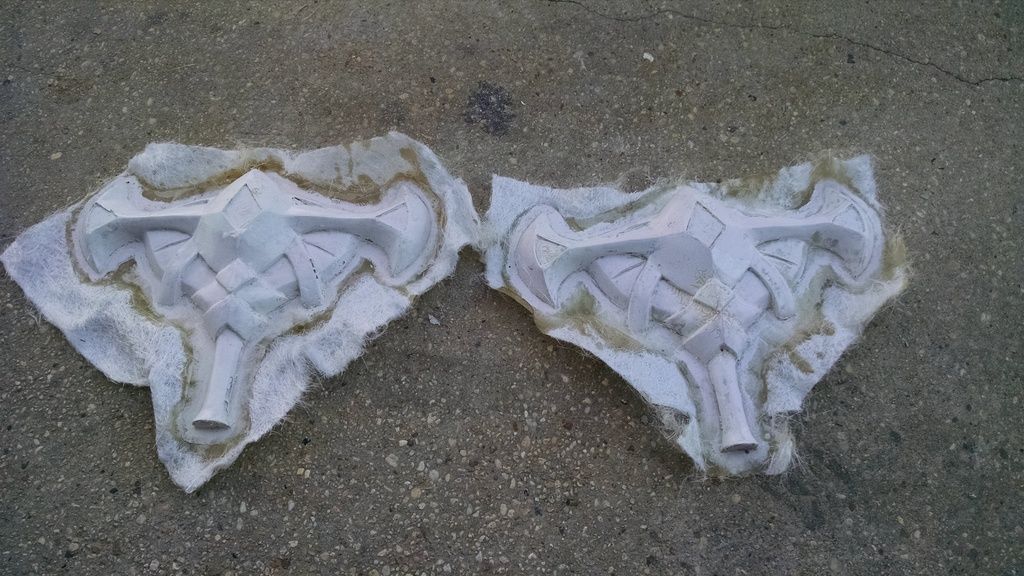
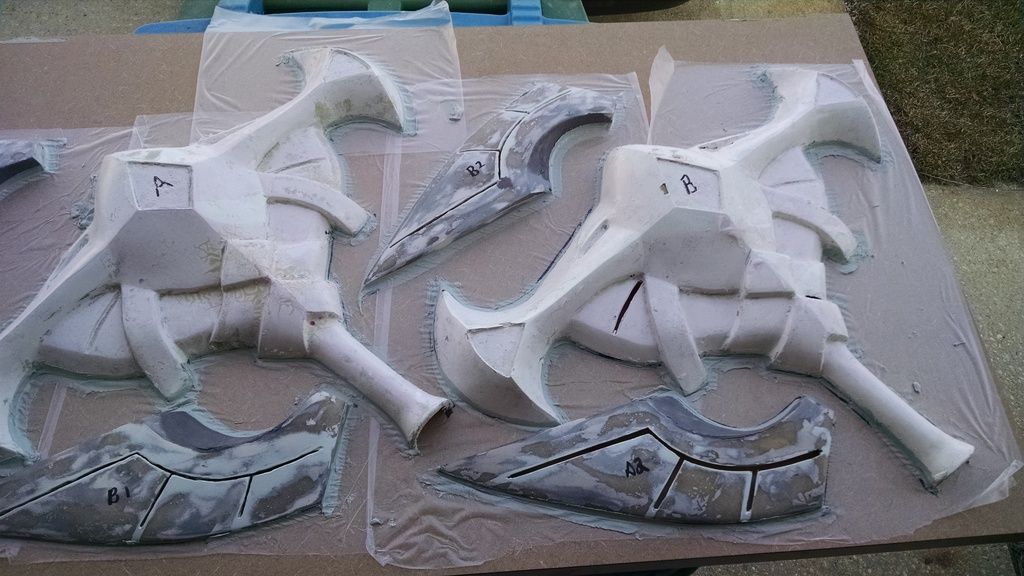
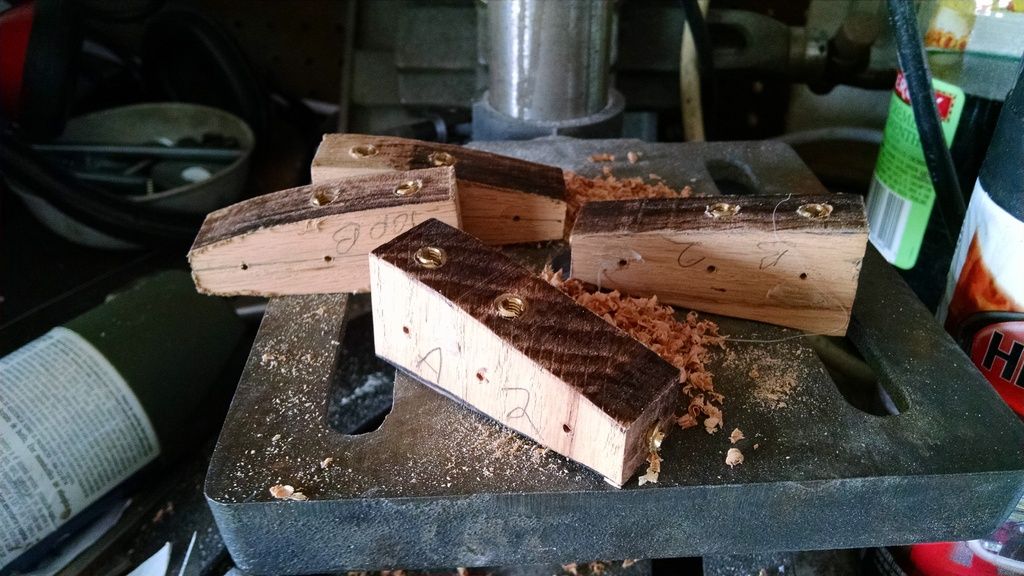
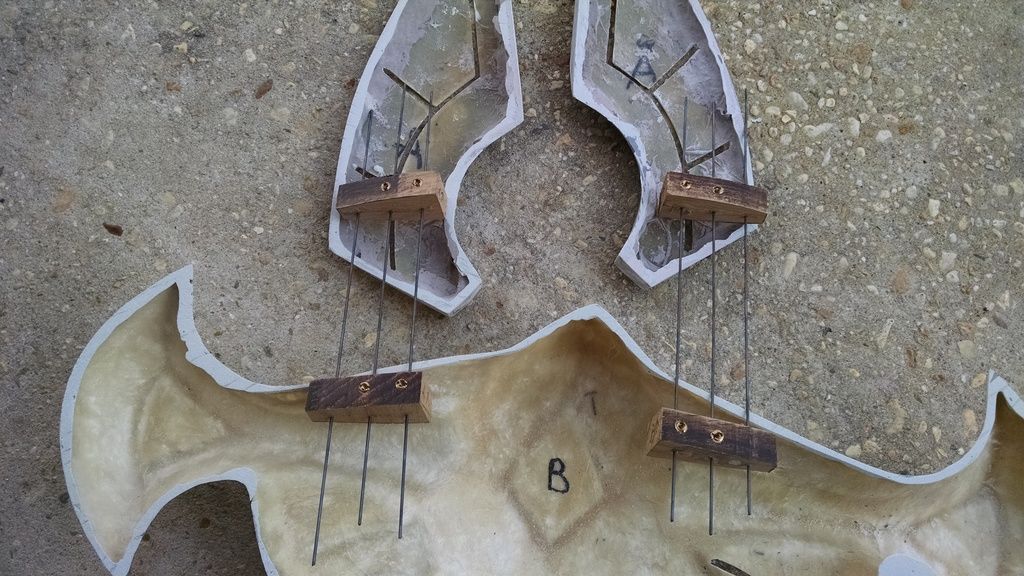
Our construction plan consisted of making solid blanks sculpted in floral foam to serve as a pattern for making fiberglass molds

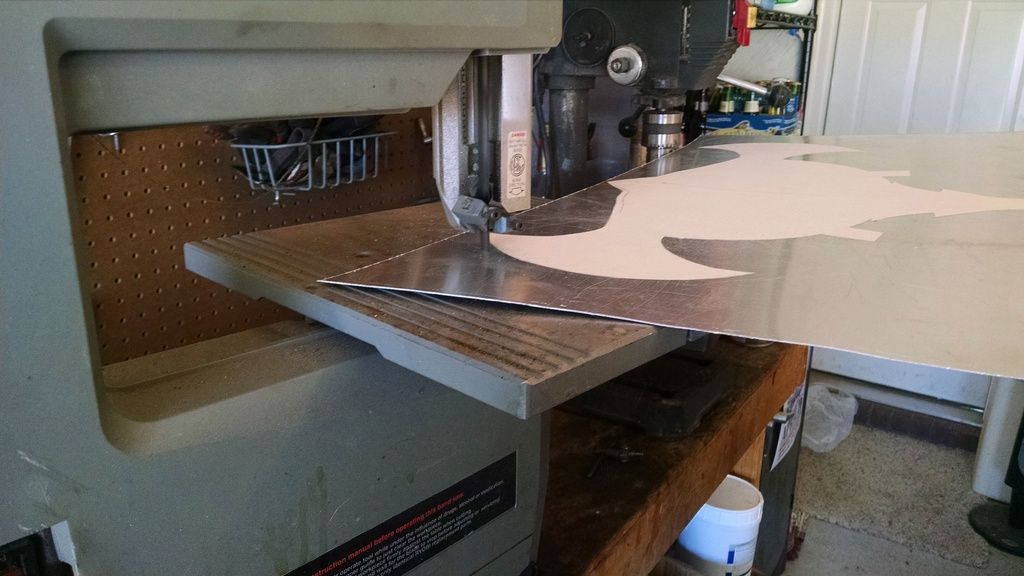
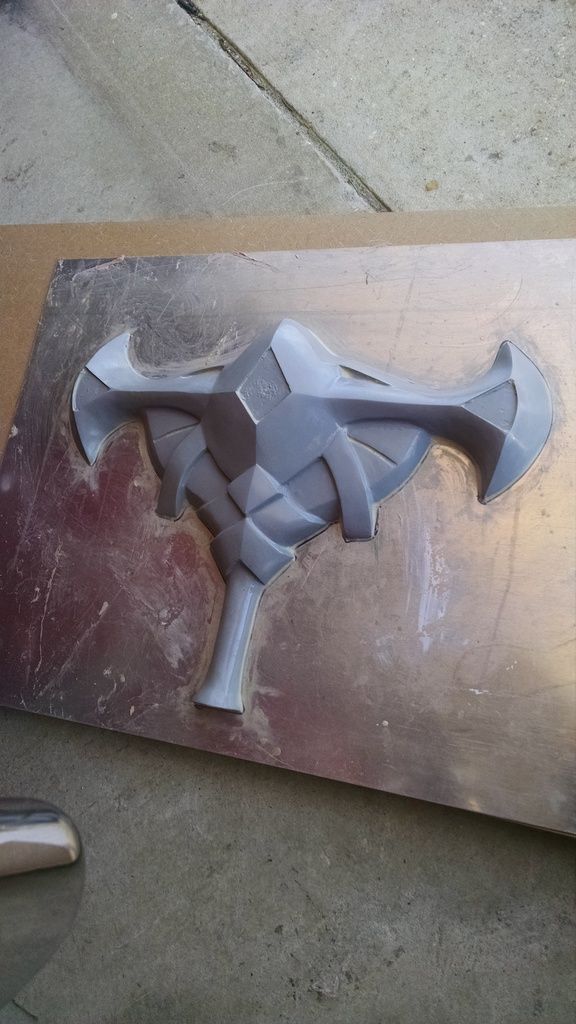
We bonded the pattern to sheet metal. The sheet metal will serve as a backing for the foam and ensure symmetry between halves by minimizing variation in the foam sculpting.

Azir%20Staff%20LOL%20Prop%202.jpg


The band saw made short work of the basic metal cuts.

Azir%20Staff%20LOL%20Prop%204.jpg


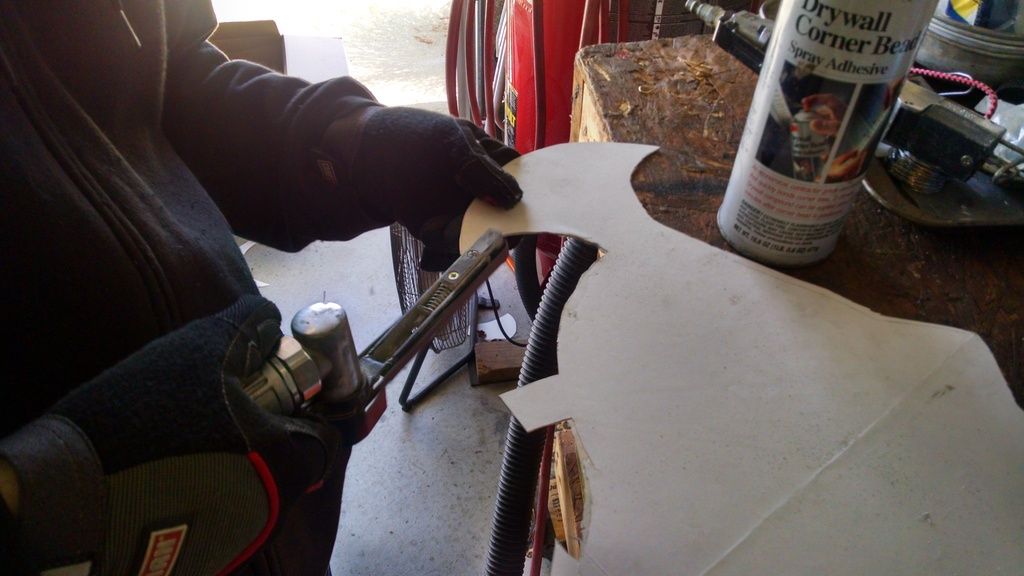
One of my favorite tools, the air belt sander, is used to clean up the edges.
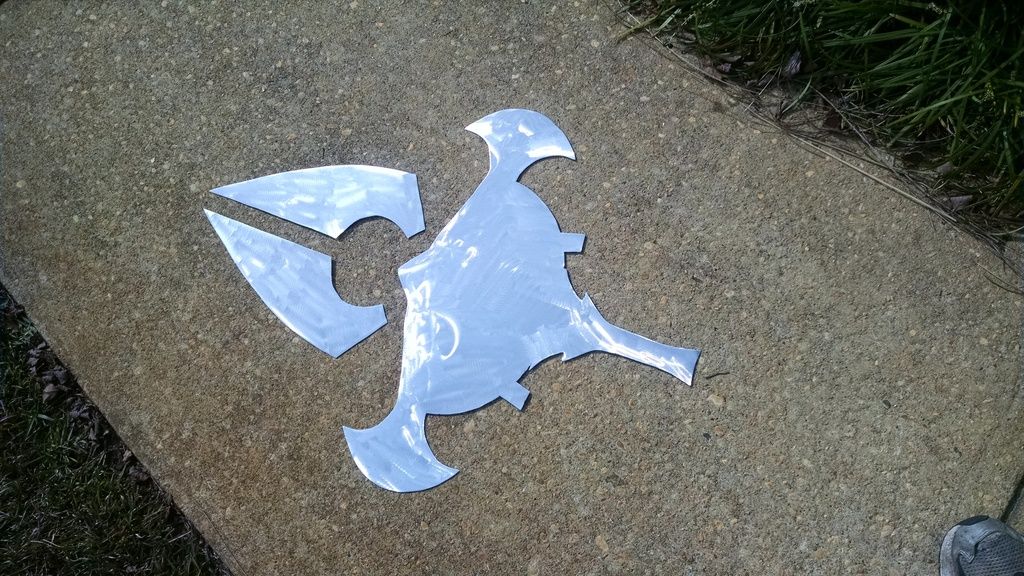
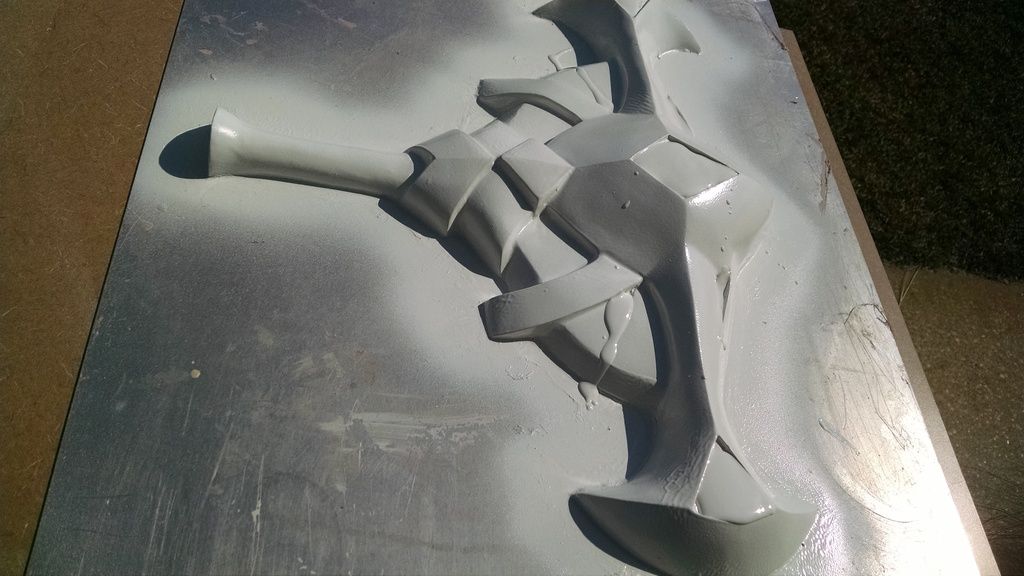
Azir%20Staff%20LOL%20Prop%205.jpg


Shiny!

Azir%20Staff%20LOL%20Prop%206.jpg


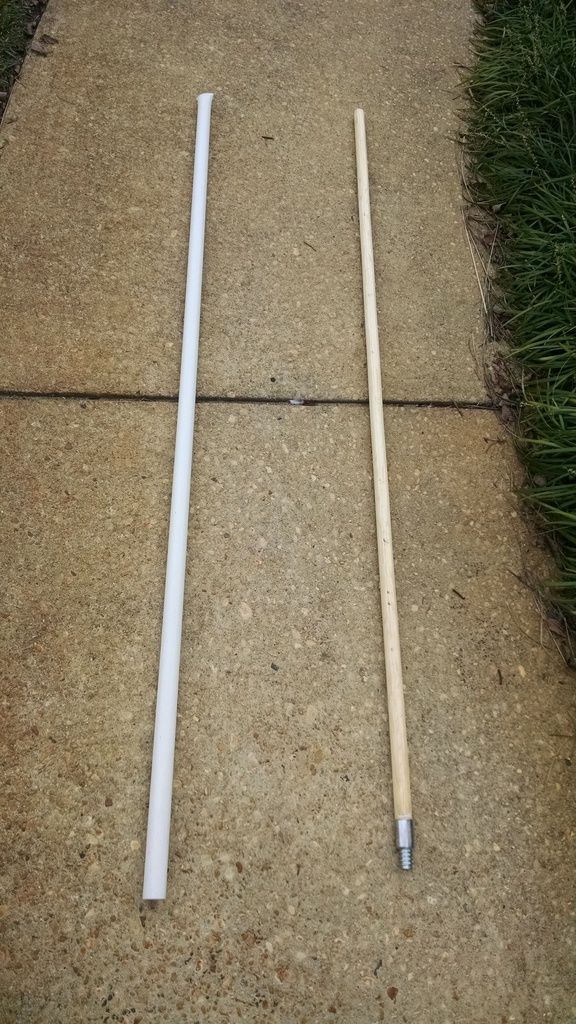
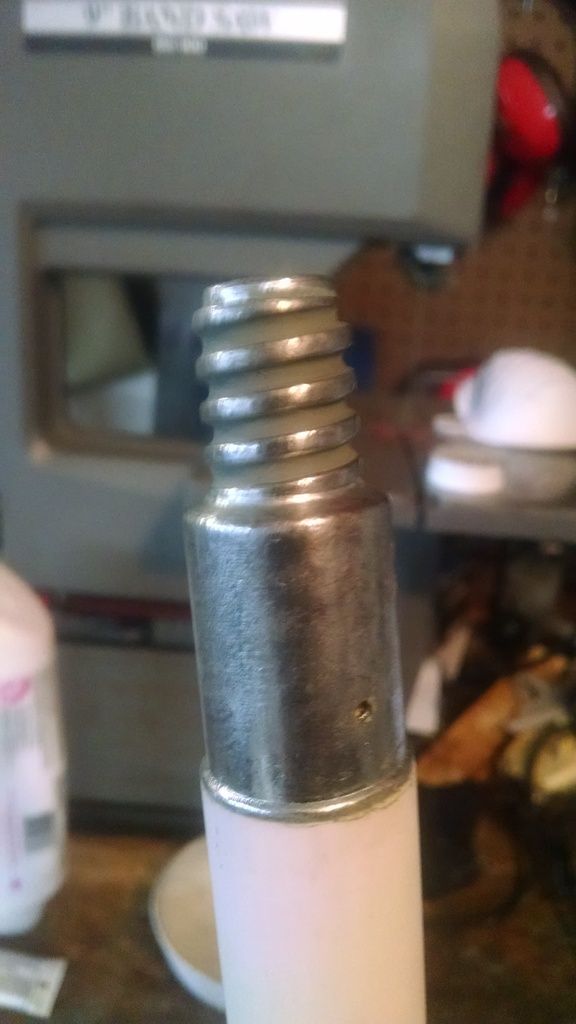
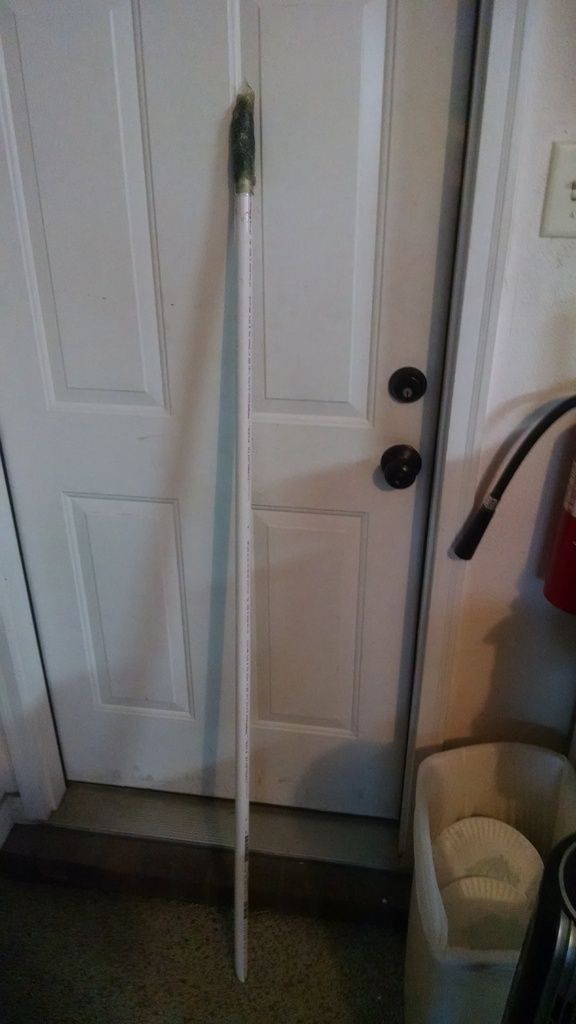
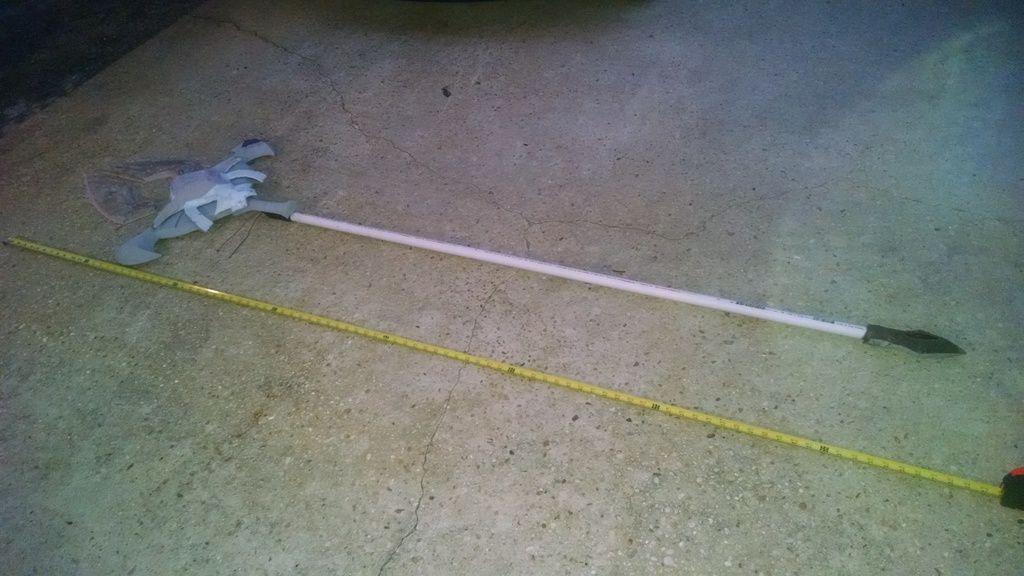
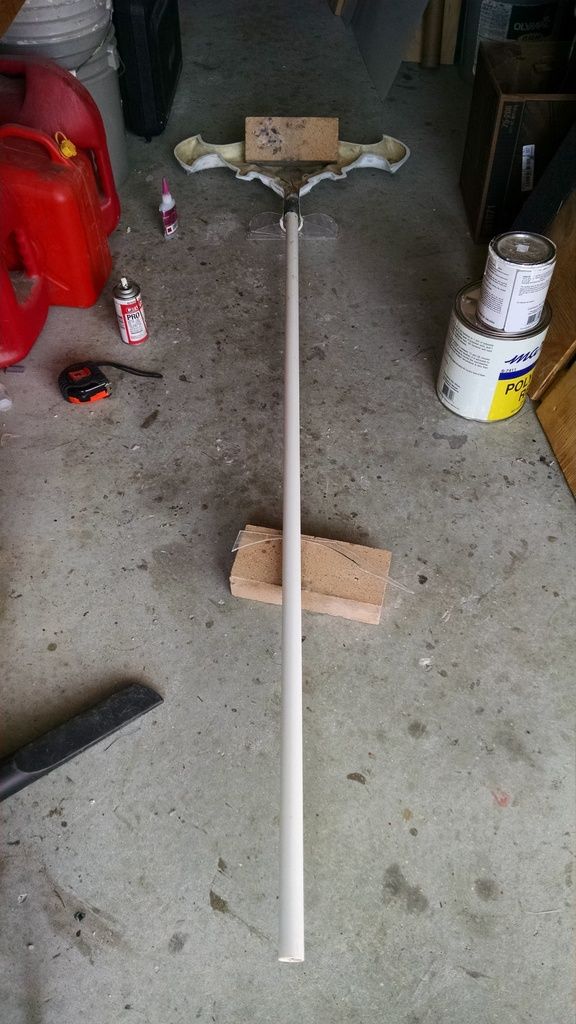
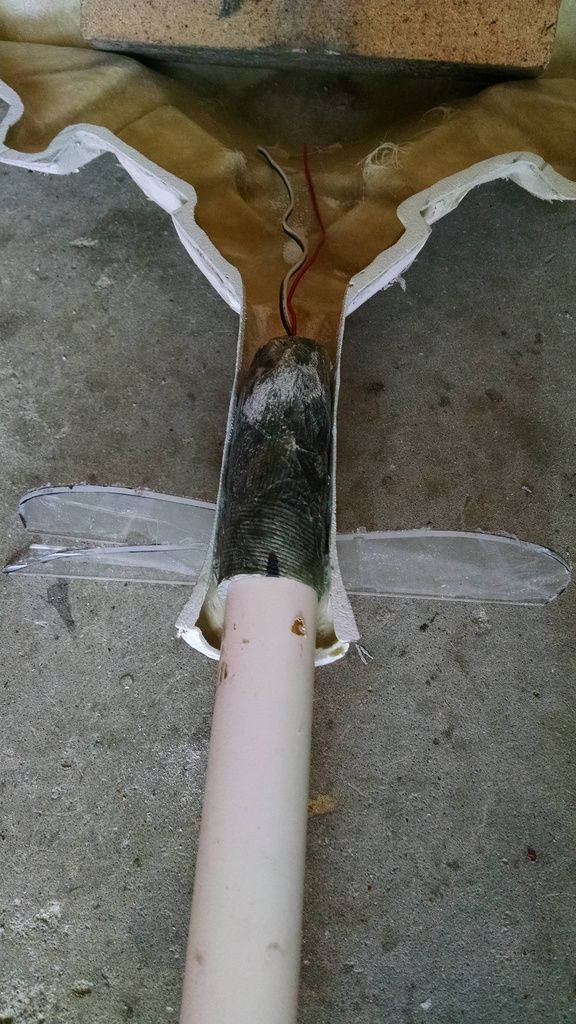
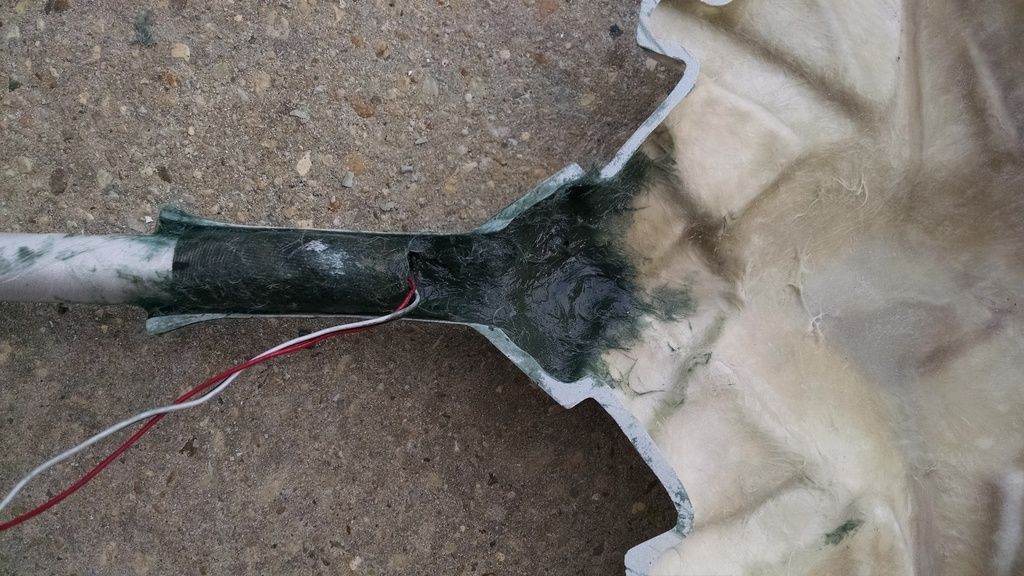
A trip to Lowe's yielded the shaft kit in the form of a wooden broom handle and a PVC pipe to cover it. We needed a broom handle with metal threads so we could design the staff to be broken down for easy transportation.

Azir%20Staff%20LOL%20Prop%208.jpg


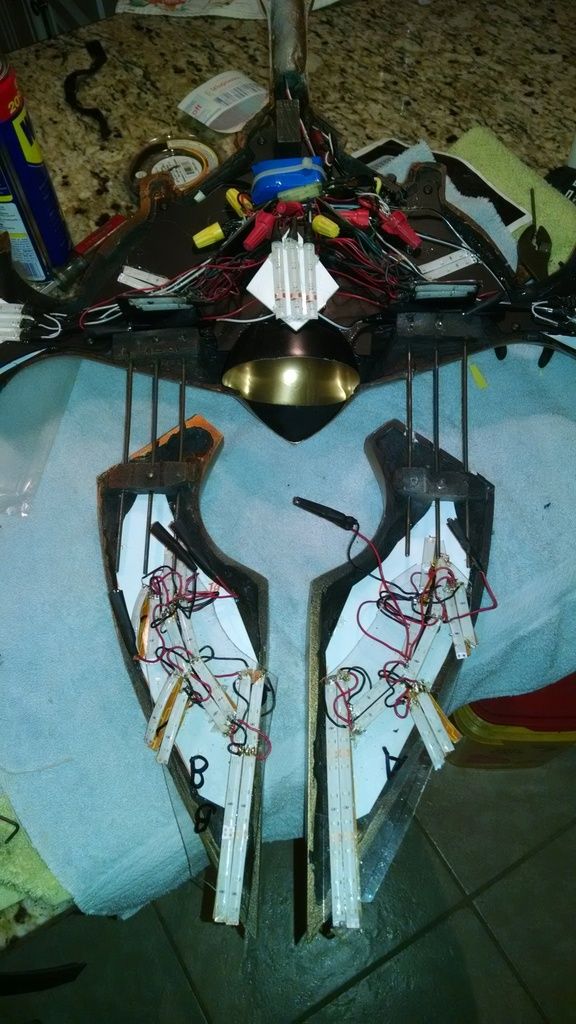
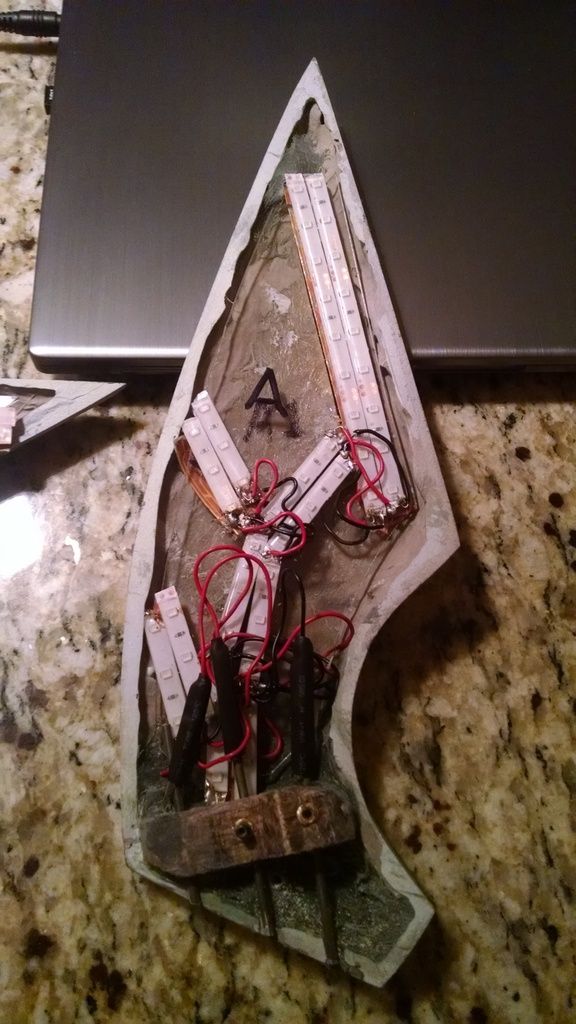
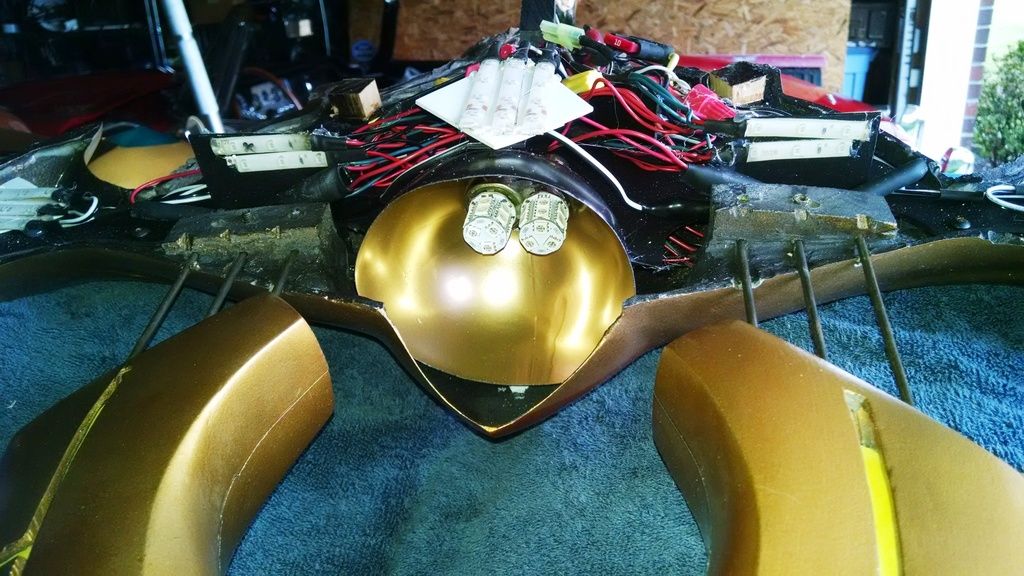
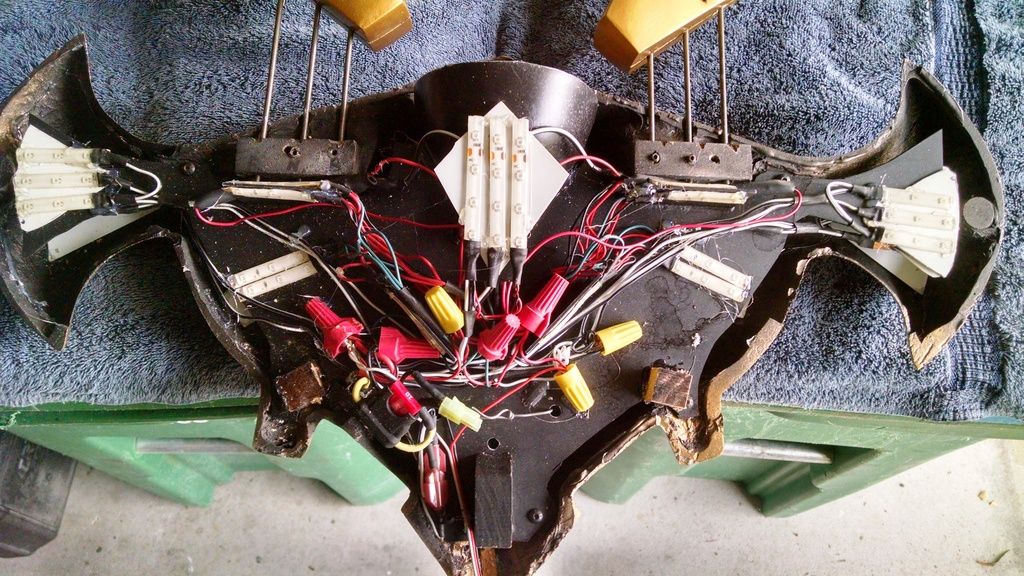
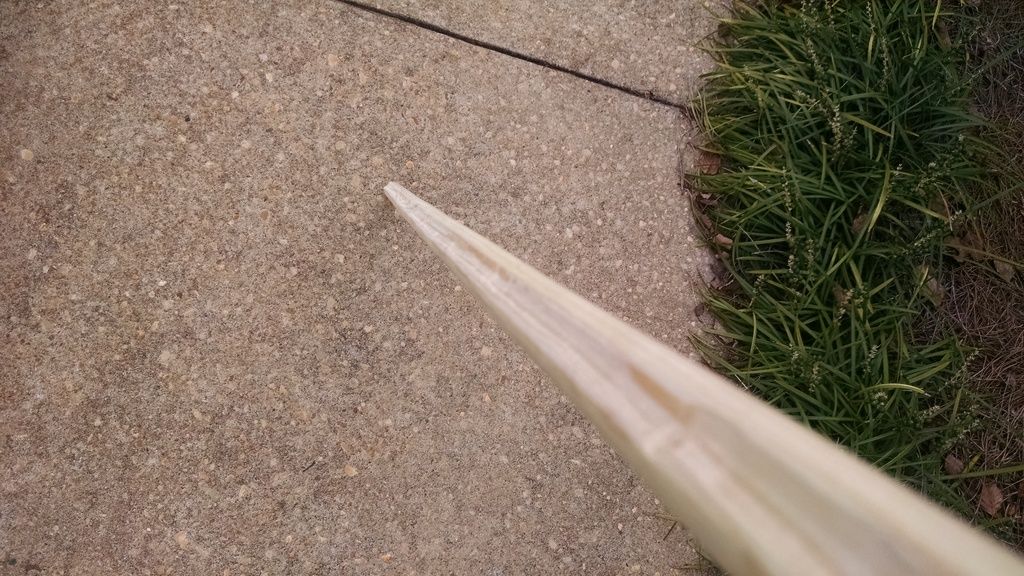
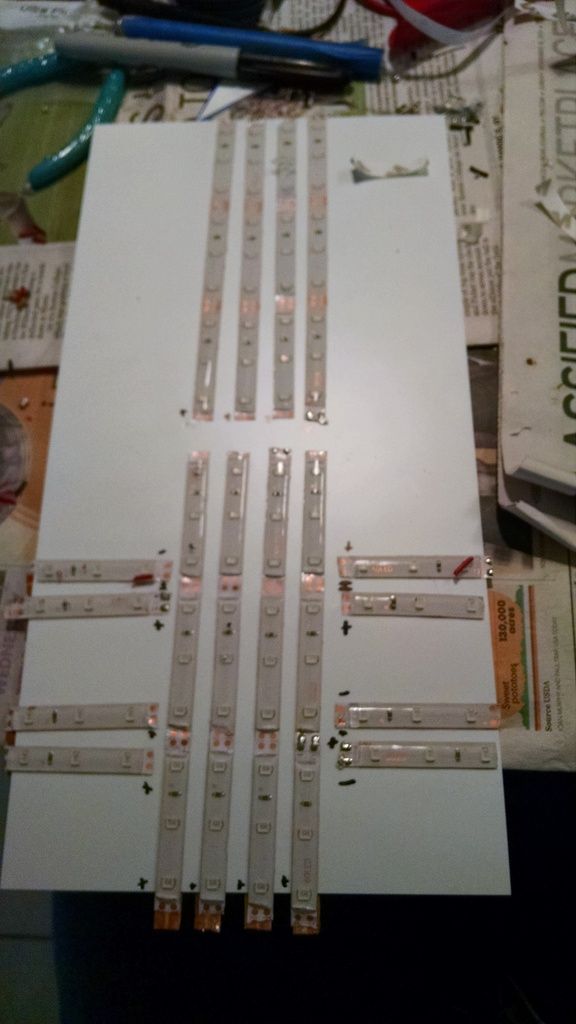
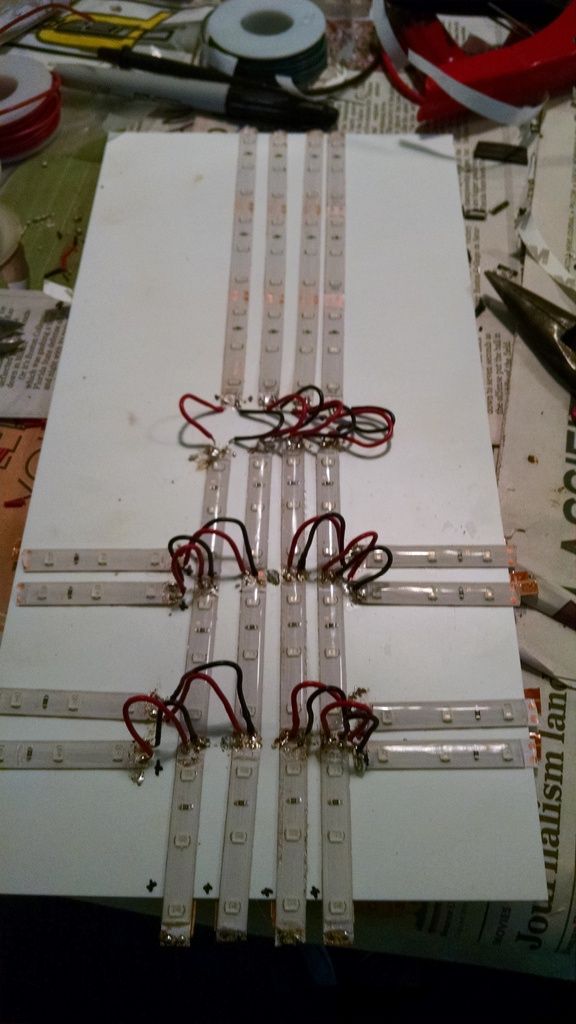
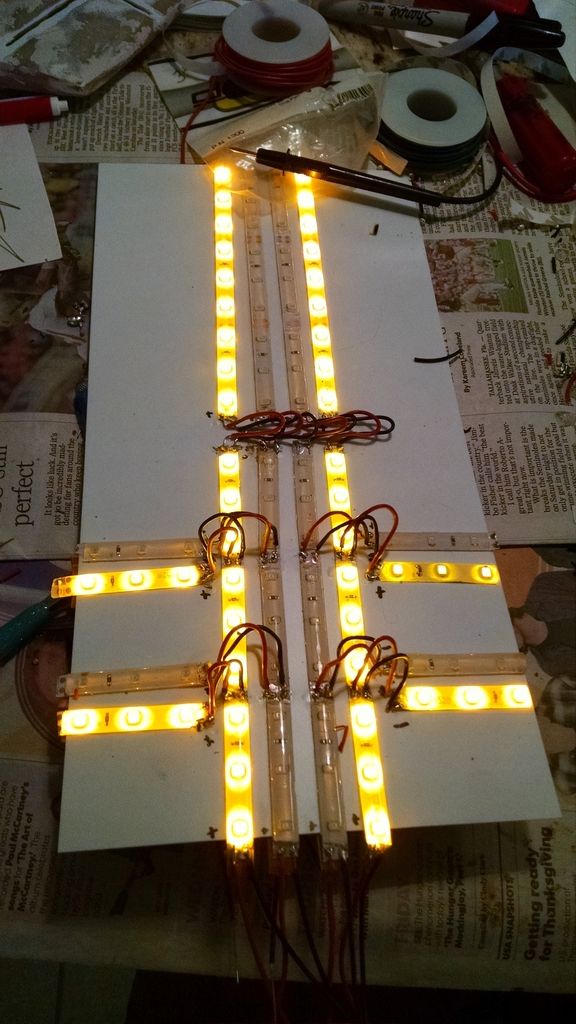
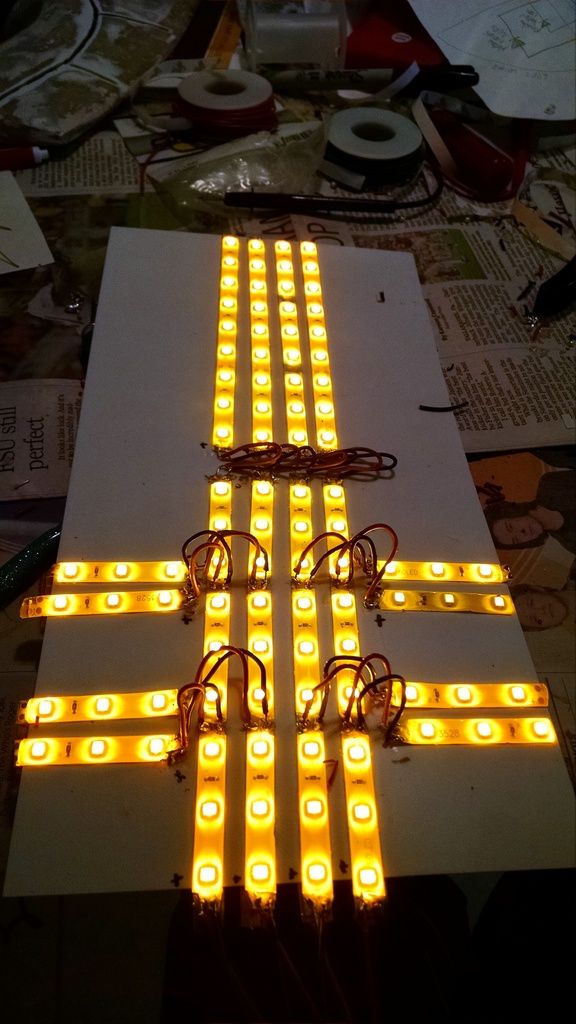
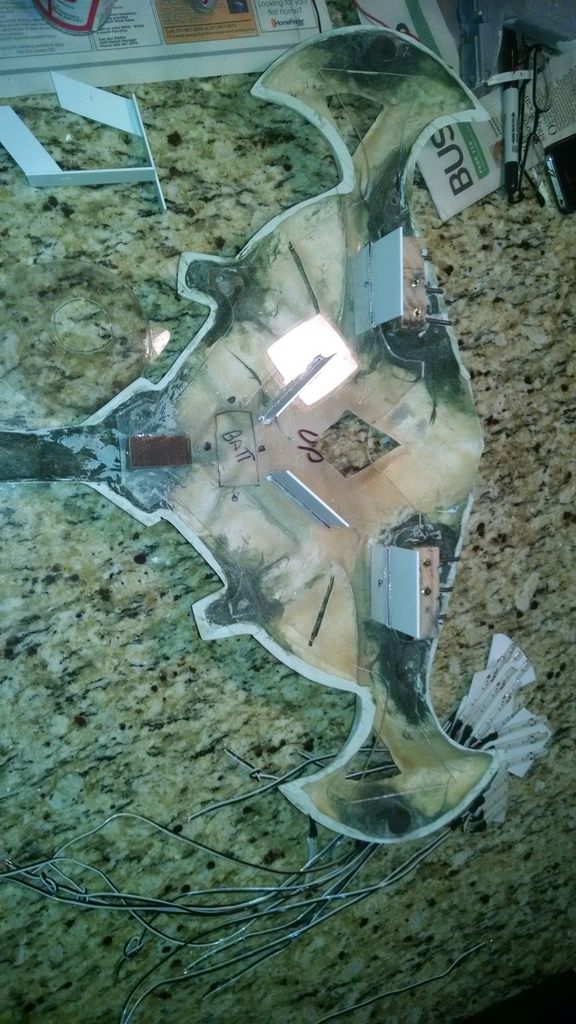
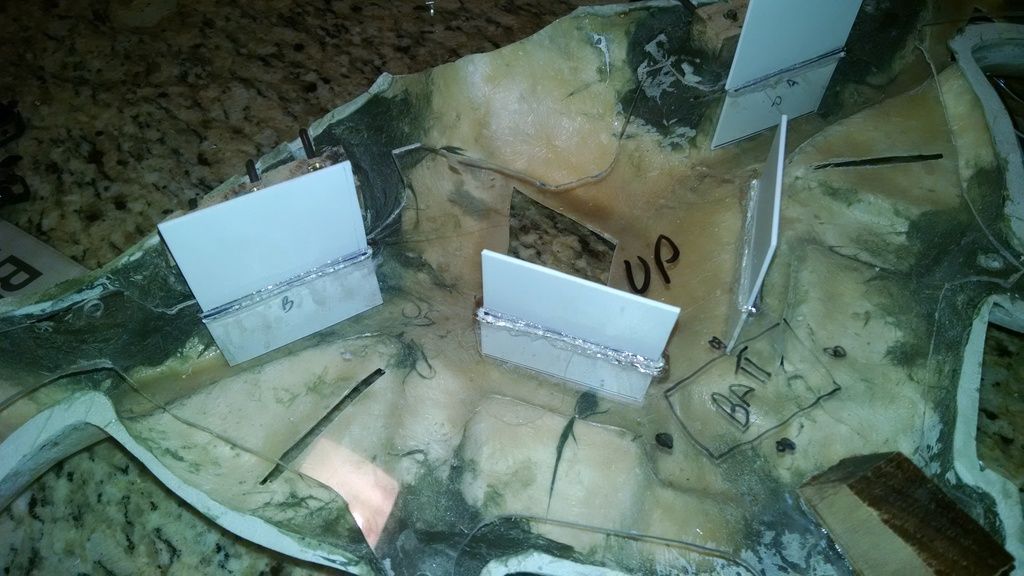
Because I just had to have a lighted/animated prop, we needed a groove to carry wiring and support a trigger button for the firing effect. Time to break out the router table. Since the wire groove would be hidden under the PVC sleeve, I favored not cutting off my thumb over neatness.
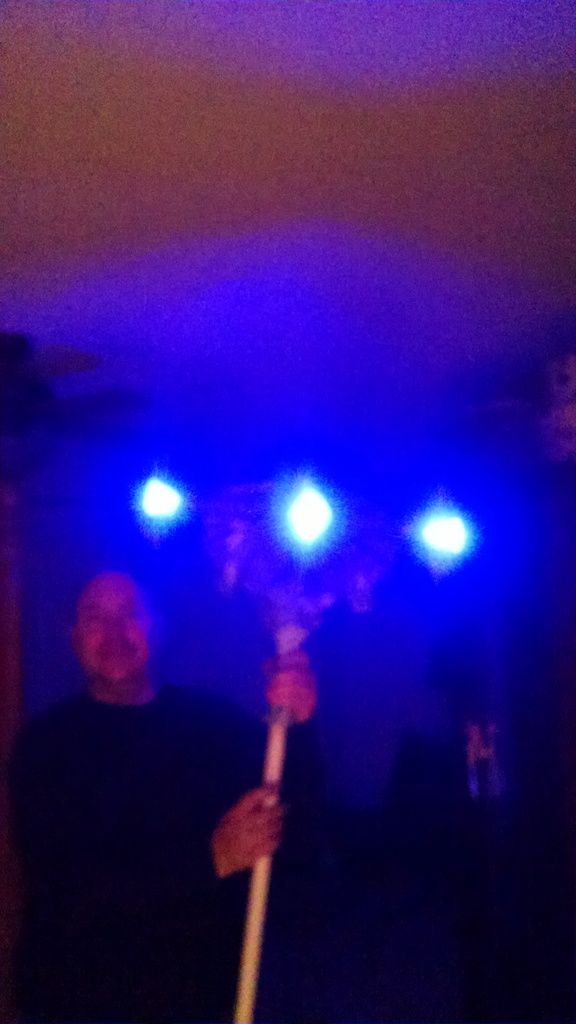
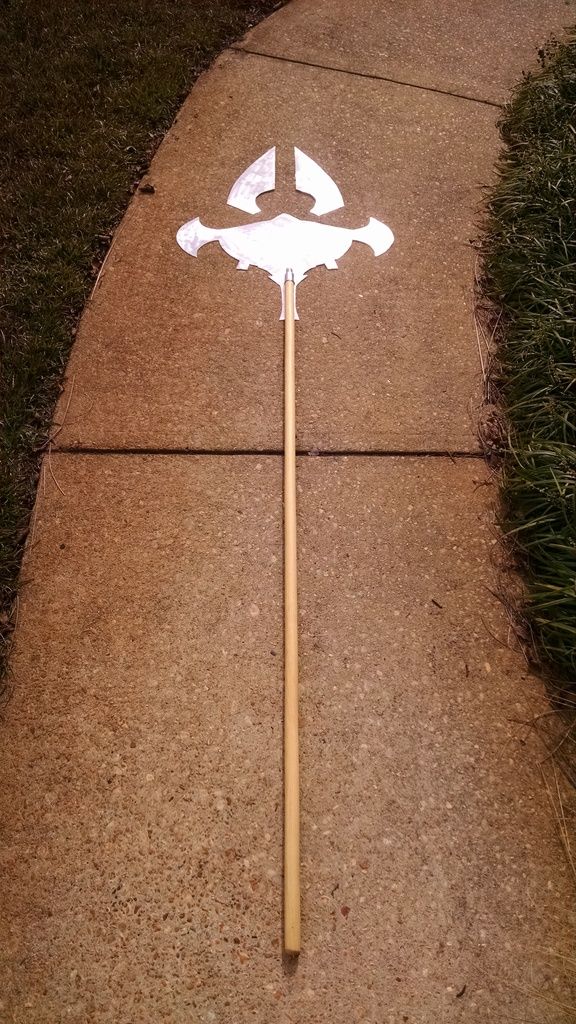
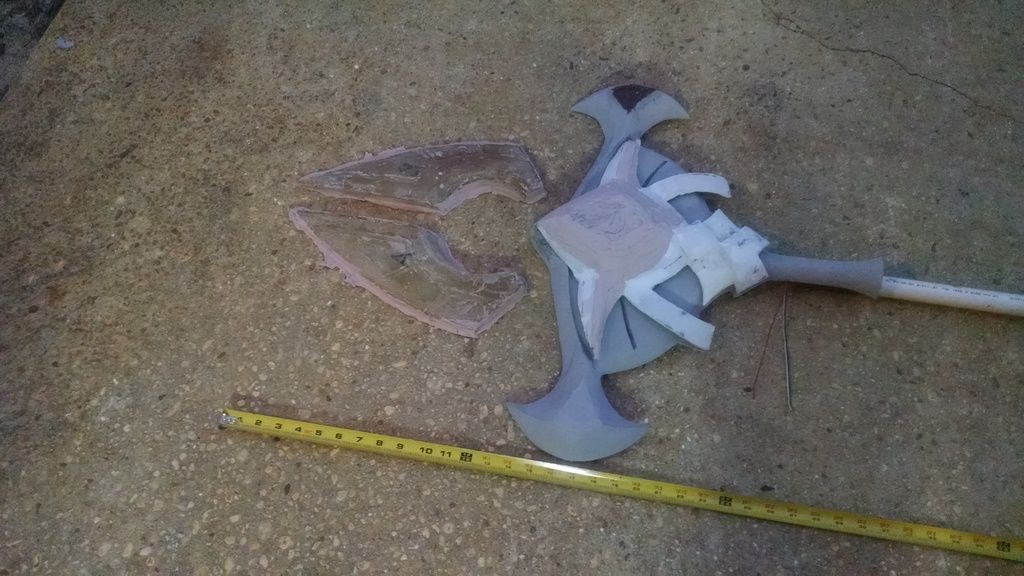
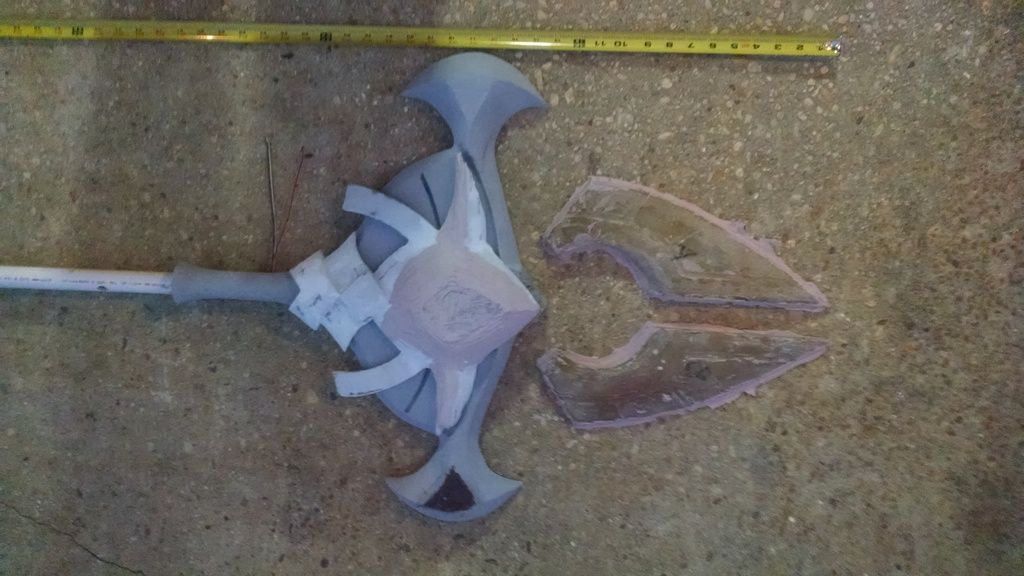
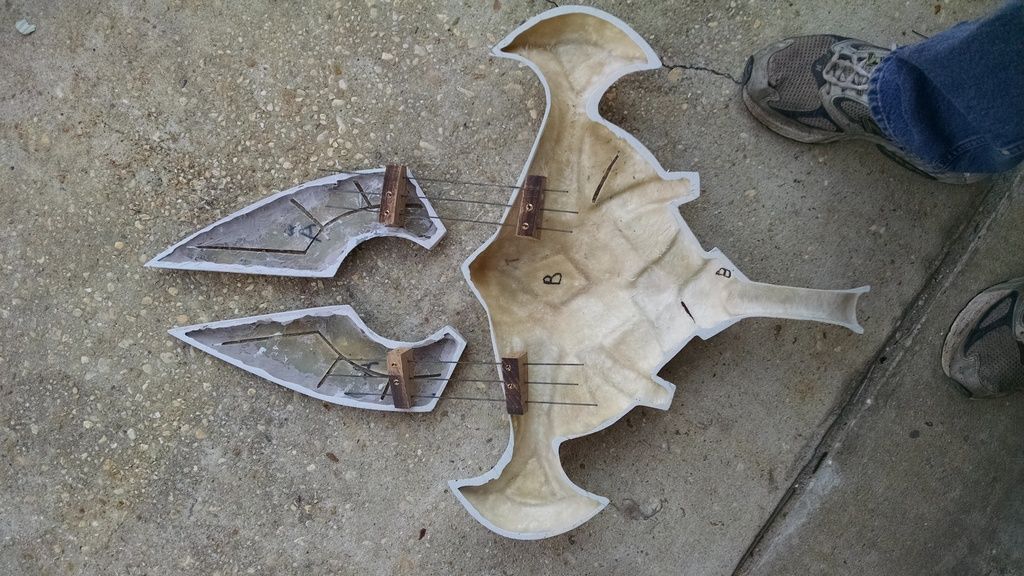
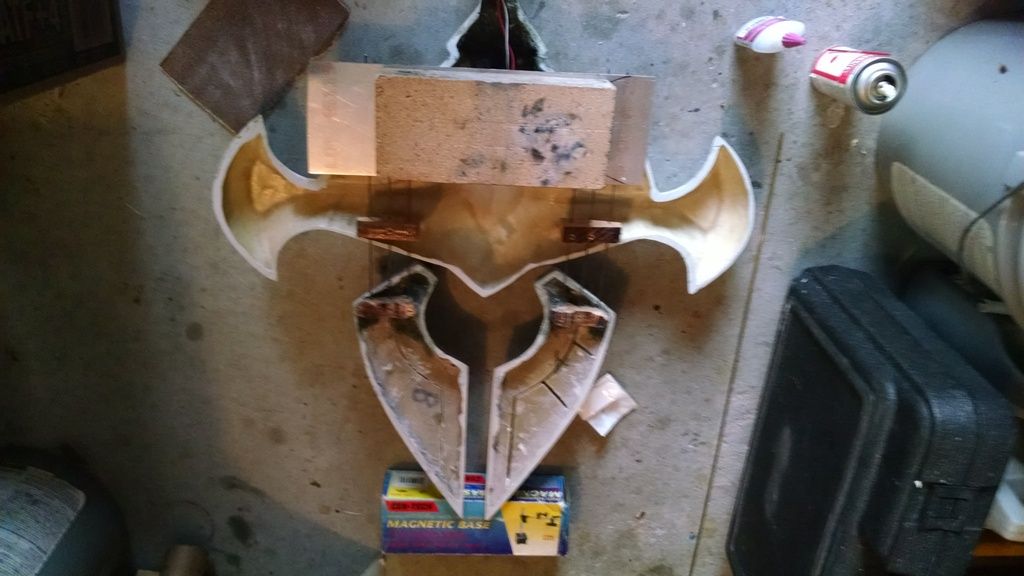
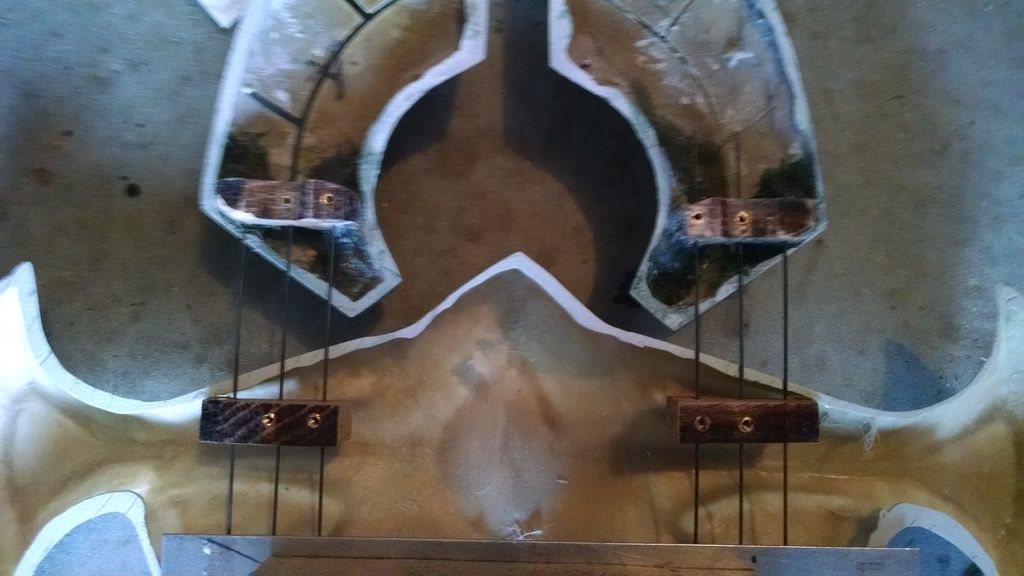
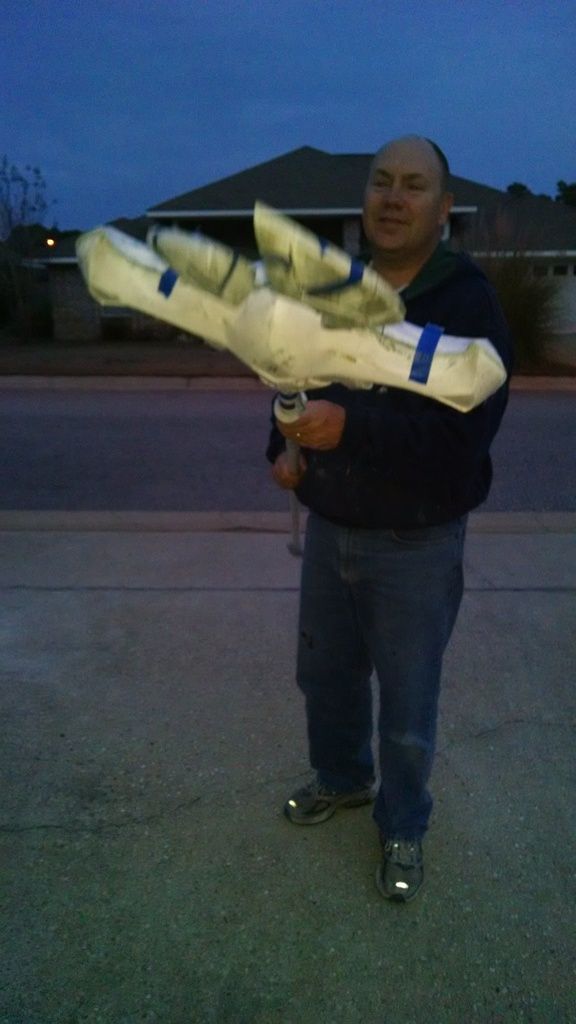
Azir%20Staff%20LOL%20Prop%209.jpg


Our first mock up.

Azir%20Staff%20LOL%20Prop%207.jpg


That's it for now. Up next: Foam cutting.

Redshirt98
 
Last edited:
There are so many awesome props and characters from League and I'm sure this is going to be amazing! Good luck and looking forward to seeing the molded fiberglass and electronic lights and animation version.
 
There are so many awesome props and characters from League and I'm sure this is going to be amazing! Good luck and looking forward to seeing the molded fiberglass and electronic lights and animation version.

Thanks! We picked this because it hasn't been done (that we've seen) with electronics.

Now we pick up with the foam work and sculpting. In this section, we'll depict a process in photos and make it look painless and straightforward. In fact, the foam is damn delicate, bruises and dents from from harsh looks and coarse language and produces a static charged cloud upon sanding that clings to everything.

We also cut metal blanks for the crystals.

Azir%20Staff%20LOL%20Prop%2011.jpg


We used a spray adhesive to stick blocks of floral foam to the aluminum backing plates.

Azir%20Staff%20LOL%20Prop%2014.jpg


The end result looks kind of like green space shuttle tiles--and just as delicate.

Azir%20Staff%20LOL%20Prop%2015.jpg


We strung wire across a bow saw and hooked the ends up to a battery charger to make a hot wire cutter. This was overkill as the floral foam was so soft that a large knife worked just as well with less risk and fumes than the wire cutter.

Azir%20Staff%20LOL%20Prop%2012.jpg


This is the blank for the tail staff mold after rough shaping with the wire cutter.

Azir%20Staff%20LOL%20Prop%2013.jpg


Initial cut on one of the wing blanks.

Azir%20Staff%20LOL%20Prop%2016.jpg


Starting the shaping cuts.

Azir%20Staff%20LOL%20Prop%2018.jpg


More cuts.

Azir%20Staff%20LOL%20Prop%2019.jpg


The end of basic shaping. In the end, the dual action sander proved to be the best way of shaping this material.

Azir%20Staff%20LOL%20Prop%2017.jpg


After basic shaping, we applies fiberglass resin to harden the foam in preparation for using Bondo to do the remaining sculpting. The crystals are coming along particularly well at this point.
Azir%20Staff%20LOL%20Prop%2020.jpg


We wanted the wings and crystals to lead the main piece. In any case, the main piece has proven to be a real PITA to shape. Because it's large, it flexes and results in the foam blocks cracking or popping off. If I was starting over, I'd use a thicker backing plate or add some stiffeners to reduce the flexing.

Azir%20Staff%20LOL%20Prop%2021.jpg


Despite the slow start, the main piece is coming along. EVERYTHING in view and throughout the garage is electrostatically coated with foam powder. I was shocked by how much collected in my hair and clothing.

Azir%20Staff%20LOL%20Prop%2022.jpg


Wish I'd put the dust cover on the car before I started sanding. At this point, the staff was coming along well though.

Next: Foam shaping and Bondo hi-jinx.

Redshirt98
 
Back for more? Clearly not many LOL fans on this site.


We needed to be able to break the prop down for transportation and maintenance, but be strong as well. To make a threaded female insert for the head of the staff (that all sounds very wrong), I filled in the deepest parts of the threads with modelling clay

Azir%20Staff%20LOL%20Prop%2026.jpg


Then painted the whole area with PVC mold release and let it dry overnight.

Azir%20Staff%20LOL%20Prop%2027.jpg


I filled in the threaded area with a special Bondo that has fiberglass fibers in it before wrapping the whole thing with layers of fiberglass mat and cloth. The idea being to unscrew it from the staff and have an extremely strong female thread to bond into the head of the staff.

Azir%20Staff%20LOL%20Prop%2032.jpg


While that was setting up, we moved on to the crystals and other foam bits. Rather than use spot putty (AKA glazing putty), I use body icing. Unlike the putty that has to dry, icing is catalyzed and can be sanded in just a few minutes. It's like Bondo, but much easier to sand. It is a great choice for silling surfaces, but is too weak and chip prone to use on edges.

Azir%20Staff%20LOL%20Prop%2028.jpg


Just mix up small quantities as needed--it sets very fast.

Azir%20Staff%20LOL%20Prop%2029.jpg


Here are the crystals getting close to finished.

Azir%20Staff%20LOL%20Prop%2023.jpg


After a couple more rounds of fill and sand, we made a rubber mold of the crystals

Azir%20Staff%20LOL%20Prop%2030.jpg


Filling was slow going on the foam pieces. They flexed and cracked or we would get close to perfection only to sand through the Icing and resin into the foam which would then collapse. I won't use floral foam again without a layer of fiberglass before adding the filler on top of that. The setup we had was too flimsy and cost a lot of time correcting damage along the way.

Azir%20Staff%20LOL%20Prop%2024.jpg


In making a mold for the wings, I first shot gel coat through an automotive touch-up gun. I under-catalyzed it and it took a couple of days to set up. This allowed the gel coat to undermine the mold release. In the end, I had a devil of a time getting the foam blanks out of the molds. The end result was the complete destruction of the mold blanks and the resultant molds bing useable, but with numerous surface imperfections. Here you can see the primer (grey) and some foam (yellow-green) stuck to the molds.

Azir%20Staff%20LOL%20Prop%2033.jpg


I cleaned it up as best I could. Here is the best I could do with the molds for the wings.

Azir%20Staff%20LOL%20Prop%2036.jpg


Next: Molding the wings and tail staff.

Redshirt98
 
Sorry for the delay in updates. Lots going on during this part of the build as the first of the final pieces get cast from the finished molds.


Before mixing resin we cut all the pieces of mat we would need as it is very difficult to cut more with sticky fingers. We used lots of small pieces to make it easier to conform to the complex mold and to ensure every section was at least two layers thick because the molds were rough and we knew that alone would drive lots of cutting filling and sanding of our pieces.

Azir%20Staff%20LOL%20Prop%2038.jpg


Laid up and curing. I use a very small fiberglass roller to force the mat into the nooks and crannies as well as work the air bubbles out. Each pair took about 45 minutes to get worked to my satisfaction. Again, these molds were not great, so I needed to get the most out of them to reduce the post casting work in any way I could.

Azir%20Staff%20LOL%20Prop%2039.jpg


The floral foam had proven to be so fragile to work with, we abandoned it for building up the details on the main mold blank. Layers of cardboard held with hot glue conformed to the curves of the back piece.

Azir%20Staff%20LOL%20Prop%2034.jpg


The idea here was to completely detail this piece before joining it to the main section as this was a handy size to work. Keeping is separate would allow us to get sanders and files into spaces that will be inaccessible aster assembly. Done right, we would only have slight gaps to fill after bonding to the main piece.

Azir%20Staff%20LOL%20Prop%2035.jpg


Already starting to look the part after saturating with catalyzed resin then applying the first layer of Bondo.

Azir%20Staff%20LOL%20Prop%2042.jpg


If this were a reality TV show, this is where the producers would inject contrived drama by showing the cooks start a fire, the car restorers break a major part, or the over-sensitive workers get into a fight. Here's our drama. The main part fell off the edge of the bench I was too lazy to clean and exploded, Floral foam how I hate you so . . . .

Azir%20Staff%20LOL%20Prop%2037.jpg


Meanwhile, the tailstaff halves are out of the molds!

Azir%20Staff%20LOL%20Prop%2041.jpg


They came out cruder than we would have liked, but we can work with these no problem.

Azir%20Staff%20LOL%20Prop%2043.jpg


Medic! Here is the main piece in traction and covered in band aids as we try to get it back into shape after the mishap. We lost a couple of days' work here. You think I would have learned as I had a similar mishap with my Spartan Laser that very dramatically revealed which of my welds on the aluminum receiver were substandard.

Azir%20Staff%20LOL%20Prop%2040.jpg


Finally, we have two sets of wing parts from the mold. Copious quantities of mold release wax and PVC mold release spray ensured these demolded without issue. Wow, these are a long way from finished! They will look 100% better once we use the band saw to cut off the excess and get the initial layer of Bondo on and sanded. Most certainly a lie, but sometimes you have to lie to yourself to keep a project going.

Azir%20Staff%20LOL%20Prop%2045.jpg


That's it for today. Next time we'll get some real progress on the main piece and make jewels so we can bedazzle it!

Redshirt

 
Clearly not a lot of League of Legends enthusiasts here. Even so . . . .

After cleaning up the molded pieces of the wings, there is quite a bit of finish work to do, but everything is solid and should assemble nicely.

Azir%20Staff%20LOL%20Prop%2054.jpg


The detail piece for the main body is gaining more and more fidelity with each coat of filler. I use body icing for fast turnaround between coats.

Azir%20Staff%20LOL%20Prop%2047.jpg


Another view of the layout.

Azir%20Staff%20LOL%20Prop%2052.jpg


On initial mock up, the setup was over eight feet long. We had to shorten the staff to make it practical to carry around.

Azir%20Staff%20LOL%20Prop%2049.jpg


Getting down to the final details. Where the jewels will fit we placed 80 thou pieces of styrene coated with mold release then built up filler around the edges before popping out the styrene to leave a recessed pocket to fit the jewels.

Azir%20Staff%20LOL%20Prop%2056.jpg


All done! All the details are perfect. Ready for making a mold of it.

Azir%20Staff%20LOL%20Prop%2058.jpg


The wings are starting to come along. We cut the grooves for the lighting system. Sharpening the edges of the grooves will take some doing.

Azir%20Staff%20LOL%20Prop%2059.jpg


To make the mold, we bonded the blank to a thick panel of aluminum and coated the entire thing first with mold release wax followed by a layer of PVC mold release.

Azir%20Staff%20LOL%20Prop%2060.jpg


several layers of gel coat were next. The gel coat captures the details better than pure fiberglass resin and is more flexible, making for a better molding surface.

Azir%20Staff%20LOL%20Prop%2062.jpg


The final step was to build up at least two layers of matt for a very strong mold, then hope for the best. This was about an hour job to get all the air bubbles out.

Azir%20Staff%20LOL%20Prop%2064.jpg


Next time we'll pop the mold and make some parts.

Redshirt
 
Im surprised this hasnt gotten more comments although im not a LoL, from seeing youre Spartan Lazer, I cant wait to see the end result!

Thank you. I'm not an LoL guy myself, but my son who drove the project is. Even for viewers that are not LoL fans, there is still a core piece here relevant to any large scale fiberglass prop construction.

Redshirt
 
Sorry for the long delay. Here is some more progress.

With fiberglass, everything starts looking like a mess until you bring it under control. Case in point:

Azir%20Staff%20LOL%20Prop%2066.jpg


Nothing but hair and sharp edges everywhere. A few minutes on the bandsaw gets us something we can use:


Azir%20Staff%20LOL%20Prop%2067.jpg


Now that looks like a useable mold.


We cut out pieces of mat to match to overall shape. In this case, we didn't need it too thick or the prop would be needlessly heavy.
Here is the inside of the first finished piece:

Azir%20Staff%20LOL%20Prop%2069.jpg


And here is the business side. It came out nearly perfect. The flaky bits are the remnants of the film of PVA mold release. Before laying the gel coat and fiberglass in the mold, I waxed the mold using Johnson & Johnson Mold Release Wax and then sprayed the whole thing with PVA mold release. After about 30 minutes of drying time, the mold is ready for use.

Azir%20Staff%20LOL%20Prop%2072.jpg


Here are both halves prior to cleanup. Major milestone!

Azir%20Staff%20LOL%20Prop%2073.jpg


After cleaning it all up, the test fittings began:

Azir%20Staff%20LOL%20Prop%2074.jpg
Azir%20Staff%20LOL%20Prop%2076.jpg
Azir%20Staff%20LOL%20Prop%2075.jpg


We were pretty happy with that. There is still a lot of fitting and engineering remaining, but we have the major parts at this point.

Next up were the crystals.

Not a great picture, but here is the first set of crystals curing in the mold. We used clear casting resin from Hobby Lobby. It wasn't cheap, but at least it doesn't smell too bad. It has a 24 (or more) hour cure time.

Azir%20Staff%20LOL%20Prop%2031.jpg


After the clear crystals were out of the molds, we airbrushed them with a mix of blue and green Tamiya clear paints. To add durability, we clearcoated the crystals with Eastwood's Diamond Clear Gloss. Eastwood supports the classic car restoration hobby. Their Diamond Clear products are second only to commercial catalyzed automotive clear coats. Good stuff!

Behold!

Azir%20Staff%20LOL%20Prop%2071.jpg


These beauties will be backlit by LEDs when installed. They will also include a 'flare' effect when the staff is fired.


Next time well show the fitting of the fiberglass parts and the construction of the electronic systems.

Thanks for following!

Redshirt 98

 
Redshirt98 transmitting in the blind with another update.

The lighting system for this entire project is based around 12V automotive LED strips. The going in assumption was that these would be easy to cut, solder together and bend around corners to make a cost and labor effective approach to prop lighting. History would later reveal that these were utter falsehoods.

We we cut our strips, scraped away the rubber coating from the areas we would need to solder and got to it. Of course one of every four attempts to expose the copper strips resulted in cutting the copper and ruining the part. Notice the plus and minuses on the backing card to indicate polarity. Whatever end of a particular piece that was succesfully stripped without cutting the copper lead, determined where it ended up in the batting order.

Azir%20Staff%20LOL%20Prop%2077.jpg


All the jumper leads soldered in place. Too bad I used solid core wire for the red leads. It proved less flexible than the copper leads, imparting stress into the fragile joints. So much resoldering in my future.
Azir%20Staff%20LOL%20Prop%2078.jpg


Successful test! This will be the basic level of lighting for the wings when the staff is turned on.

04321010-6cd4-4ab4-81b7-9051e4237bf4.jpg


And here's what will habber in the wings when the firing button is pressed!

Azir%20Staff%20LOL%20Prop%2080.jpg


Meanwhile, I attempted to make crisp seams for every part by Bondoing the edges of every fiberglass piece gainst a level plane. The Bondo wrinkled the Press-N-Seal, so this was not entirely successful. It wasn't a failure either, there was just more work still needed to clean up the edges.

Azir%20Staff%20LOL%20Prop%2081.jpg


I selected one of the body halves to be the master where everything would mount to. I leveled up the staff with the body and fiberglassed in the staff mounting piece we had made much earlier.

Azir%20Staff%20LOL%20Prop%2083.jpg


Here's a closer look at the work. The green plug is an very strong impression of the threads on the staff.

Azir%20Staff%20LOL%20Prop%2082.jpg


After this photo, we used fiberglass mat to bond this piece very solidly into the body with elements running well into the body to avoid creating a natural weak point at the narrow point just above the attachment point.

Azir%20Staff%20LOL%20Prop%2088.jpg


So much thought went into how to mount the wings and balance the three competing requirements:

Need to get electricity into each wing for two circuits (common negative lead will work)
Need to be strong enough to suspend the wings above the body without being floppy
Need the suspension to be nearly invisible as the wings are supposed to levitate above the body

The electrical requirement eliminated using clear plastic rods or sheeting. We ordered 1/16 inch air drill rod to do the job. Each wing would need three sections of rod to suspend it--two positive leads and a single common negative. Whatever mounted the rods on either end needed to be rock frickin solid because they were gong to take a lot of stress. The mounting also had to be non-conductive. I had a nice block of red oak handy and it got pressed into service. The brass fittings are thread inserts. They host the set screws that will secure the rods.

Azir%20Staff%20LOL%20Prop%2084.jpg


Here are a series of pictures showing the initial fitting of the rods and mountings showing that the wing mounts in particular need modified to fit inside and leave room above and below for the lighting strips. This ended up being no small matter.

Azir%20Staff%20LOL%20Prop%2085.jpg


Azir%20Staff%20LOL%20Prop%2086.jpg


Not great pictures, but everything is being jigged into place here to glass in the mounts to the body. in this picture the preliminary bonding of the wing mounts is already complete.

Azir%20Staff%20LOL%20Prop%2089.jpg


Azir%20Staff%20LOL%20Prop%2090.jpg


Didn't work. Here's the first attempt to hold everything together courtesy of good masking tape. Despite heating and properly tempering the air drill rod, it just wasn't strong enough to keep the wings in place. Any attempt to hold the staff horizontal resulted in pronounced droop of the wings. They needed Viagra or a better mounting system.

Azir%20Staff%20LOL%20Prop%20100.jpg


The wings will only get heavier with the edition of lighting so we'll have to use thicker rods which means they will be more visible. Some of the flex is in the mountings themselves, so we will have to shore those up as well.

Redshirt98
 
Maybe I should add TOS Phaser or BTTF NIKE to the tags?

OK, so last update the wing mounting came together, but needed serious beefing up.

I came back with thicker and springier rods to support the wings. Here it's looking good. I'll paint the wires a matte black and grey to reduce their visual signature later.

Azir%20Staff%20LOL%20Prop%20104.jpg


So I set about figuring out how to join the parts together. Where I could hide screws, I did. Most often I used setcrews because of the small hole they needed on the outside of the model. Where I couldn't hide screws, I closed the gaps with rare earth magnets held in place by the tough glass fiber filled Bondo..

Azir%20Staff%20LOL%20Prop%20108.jpg


I also cut the lighting slots into the various pieces and cleaned up the edges. Lots of work here to get visible and hidden light apertures for the amber lighting.

Azir%20Staff%20LOL%20Prop%20109.jpg


On the inside of the main piece I fit a section of Lexan that would ultimately host the entire lighting and electronics package. At the bottom of the picture are all of the the lighting elements for the jewels.

Azir%20Staff%20LOL%20Prop%20106.jpg


The white styrene sheets will hold the sections of amber LED strips that will project horizontally out from under the cross-staff details. The triangulat cutout at the top will hold a reflector for the main beam that will illuminate for firing the staff.

Azir%20Staff%20LOL%20Prop%20107.jpg


Quick and dirty test of the blue LEDs to illuminate the jewels. It is easiest to see on the left, but only one of three strips is lit for basic illumination. When the trigger button is pressed the Blue LEDs will triple and the amber LEDs will double for firing.

Azir%20Staff%20LOL%20Prop%20111.jpg


ZOT!!! Hard to tell since the camera adjusts brightness, but here's all the blue lighting.

Azir%20Staff%20LOL%20Prop%20114.jpg


Better still in a darkened room. This will be awesome with the amber lighting!

Azir%20Staff%20LOL%20Prop%20112.jpg


There is no substitute for high lumens on a prop like this. This is going to be great when its done!

Azir%20Staff%20LOL%20Prop%20116.jpg


Next time we'll move on to final finish details and get the rest of the lighting working!

Redshirt98
 
Very nice progress with a lot of pictures, this is definitely going to help me in the future :)

Thank you. I'm trying to show the process so that others can take the info over to their own projects, but discover that we didn't take nearly as many photos as we thought. Amazingly that happens most when progress is good!

Redshirt98
 
Working on the amber lighting. The first order of business was to get the golden beam effect going. When fired, the staff emits a gold beam from the front. We wired together a pair of LED turn signals and placed them at the focal point we made from the top of a two-liter Coke bottle. We painted the reflector chrome-gold so it would fit with the rest of the staff.


Here are shots of the first test fires.

Azir%20Staff%20LOL%20Prop%20113.jpg

Azir%20Staff%20LOL%20Prop%20115.jpg


Each day brought another round of filing and filling to get the exterior straight.

Azir%20Staff%20LOL%20Prop%20110.jpg


Further refinement on the electronics in the headpiece gave us this for baseline.

Azir%20Staff%20LOL%20Prop%20120.jpg


And this for firing. Booyah!

Azir%20Staff%20LOL%20Prop%20119.jpg


The headpiece is almost ready for paint. Here the crystals are getting their final test fitting.

Azir%20Staff%20LOL%20Prop%20122.jpg


This view shows the slots under the cross staff and below the crest where the amber lighting will illuminate the face of the headpiece. The crystals look really good.

Azir%20Staff%20LOL%20Prop%20125.jpg


We got busy with the amber and got the setup installed in the headpiece and the Lexan centers for the wings constructed. As you can see, the headpiece is done and ready for finish painting.

Azir%20Staff%20LOL%20Prop%20128.jpg


And here's the firing test. The amber and blue illumination of the headpiece will look better when assembled. Here the top piece is resting in place so the LEDs are not correctly aligned with their emitter holes or crystals.

Azir%20Staff%20LOL%20Prop%20127.jpg


That's all for tonight. The paint and final install of the electronics is next!

Redshirt
 
This post takes us to the end of the build!

I had a tough time getting the normal and burst (firing) LED strips aligned by the slots in the wings. Here is my first attempt to pack everything into the wings--not a lot of space.

Azir%20Staff%20LOL%20Prop%20133.jpg


Done! At the bottom you see insulated alligator clips each grabbing on of the three suspension rods that hold up the wings. These three thin rods also carry electricity to the wings. Right is common ground, center is firing positive, and left is normal positive is firing. I kept normal positive and ground as far apart as possible to reduce the chance of accidental shorting if something conductive fell across the exposed steel rods. There's really not an issue as the battery amperage is low and I have fusing installed in our system. In this photo there are three short 'dummy' rods in place for testing.

Azir%20Staff%20LOL%20Prop%20121.jpg


Finally, time for paint! We tested several types of gold paint. The brightest was Krylon chrome gold, but the finish was soft and damage prone. When clear coated, all the metal flake re-oriented causing the appearance to become very dull. In the end, we went with VHT gold which is a little redder than the other golds, but tough and vibrant.

Azir%20Staff%20LOL%20Prop%20129.jpg


Over the gold base we airbrushed Testors Model Master Copper Metalizer. It had just the right red level to really set off the VHT Gold base.

Azir%20Staff%20LOL%20Prop%20130.jpg


We used super thinned-out acrylic black with a little brown to airbrush shadow and panel lines. The panel line denoting the outer hub of the copper area really didn't show until we highlighted it with the airbrush.

Azir%20Staff%20LOL%20Prop%20131.jpg

Azir%20Staff%20LOL%20Prop%20132.jpg


Here's a detail of the main beam LEDs. We scavenged a two-liter Coke bottle and painted it with chrome gold to make a reflector. Into that we installed two LED turn signal bulbs. They are super bright and draw a low amperage. When fired, they will project through a diamond-shaped aperture up between the two wings.

IMG_20150815_122646258.jpg


Here's a test fire of the main beam!

IMG_20150816_194616936.jpg


Here are all the dirty secrets inside. Very busy and packed full despite the giant size of the prop. We used wire nuts to bring wiring sub-assemblies together. While not a preferred choice in small electronics, they allow removal and repair of the individual harnesses.

IMG_20150815_122551342_HDR.jpg


Finished! This is normal illumination.

IMG_20150816_150006495.jpg


This is firing illumination. ZOT!

IMG_20150816_150259622.jpg


Some outdoor shots at night.

IMG_20150816_194516217.jpg


IMG_20150816_194542494.jpg


IMG_20150816_194421066.jpg


With the staff complete, it was time to debut it at the local CON. We are very happy with the result and were surprised at how many people recognized it.

Azir%20Staff%20LOL%20Prop%20135.jpg


Azir%20Staff%20LOL%20Prop%20137.jpg


Azir%20Staff%20LOL%20Prop%20138.jpg


Thanks for watching. We are looking forward to getting it out to more events in the future.

Redshirt98
 
I have to admit, a very nice build

Thank you. Glad to be finished. We are very happy that the lighting effort paid off so well.


That was clearly a lot of work. But it paid off. Very nice end result !!!

Thank you. As with most builds, it took much longer than expected. About a third longer than I expected--about three times longer than my son expected. Remember that this began as a father/son project to teach him how to build props. Much of the teaching came in the form of me texting pictures and progress updates to him while he was away at college.

Redshirt
 
This thread is more than 8 years old.

Your message may be considered spam for the following reasons:

  1. This thread hasn't been active in some time. A new post in this thread might not contribute constructively to this discussion after so long.
If you wish to reply despite these issues, check the box below before replying.
Be aware that malicious compliance may result in more severe penalties.
Back
Top