Jason Voorhees Build from Friday the 13th Part 7

Cbstudios

Sr Member
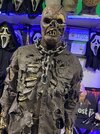
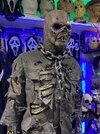
After a significantly long period of being in a sculpting funk, I finally decided to start a new project. What better to try and build than the hulking Zombie Jason from Friday the 13th part 7: the New Blood. This will be a full costume build with the latex undersuit showing flesh and gore and bone, with the heavily weathered costume over the top.

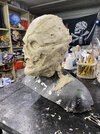
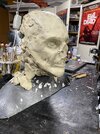
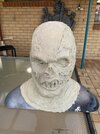
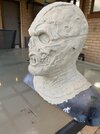
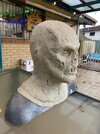
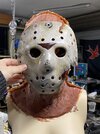
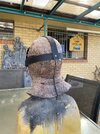
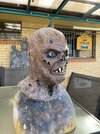
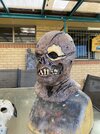
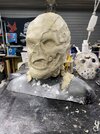
I started off with the undermask, by roughly blocking out the basic shapes and forms in plasticine on a lifecast of myself. After a few hours we got to a decent place.
IMG_2880.jpegIMG_2881.jpegIMG_2882.jpeg

I continued throwing clay on the form until I had the overall shape and proportions, then began adding detail.
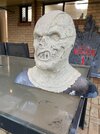
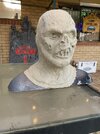
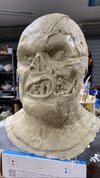
After roughly 4 sessions, this is the almost finished sculpt. Just a few tweaks I wanna make to the eye sockets.
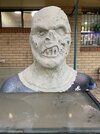
IMG_2974.jpegIMG_2973.jpegIMG_2972.jpegIMG_2975.jpegIMG_2976.jpegIMG_2977.jpeg

Next up is going to be making the 2 part plaster mould so I can run myself a couple of copies in latex. The idea with this is to have one with a full face and another with the face cut out so I don’t suffocate under the hockey mask. I’ve been timelapsing the whole process for my YouTube channel showcasing the project.

Watch this space!
 
Alrighty, update time!
I finished up the sculpt and tweaked the eyes and got it right where I wanted it.
4728B449-BA41-499B-AE20-A1F05941C3C9.jpeg
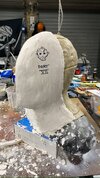
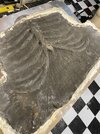
Then it was time for moulding. Two solid sessions of white hydrocal halves, I have very few photos of this stage because it’s just not worth the effort.
IMG_3054.jpeg

Once these had a chance to cure, and they got demolded, I began laying up the latex. I brushed in a few layers of pre-tinted latex, just regular latex with some burnt sienna acrylic paint mixed in to give it a decent base coat. I kept brushing latex in until I got it to the thickness I wanted and let it fully cure over a day or so. Once it was fully dry, the exciting part…. Pulling it from the plaster mold!
IMG_3209.jpegIMG_3210.jpegIMG_3211.jpegIMG_3212.jpeg

I’m stoked with how it looks, next up will be trimming and patching the seams, cutting the back split and then the paint work can begin!
 
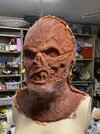
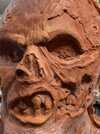
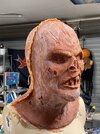
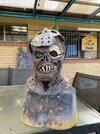
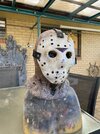
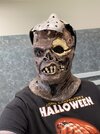
So, with a pair of scissors, I hacked (neatly trimmed) the flashing off the seam, and using tinted latex to patch and a dremmel to smooth, i evened the whole seam line out. Once I’d stippled some more texture in and let it all dry, I cut a slit in the back and using contact cement, I glued a zipper in. I also used a small hollow punch and added breathing holes in the nose and mouth, holes in the ears and a bunch of holes in the blacked out eye socket for sight. Then it was on to paint. I used acrylics mixed with latex as a base, and then slowly mixed a bunch of appropriate colors and dry brushed them on. I went back and forth with color until I had a look that I liked. I mixed up a bone white and painted the teeth and exposed eye socket, then blacked out the areas that needed it. The two gashes were base coated in a burnt sienna and then had a heavy wash of black added giving blackness but also depth.

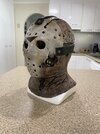
Once all the paint work had dried, I shot two coats of clear plastidip over the whole thing to lock it all in, and called it done!
IMG_3334.jpegIMG_3330.jpegIMG_3331.jpegIMG_3332.jpegIMG_3335.jpegIMG_3336.jpeg

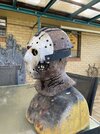
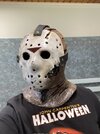
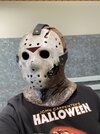
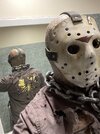
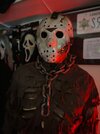
This thing turned out really fun, I’m super happy with it and with the hockey mask on really gives the Jason look. Wears super comfortably too.
IMG_3339.jpegIMG_3338.jpegIMG_3346.jpeg

Onto the next stage…. Perhaps the torso
 
Looks awesome man. Picked probably the hardest Jason to do!! Looking fantastic!

On a side note, there's a member here that had the OG Part 7 teeth, and offered some casts up for sale a few years ago. Might be worth a search to see if he's still active around here.
 
Looks awesome man. Picked probably the hardest Jason to do!! Looking fantastic!

On a side note, there's a member here that had the OG Part 7 teeth, and offered some casts up for sale a few years ago. Might be worth a search to see if he's still active around here.
Thanks dude! And that’s rad! I’ve seen a few castings of the teeth around before. I never even considered using a set for this but it’s a great idea
 
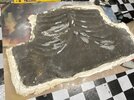
Ok, small update time. Between working on an Iron Man build and work kicking my ass, I’ve begun work on the rotting chest.

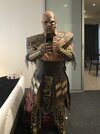
Back in 2018 I sculpted a pretty gnarly replica costume of the Finnish Hard Rock band Lordi’s guitarist, specifically his 2008-2010 “Deadache” era. It was almost entirely cast latex and it looked awesome, with a few very Jason inspired aspects I think.
IMG_7755.jpeg
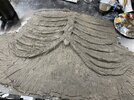
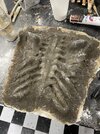
Now a lot of the molds I still have for this aren’t gonna work, as they’re fairly stylized, however the chest is already very Jason-esque (Not Jason X), so I went ahead and mixed up some tinted latex and ran a cast out of the somewhat crumbling chest mold.
IMG_3545.jpeg
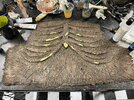
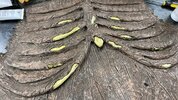
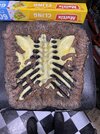
Now, this was looking good to start with, but the sculpt needed more bone exposed, so I went back to the mold and brushed up a few little thin bone appliances. Once they’d cured, I freed them from their plaster home and using more latex, bonded them into place
IMG_3623.jpeg
Once the latex had dried, it all blended together really nicely, the seams for the bone patches are pretty discreet thanks to the texture of the sculpt. Now next up will be painting to match the mask, and bonding the appliance to a compression shirt, oh and then sculpting more pieces like the arms and spine
 
Lets get going with some flesh.

The torso got a base coat of some Burnt Umber, then a mix of burnt sienna and flesh colors for the skin tone, building up layers and color until i was happy with it, then the bone got its lovely aged finish and the whole thing was locked down with a coat of clear plastidip.
IMG_4020.jpegIMG_4022.jpegIMG_4023.jpeg
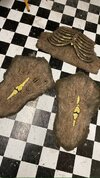
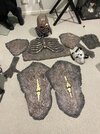
At this stage I decided to change my plan, and use the thighs and biceps molds I'd made for the earlier mentioned Amen costume, I figure that with a bunch of shredded fabric and some careful paint work, the drastic change in texture isn't gonna be noticeable. So I ran some pieces up. I did take this opportunity to quickly sculpt up some knee appliances, using plasticine and plastic halloween bones. These were very quick and rough but when blended into the thighs looked great. I also cast up 2 extra casts of the bicep pieces, which when turned upside down made great shin extensions for the thighs. These all got latexed together and painted like the chest.
IMG_4179.jpegIMG_4338.jpeg

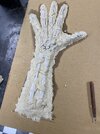
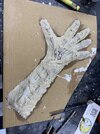
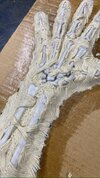
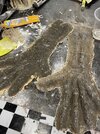
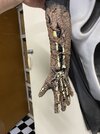
Next up, hands. Super simple, i just drew around my own hand and forarm, and sculpted a rough structure using the same plasticine and halloween bones method. Plaster moulded that and got some sweet latex pieces out. I cast these pretty thin so I get a good amount of flexibility.
IMG_4416.jpegIMG_4451.jpegIMG_4418.jpegIMG_4471.jpegIMG_4499.jpeg
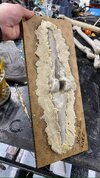
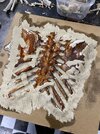
Same approach was done for the back piece, Plastic halloween skeleton and plasticine, plaster and then cast the latex version.
IMG_4454.jpegIMG_4470.jpegIMG_4497.jpeg
Now that that's all together, next step will be gluing the pieces to pants and a shirt, weathering the top layers and calling it done! Lets get going on that shall we?....
IMG_4474.jpeg
 
Your work is looking AWESOME!! I just finished watching all of these in order, and this looks fantastic. It's definitely the most complicated Jason costume/makeup.

Are you trying to have it ready for Halloween? It looks like you will make it!!
 
Your work is looking AWESOME!! I just finished watching all of these in order, and this looks fantastic. It's definitely the most complicated Jason costume/makeup.

Are you trying to have it ready for Halloween? It looks like you will make it!!
Thanks dude! I really appreciate it.
Part 7 Jason is definitely his most complex look, and I kinda love the challenge, I figured it would be a fun one to tackle especially with my monster making experience.

I'm actually intending to have it done for a convention for this weekend. I may have dragged my feet a little too much but I'm in the home stretch now at least
 
Hell yeah, Curt! Looks amazing! Those Amen parts came in quite handy. I wouldn't have known they weren't sculpted just for this.
Thanks dude, Yeah they've come in nice and useful, Always great when I can make use of old stuff and cut down on my work, Plus, extra Lordi references in my costumes are always great
 
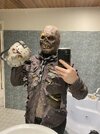
Alright, so my con weekend deadline came and went, however I got it over the line. Not a whole lot of pictures or footage of the assembly of things, mainly cos it was such a tight timeframe at the end.

Here's my first test fittings of the shirt/undershirt and mask. The latex chest and back are glued to a long sleeve cotton t-shirt, just using latex as the adhesive, and boy do they sit great.
IMG_4528.jpegIMG_4525.jpegIMG_4533.jpeg

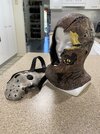
At this stage I realized wearing the full mask at a con was gonna absolutely destroy me, so I ran up a second latex mask and made a faceless hood. Its the exact same mold and construction, identical paint up, just with no face. Rad
IMG_4676.jpegIMG_4675.jpeg

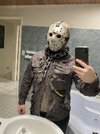
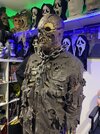
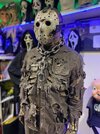
And then, the final shots! Clothing was a cheap (Aussie) Kmart work shirt and paints in a grey green, They got some dyebath and rattlecan weathering and shredded with various sand papers and xacto knives. The legs were glued down to a pair of tights and those tights sewn into the work pants. Honestly, I'm stoked as hell at how this turned out
IMG_4658.jpegIMG_4661.jpegIMG_4662.jpegIMG_4663.jpegIMG_4668.jpeg
 
And finally, the obligatory youtube video showcasing most of the process and the final result! Thanks for joining me on this hike through Camp Crystal Lake!
 
I can't say enough about yur work here...it's top tier for sure. Part 6 and 7 are my two favorites from the series. Such distinct looks too. This kind of artistry always amazes me. This is my first time seeing your work. Just fantastic!!
 

Your message may be considered spam for the following reasons:

If you wish to reply despite these issues, check the box below before replying.
Be aware that malicious compliance may result in more severe penalties.
Back
Top