Well the conversion went swimmingly. I did feel bad taking such a brand new, clean pair of sneakers and making them as dark as the night. I guess I'll write up a tutorial for anyone else thinking about doing this if they cannot get a hold of Jabbar V2's, or well, want to give it a shot.
Difficulty: Easy
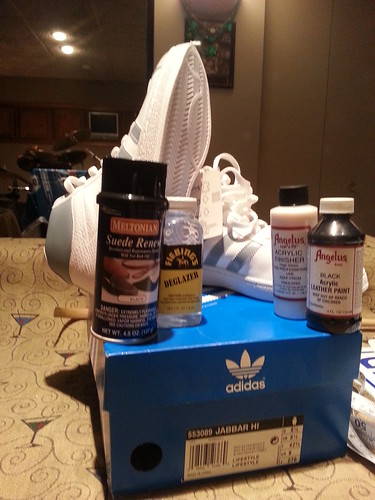
Materials:
-Adidas Kareem Abdul Jabbar sneakers (Deadstock if possible).
-Angelus Black leather paint 4oz bottle (not the dye!)
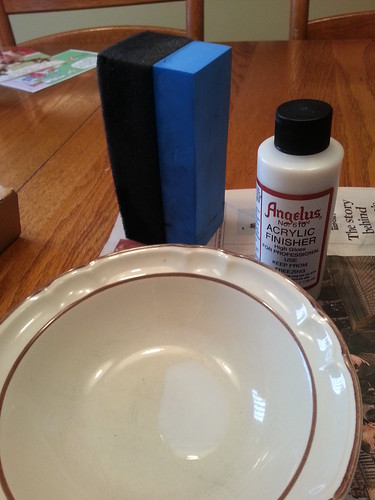
-Angelus High Gloss Acrylic paint Finisher 4oz bottle.
-Angelus (or Fiebings) Deglazer and Preparer.
-Sponge applicator (multiple).
-Small brush for detail areas.
-Small bowl.
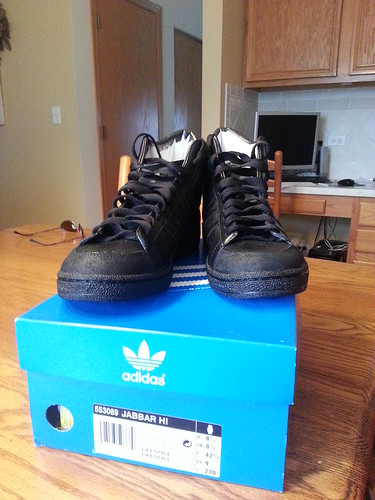
 Adidas Kareem Abdul Jabbars Sz 9
 by
TK9336, on Flickr
TIME: 3-4 Hours.
Preparation is everything when making a replica, or anything. You don't have to get halfway, and have a "oh snap" moment because then it is very likely it is too late, and a mind numbing fix. Make sure your workspace is ready (some newspaper would do really.) This isn't a messy project, just make sure you shake the paint bottle, put it in a bowl, have a sponge applicator ready, and just take your time.
First off, take the laces out. Remember, if your shoes are "deadstock" they are factory fresh, they have just been in the box for a long time. Make sure there isn't any dirt, or dust on them that could contaminate the paint finish. Take a cloth, wipe it off, and just make sure there isn't anything that screams dirt. If your shoes are dirty however, make sure you clean them with simple soap, and water and dry them bad boys off.
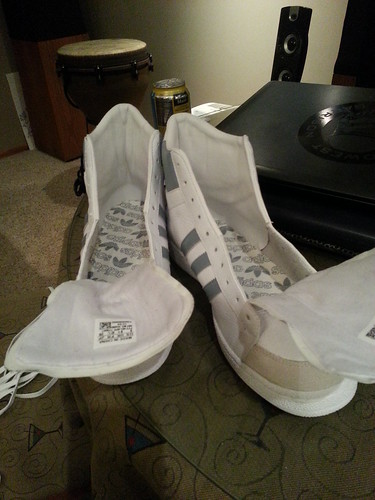 The Conversion
 by
TK9336, on Flickr
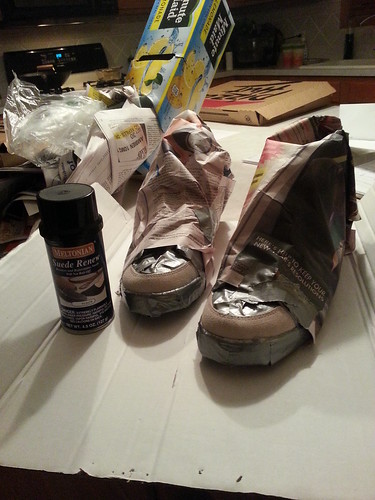
NOTE: I used Meltonian Suede Re-Nu for my suede toe bumpers. I put on really thin coats and it went on, but it was taking forever, and the best results I was getting, was dark grey, not jet black. I wouldn't recommend it. The tip to painting suede is that a little paint goes a long way. You have to
work the paint into the suede, otherwise glopping it on will look bad, and not work well. I don't recommend using that product, as the Angelus works fine, when using a sponge and taking your time.
 The Conversion
 by
TK9336, on Flickr
 The Conversion
 by
TK9336, on Flickr
(Definitely not black...but it served as a great undercoat!)
 The Conversion
 by
TK9336, on Flickr
(Painting suede [covered a little later in this post]. One coat on the left versus none on the right.)
Now, where were we? Right.
Deglazer, this stuff will stink up whatever space your working in, and the fumes aren't good for you either. Make sure you have a ventilated workspace! You don't need a ton, just spread over the LEATHER parts. Keep it off the rubber and suede. You don't need much because all your doing is taking off the protective factory finish. You can do the touch test. The factory finish leather will feel smooth and your finger glides across it. Once deglazer is on, it feels a little more natural. It feels a little rougher, but not a whole ton. You can, and will feel a subtle difference. This stuff also runs (consistency of water) so don't soak your sponge in it like I did, and end up finding another sponge to absorb the waterfall.
Coat it with two thin coats. Let dry. Like 10-15 minutes, let the juice do its work.
After it's dry feel to shake up your black paint. This paint has more similarity to sludge than water based paint. Once mixed up, it should have the flow of normal paint. However note: if you let the paint in your bowl sit out too long it will harden. So don't walk away from the paint and expect it to be the same an hour later. With that I recommend...
paint in sections! Pour out a little paint at a time, and don't go ham right away! Too much paint too quickly won't settle correctly, or bond as well and be MUCH more prone to cracking.
 The Conversion
 by
TK9336, on Flickr
Don't freak out after you do an area you see streak marks from your sponge, remember
thin coats! When you do every part on the shoe, go back and start at the first section you started at. It should be dry to the touch by then! You want a rich black, and that small bottle has WAY more than enough to do BOTH shoes. You could do another two pairs!
AGAIN: With Angelus paint, a A LITTLE GOES FAR! The biggest thing here is patience. Let the paint dry and take your time, hell...enjoy it! Put on TRON: Legacy, or Interstella 5555...I watched Pulp Fiction. Also, remember to have a drink near by. No one likes being thirsty! Rush it, and it will LOOK rushed!
 The Conversion
 by
TK9336, on Flickr
That is the meat and potatoes of it. A little goes a long way here. I recommend doing the center of the shoe, and tongue last. After that, using SMALL amounts, hit up that suede. This part will take time to get right. Just
take your time. I have stressed that enough yet? Rush it, and you soak the suede, and you can't really fix that.
If there anywhere you missed, use a small brush and fill in the areas with a good amount of paint (I found this happened on the top areas of stiches, and the recessed seam in the sole). Then your sponge and spread the paint around in that area, and not only is the spot filled, but it doesn't
look like you filled it.
Once everything is where you want it to be, put away your Angelus paint Break out the High gloss finisher. You really do not need a lot of this. Just pour a little, work it in. Pour a little more, repeat until completed. You notice a instant change. Essentially, you putting a clear layer over the paint that seals it, and protects it from the cruel world! It should also not be any bit tacky. Once dry, lace those bad boys up and break them in a bit. I think the results speak for themselves.
 The Conversion
 by
TK9336, on Flickr
OPTIONAL: Using the high gloss on the soles. I know, I know the soles weren't shiny...but the protection keeps paint from scraping off left and right. I wore my previous pair of modified Nizzas for about three months around a college campus. I haven't figured out anyway to really paint, or dye the rubber soles to be permanent. The leather paint is most certainly strong, and won't be taken off easily...I really applaud Angelus on that. I also put on the Forever Black tire dye on the soles, for kicks (no, not for kicking people), maybe it might help the finish last longer. I still have yet to put on the gloss finish on the soles, but I first put on the Angelus paint, then Forever Black, and will put on the gloss.
Last reminder...the paint on the soles will only rub off when making abrasive contact with other objects, and the recessed areas will remain black. If out at a con (like I plan to do) I will just bring the tiny bottle of paint and the sponge applicator, and re apply as necessary.
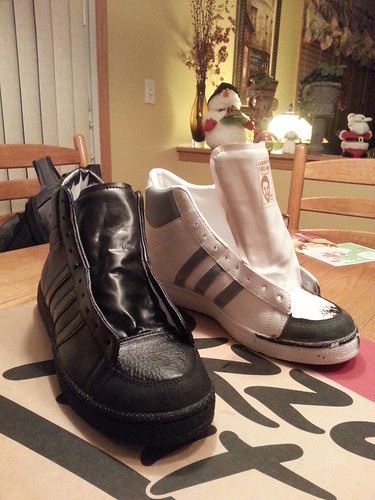
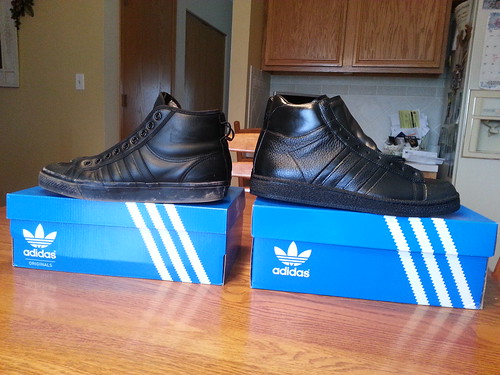
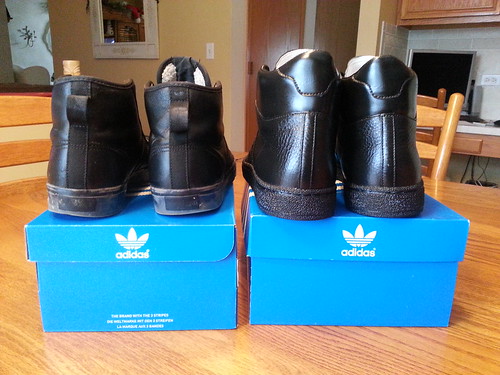
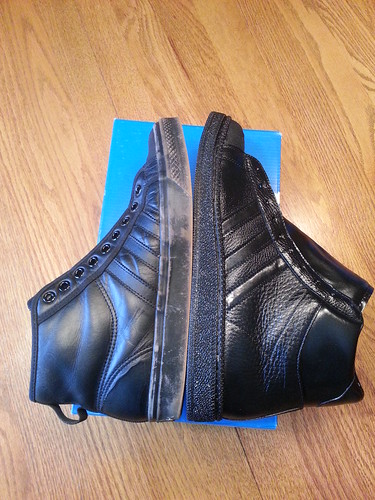
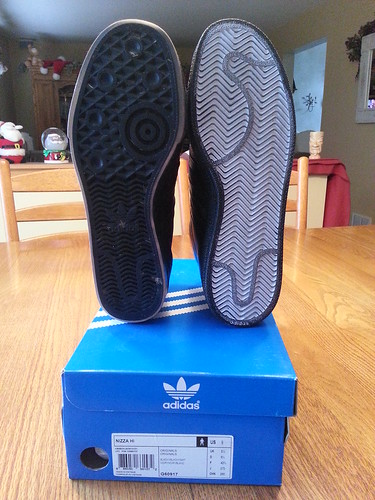
Now for a compassion next to my Nizza Hi tops. You can see they have a little wear and tear from regular wear.
 The Conversion
 by
TK9336, on Flickr
 The Conversion
 by
TK9336, on Flickr
 The Conversion
 by
TK9336, on Flickr
 The Conversion
 by
TK9336, on Flickr
 The Conversion
 by
TK9336, on Flickr
(Yes I only lightly went over the bottom. Once I have a official photoshoot done I will do it for it. Otherwise...it will just come off in time anyways...)
 The Conversion
 by
TK9336, on Flickr
 The Conversion
 by
TK9336, on Flickr
That ALL said...if I could just get the V2 Jabbars (which are smooth leather, and all black) I would and skip all this work ANY day of the week. If you can get the Brown Jabbars hi tops V2 in your size, or if your lucky to find black...just get them! When your soles scrape off the black paint on top of the brown, it won't even be noticeable. The only thing with the V2's...is that they lack the suede toe bumper. My recommendation? Once you have V2's in your possession, take them to get a suede toe bumper added by a cobbler. BAM! That's all you'd have to do.
So in closing I say, happy hunting!