wow... thanks man. But beautiful??? It was my very first attempt. I remember being about 16 years old and buying some sink tube at Lowes but I never got around to turning it into a lightsaber.
Fast forward about 10 years later and I'm at the hardware store on a mission! I managed to build this one using only 2 part epoxy glue. I used zero power tools. At the most I think I used a razor blade to cut a particular part.
I am actually very flattered that someone wants to replicate my design. I want to say thank you but instead I'll just stay humble and say... good luck with your build man... and you BETTER post pics of the results!
To be honest... the parts description I will be able to list but as for the insides... I'm just going to have to make some educated guesses, it's been about 4 years since I built this thing.
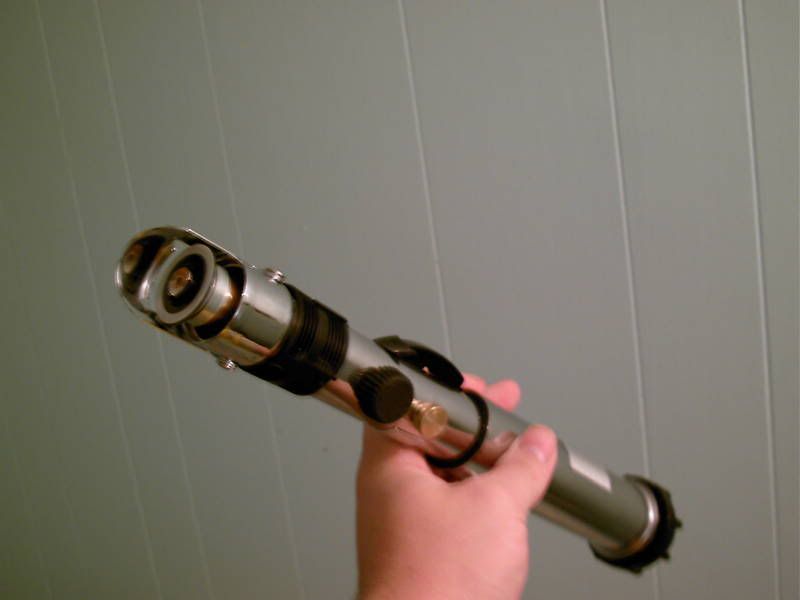
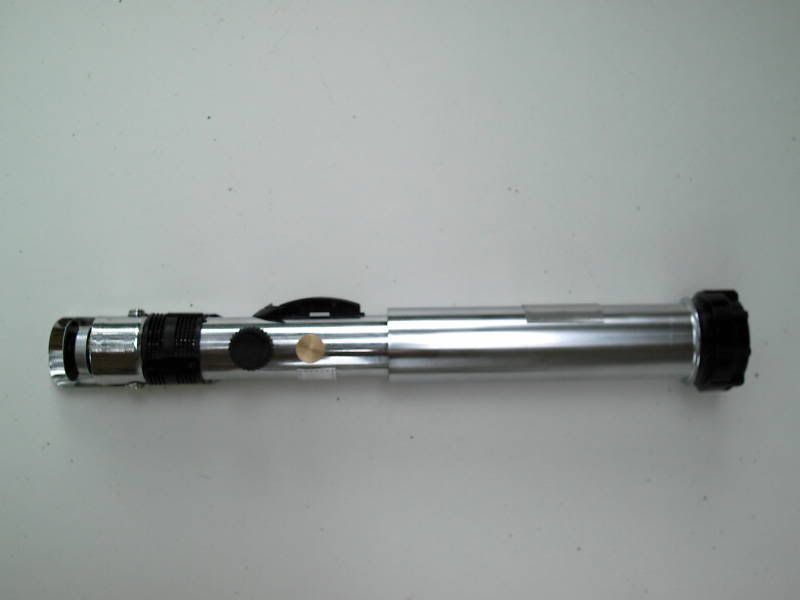
Here is the first pic to start....
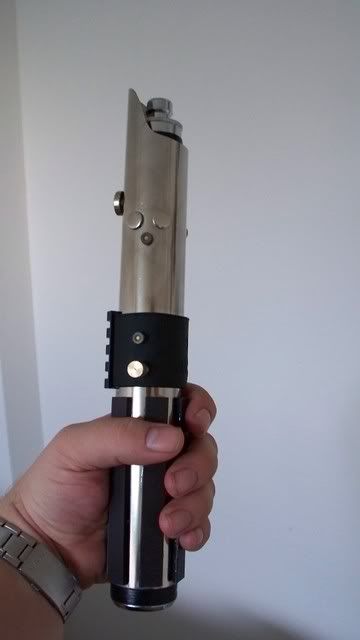
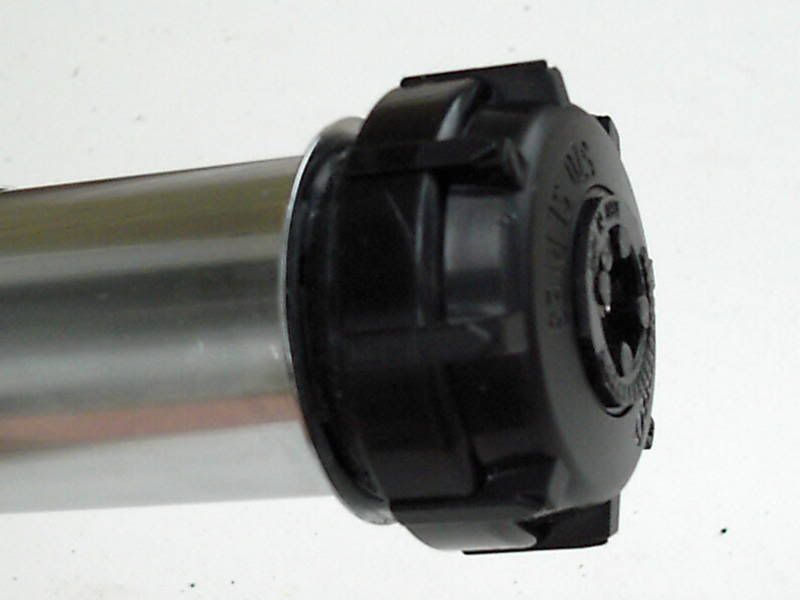
1) The pommel is actually a water sprinkler head bought from the local Home Depot. I didn't modify it at all. Just used some rubber O-rings and epoxy to secure it to the inside of the main body tube.
2) The main body tube is a chrome sink tube from Home Depot. It is a 1 and 1/2 inch tube, 6 inches long.
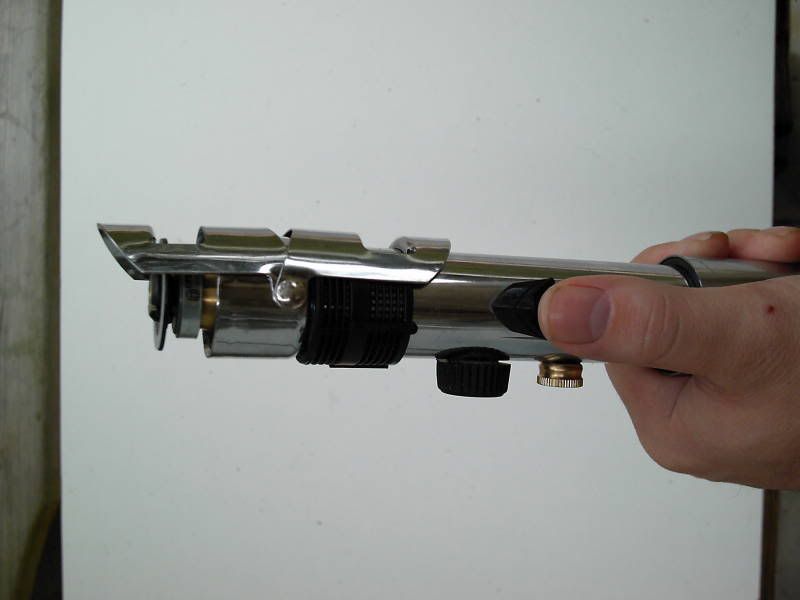
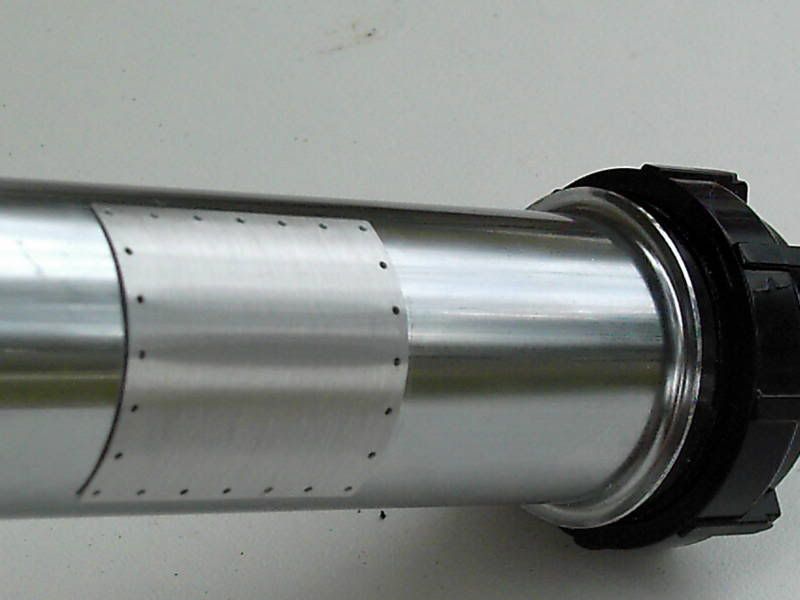
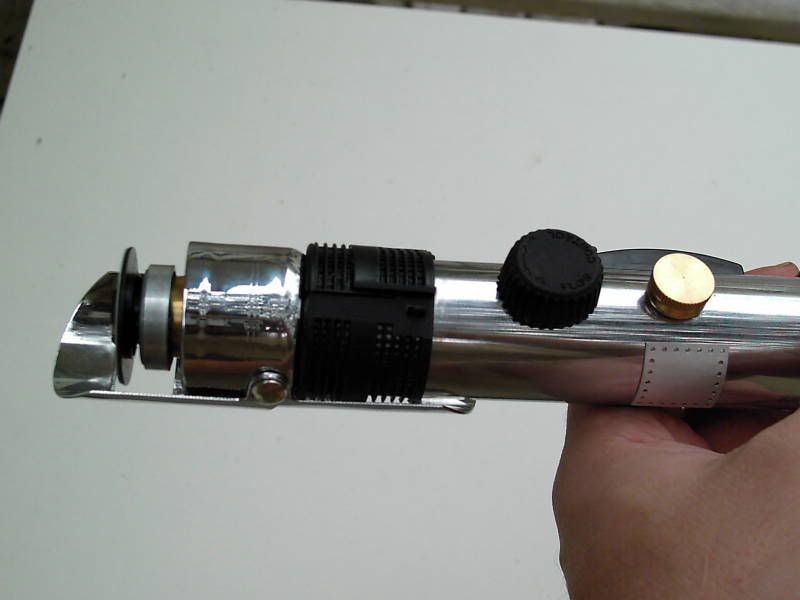
3) This metal "patch" is something I found at the local craft and hobby supply store. It has an "aluminum" finish and is very thin. I bought it from the Scrapbook supply isle. I just liked it because it had little holes punched all around the perimeter and it looked like rivets.
I took this part and held it against the sink tube while I rolled it, like a rolling pin, across the top of my desk. That put the correct curve to it and I used epoxy to glue it to the surface of the sink tube.
4) 1 and 1/4 inch chrome sink tube from Home Depot... 6 inches long. I think I used rubber O-rings and Epoxy glue again to hold the two together. I also think that there was some way that the sprinkler head attached itself into the smaller sink tube... but I don't remember for sure. And there's not much of a way to find out since the whole thing is glued together.
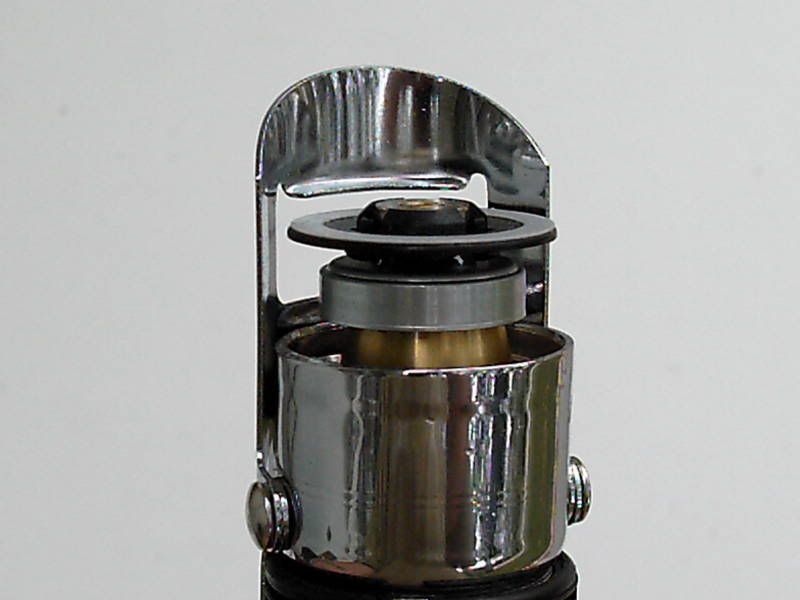
5) This part is one of those "special" parts that you only come across a few times. It is the dark lens that covered a Play Station 2 Multimedia Remote Control infrared emitter section. Seriously... I had a remote that I wasn't using, took it apart and pulled the "lens cover" that goes over the infrared LED.
6) This part would be even harder to find than #5... it's the SHOULDER peice off of a little plastic Anime model robot that I bought at Walmart YEARS ago. I don't know what else to say about it. I don't remember the name of the toy and have no way to track it down. But I DO remember that it was a "shoulder joint" or "shoulder pad" from that toy robot.
7) Another small metal "patch" just like the one mentioned in item #3. It's just smaller, but they came in the same pack.
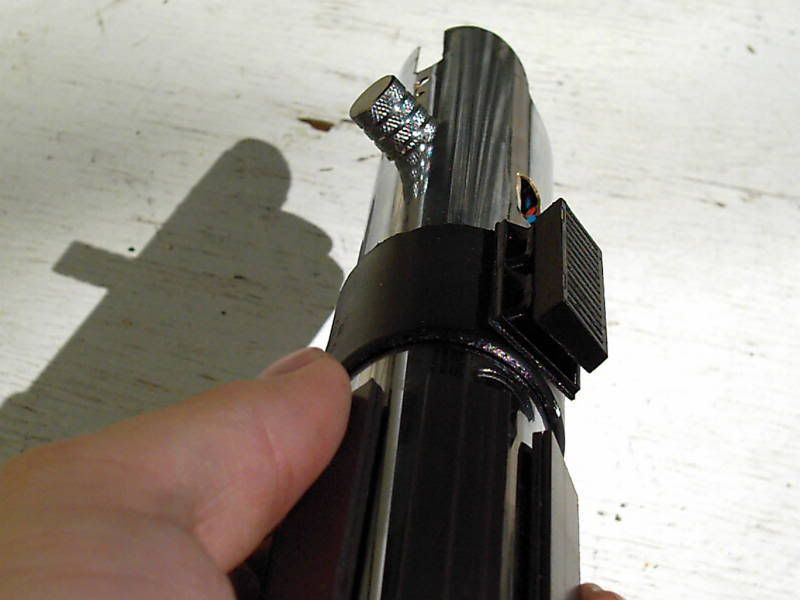
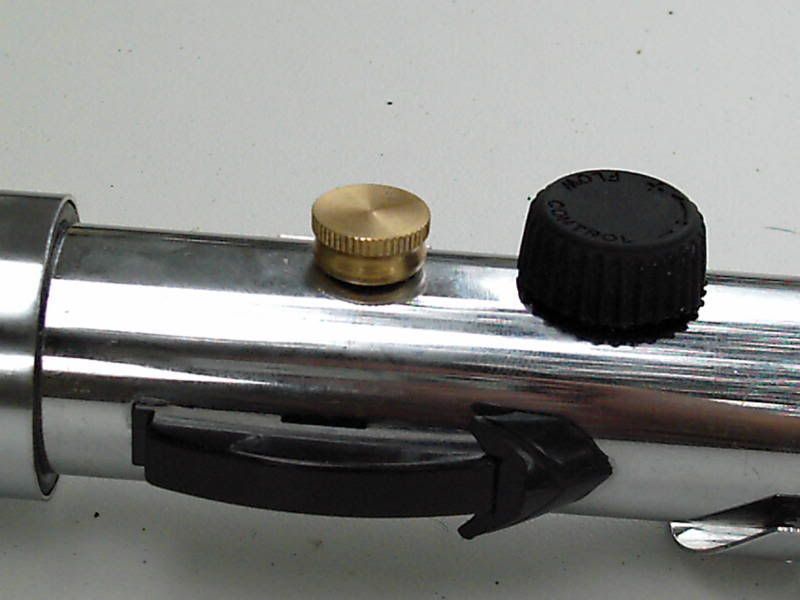
8) This is a Brass fitting that looked to me like a control knob. I think it actually came from the "CREATE YOUR OWN LAMP" parts section at Home Depot. It's the area where you would get parts to build your own lamps... it's usually on an endcap.
9) This little rubber "knob" actually came from a garden hose I bought at Walmart. It was mounted to the rear of the garden hose sprayer attachment and actually has the words "FLOW CONTROL" stamped into it with little arrows pointing to either side. One of the best found parts for that saber. FLOW CONTROL... Are you kidding me?!!??!!?
10) This little black "webbed" "collar" came from a smoke detector. Seriously... you take a smoke detector apart and there is a radioactive chip in there that is protected by a plastic shroud. You'll mistake it for a speaker if you don't know what you're doing. But I took the black plastic cage that surrounded the radio isotope and cut it up a bit... and glued it to the sink tube.
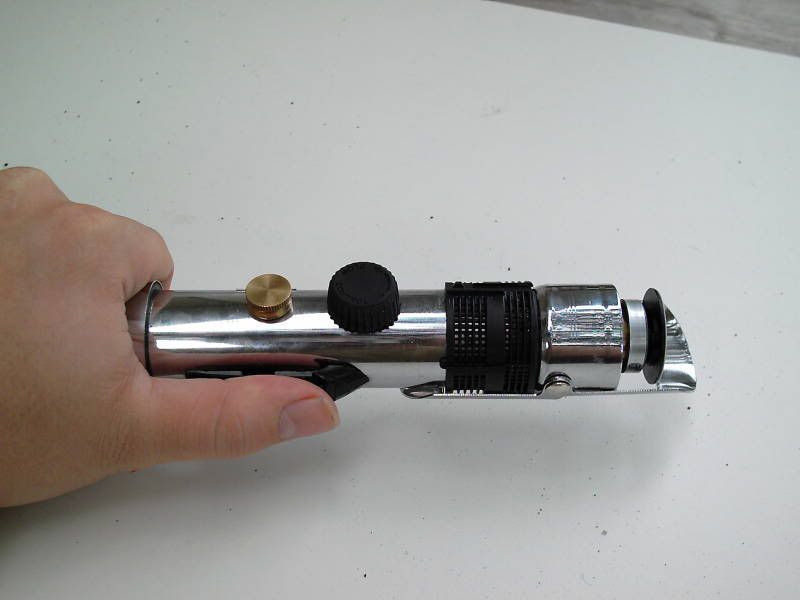
11) 11 is the emitter section and will be described below...
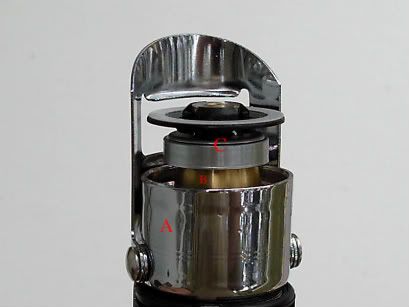
EMITTER SECTION...
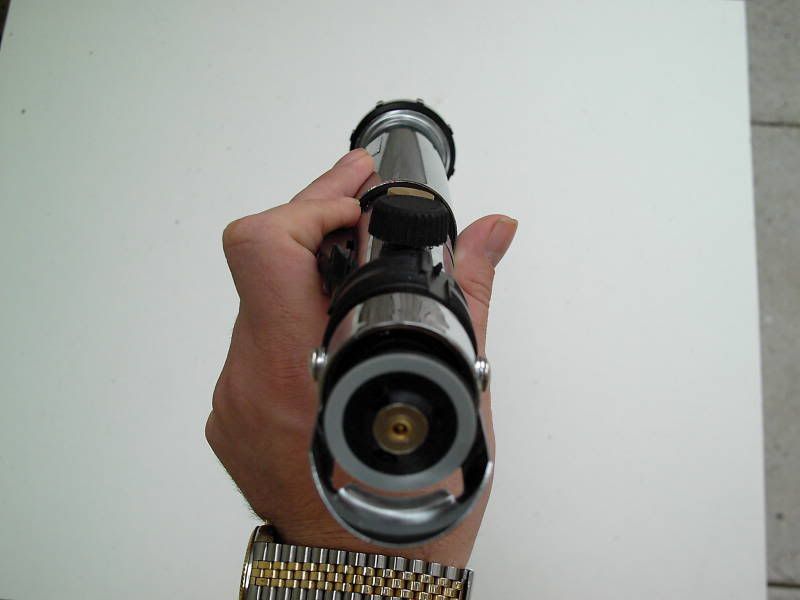
A) This is a "Wine Saver" sold at CVS drug store. It's on an end cap and has a white rubber plug on the end of it. Pull the plug out with a pair of pliars and there ya go...
B) This brass part is the end tip of a garden hose sprayer. I just twisted it until it came right off.
C) On the end of the brass hose tip... I glued the end of a CD Rom drive on. It's the part in the center that grips the CD. I just pulled it off and glued it onto the brass bit.
That's about all I can think of in the way of parts.
Again, I'm just completely flattered that you want to go back over my build and re-create something that I brought into the world. Makes me feel Shiny if you catch the meaning.
All else I can say is that if you're going to glue things to Chrome Sink Tube, you need to use some sandpaper to scruff up the surfaces to be glued. I actually like to use a dental pick, bought from the dental area of the drug store... it really lets you get a nice deep gash into the metal that is just wonderful for epoxy glue to get a hold of.
Good luck to you on your build... welcome to the board... and feel free to PM me with any specific questions you may have on your build. And for sure... be sure to post pictures of your creation for us!
Take care.
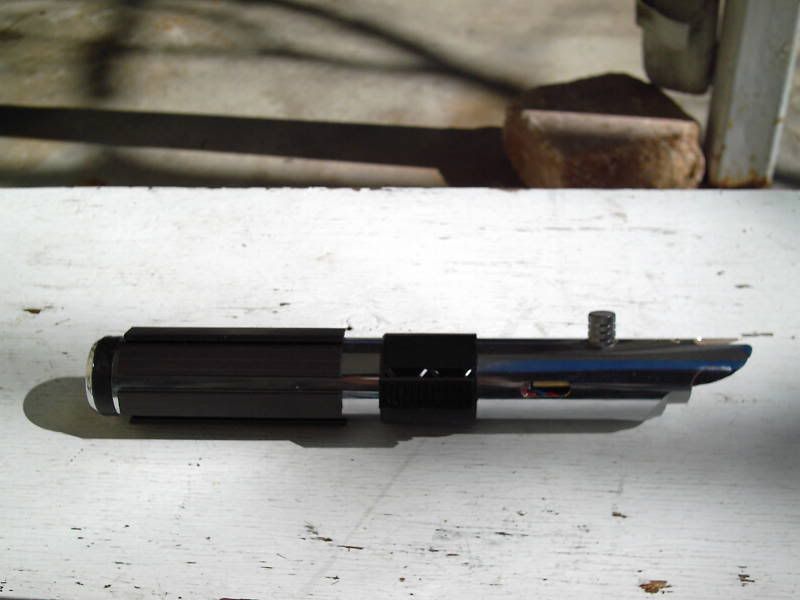
And here's the rest of the images...
Well... let know if there are any questions.
Adam


