indiefilmgeek
Sr Member
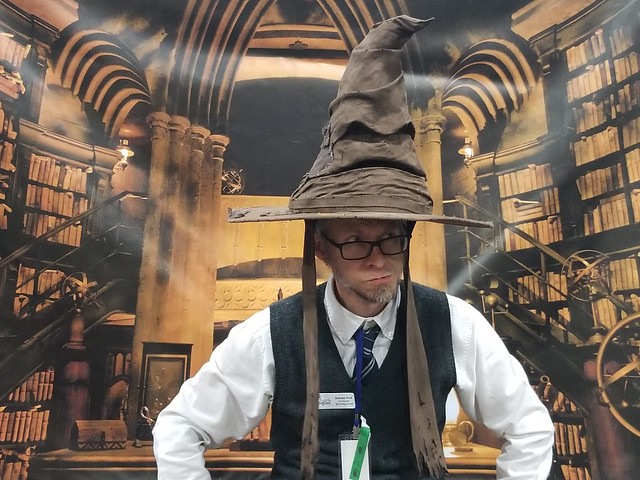
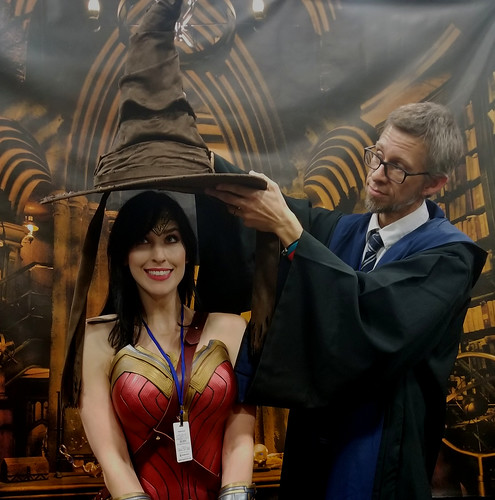
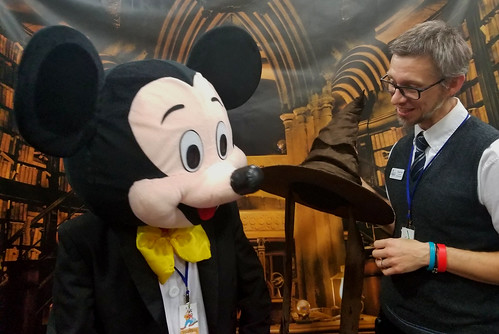
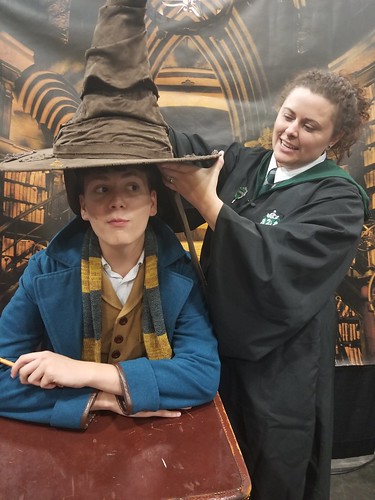
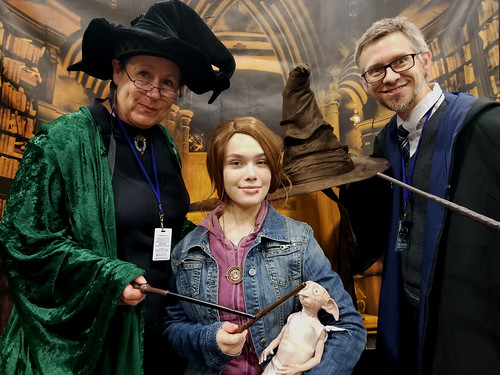
A local convention contacted me and asked if I could build a Sorting Hat 'puppet' for a charity fundraiser they were doing. As you know I work mostly in hard-surfaces (armor), but I love the charity they were supporting (Transfiguring Adoption). So, I said 'yes' I talked them into ditching the design of the hat just sitting on box with a puppeteer under it, and into a version where the hat could be placed over guest's heads and call out their house assignment (via Bluetooth speaker and a custom app I would write).
With this plan in place, I had one other big decision to make... The physical prop for the movies was made of leather and looked amazing, but it wasn't used during any of the talking shoots, as WB used CGI for all of that. And the look of the CGI hat isn't remotely close to the physical prop. My choice was to attempt to build something that looks most like the talking CGI version of the hat, since that is what most fans are most familiar with.
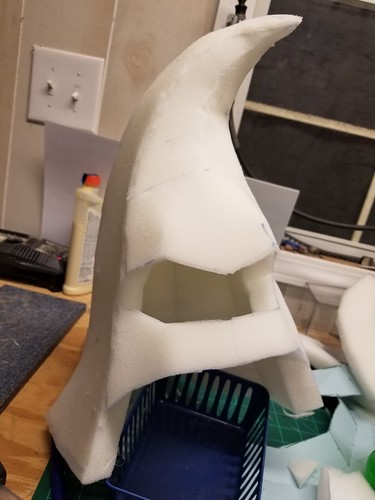
And since I'm a creature of habit, I started with Pepakura to determine the general shape. From that rough sizing reference, I converted the pep to templates and cut it out of 1" foam padding.
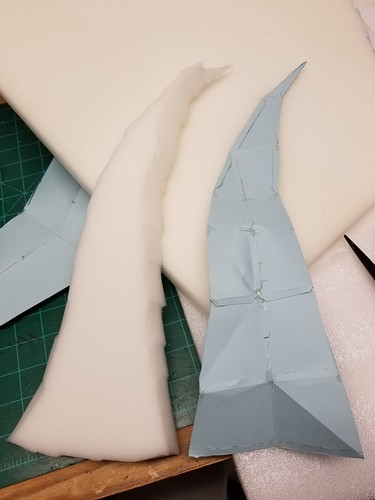
By cutting the foam edges at angles, I was able to hotglue them together to build the shape of the hat.
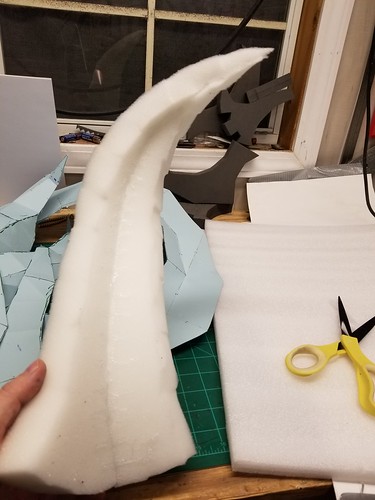
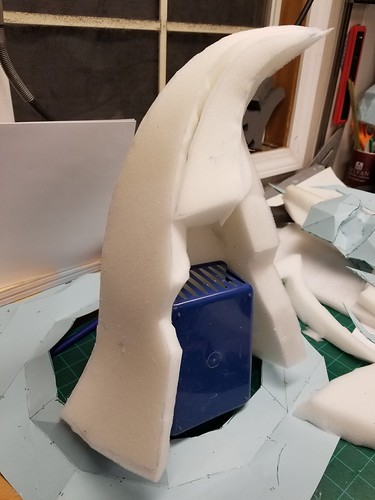
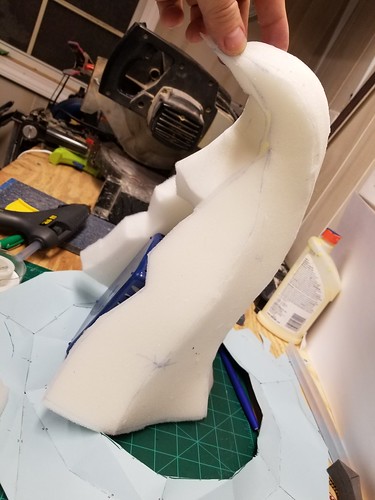
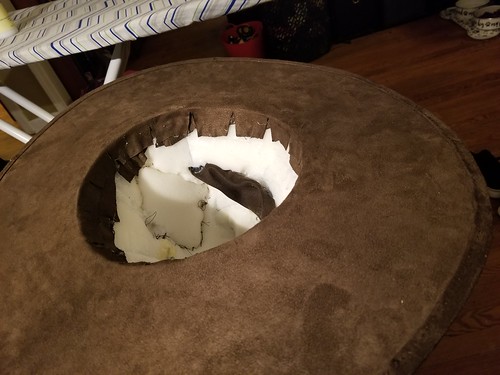
The trickiest part was the face area...

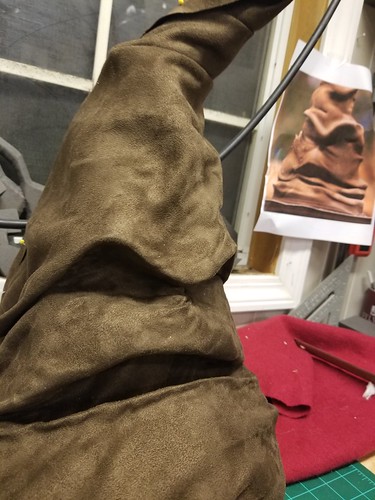
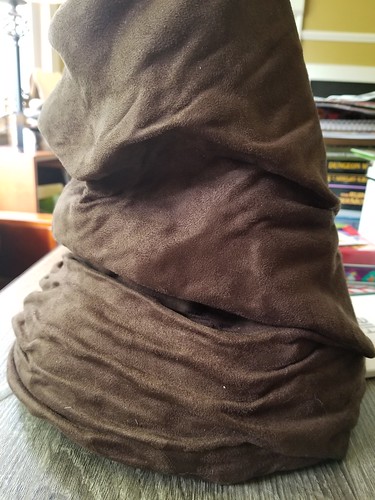
Next came the decision on material to cover the foam shape. I had ruled out leather, as that simply didn't 'look' like the CGI version of the hat (too shinny). So, I eventually landed on an upholstery fabric that looks as close as I could get to the CGI hat. I cut out material templates and then cut the final fabric and began hot-gluing it down (adding folds as I went.
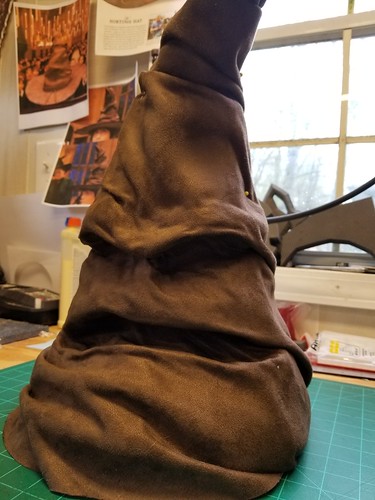
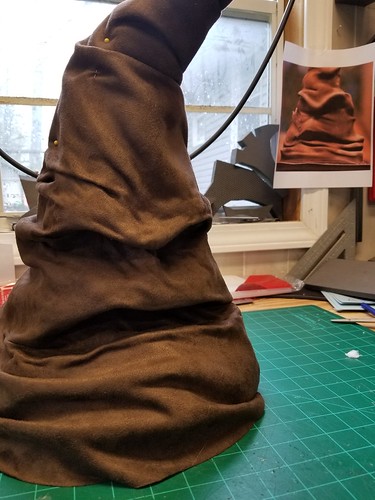
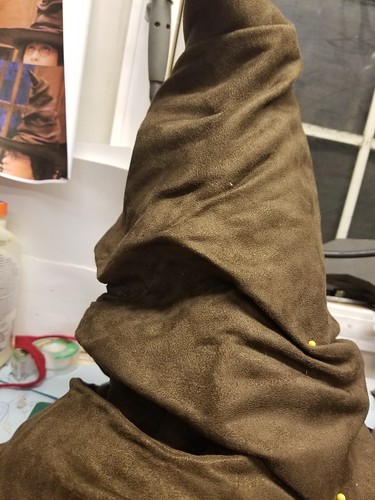
As I started to get the top glued down, I also started hand-stitching the fabric seam that will run down the back of the hat.
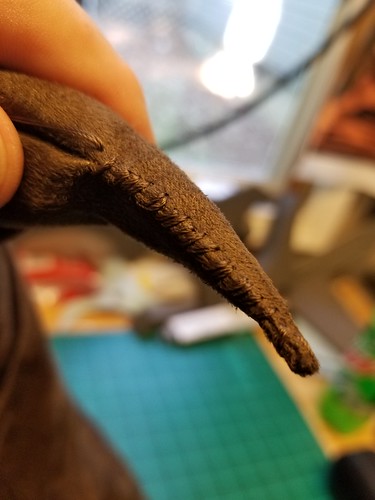
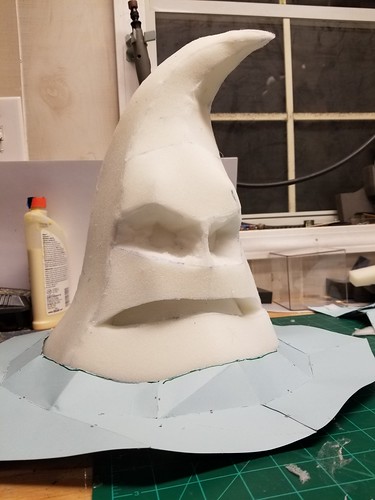
Not exactly happy with the arch of the eye-brows, I went back and did a little reshaping with a heat gun and more hotglue.
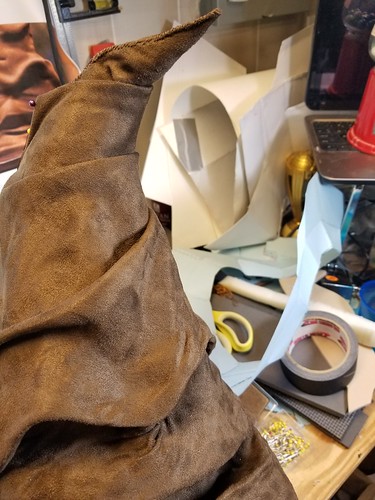
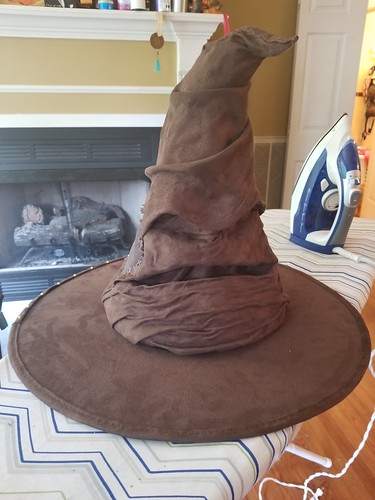
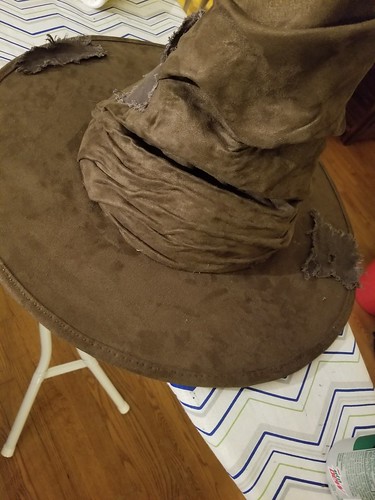
Finally satisfied with the top of the hat, I was ready to attempt the brim of the hat.

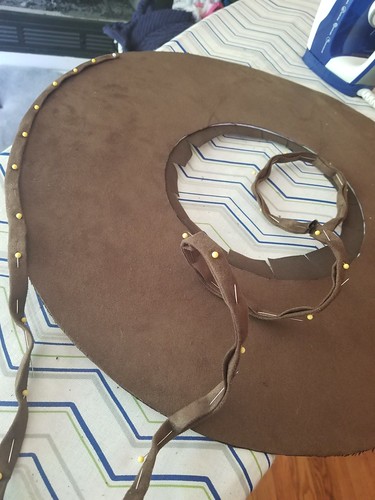
This was a major challenge, as I've never built a hat before and had NO idea what to use. I finally found some thick iron-on fabric backing that I did testing with. I eventually went with ONE of these layers (which was plenty stiff for the job).
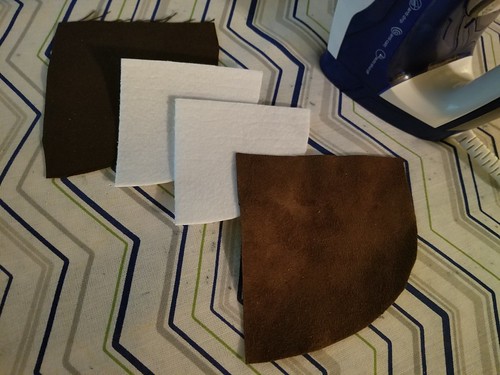
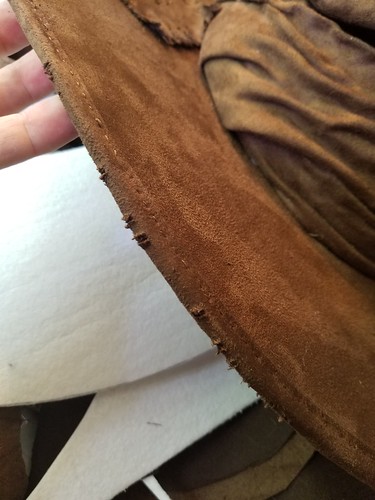
Lots of ironing later, and I had the top and bottom materials attached to the backing material. I then cut a very thin piece of the same fabric and pinned down the edging of the brim... NOTE: You WILL bloody your fingers if you hand-stitch this crap!
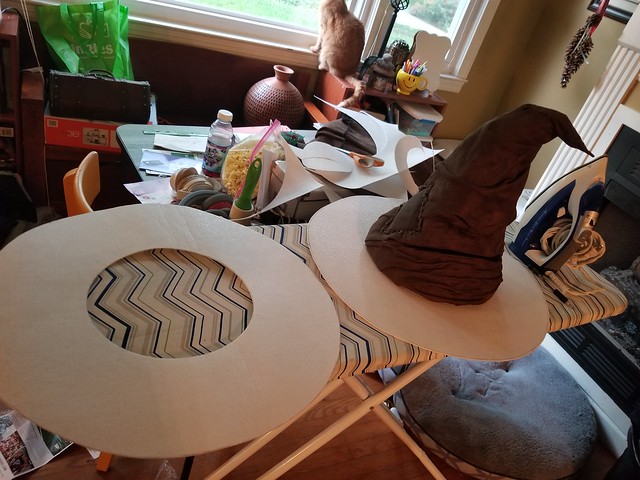
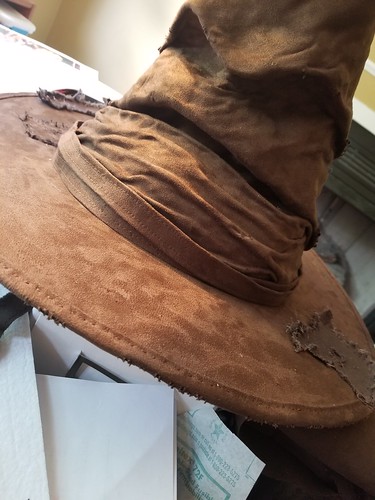
Test fit of the top of the hat on the brim!
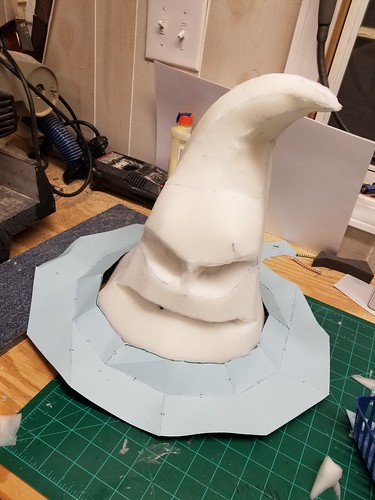
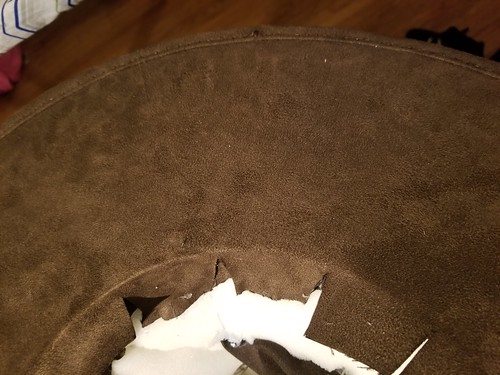
To attach the top to the brim (and because I didn't know of any better way to do it), I had left extra material on the bottom side of the brim 'sandwich'. I had cut those into flaps, so I could hotglue the brim to the hat and then fold over those flaps and glue them down so it held the brim in place. I will then hide this ugliness with a liner.
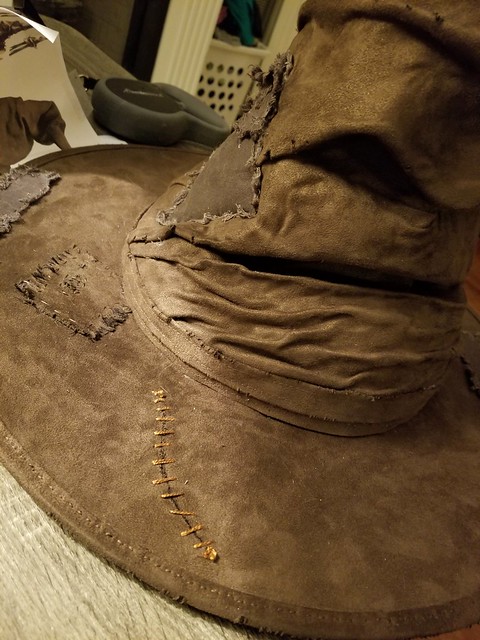
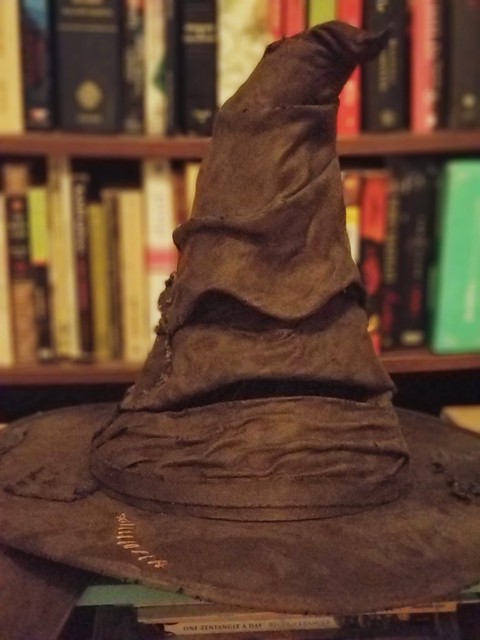
AND NOW MY FAVORITE PART!!!! Distressing my beautiful creation!!! lol
I started with a couple of the patches. I used a completely different fabric so they would show up well.
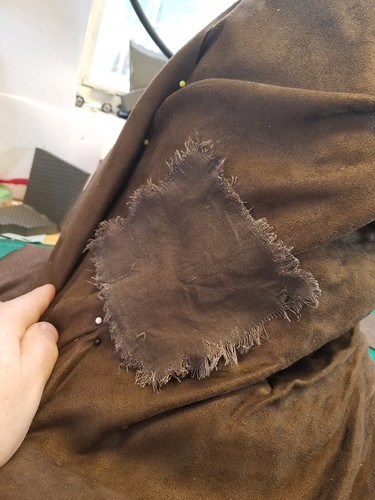
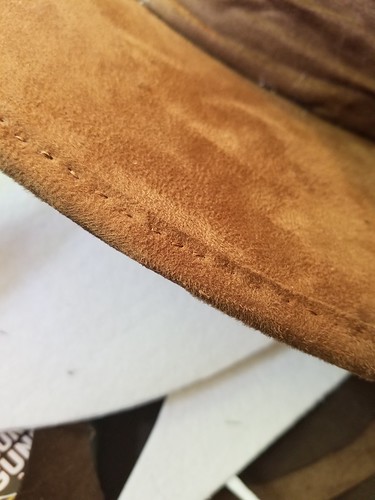
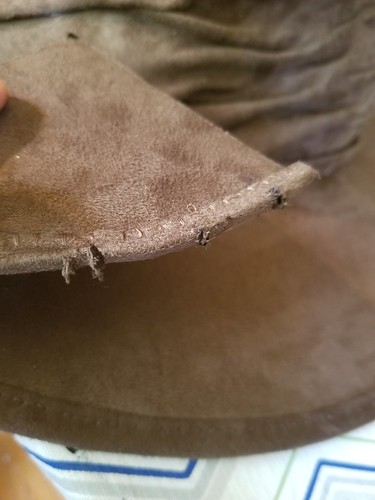
Then hatched at the edge of the brim and roughed it up with scissors and sandpaper. NOTE: always create a test piece just like your final piece that you can try all this out on.
Then I sewed the ribbon at the base of the hat. This will be distressed as well, and then glued down.
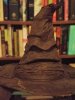
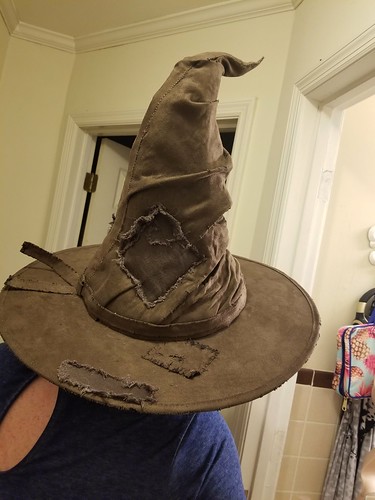
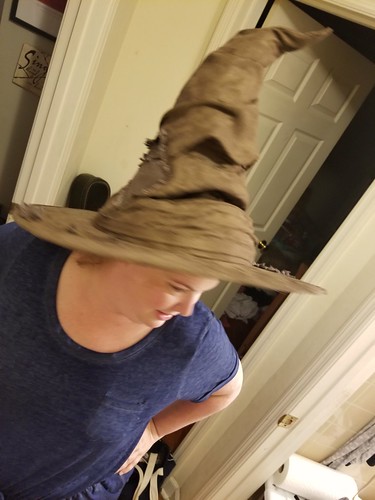
I also added some rips and obvious repair stitching. Here is a look at final look with all the distressing.
As soon as it was done, my wife stole it and started wearing around the house... The hat immediately assigned her to Slytherin.")
I'll share more pics (and hopefully video) from the event later this month!
Thanks & keep building!
IndieFilmGeek
With this plan in place, I had one other big decision to make... The physical prop for the movies was made of leather and looked amazing, but it wasn't used during any of the talking shoots, as WB used CGI for all of that. And the look of the CGI hat isn't remotely close to the physical prop. My choice was to attempt to build something that looks most like the talking CGI version of the hat, since that is what most fans are most familiar with.
And since I'm a creature of habit, I started with Pepakura to determine the general shape. From that rough sizing reference, I converted the pep to templates and cut it out of 1" foam padding.
By cutting the foam edges at angles, I was able to hotglue them together to build the shape of the hat.
The trickiest part was the face area...
Next came the decision on material to cover the foam shape. I had ruled out leather, as that simply didn't 'look' like the CGI version of the hat (too shinny). So, I eventually landed on an upholstery fabric that looks as close as I could get to the CGI hat. I cut out material templates and then cut the final fabric and began hot-gluing it down (adding folds as I went.
As I started to get the top glued down, I also started hand-stitching the fabric seam that will run down the back of the hat.
Not exactly happy with the arch of the eye-brows, I went back and did a little reshaping with a heat gun and more hotglue.
Finally satisfied with the top of the hat, I was ready to attempt the brim of the hat.
This was a major challenge, as I've never built a hat before and had NO idea what to use. I finally found some thick iron-on fabric backing that I did testing with. I eventually went with ONE of these layers (which was plenty stiff for the job).
Lots of ironing later, and I had the top and bottom materials attached to the backing material. I then cut a very thin piece of the same fabric and pinned down the edging of the brim... NOTE: You WILL bloody your fingers if you hand-stitch this crap!
Test fit of the top of the hat on the brim!
To attach the top to the brim (and because I didn't know of any better way to do it), I had left extra material on the bottom side of the brim 'sandwich'. I had cut those into flaps, so I could hotglue the brim to the hat and then fold over those flaps and glue them down so it held the brim in place. I will then hide this ugliness with a liner.
AND NOW MY FAVORITE PART!!!! Distressing my beautiful creation!!! lol
I started with a couple of the patches. I used a completely different fabric so they would show up well.
Then hatched at the edge of the brim and roughed it up with scissors and sandpaper. NOTE: always create a test piece just like your final piece that you can try all this out on.
Then I sewed the ribbon at the base of the hat. This will be distressed as well, and then glued down.
I also added some rips and obvious repair stitching. Here is a look at final look with all the distressing.
As soon as it was done, my wife stole it and started wearing around the house... The hat immediately assigned her to Slytherin.
I'll share more pics (and hopefully video) from the event later this month!
Thanks & keep building!
IndieFilmGeek
Last edited: