You are using an out of date browser. It may not display this or other websites correctly.
You should upgrade or use an alternative browser.
You should upgrade or use an alternative browser.
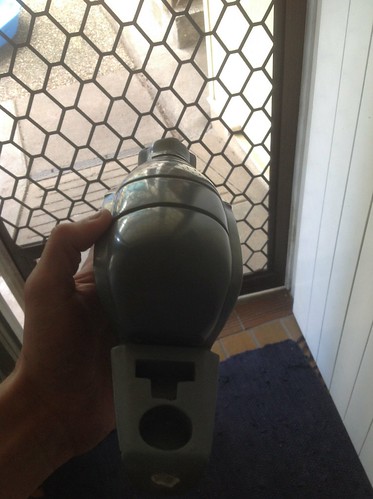
Halo Reach Needler Build
- Thread starter Xtremenoob
- Start date
Xtremenoob
Active Member
Just the tiniest bit in love.
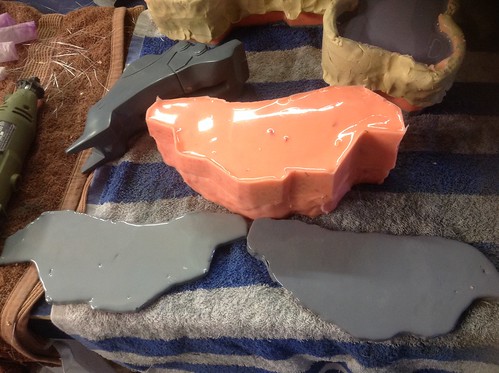
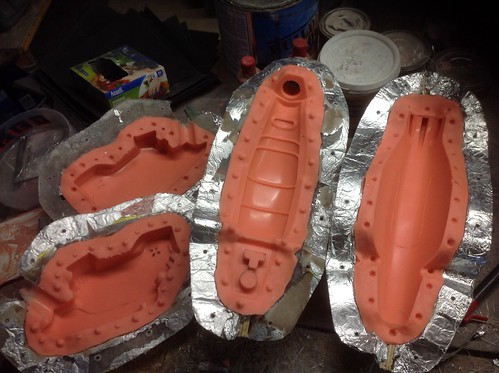
What materials are you using for the mold/cast? I've seen the pink mold material before but can't remember what make/specific type/model it is?
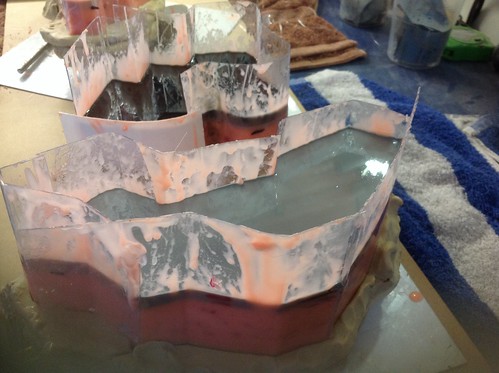
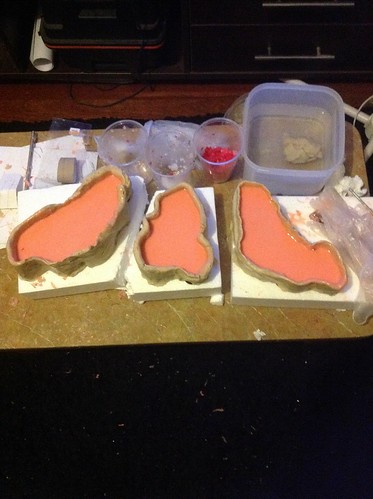
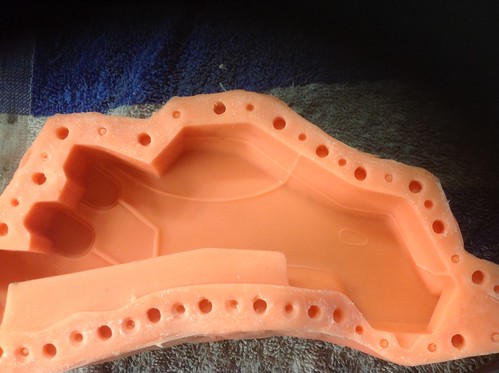
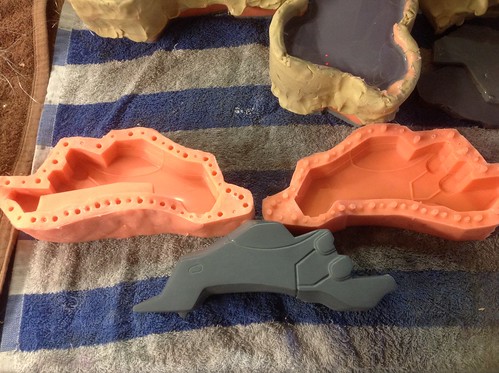
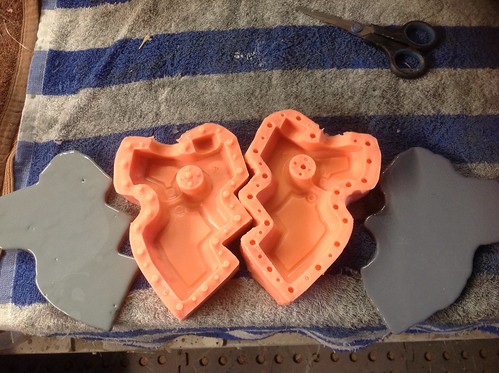
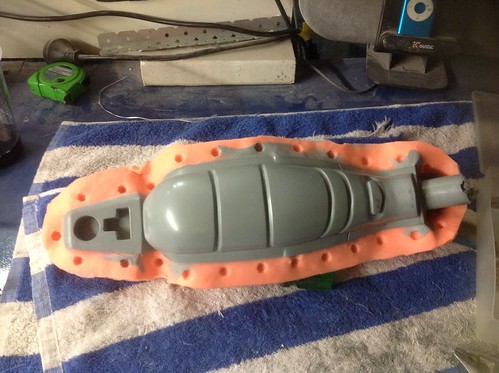
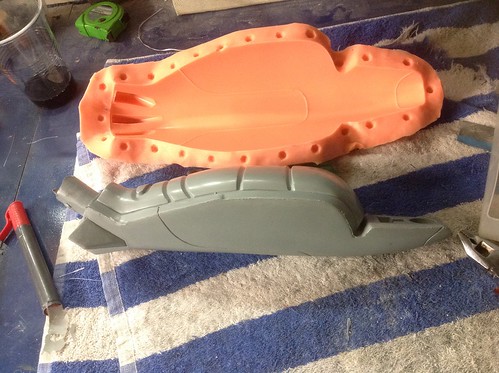
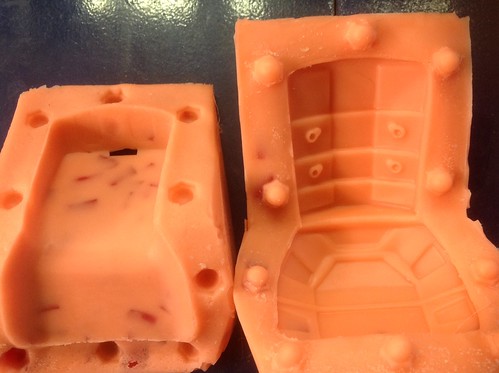
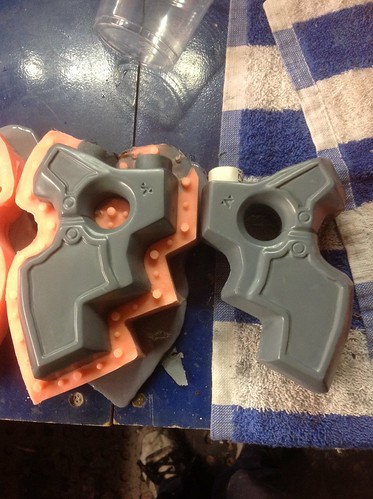
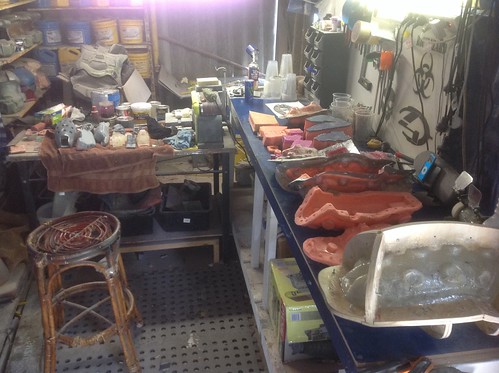
Well to mold it I'm using rebound 25 and dragon skin 10 medium. For casting I am using smoothcast 320, smoothcast 325 and diggers clear casting resin.
Holy **** this is awesome!
Thanks
")
Very nice, it looks like you're going to have a really nice piece at the end.
Your molds also look quite impressive!
Indeed I will, I was suppose to have it finished a week ago but hey I wanted detail so I put in the extra time.
Fawbish
Sr Member
Well to mold it I'm using rebound 25 and dragon skin 10 medium. For casting I am using smoothcast 320, smoothcast 325 and diggers clear casting resin.
Thanks
Indeed I will, I was suppose to have it finished a week ago but hey I wanted detail so I put in the extra time.
Thanks for the information man!
Xtremenoob
Active Member
Hi awesome work are you going to be doing a run of these?
sorry for the late reply i didnt see your comment
I will be selling the first one and from there i will do commissions for it if people want one since i have it molded. I wioll not be doing a run of these because its taking me forever just to get the first one finished.
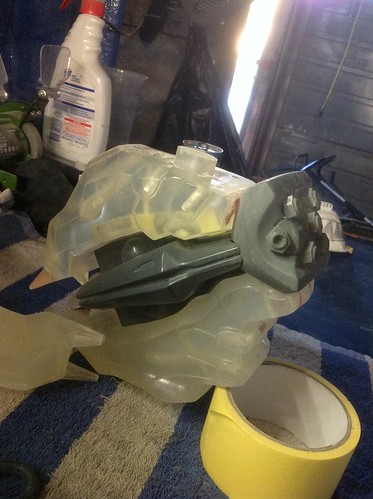
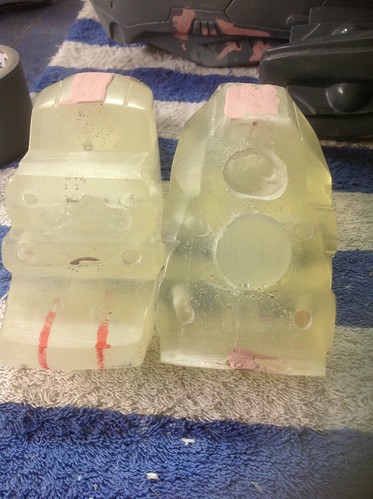
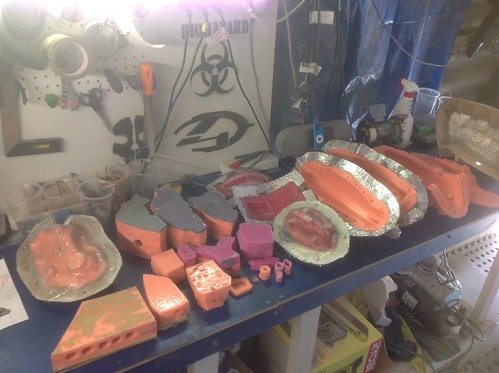
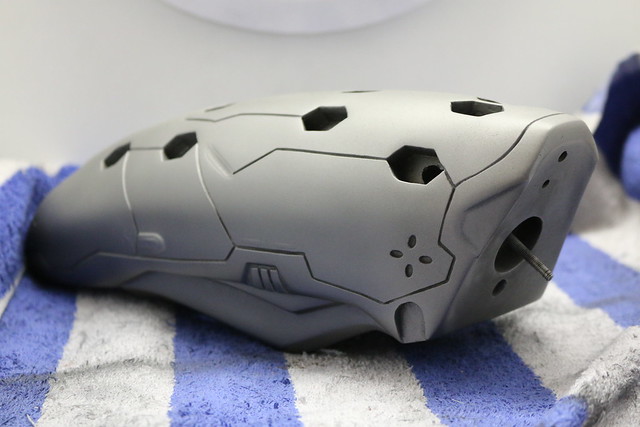
Well here are the rest of the pics and until the next picture dump
 Untitled
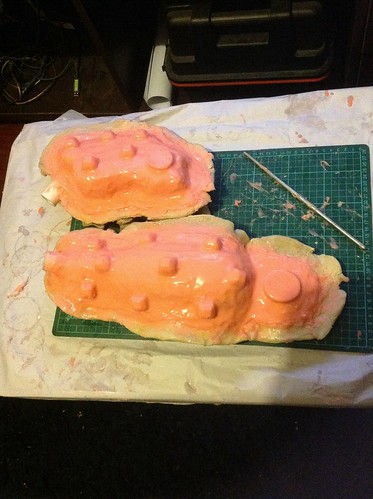 Untitled
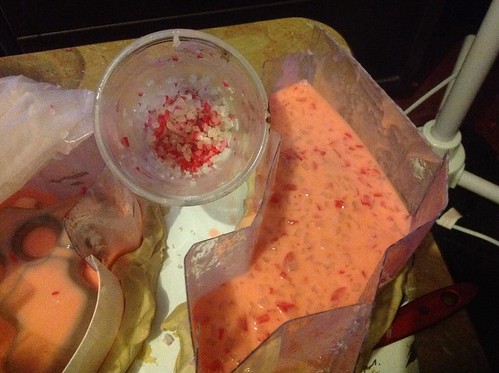


Xtremenoob
Active Member
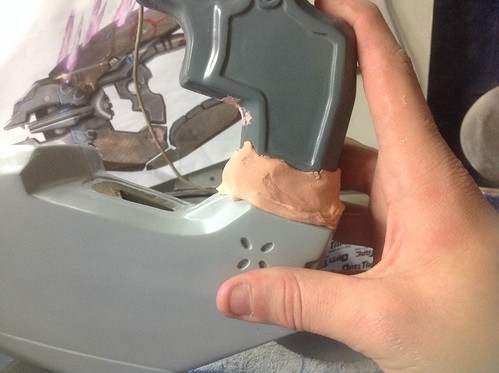
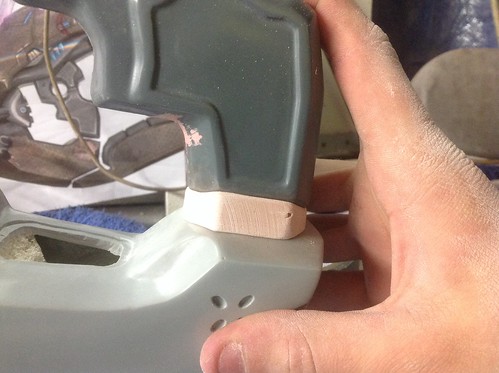
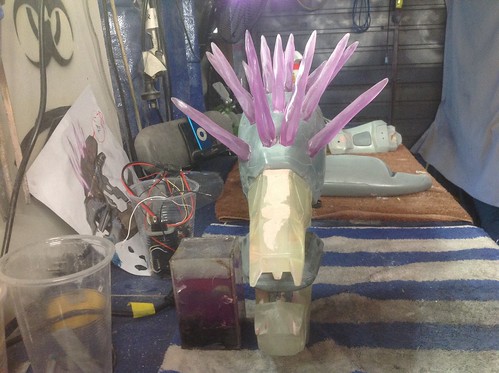
Update time,
 Untitled
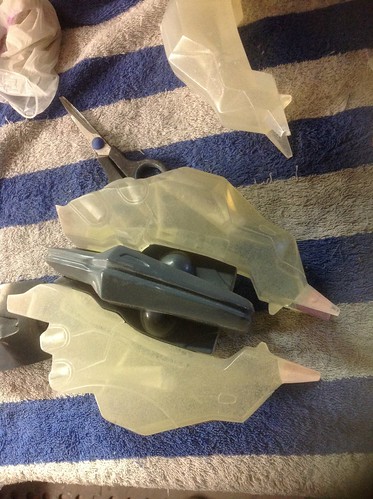
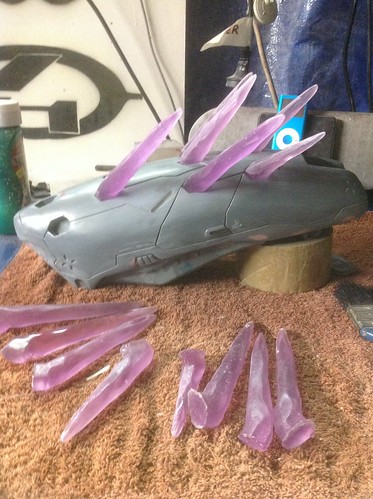
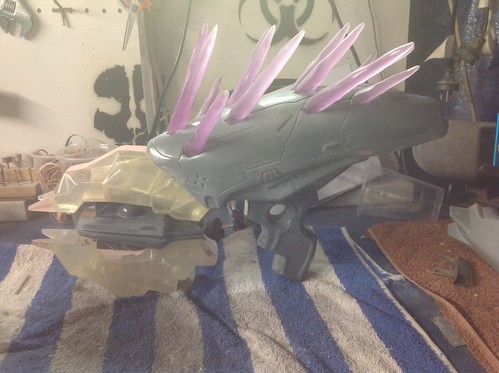
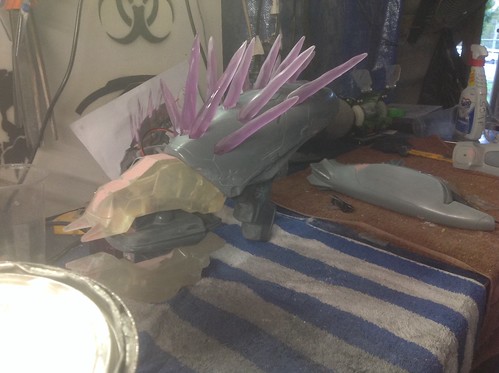
This piece will be casted in clear resin to give it a hovering appearance the only down side is that i will have to put a screw through it so it doesnt fall apart. Meaning the screw will be visible through the clear resin.
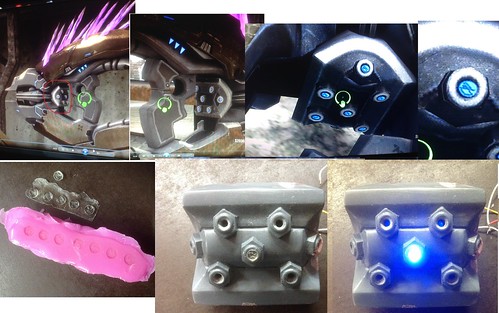 LED DETAIL
 Untitled

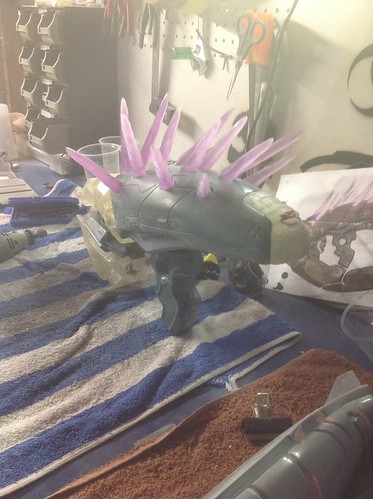

Well here are some last minute final painting tests before i paint tomorrow.
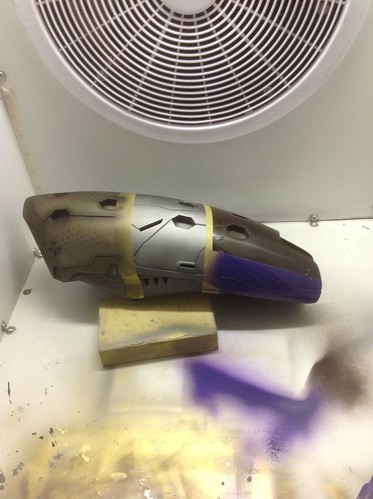
 Untitled
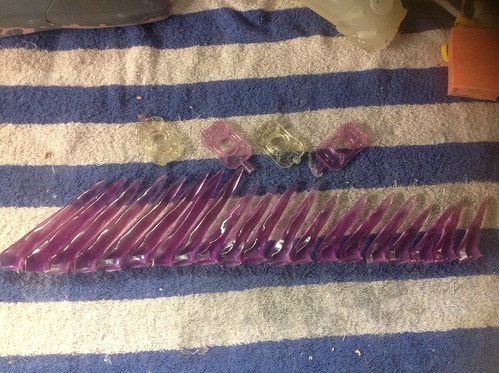
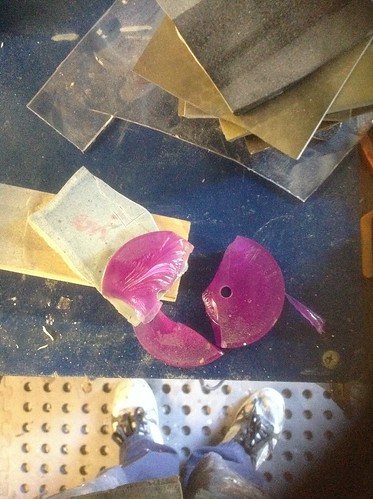
Aswell i did some testing on what glue i will use and i am surprised how strong it is. I glued a 1" thick resin cylinder (as well as testing the purple pigment) to a scrap of smoothcast 320 and then glued that to the end of a 1m long piece of wood. Once it fully cured i then clamped down Only the resin cylinder to my bench so that the piece of wood was free floating. By adding weights till something snapped and it turns out that the resin would break before the glue join would. So this was a very important test for the build because the lower piece will only be held on with the glue (so screws are not needed). If your are following this build from here then you will understand what i will be doing to the finish piece to give it a floating/hovering effect.
Ill update in the next few days when i have everything painted and ready for assembly.
Until then
Daniel
Untitled This piece will be casted in clear resin to give it a hovering appearance the only down side is that i will have to put a screw through it so it doesnt fall apart. Meaning the screw will be visible through the clear resin.
LED DETAILUntitled Well here are some last minute final painting tests before i paint tomorrow.
UntitledAswell i did some testing on what glue i will use and i am surprised how strong it is. I glued a 1" thick resin cylinder (as well as testing the purple pigment) to a scrap of smoothcast 320 and then glued that to the end of a 1m long piece of wood. Once it fully cured i then clamped down Only the resin cylinder to my bench so that the piece of wood was free floating. By adding weights till something snapped and it turns out that the resin would break before the glue join would. So this was a very important test for the build because the lower piece will only be held on with the glue (so screws are not needed). If your are following this build from here then you will understand what i will be doing to the finish piece to give it a floating/hovering effect.
Ill update in the next few days when i have everything painted and ready for assembly.
Until then
Daniel
santiclause
Sr Member
Dude! Holy @#$@# This is indeed an impressive build. I'm not sure if this is your first build, but as a 3d modeler I know the work involved with the 3d model side of things and planning involved. I like all the detail you have done and your casts are coming out NICE. Just curious how long has this build taken you so far?
Keep up the (excellent) work man, it's looking great!
Keep up the (excellent) work man, it's looking great!
Xtremenoob
Active Member
Loving this build, Daniel... This is really nice work
Thanks for the feedback
Dude! Holy @#$@# This is indeed an impressive build. I'm not sure if this is your first build, but as a 3d modeler I know the work involved with the 3d model side of things and planning involved. I like all the detail you have done and your casts are coming out NICE. Just curious how long has this build taken you so far?
Keep up the (excellent) work man, it's looking great!
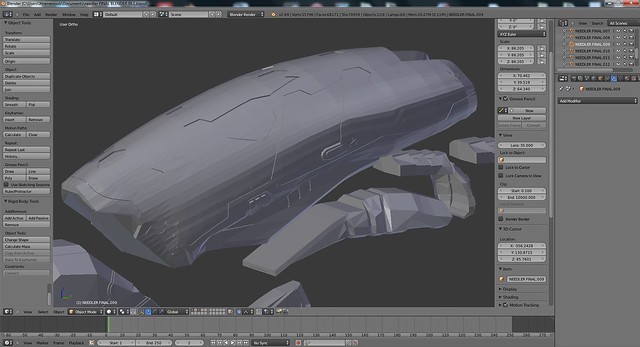
Thanks, i am a horrible 3d modeler thats why this build is taken me soooo long. I started preparing for this build in February and learned how to create my own eagle board since i couldn't get the file of volpin. And i state again a horrible 3D modeler i am and the needler was the first model i have done in any 3D modeling software (3 days after getting my first 3D printer i started physically building it). I spent hours watching online tutorials to prepare me to start modeling. Here is my Base model for my needler but if you go back you can see i and up layering bondo almost up to 1cm in some spots to get a more accurate look. Hopefully i can finish this build within the next few weeks.:
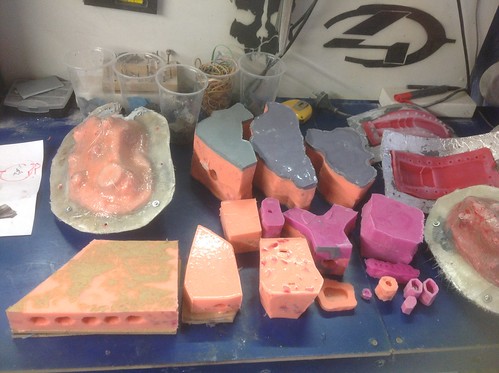
 Untitled
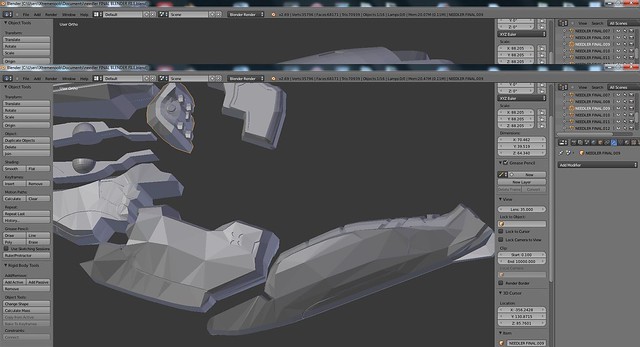 Untitled2
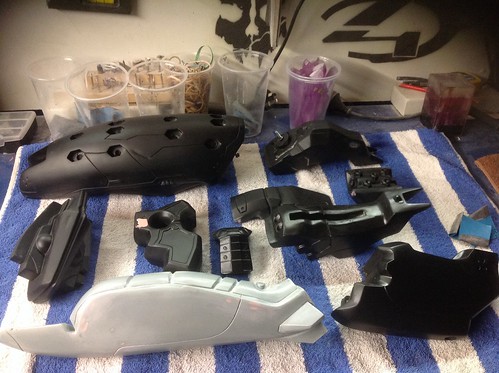
So It has been a long time since the last update, i had problems with painting. Working with new paints and learning how they react is all apart of why i love doing it even through all the failers i now know and wont make the same mistakes. So here is the leading up to my current progress:
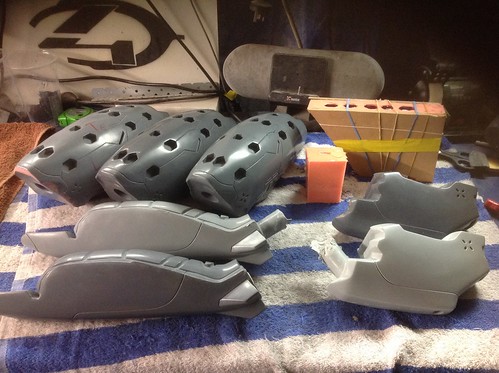
Some of these pieces still need the black wash for the detail lines.
 001
001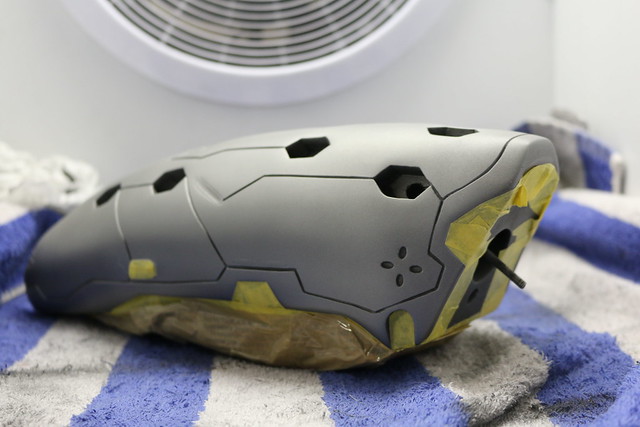 003
003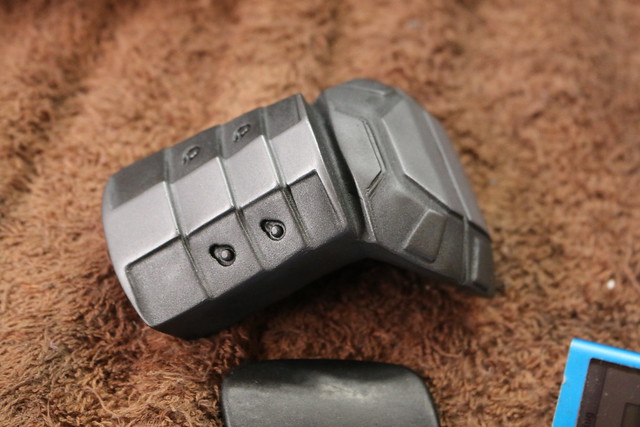 003
003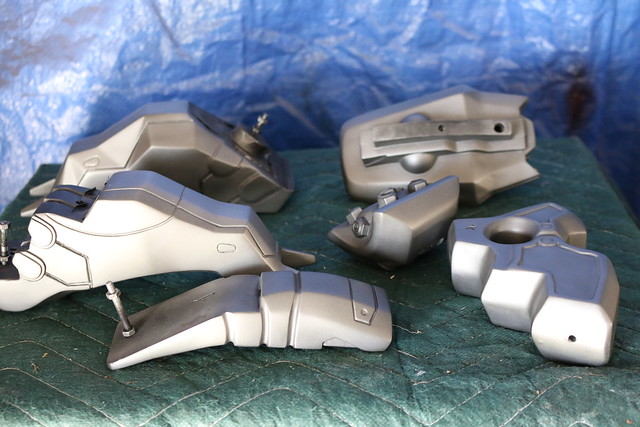 005
005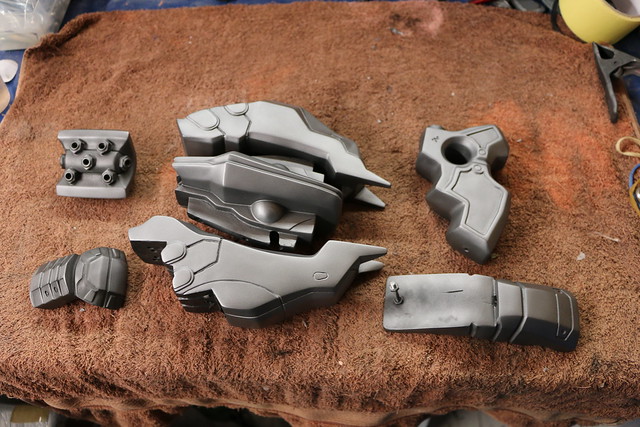 013
013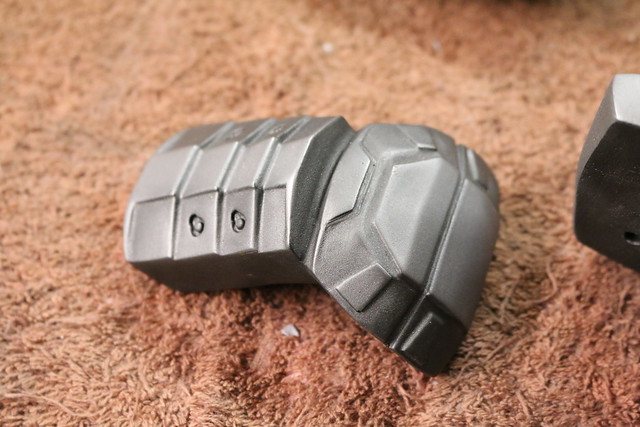 014
014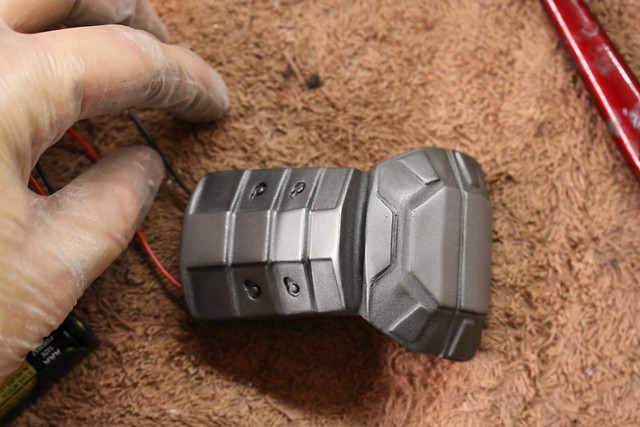 016
016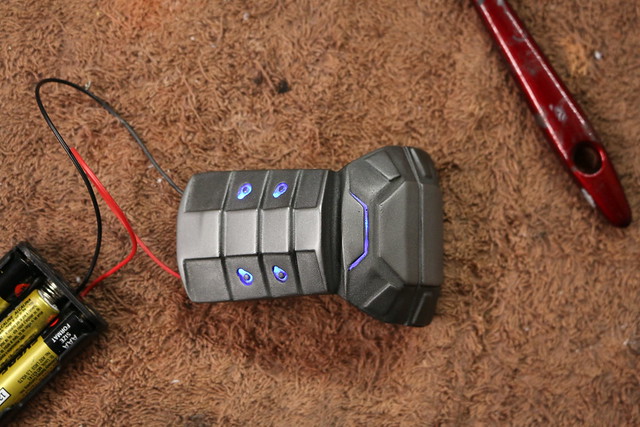 015
015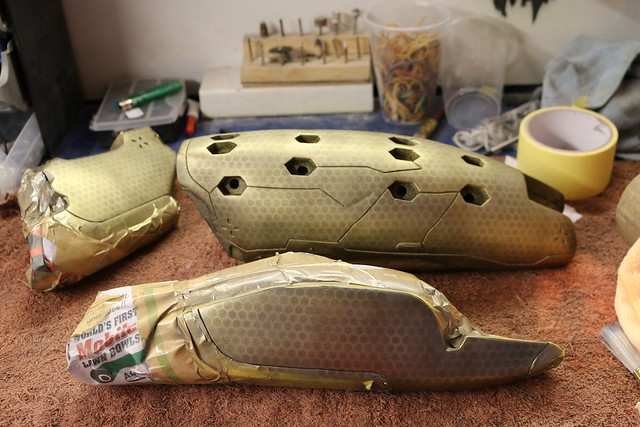 001
001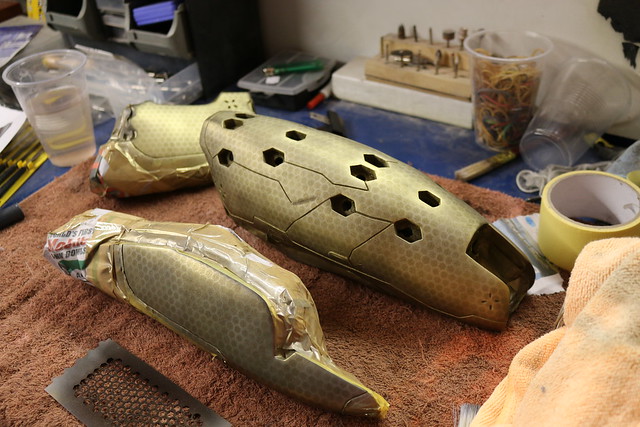 002
002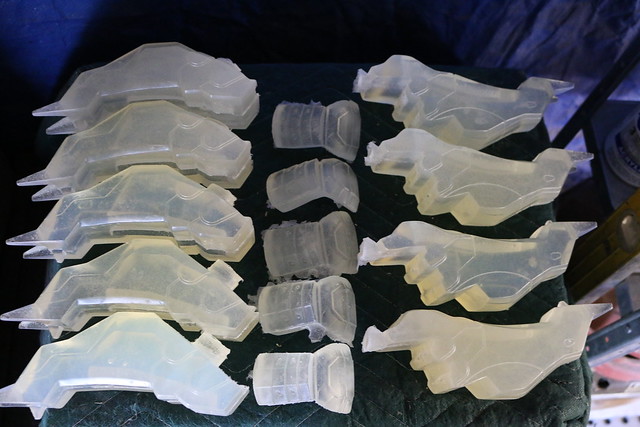 003
003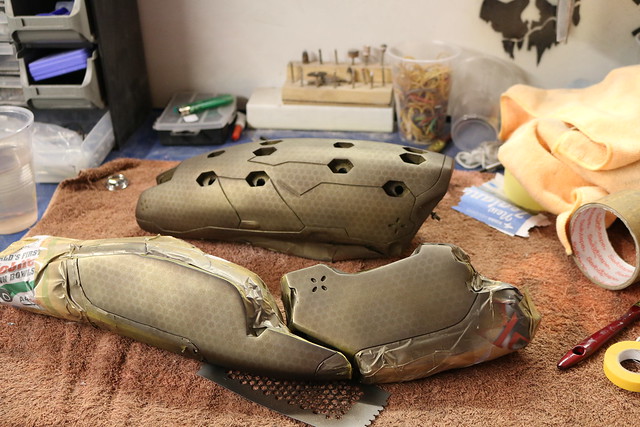 004
004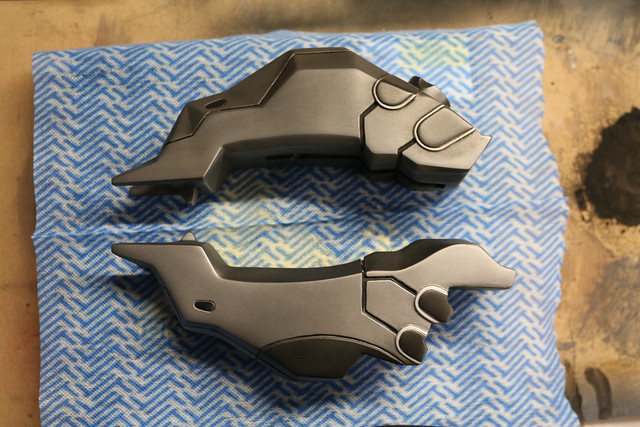 005
005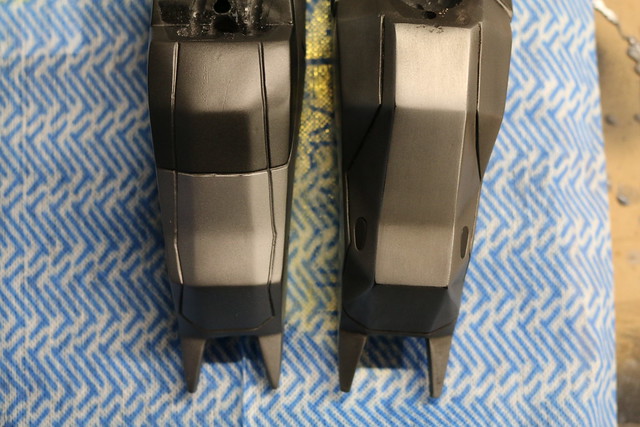 006
006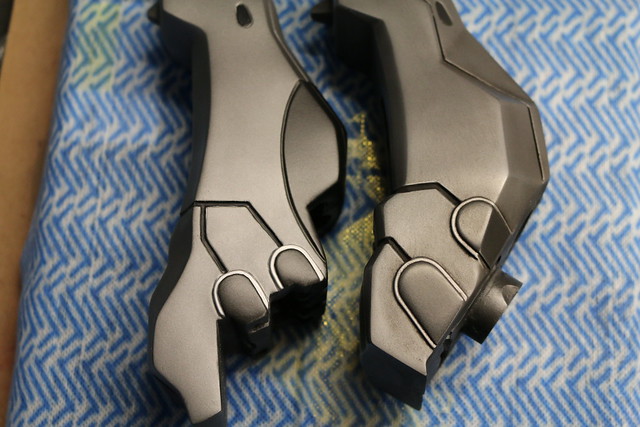 007
007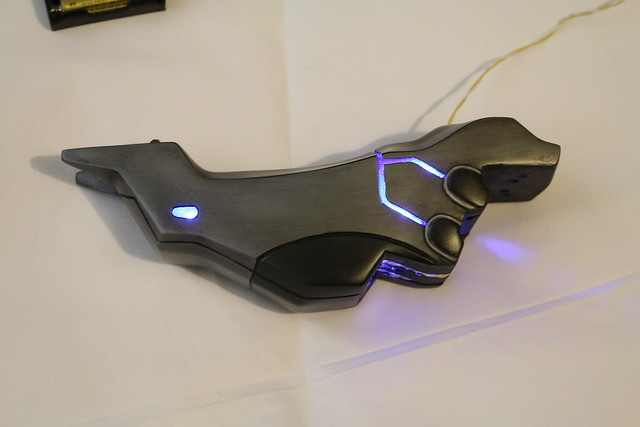 001
001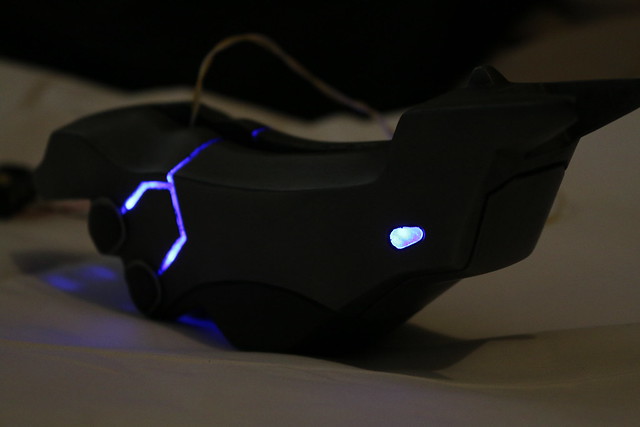 003
003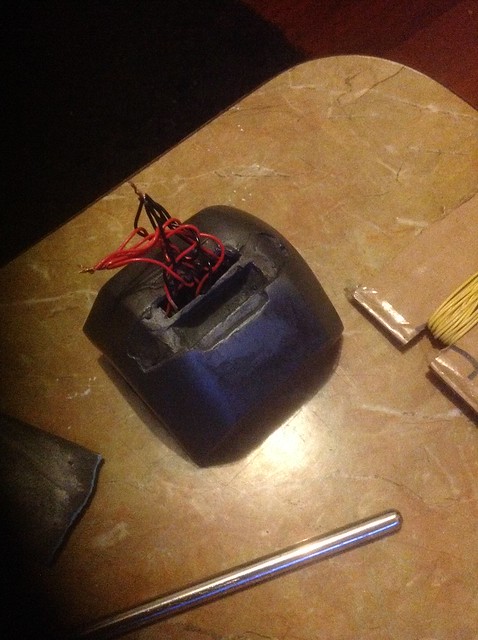 038
038 039
039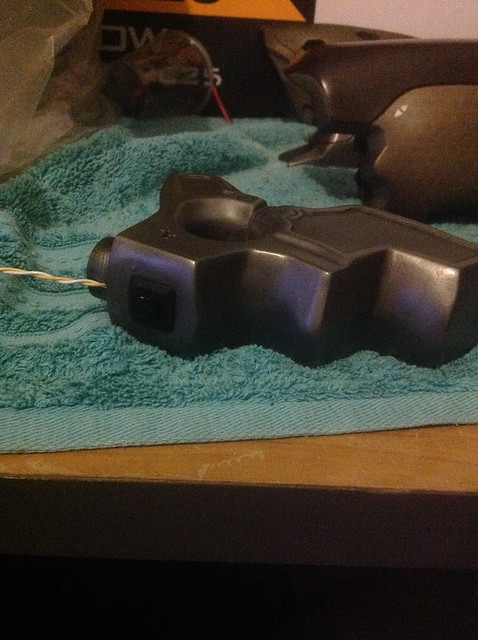 040
040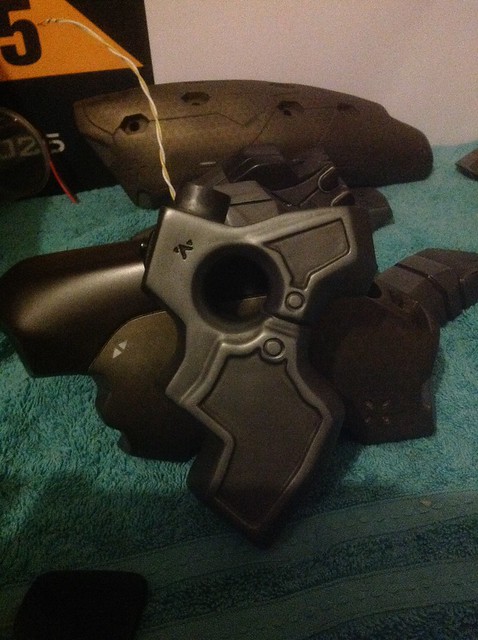 041
041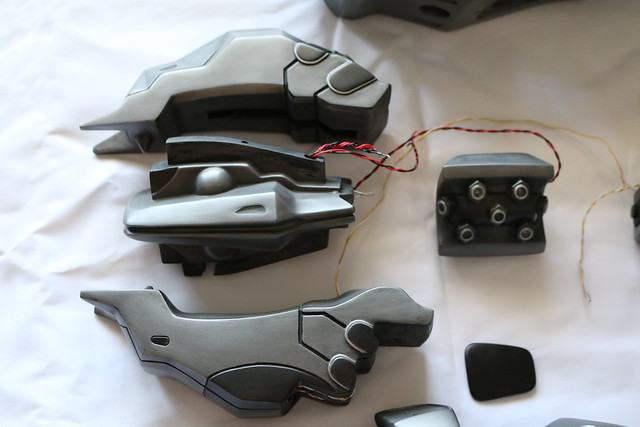 012
012 014
014 015
015 013
013 010
010 011
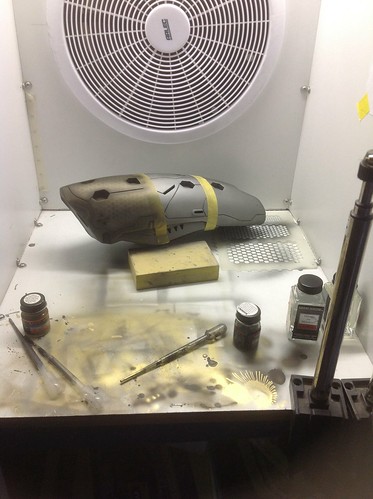
011So when it is all put together i will be using enamal silver over the raised areas to give it a semi worn and scratched finish
Ill be back next pic dump
Until next time
Daniel
The5thElement
Active Member
Amazing work... I would also be very interested if one was for sale/commission.
Where in Australia are you?
Where in Australia are you?
santiclause
Sr Member
man, the quality is still there! lol can't wait to see it finished. It looks like a lot of thought process went into this one here lol.
Xtremenoob
Active Member
Ohh we're so close, I can't wait! If you are taking commissions on these I'd be interested when you're ready.
I'm only going to sell the finished piece that will include the base aswell. I haven't got a permanent price on it yet since I'm working out how many metres or wire and glue and all the little stuff has been added but so far it's around $950. It may seem a lot as a base price but give it a few weeks when you see the finished pics.
Amazing work... I would also be very interested if one was for sale/commission.
Where in Australia are you?
I am in Queensland 4305
man, the quality is still there! lol can't wait to see it finished. It looks like a lot of thought process went into this one here lol.
More than alot of thought has gone into it. It's going to be like a 100 piece puzzle when i go to assemble it.
Nice job! very nice model (even if you say your a terrible modler) and amazing paintjob!
Thanks, I'm new at modelling and did a lot of different test panels before choosing which one I like best.
Last edited:
The Schlitzie
Sr Member
Man, that is looking amazing! When you think about all the time that's gone into this beauty, $900 + isn't unrealistic.
Strode
Sr Member
Thanks said:Man i am in awe. You say you learnt all this from scratch? The 3D modelling and printing? That is seriously amazing. I'm struggling with Blender myself and it's hard going. Any tips you could share?
The5thElement
Active Member
Hey mate, just checking to see how you are progressing on your build. Any updates?
Really looking forward to seeing the end result. Have a great Christmas!
Really looking forward to seeing the end result. Have a great Christmas!
Xtremenoob
Active Member
Man i am in awe. You say you learnt all this from scratch? The 3D modelling and printing? That is seriously amazing. I'm struggling with Blender myself and it's hard going. Any tips you could share?
I Just found tutorials on youtube its very difficult for me to say but, start with a a small model and keep practicing its like learning any other program
Hey mate, just checking to see how you are progressing on your build. Any updates?
Really looking forward to seeing the end result. Have a great Christmas!
Here it is
ITS FINALLY FINISHED !!!
Thanks for The ride, Ill catch you guys when my client has it with one of my suits
Daniel
Last edited by a moderator:
Similar threads
- Replies
- 0
- Views
- 271
- Replies
- 0
- Views
- 306
- Replies
- 20
- Views
- 1,780