HAL-9000 (An upgraded Moebius model)

sunsetblvd

New Member
Hello everyone! After lurking around on this forum without an account for some time, I decided to finally make an account and share a project that I have been working on for the past few weeks. 2001: A Space Odyssey is my all-time favourite sci-fi film so I’ve embarked on this project to recreate HAL-9000 as accurately as possible, utilising the tireless research of other forum members as well as my own observations. I’m hoping to display this model in my upcoming end of university degree exhibition which will be open to the public in London. Once I get the dates and location, I’ll share it here.

My build is inspired by the HAL replicas of j_holtslander, rogerrabt, 3Dsf and SoulkeepHL, so huge thanks to them!

For this build I have decided to use the Moebius model kit as it is mostly accurate in terms of the size and because I simply don’t have access to more advanced workshop facilities. Also it would be very cost prohibitive to make it all out of aluminium. I aim to be as open and transparent as possible so feel free to ask any questions! Once my build is fully complete, I will share all my 3D files.

The first things I acquired:
I also want to add sound but I’ll have to look around to see how I could go about doing this. I know that other people have used either an arduino or raspberry pi but I'm looking for something more simple to program and presentable for my exhibition (ideally a button next to HAL that can be pressed).

Note: I will use a 3D printer for this project, the Bambu Lab A1 mini on a 0.2mm hotend (I know this will take ages but I don’t mind being patient if i can get superfine details).
 

The problem with Moebius’s HAL-9000 model kit and what I’ll do about it​

3Dsf explains it best: The Age of Plastic - VI: Replicating HAL

In summary, it is an incredibly accurate HAL in terms of the size and proportions of the main frame and layout. The look of the speaker grille and lens is right but that’s where the nice things about this kit stops. The most frustrating thing that I can’t understand is why the speaker holes are not fully cut through, also the number of holes is incorrect, it should be 22 horizontal not 24. I didn’t realise this until I had already manually drilled every hole, so you can understand my frustration! Looks like I’ll need to model and print a new grille.

The main body is alright. In the film we don’t see HAL’s full side body, only a small bit, so this is what I plan on doing for my exhibition. I did add faint cuts in the corners to emulate 45 degree joints. I’ve looked into various ways to imitate brushed aluminum with steel brushes and chrome paint so I’ll experiment to see what works.

Moebius’s faceplate has an exaggerated brushed texture which replicates the anodised brushed aluminum seen in the film but this is too noticeable. Perhaps this was done on purpose because Moebius assumes that after people prime and paint it black, the texture might become less noticeable? Who knows! I don’t plan on painting it. Instead I plan on using a brushed vinyl car wrap which has a nice look. It is very reflective and the brushing is big but I might be able to offset this with a light spray of acrylic black and matt lacquer.

IMG_3185.JPG


Onto the outer ring and lens housing, the sizing is really not perfect! As 3Dsf notes, there are a number of issues, too many for me to say so check out their website. I’ll have to completely replace this which means I will have to enlarge the hole on the main body. This will accommodate my new outer ring which will have an interior that is recessed beneath the black faceplate to be more accurate. As for the lens barrel, I will use SoulkeepHL’s 3d model, designed to fit a 37mm lens, and modify it for my build. Notably I plan on adding the engraved Nikkor lettering (a water decal will not suffice!).

I won’t even get into the acrylic lenses supplied in the kit because they are just sad looking. My Aliexpress lenses aren’t perfect or the right sizes but you just can’t replicate the look of real glass. For HAL’s eye, in the film this was a small tungsten light lit through a red optical filter built into the Nikkor lens. The Moebius kit comes supplied with a red LED which is incorrect and can’t replicate a yellowish pupil surrounded by red light. I’ll do something similar to the film and use a warm white LED behind a 590nm longpass optical glass in a custom housing behind my secondary lens.

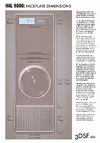
I have attached a copy of 3Dsf’s HAL-9000 Blueprint. This is the definitive blueprint that uses measurements carried out by Adam Johnson.
 

Attachments

  • Hal-blueprint-3dsf.png
    Hal-blueprint-3dsf.png
    1.5 MB · Views: 63
Last edited:
Ignore the ugly print quality! Some issues with my 3d printer that need to be fixed…

IMG_3198.JPG

I created a cutting template which has a protrusion on the bottom that allows it to slot into place. This centered nicely so I could draw my new hole. I had to print 2 initial templates before finally managing one that could slot in perfectly! After some patience with a cheap rotary tool and sanding it down so it was smooth, my test outer ring slotted in with no movement or gaps.

IMG_3201.JPG
IMG_3202.JPG


I also printed a test lens barrel that is just the model from SoulkeepHL. There is a 2mm protrusion that sits above the lens which really doesn’t look that great and only highlights how shallow my aliexpress lens is. I’ll have to remove this.

However I’m still not fully satisfied with the ring. Most fan-made blueprints and builds seem to list the outer ring resting above the faceplate at 5mm tall with an interior recess of 2.5mm. This is incorrect and makes HAL look a little chubby when viewed from the side. 3Dsf’s HAL build made me aware of the need for a deeper recess so I lowered the height down to 2.5mm and increased the recess to 5.5mm. This allows the focus ring of the lens barrel to only be slightly visible when viewing HAL from the side and greatly improves the overall side elevation.

I couldn’t be bothered to use a small hotend to print my new outer ring so there are some print issues but I’m going to use motip spray putty, sand it down and keep on repeating till I’m happy with the results.

Quite a difference between my modification and the original Moebius solution.
IMG_3204.JPG
 
UPDATE: my new lens barrel just finished printing and looks fantastic so I think I'll only need to lightly sand it. I've added the engraved lettering in VAG Round bold font (this is the closest we can get since the original engraving font simply doesn’t exist). I’ve removed the protrusion above the lens and overall it looks good. Took around 2 hours to print! This was really the only way my printer could manage to capture the little details of the lettering. I'll looking to use some sort of liquid chalk or grease pencil to fill in the lettering and then it'll be varnished with the rest of the lens barrel once it's primed and painted black. Then I'll move onto the speaker grille which I've already modelled but not yet printed because my slicer software is showing it will take 4 hours to print!


Also as promised, I've started putting together my 3d files. Once this project is complete, I'll share everything!
Screenshot 2025-02-13 at 23.25.03.png
 
Last edited:
Looking good! Glad that my HAL model research was useful to you.

Does seem a bit like making a purse from a pig's ear, though... :) (ie: at this stage why not make the whole thing from scratch?)
 
ie: since the Moebius kit is so mediocre, and if you're doing it for a student show, why not go for the full brag rights and make the lot yourself? Full scratch build! There's not much Moebius left in your project as it stands.

I understand your reluctance to go for machined aluminium for the framing - that's pretty expensive if you can't do it yourself. But you could make the sides from hand-cut aluminium strip. A quicker solution would be to use strip styrene plastic. Then paint with an aluminium metallizer paint. The top of the main panel could be black dibond.
I did look into other ways instead of having to rely on the Moebius kit. I saw one forum member who found a picture frame manufacturer that sold cut to size aluminium frames but unfortunately they don't ship to the UK. I looked around for other UK-based companies but none sold anything similar to what I needed. In terms of using styrene strips, I don't think it would have looked as nice as something like the Moebuis frame which is already smooth, pre-made and precise looking. This HAL project isn't really related to my modelmaking showcase so I'm not under any obligation to make everything from scratch thankfully! Just a fun side project.
 
Halfway finished printing my new grille (109x71.2mm), I wanted to use a 0.02mm wave height but my printer couldn't handle it so I opted for 0.03 instead. The holes are positioned on the slope of the waves, not the crest or the trough (where the Moebius grille is).
Screenshot 2025-02-14 at 13.37.17.png
 
Well, the ever elusive HAL face plate;) Looking very good from where I stand.:cool::cool:(y)(y) Unless someone, somewhere, has an original face plate + all the bell and whistle, all our effort are "Best we can" until further notice:)
 
Well I’m sure it’s not obligatory but it’s always cool. :) Anyway - hope your project turns out great. It is a big improvement over the commercial product already!
 
Good work, the glass lens makes a big difference! I plan to make an accurate version, I was lucky enough to get one of the glass lenses made for the aborted Master Replicas panel, and made my own using the Moebius kit as a jump off point, I also used video from the Hal Project to make a loop video for an inexpensive video picture frame, with the Discovery background noise also looped, I also used a much better lens mount I found on Thingiverse printed on my Elegoo Mars, with a real turned aluminium bezel, I think there's a thread on here somewhere...
1000025088.jpg
 
Halfway finished printing my new grille (109x71.2mm), I wanted to use a 0.02mm wave height but my printer couldn't handle it so I opted for 0.03 instead. The holes are positioned on the slope of the waves, not the crest or the trough (where the Moebius grille is).

0.02mm? Do you mean 0.2mm?
 
Sorry for the lack of updates! Cold weather has prevented me from painting and my 3D printer has decided to act up again. Once the weather gets better, I'll be able to resume this project.
 
Back
Top