superjedi
Sr Member
Finally had time and good enough lighting to take some pics of the latest progress.
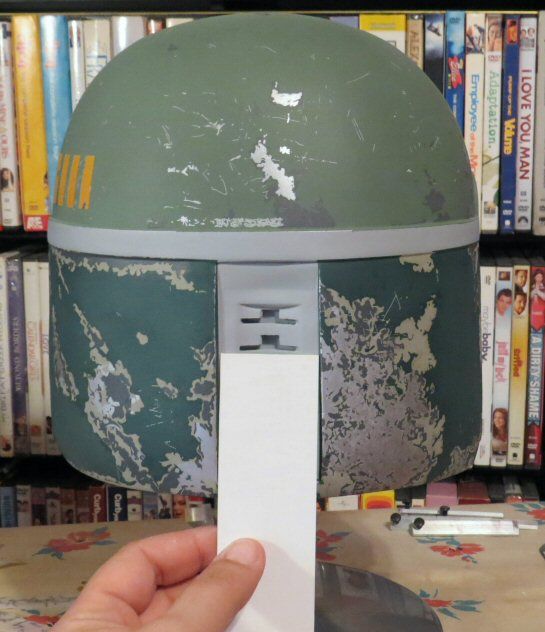
Killstripes are done! This shows a couple days worth of work on this section of
the helmet. The stripes were taped off, then the chips were masked with my
Winsor & Newton fluid. I airbrushed the stripes, adding the slightly darker shade
toward the back of the dome.
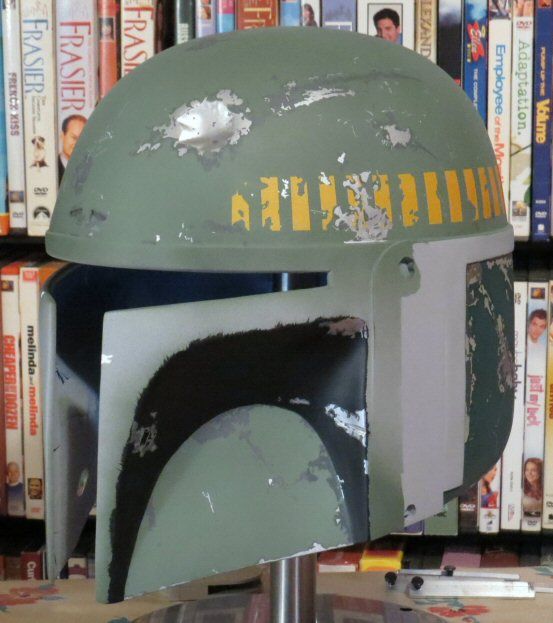
I then went back and added the remaining gray and silver damage on the dome.
The helmet is now ready for the red on the mandibles and "hat band." But before I
begin that stage, I wanted to prep the MQ-1 circuit board so that I can airbrush that
piece at the same time.
The circuit board on its own isn't wide enough to fully cover the keyslots on the back
of the helmet. Also, since only the upper half of the board is used, it definitely isn't
tall enough! This is the second real MQ-1 circuit board I've installed in a helmet, and
to make everything look nice, I build a styrene platform for the board.
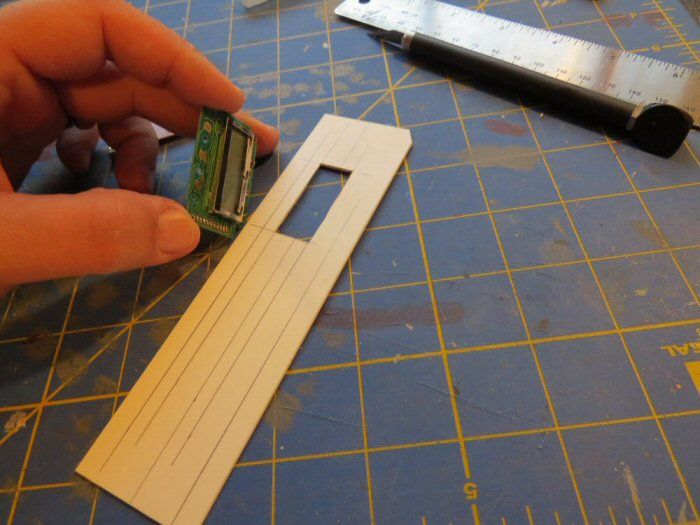
I began with the circuit board itself.
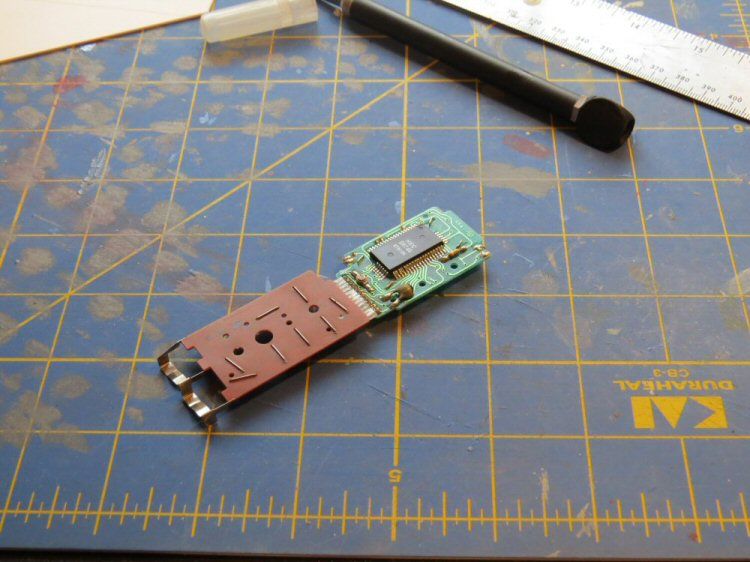
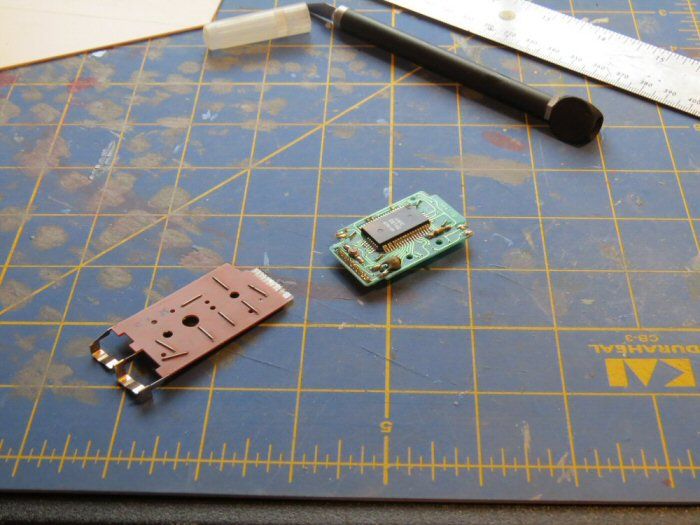
I separated the upper and lower halves.
I cut a strip of .020" styrene to the width of the keyslot insert. Length doesn't
really matter at this stage. I'll trim it to length later.
I made some measurements on the styrene strip to accommodate the little
protruding screen on the circuit board. The screen won't allow the circuit board
to sit flush with the styrene.

Here's the slot cut out.
Now the circuit board fits nice and flush against the styrene.
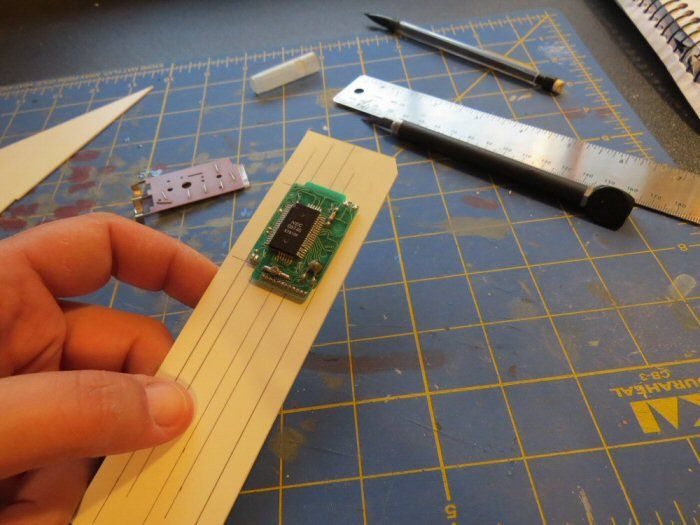
The screen fits perfectly through the cutout.
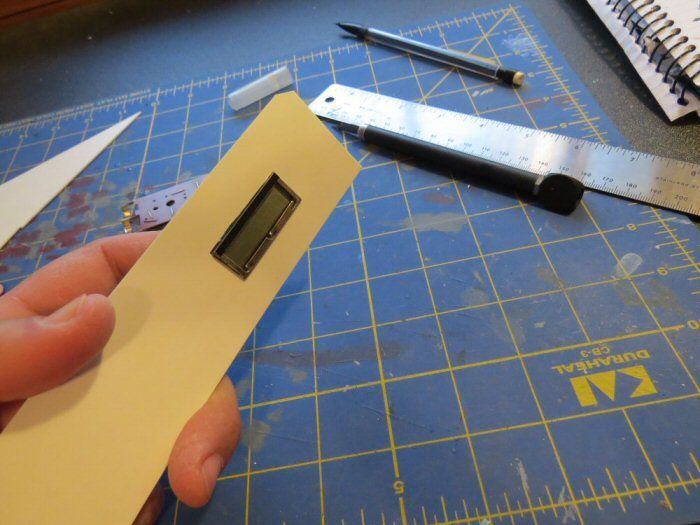
I'll place the styrene strip inside the helmet and determine the best vertical position.
Then I'll trim it to the proper length. Once the strip is trimmed and painted, I'll use some
2-part epoxy putty to install it after all paint work is complete on the rest of the helmet.
More to come!
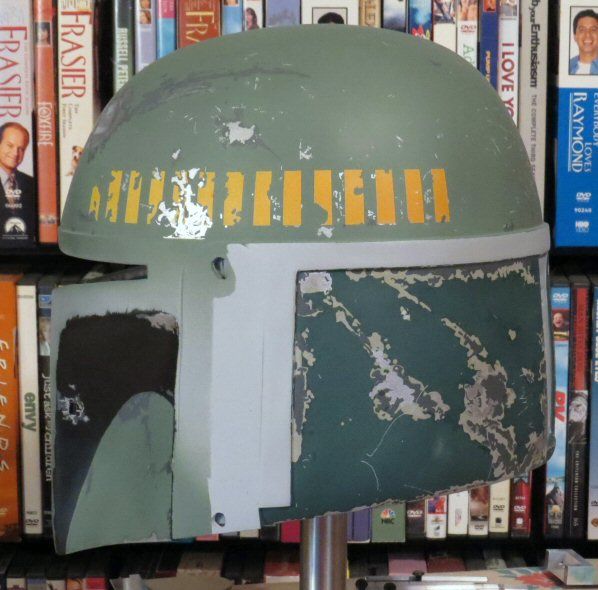
Killstripes are done! This shows a couple days worth of work on this section of
the helmet. The stripes were taped off, then the chips were masked with my
Winsor & Newton fluid. I airbrushed the stripes, adding the slightly darker shade
toward the back of the dome.

I then went back and added the remaining gray and silver damage on the dome.

The helmet is now ready for the red on the mandibles and "hat band." But before I
begin that stage, I wanted to prep the MQ-1 circuit board so that I can airbrush that
piece at the same time.
The circuit board on its own isn't wide enough to fully cover the keyslots on the back
of the helmet. Also, since only the upper half of the board is used, it definitely isn't
tall enough! This is the second real MQ-1 circuit board I've installed in a helmet, and
to make everything look nice, I build a styrene platform for the board.
I began with the circuit board itself.

I separated the upper and lower halves.

I cut a strip of .020" styrene to the width of the keyslot insert. Length doesn't
really matter at this stage. I'll trim it to length later.

I made some measurements on the styrene strip to accommodate the little
protruding screen on the circuit board. The screen won't allow the circuit board
to sit flush with the styrene.

Here's the slot cut out.

Now the circuit board fits nice and flush against the styrene.

The screen fits perfectly through the cutout.

I'll place the styrene strip inside the helmet and determine the best vertical position.
Then I'll trim it to the proper length. Once the strip is trimmed and painted, I'll use some
2-part epoxy putty to install it after all paint work is complete on the rest of the helmet.
More to come!


")


