Getting back on the wagon - Mask of Nihilus

Zantergog

New Member
A bit of background, I used to be a maker - a low level prop maker on a few high level projects - now I have a 'regular' job and making is just a hobby. Then computers came along and ruined all that :) my self discipline is terrible, I would rather spend 5 hours playing a game than being creative so....

First time post to RPF, this place is inspirational, combined with other things like Tested and Volpin props I want to make something again, Of course I want to make something ultra cool and uber fantastic like I see in the forums, However I am old enough and wise enough to realize I have to start with something I can manage that wont be too big a project to put me off.

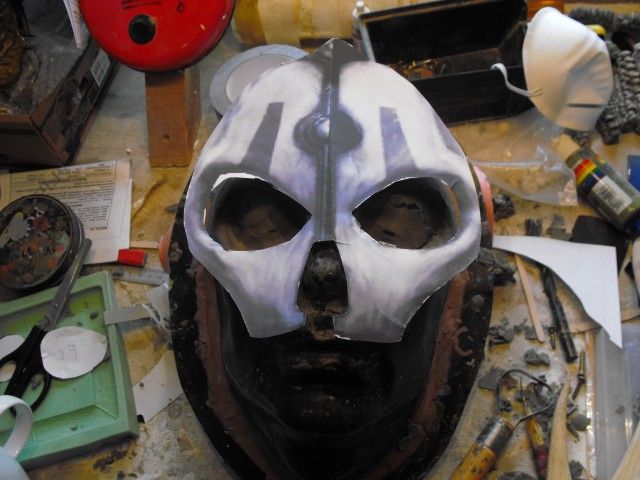
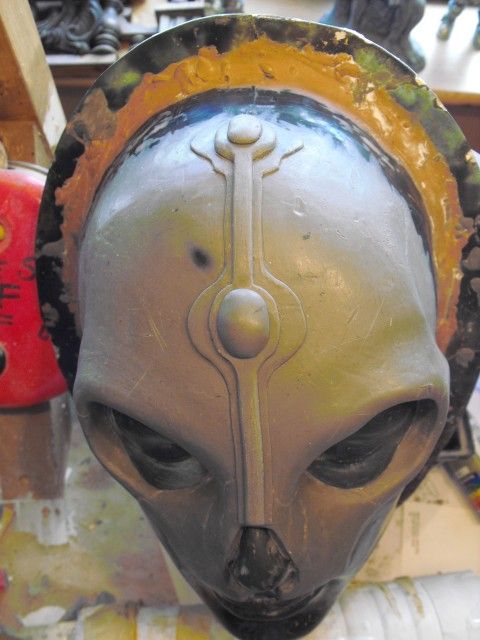
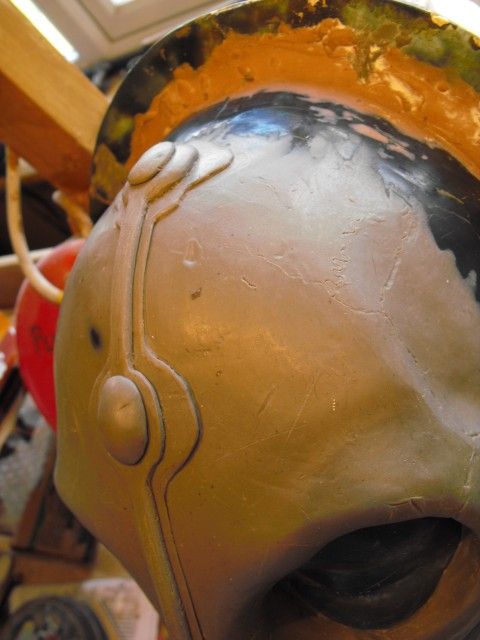
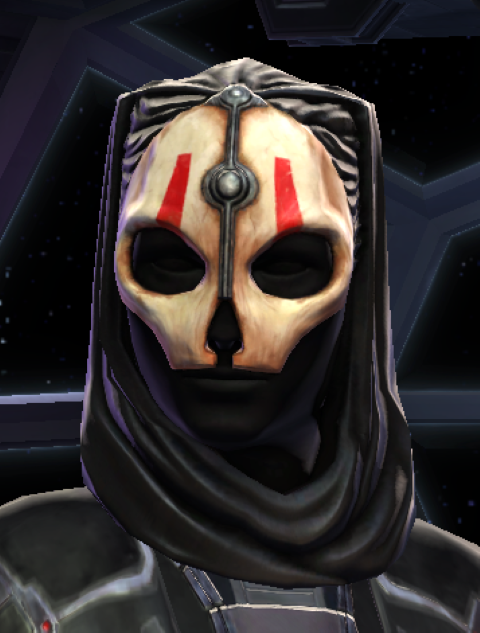
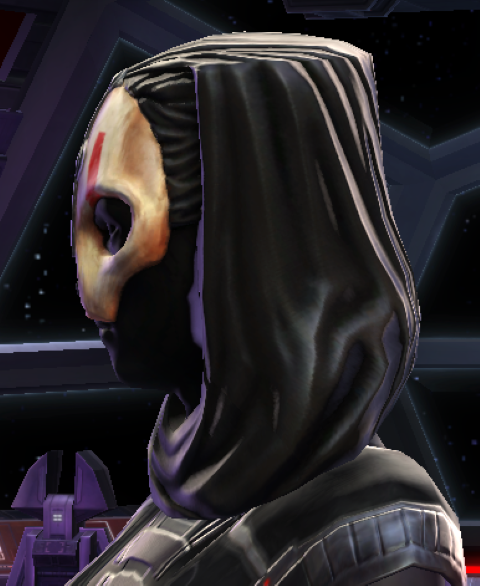
I like Star Wars the Old Republic video game, so I'm going to make this : The Mask of Nihilus, a helm from the game.

maskfrontSmall.png

maskbackSmall.png

The sculpted piece will be made from 'neoprene' (toytex) a filled latex I really like using, cast from a plaster mold. I have no clue as to materials so I will be enlisting help from a local who does clothing repairs. The idea is to make this wearable.

So this is for all those lurkers who want to try but don't and a special thanks to Adam Savage who in one of his podcasts spoke about 'just doing something' don't judge yourself - there's always someone better.


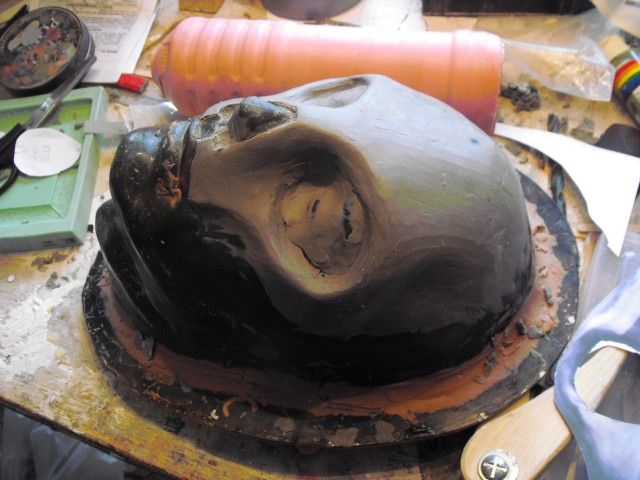
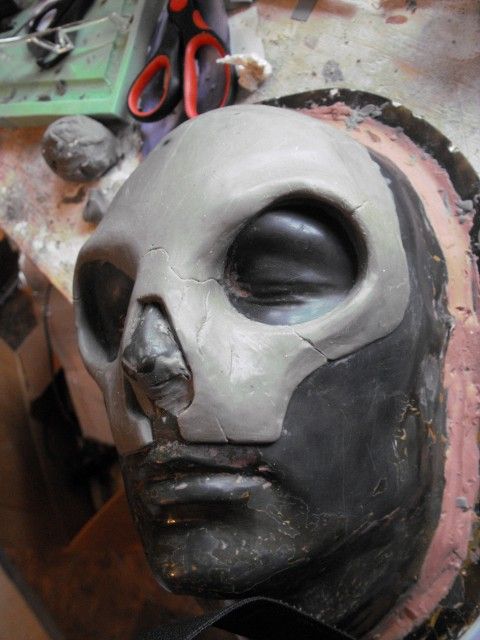
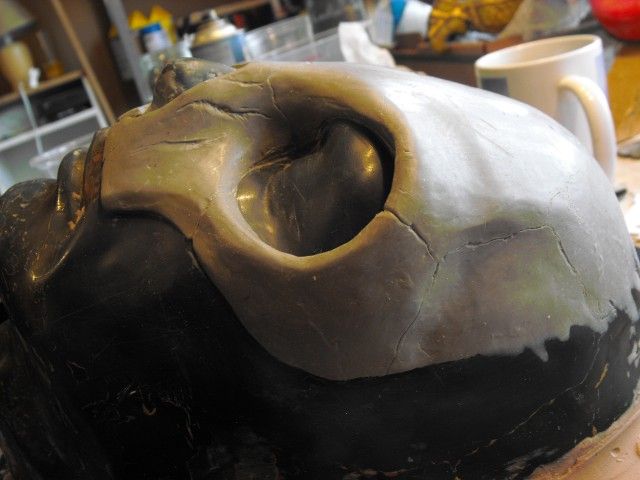
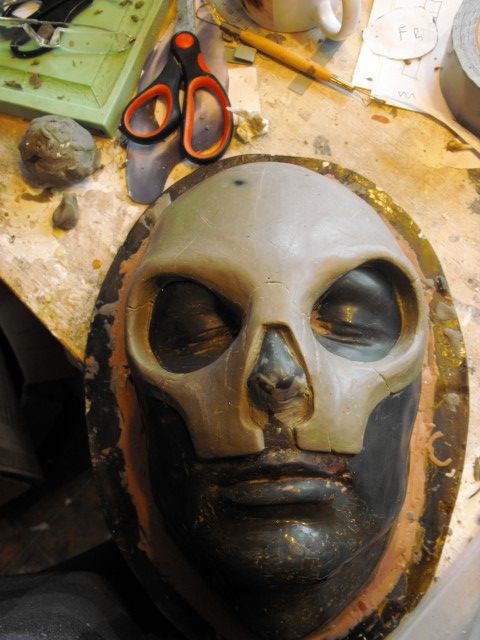
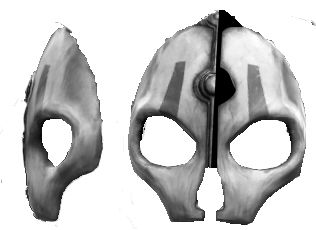
So I used Photoshop just to isolate the mask part so I could get the scale right, I printed this on a piece of A4 and it turns out to be pretty much spot on the right size for life. I am blessed to have a fiberglass face form to sculpt on so I'll be modeling on that with some oil based clay.

I cut out the paper mask and use this to match the sculpt - this allows for accurate reproduction, also helps with symmetry. wish me luck !

maskbw.jpg
 
I always wanted to play the game, but never got around to it since it's not really my type of game. But I always like the look of this character. Can't wait to see it finished.
 
I'm very similar to you, been fallowing people like Volpin and Feveron for a while, the videos from Tested.com with Adam are the main reason I finally buckled down and started a proper project. I totally love this forum, just lurking around gives me so much inspiration and drive. Good to see you're not starting with ANOTHER Iron Man, hah, seems like half the board is IM related.
 
Just a quick update - I have blocked out the skull mask, should be able to post a pic tomorrow when my batterys charge, work on atm. Will get back more on this on the weekend.
 
ok some pics of the blocked out mask, I melted down a lot of my older clays as I didn't have much material. I think the proportions look good, I kept flipping it and checking the symmetry with the paper cutout, amazing how hard it is to match the sides as I'm so rusty. Busy at work until the weekend but should finish the sculpt then. Now I wish I had a rake tool.

DSCF0357Small.jpg

DSCF0355Small.jpg


DSCF0356Small.jpg
 
Smoothing .... sigh

Ok
So from those pics to these is around 6 hours work smoothing, then smoothing more. When I came back to the sculpt I found the symmetry in the optical socket was really out. Just using a paper cutout for the socket and flipping it I tided up the sym a lot more. I also use calipers to check measurement and depth. As it been so long since I've sculpted this took a while. I discovered two things, how fun it can be to be 'Anal' and the almost meditative state you mind gets into. For the first hours I really wanted to do something else, ANYTHING else!

So this thread is not so much about the mask more about my inner demons, I'm sharing because you probably get them as well, the ones that say you arn't good enough ? Well you are, and it's only your own mountain you have to climb, so stop looking at the top of other peoples!

At some point I stopped using the Photoshop reference and just took it on as mine. I want a bit of me in here, it occurred that the optic sockets are so big this could be an alien grey skull. The Video Game version does not show bone detail but after extensive soothing I wanted to add some to suggest that this did come from a biological source.

Next step will be to add the metal detail (again clay) I'll roll out some thin clay and cut it to shap, not sure how I'm going to to do the doms yet, I'll try and find something to use.

The plan is to have a wearable mask, But I also would like a wall mountable version, so I cleaned up the fiberglass life-cast and will use this in a finial wall mount version as part of the mold.

DSCF0364Small.jpg


DSCF0367Small.jpg


DSCF0365Small.jpg
 
Fantastic work so far! I can't wait to see the final piece.

Something you may wish to note, though, is that Nihilus' nose doesn't protrude through the nasal slit. Perhaps some shimming at the perimeter will help that depth some.
 
Thanks for the reply Theist17, a good point you made, Nihilus was 'made of shadows' - I'm thinking of cosplay and of a wall mounter piece. Yoou got me thinking about the negative mold. I'll fill the nose area with plaster to get rid of the nose in the mold. This way I can cast the complete face as the walliece or just cut out the mask for cosplay. The wearer can then use bodypaint or a blackout mask to 'remove' their nose. No update on this yet, because of real world stuff, but I'll get back to it.
 
ok, sorry about the lack of progress on this, real world stuff..
I've pretty much finished the sculpt now, there's a few tweeks, smoothing etc I used the same clay for the metal parts, I have an extruder for the forms and just smoothed with fine sandpaper, if you wait a while until the clay is cold it's better. Next step is the molding with crystalcal. The messy bit I enjoy, but my bench is a mess so a clean up first.

DSCF0378Small.jpg

DSCF0379Small.jpg
 
Heres some pics of the mold making progress:
DSCF0382Small.jpg
DSCF0385Small.jpg

I'm using crystacal R - with some bandage.

I filled the nose area and some air bubbles - in order to get the plaster to stick well to the cured plaster I scored it and made sure it was very wet before pouring the fill plaster.
DSCF0391Small.jpg


I love the way your mind sees a positive when looking at the negative - hard wired dna
DSCF0388Small.jpg

Next step is to cast the neoprene positive and let cure before painting. Plaster needs to dry out a bit first.
 
Ok so the cast came out well with only a few air bubbles to fill. I have now retty much finished the paint, a little more satin varnish to go on. This has been cast with the lifecast as well so I can wall mount it, I'll add the cloth later once it is on a board. Pleased with how this has come out although I can see differences from the original reference.
DSCF0406Small.jpgDSCF0401Small.jpg
DSCF0400Small.jpg
 
Back
Top