dortega
Active Member
Hi all! First of all sorry for my english.
I'm gonna try to document the progress on my GB2 Proton Pack build.
First lets talk about the Shell, the base of the build. This is a fiberglass shell made by me, this is a project i started working like 7 years ago so the master has been heavily moddified during this years. I started building the entire pack using stirene sheets, and with the past of the years i add some 3d printed pieces i modeled to the master to make all the process easier, faster and more accurate. The shell i' m using now is my V2.
V1 V2


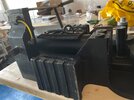
The most noticiable difference between the V1 and the V2 is that the Nfilter is gone (i did this to make Hero Packs with alluminium Nfilters), but also i changed a lot of little details like angles, retextured a little bit the shell and added some predilled holes to make it easier to clean and drill. Once i was happy with the modds we did silcione mould and started taking some fiberglass casts.


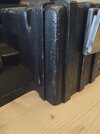
The first copyes came out grate, except for some little bubbles that i repaired easily with some bondo.
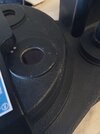
Next step, clean and drill some holes.
For this step i'm using my dremel and some sandpaper to give a nice and smooth finish to all the edges.


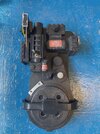
This is how they look on the inside (i'm using grey gelcoat for the first thre layers and then fiberglassing and reinforcing the parts that are supporting more weight, like the gun mount.


Once i have all the holes cutted i clean the shell with water and soap to make sure the paint is not gonna do anything weird on the surface.
Painting time! for this step i dont have too much pictures of how i started so i m' gonna explain what i did.
first of all i sanded some parts that have a lot of texture to make it a little bit more smooth and add some other textures later (like brush marks). I cleaned all the sanded parts again before start painting.
Then i did a base coat over the shell with a black satin spray, once its dry i over sprayed a lot (making some "paint lakes") the parts i want to add some brush texture, like the ribbs on the gear box, the ribbs on the power cell, the ribbs on the gun mount and some parts of the synchronous generator.
This is an axample of the brushed texture (light effect is making hard to see the texture, but it works perfectly in person):

Once i did all the retexturing task i did a last satin black layer and once it was driyed i mixed some baby powder and black pigment (20% baby powder-80%black pigmen aprox) and i appliyed this mix over all the surface in the pack so it kills a little bit the shine of the satin but its still shine and less black, but not too much.
After this i started with the weathering. For this i started scratching all the black paint in the surface in some areas (i started trying to recreate the venkman gb2 weathering, but i finally made it up as its easier and it looks cool too), here some pictures of the first weathering day.
You can see here the effect of the baby powder and black pigment (this picture looks pretty close to the real thing)
For the scratches i didn't use any paint, as the shell its gray (white in this case, as it was the first prototype) i only peel the paint with some sandpaper and a xcto knive.


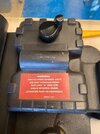
For the lenses i glued them with hot glue, i added a lot of hot glue so the glue filled every little gap between the lense and the shell and then i trimmed it with a knive and adeed a mix of baby powder and some pva glue into the edges, and also i scratched the edges a little bit with the xcto knive.


Okey, as i mentioned before the gelcoat in this shell is white, it can be seen in this picture, so to fix it i mixed some black ink with some water and i did a black wash over the white areas to make them look grey.

Second day weathering:
For the second day i printed my labels designs based in the venkman's pack that i taking aproximate measuraments and colour from the original one, so i glued them and continued adding more scratches and weathering. Also i placed some pieces to see how it will looks like, but all the pieces are just as a visual guide (they are from my old build)
For the labels i print them in vinyl and weatehred them using powders. I'm not happy with the size of the Warning label from the cranck knob so i will change it but it looks cool btw.


And here an edited picture to match the closest as possible how it looks in real life

So this is all for now, i m trying to get some pieces and materials to continue with the building but i will keep you updated! I hope you like it! And again sorry for my english :s
I'm gonna try to document the progress on my GB2 Proton Pack build.
First lets talk about the Shell, the base of the build. This is a fiberglass shell made by me, this is a project i started working like 7 years ago so the master has been heavily moddified during this years. I started building the entire pack using stirene sheets, and with the past of the years i add some 3d printed pieces i modeled to the master to make all the process easier, faster and more accurate. The shell i' m using now is my V2.
V1 V2
The most noticiable difference between the V1 and the V2 is that the Nfilter is gone (i did this to make Hero Packs with alluminium Nfilters), but also i changed a lot of little details like angles, retextured a little bit the shell and added some predilled holes to make it easier to clean and drill. Once i was happy with the modds we did silcione mould and started taking some fiberglass casts.
The first copyes came out grate, except for some little bubbles that i repaired easily with some bondo.
Next step, clean and drill some holes.
For this step i'm using my dremel and some sandpaper to give a nice and smooth finish to all the edges.
This is how they look on the inside (i'm using grey gelcoat for the first thre layers and then fiberglassing and reinforcing the parts that are supporting more weight, like the gun mount.
Once i have all the holes cutted i clean the shell with water and soap to make sure the paint is not gonna do anything weird on the surface.
Painting time! for this step i dont have too much pictures of how i started so i m' gonna explain what i did.
first of all i sanded some parts that have a lot of texture to make it a little bit more smooth and add some other textures later (like brush marks). I cleaned all the sanded parts again before start painting.
Then i did a base coat over the shell with a black satin spray, once its dry i over sprayed a lot (making some "paint lakes") the parts i want to add some brush texture, like the ribbs on the gear box, the ribbs on the power cell, the ribbs on the gun mount and some parts of the synchronous generator.
This is an axample of the brushed texture (light effect is making hard to see the texture, but it works perfectly in person):
Once i did all the retexturing task i did a last satin black layer and once it was driyed i mixed some baby powder and black pigment (20% baby powder-80%black pigmen aprox) and i appliyed this mix over all the surface in the pack so it kills a little bit the shine of the satin but its still shine and less black, but not too much.
After this i started with the weathering. For this i started scratching all the black paint in the surface in some areas (i started trying to recreate the venkman gb2 weathering, but i finally made it up as its easier and it looks cool too), here some pictures of the first weathering day.
You can see here the effect of the baby powder and black pigment (this picture looks pretty close to the real thing)
For the scratches i didn't use any paint, as the shell its gray (white in this case, as it was the first prototype) i only peel the paint with some sandpaper and a xcto knive.
For the lenses i glued them with hot glue, i added a lot of hot glue so the glue filled every little gap between the lense and the shell and then i trimmed it with a knive and adeed a mix of baby powder and some pva glue into the edges, and also i scratched the edges a little bit with the xcto knive.
Okey, as i mentioned before the gelcoat in this shell is white, it can be seen in this picture, so to fix it i mixed some black ink with some water and i did a black wash over the white areas to make them look grey.
Second day weathering:
For the second day i printed my labels designs based in the venkman's pack that i taking aproximate measuraments and colour from the original one, so i glued them and continued adding more scratches and weathering. Also i placed some pieces to see how it will looks like, but all the pieces are just as a visual guide (they are from my old build)
For the labels i print them in vinyl and weatehred them using powders. I'm not happy with the size of the Warning label from the cranck knob so i will change it but it looks cool btw.
And here an edited picture to match the closest as possible how it looks in real life
So this is all for now, i m trying to get some pieces and materials to continue with the building but i will keep you updated! I hope you like it! And again sorry for my english :s
Attachments
-
 176297078_546731422973553_7899383394770958954_n.jpg196.1 KB · Views: 142
 -
 176249625_288194199557349_2805686806186996727_n.jpg243.8 KB · Views: 144
 -
 176105188_2807205419610081_914924083190534281_n.jpg275.9 KB · Views: 147
 -
 176165328_370232474239020_2914977836150074370_n.jpg372.8 KB · Views: 155
 -
 176117834_150597826995476_7441986027594719003_n.jpg465.5 KB · Views: 171