You are using an out of date browser. It may not display this or other websites correctly.
You should upgrade or use an alternative browser.
You should upgrade or use an alternative browser.
Galileo Study Model - half studio scale replica
- Thread starter Shaw
- Start date
Shaw
Well-Known Member
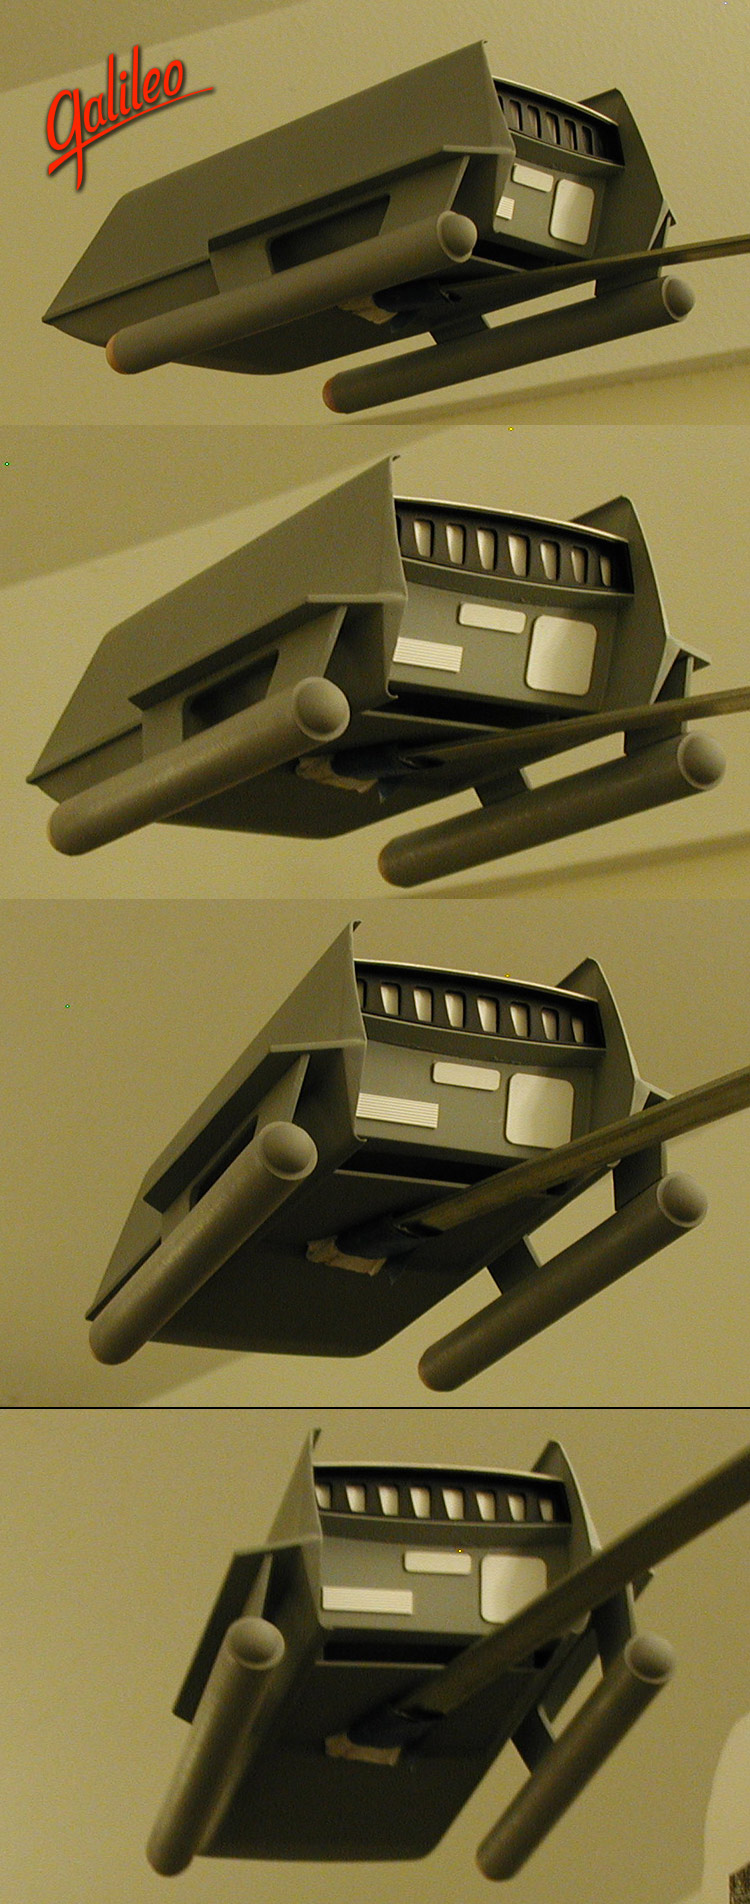
Actually, I put a super strong magnet in the floor of the model that'll lock it to the stand I'm building. That is what is holding it to the piece of metal it is currently being displayed on.
I wrapped the end of the metal bar in a piece of paper towel (and taped it on) to protect the model's surface. The metal piece on the final stand will be wrapped in a fabric to do the same thing. The model will look nicely closed up when being handled, yet should be as secure to it's stand as my models that are displayed on inserted rods.
In those last shots of the model, it is extending out about a foot and a half from my book shelf approximately 7 feet from the ground... and it is nicely locked on to the bar (it takes a bit of effort to separate them).
Shaw
Well-Known Member
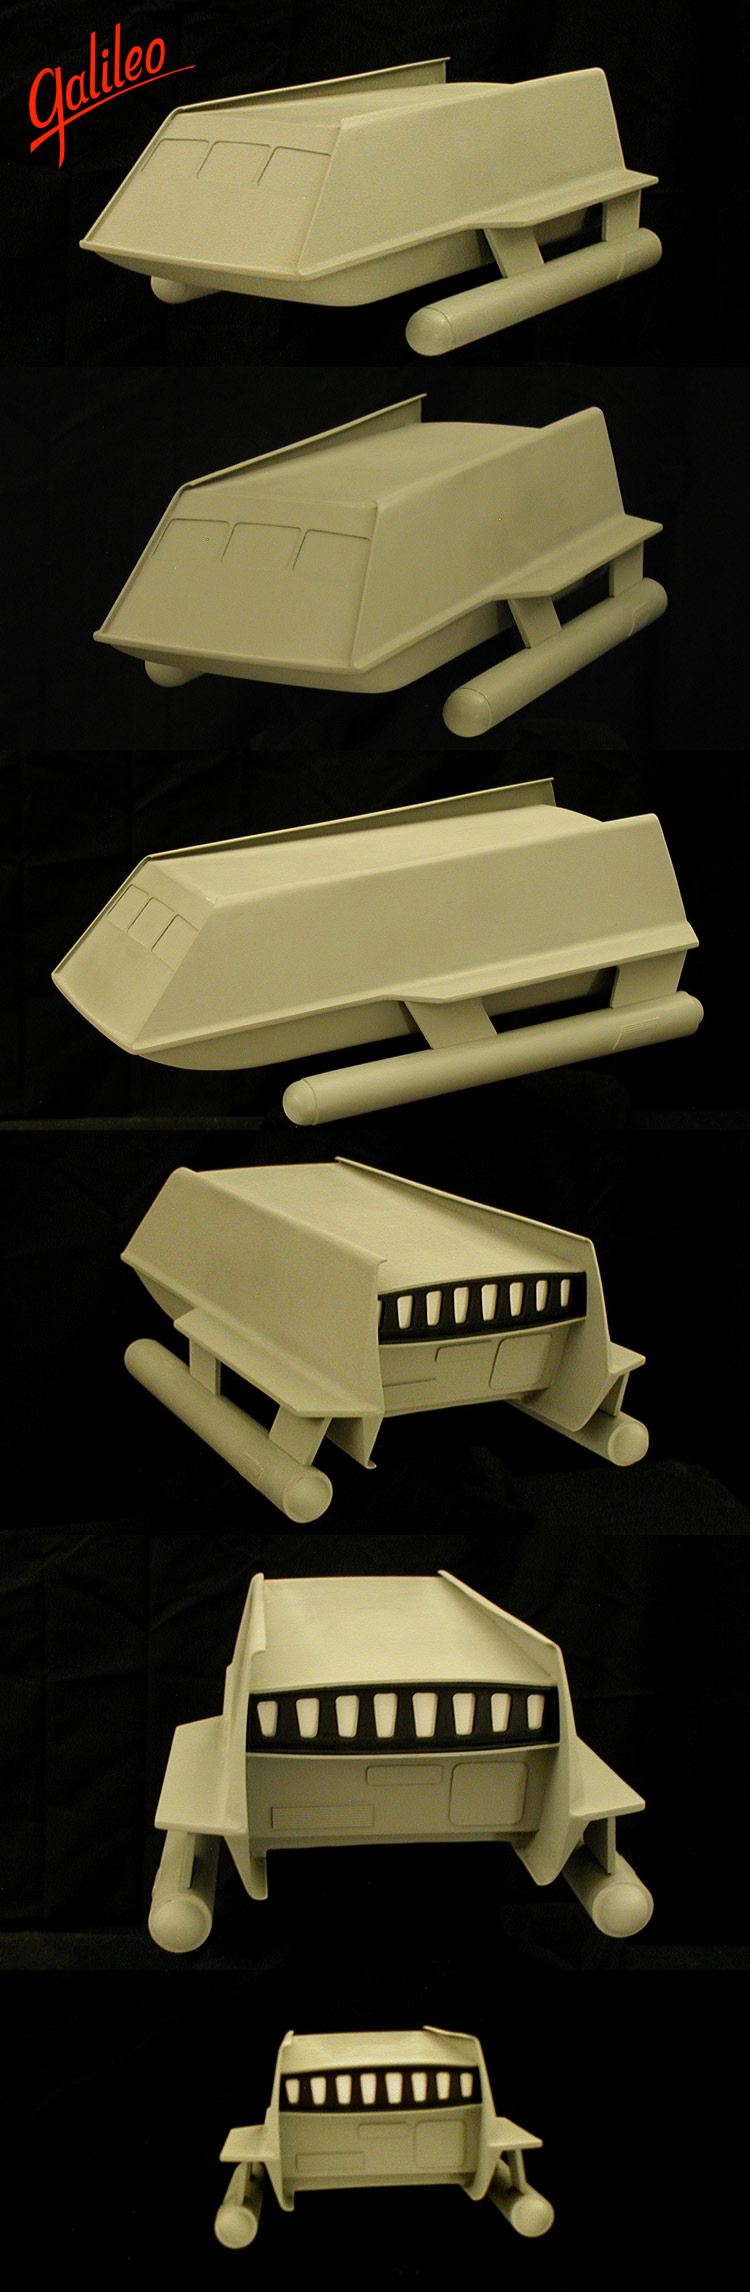
This one is going to be unlit... it is mainly intended for studying the model's physical characteristics and as a familiarization aid for the shuttlecraft in general. If I do a studio scale version, that one will be lit (with changeable front window options like the original model had).
I think I'm getting pretty close to the painting stage now...
I think I'm getting pretty close to the painting stage now...
")
Shaw
Well-Known Member
Me too!
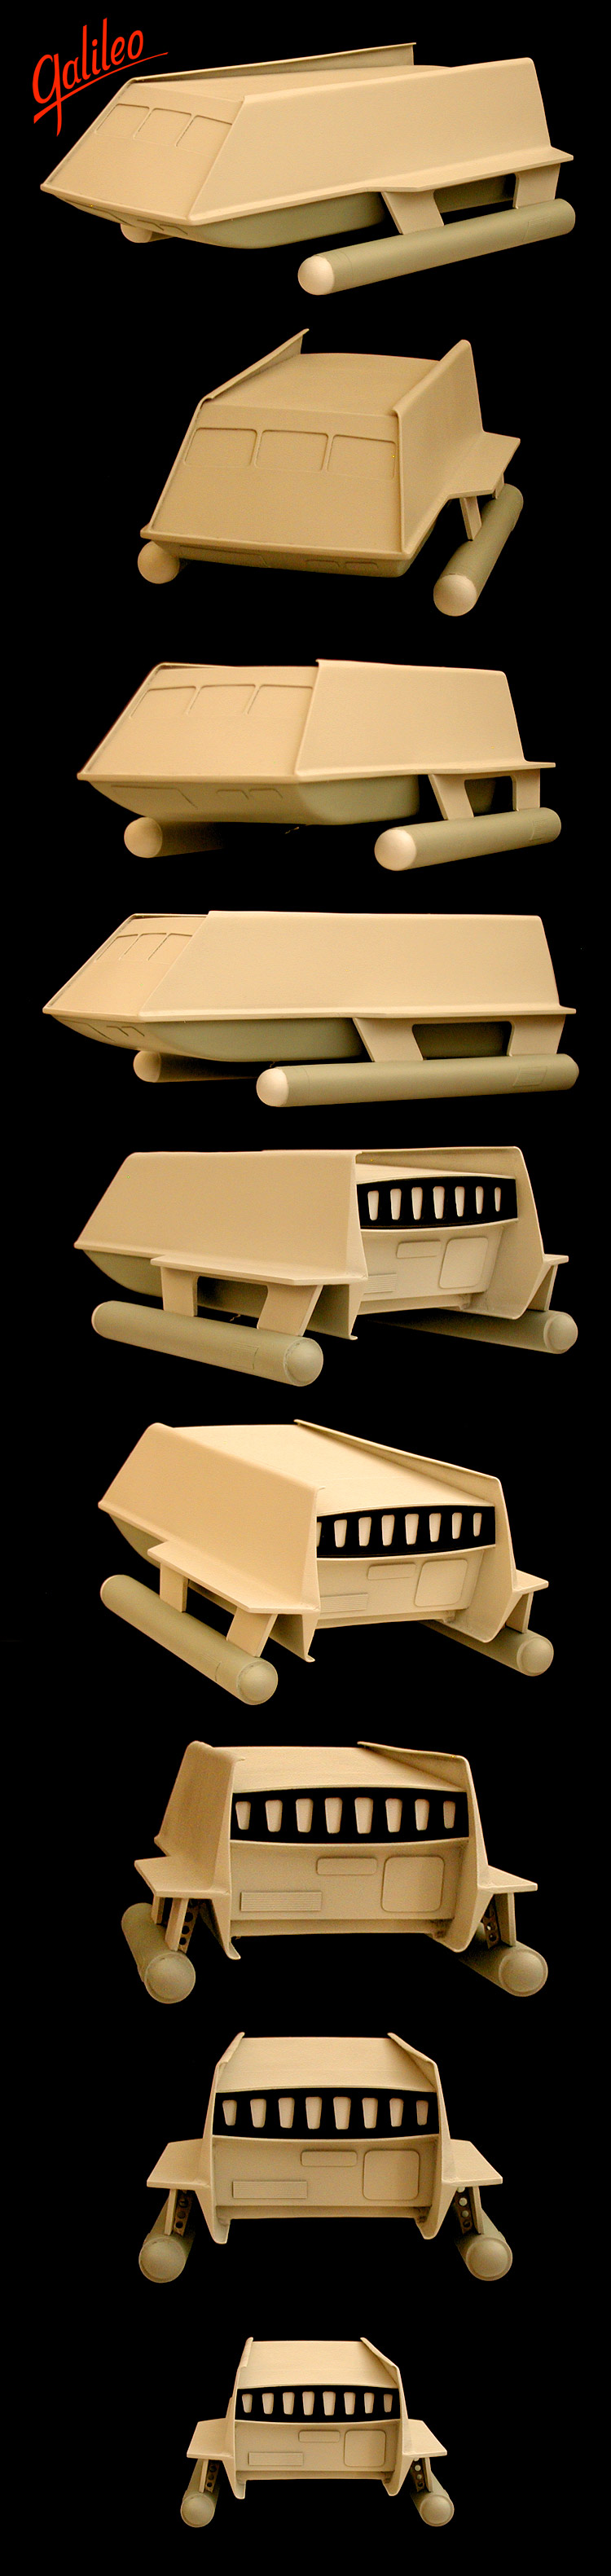
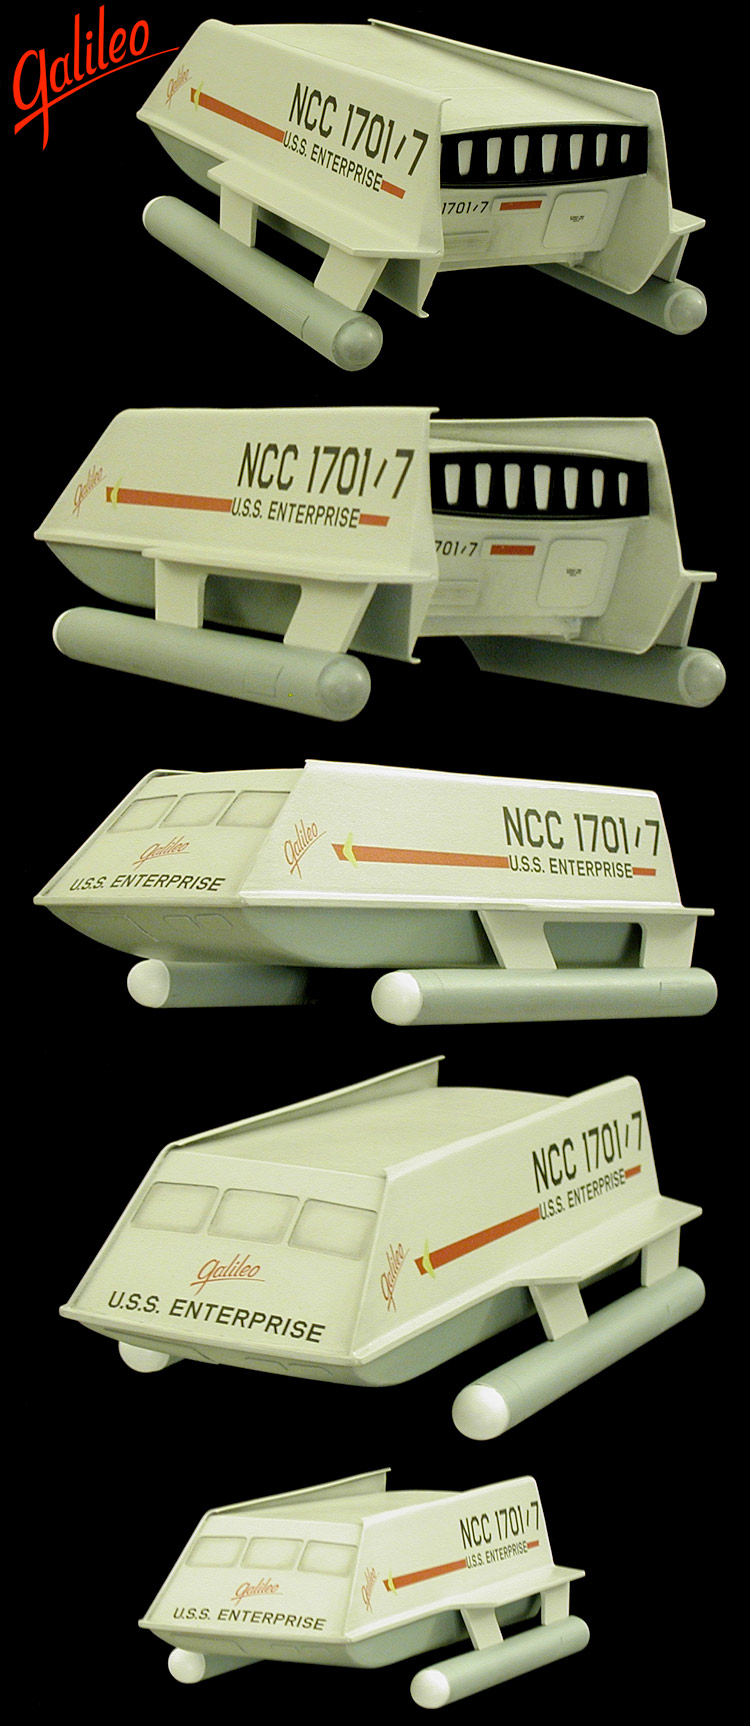
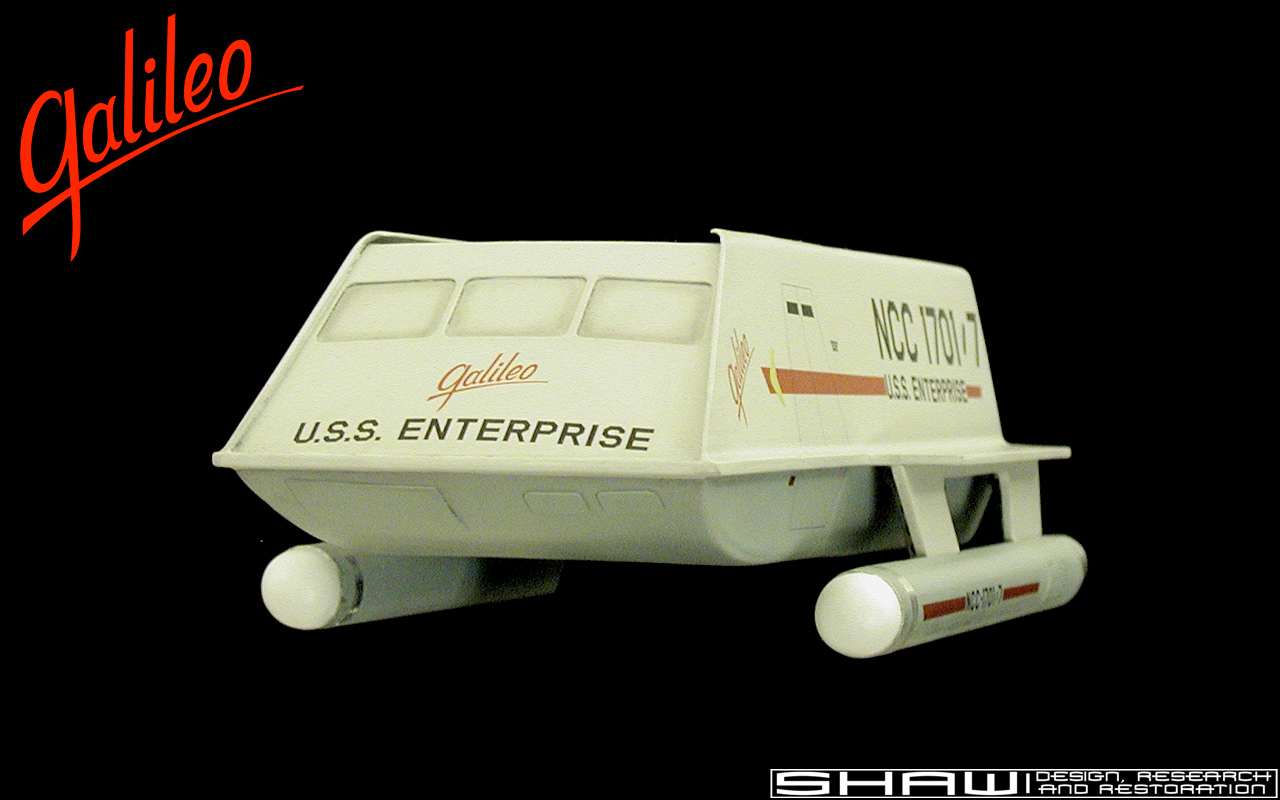
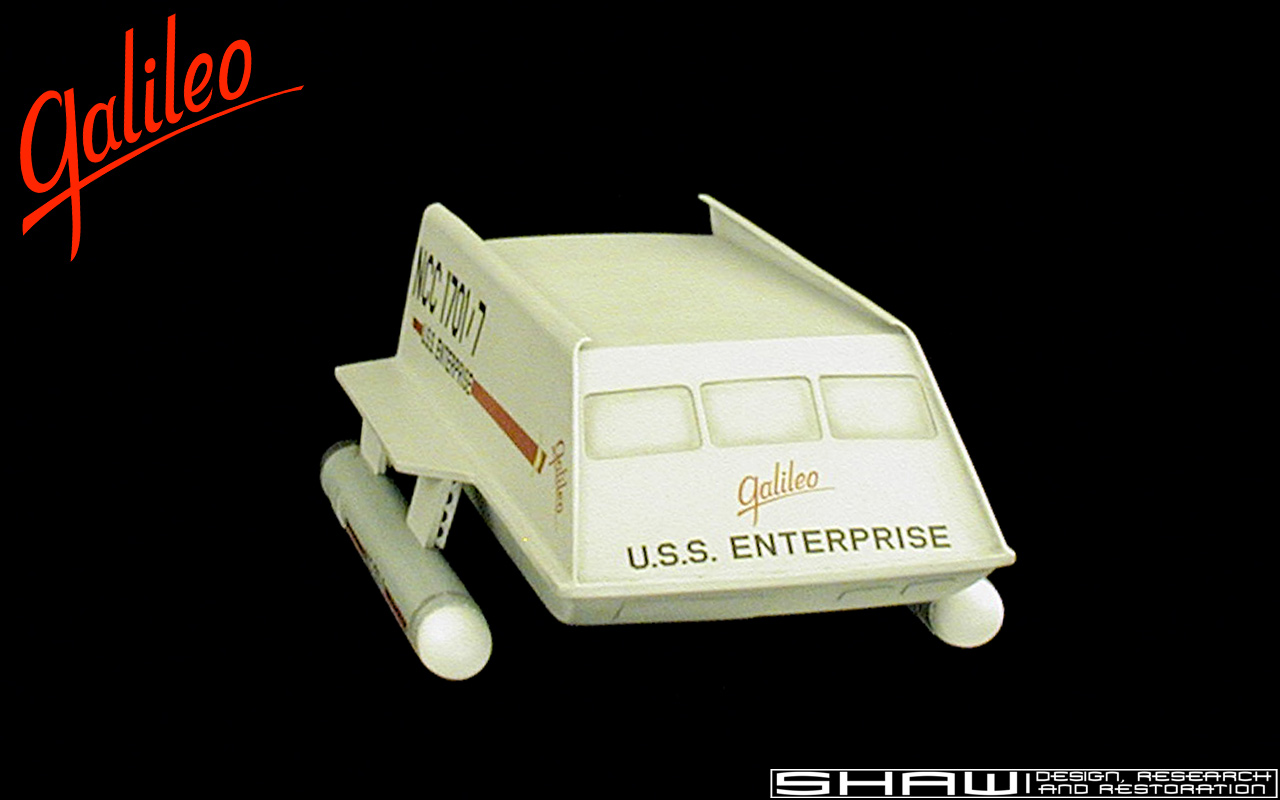
I'm pretty close to finished with the painting (the chrome/silver elements are going to be the last things done) and I'm pretty much finished with the weathering too (except for the nacelles), so I need to hit the model with a few gloss coats and then onto the decals. Here are some more shots of her...

Any thoughts on her so far? Does she sorta look like the filming model to you guys?
I'm pretty close to finished with the painting (the chrome/silver elements are going to be the last things done) and I'm pretty much finished with the weathering too (except for the nacelles), so I need to hit the model with a few gloss coats and then onto the decals. Here are some more shots of her...
Any thoughts on her so far? Does she sorta look like the filming model to you guys?
Shaw
Well-Known Member
Thanks!
Yeah, I don't want them to get covered by the gloss and matt coats, nor do I want to risk masking them, so the best option seem to be to hold off working on them until the end.
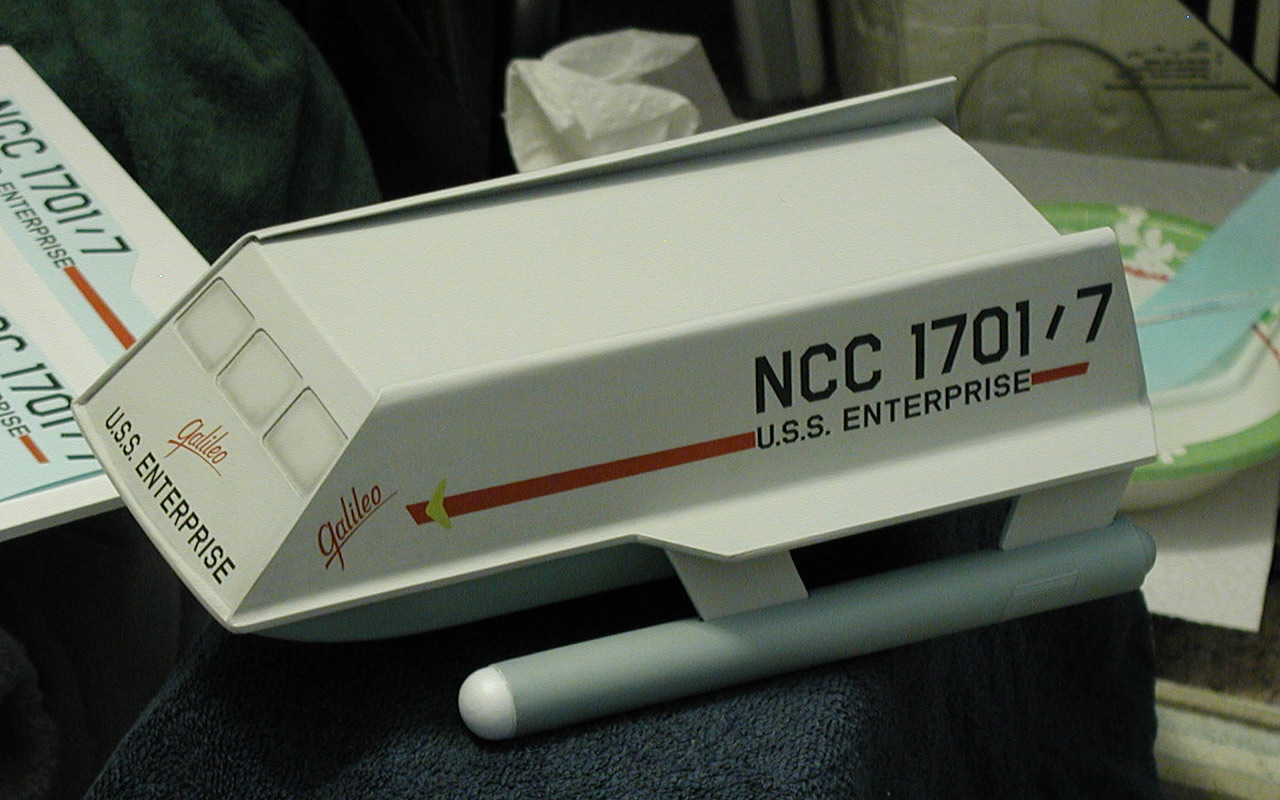
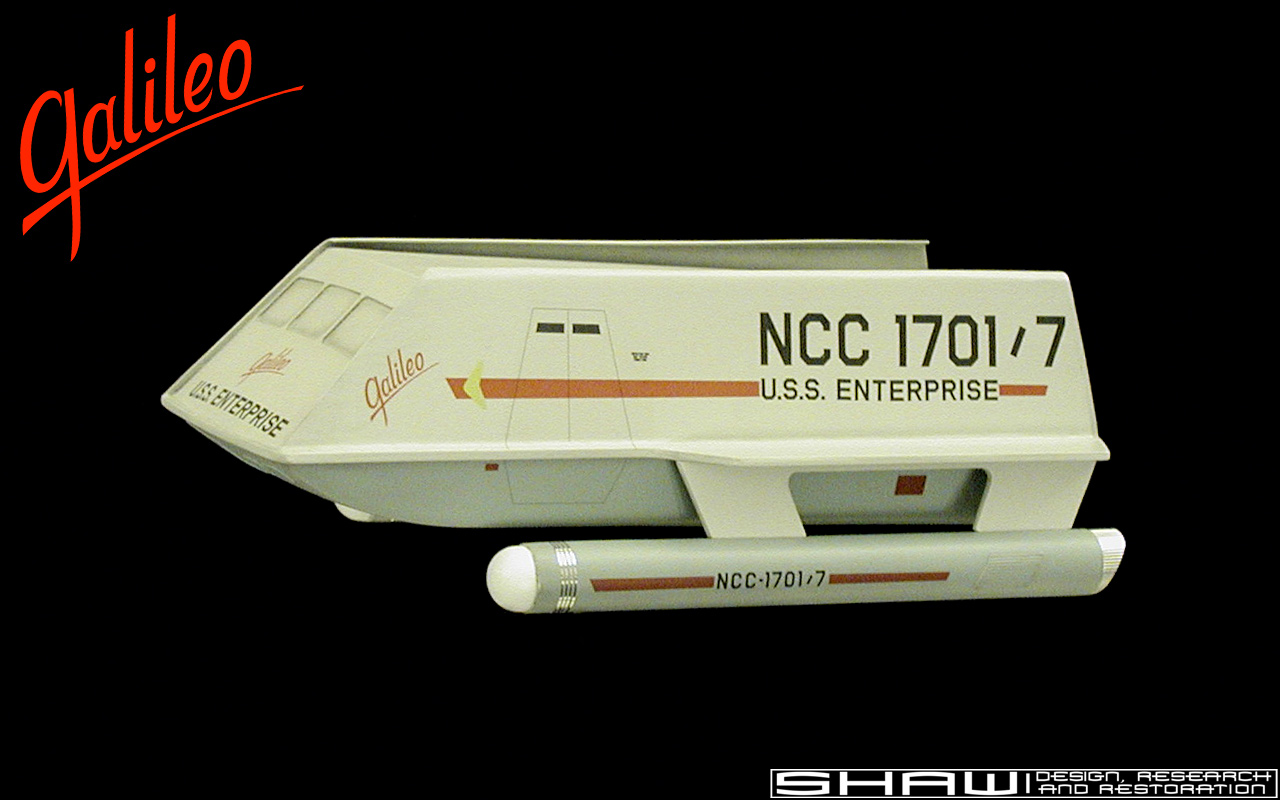
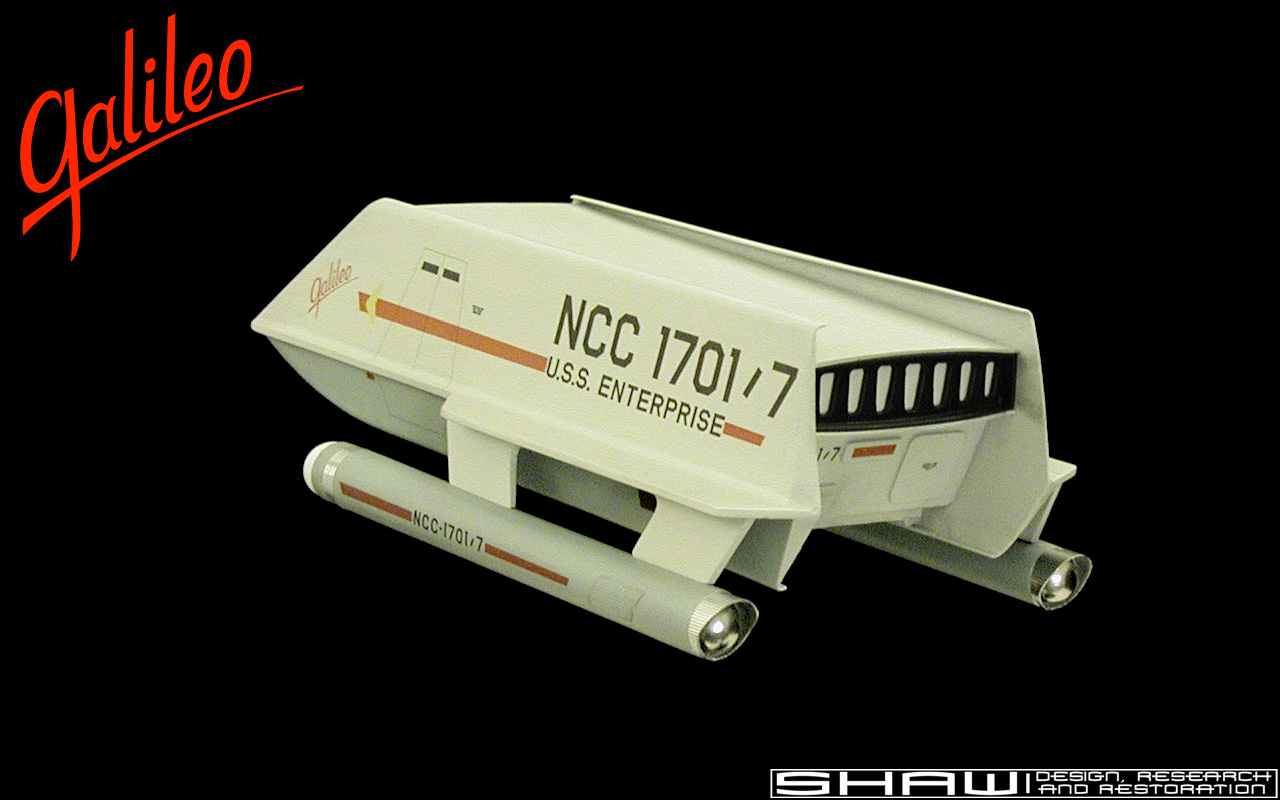
First couple decals applied, but still a long ways to go... here is a quick preview.
Yeah, I don't want them to get covered by the gloss and matt coats, nor do I want to risk masking them, so the best option seem to be to hold off working on them until the end.
First couple decals applied, but still a long ways to go... here is a quick preview.
Shaw
Well-Known Member
Thanks!
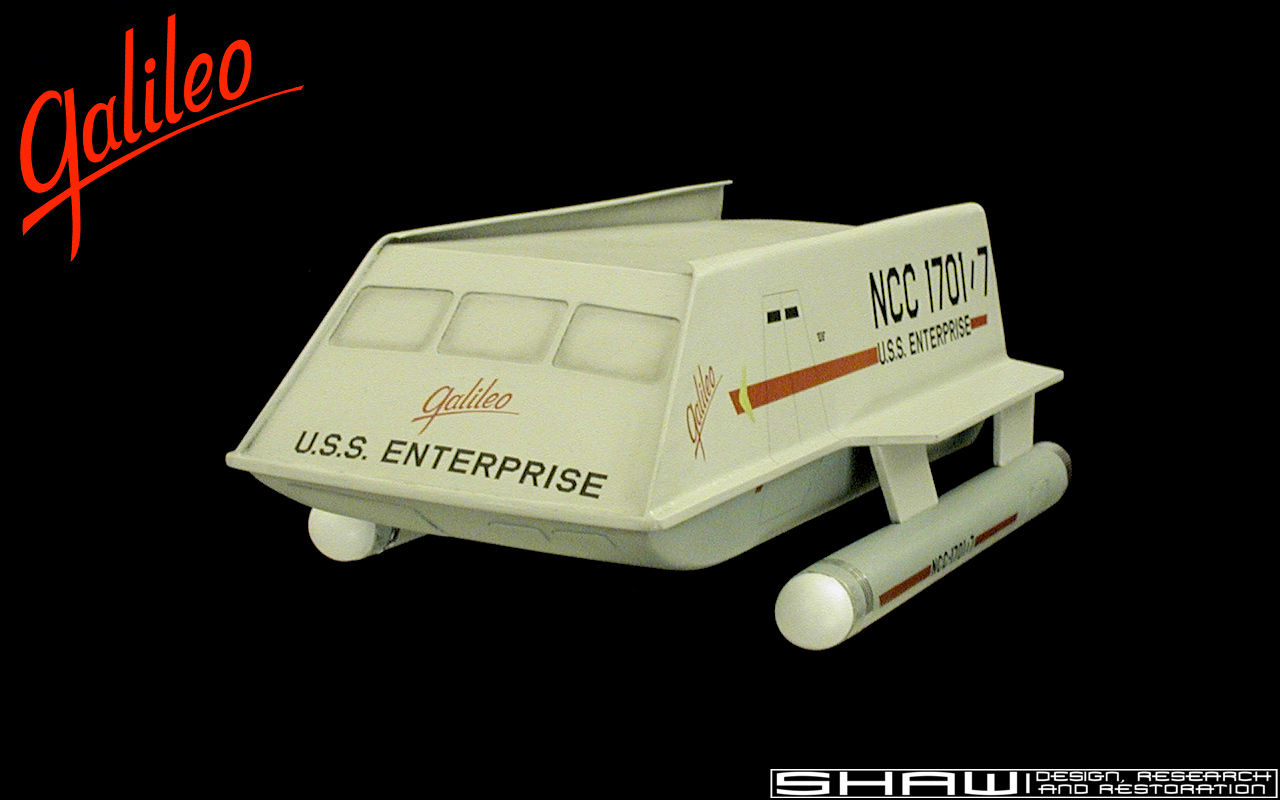
First, why didn't I just use JT Graphics for printing the decals like I normally do? The answer is the main color of the model... which is Tamiya Insignia White (AS-20). This is a light enough color that I didn't feel like it was important to have a white background printed behind the colors (most importantly, behind the yellow boomerang insignia). The secondary color is Tamiya Luftwaffe Light Blue (AS-5), which is the same color I use for the TOS/Phase II Enterprise and would have needed the ALPS printer to get the yellow color right.
The graphics for this are fontless... that is, most everything on the page is hand drawn in an illustration application (hand tracings of original decal art from the series). Even the super small lettering is modified spline artwork, so all this stuff is pure vector art. I did a test printing on my inkjet here at home to make sure that everything worked on the model, and then save the final artwork as a PDF.
For the final printing, I went to Kinko's and had the file color laser printed onto a clear decal sheet (from Microscale). I fixed the graphics to the page with a number of dusting coats of Testors' Decal Bonder Spray (a number of passes from about two feet away from the sheet).
After letting that sit for about 12 hours to fully cure/dry... I cut the decals out of the sheet.
I used Rustoleum Primer which I sand/buffed until I was happy with the surface, then applied a number of coats of paint... sanding/buffing between coats. When I was happy with the paint, I weathered the model (which includes spots of steal paint to make it look like the paint has warn off) and I lock all of that into place with a number of coats of Krylon Crystal Clear. After a quick buffing of the surface again, it is ready for the decals.
For the most part, I just use water to separate the decals from the backing. I apply water and Micro Set (from Microscale) to the surface where the decal is being placed, and once most of the water is out from under the decal I use a very soft, fine brush to apply some more Micro Set.
After about 30 minutes I apply the first coat of Micro Sol (from Microscale). After an additional 2 to 3 hours I go back and look for bubbles or silvering. I take a very sharp, very fine needle and tap the surface around any imperfections. I then apply Micro Sol again. A few hours later I repeat the process until the decal has essentially disappeared onto the surface.
I then give it 4 to 6 hours to fully dry/cure, then I hit the whole model with a few coats of Krylon Crystal Clear. After giving those coats a few hours to dry/cure, it is ready to be buffed and to start again with more decals.
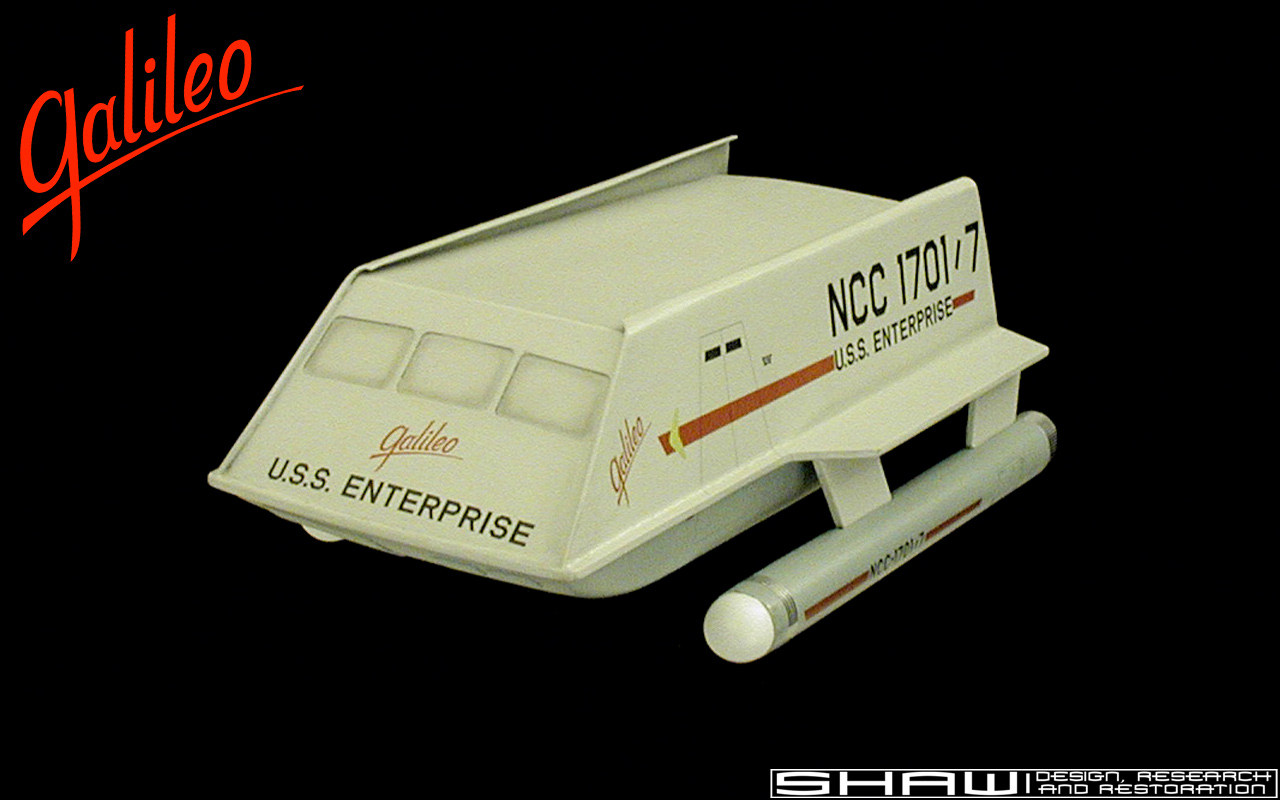
Once all the decals are applied and locked into place with a few coats of Krylon Crystal Clear, I'll apply a few coats of Krylon Matte.
While all of that is clear stuff... all of it would wreck chrome/silver paint, which is why those elements have to wait until everything else is done.
And yes, the whole process is as tedious as it sounds... but I like the final results, so it is worth the effort.
Well, as long as you asked, lets go through all the steps... mainly because this is actually somewhat new to me as this is my first time printing decals.Question: How long do you like to wait for one layer of decals to "cure" before adding the second?
First, why didn't I just use JT Graphics for printing the decals like I normally do? The answer is the main color of the model... which is Tamiya Insignia White (AS-20). This is a light enough color that I didn't feel like it was important to have a white background printed behind the colors (most importantly, behind the yellow boomerang insignia). The secondary color is Tamiya Luftwaffe Light Blue (AS-5), which is the same color I use for the TOS/Phase II Enterprise and would have needed the ALPS printer to get the yellow color right.
The graphics for this are fontless... that is, most everything on the page is hand drawn in an illustration application (hand tracings of original decal art from the series). Even the super small lettering is modified spline artwork, so all this stuff is pure vector art. I did a test printing on my inkjet here at home to make sure that everything worked on the model, and then save the final artwork as a PDF.
For the final printing, I went to Kinko's and had the file color laser printed onto a clear decal sheet (from Microscale). I fixed the graphics to the page with a number of dusting coats of Testors' Decal Bonder Spray (a number of passes from about two feet away from the sheet).
After letting that sit for about 12 hours to fully cure/dry... I cut the decals out of the sheet.
I used Rustoleum Primer which I sand/buffed until I was happy with the surface, then applied a number of coats of paint... sanding/buffing between coats. When I was happy with the paint, I weathered the model (which includes spots of steal paint to make it look like the paint has warn off) and I lock all of that into place with a number of coats of Krylon Crystal Clear. After a quick buffing of the surface again, it is ready for the decals.
For the most part, I just use water to separate the decals from the backing. I apply water and Micro Set (from Microscale) to the surface where the decal is being placed, and once most of the water is out from under the decal I use a very soft, fine brush to apply some more Micro Set.
After about 30 minutes I apply the first coat of Micro Sol (from Microscale). After an additional 2 to 3 hours I go back and look for bubbles or silvering. I take a very sharp, very fine needle and tap the surface around any imperfections. I then apply Micro Sol again. A few hours later I repeat the process until the decal has essentially disappeared onto the surface.
I then give it 4 to 6 hours to fully dry/cure, then I hit the whole model with a few coats of Krylon Crystal Clear. After giving those coats a few hours to dry/cure, it is ready to be buffed and to start again with more decals.
Once all the decals are applied and locked into place with a few coats of Krylon Crystal Clear, I'll apply a few coats of Krylon Matte.
While all of that is clear stuff... all of it would wreck chrome/silver paint, which is why those elements have to wait until everything else is done.
And yes, the whole process is as tedious as it sounds... but I like the final results, so it is worth the effort.
That's quite a process! I've been applying decals for years, but I never actually tried to whole micro-set/micro-sol process. I have some decaling coming up soon so I'll try your procedure and hopefully get some better results. and I normally use Testor's Glosscote, but I can't seem to find any around, so maybe I'll try out some Krylon Crystal Clear, too. Seems like you're getting good results with it.
Thanks for the details!
--Alex
Thanks for the details!
--Alex


Shaw
Well-Known Member
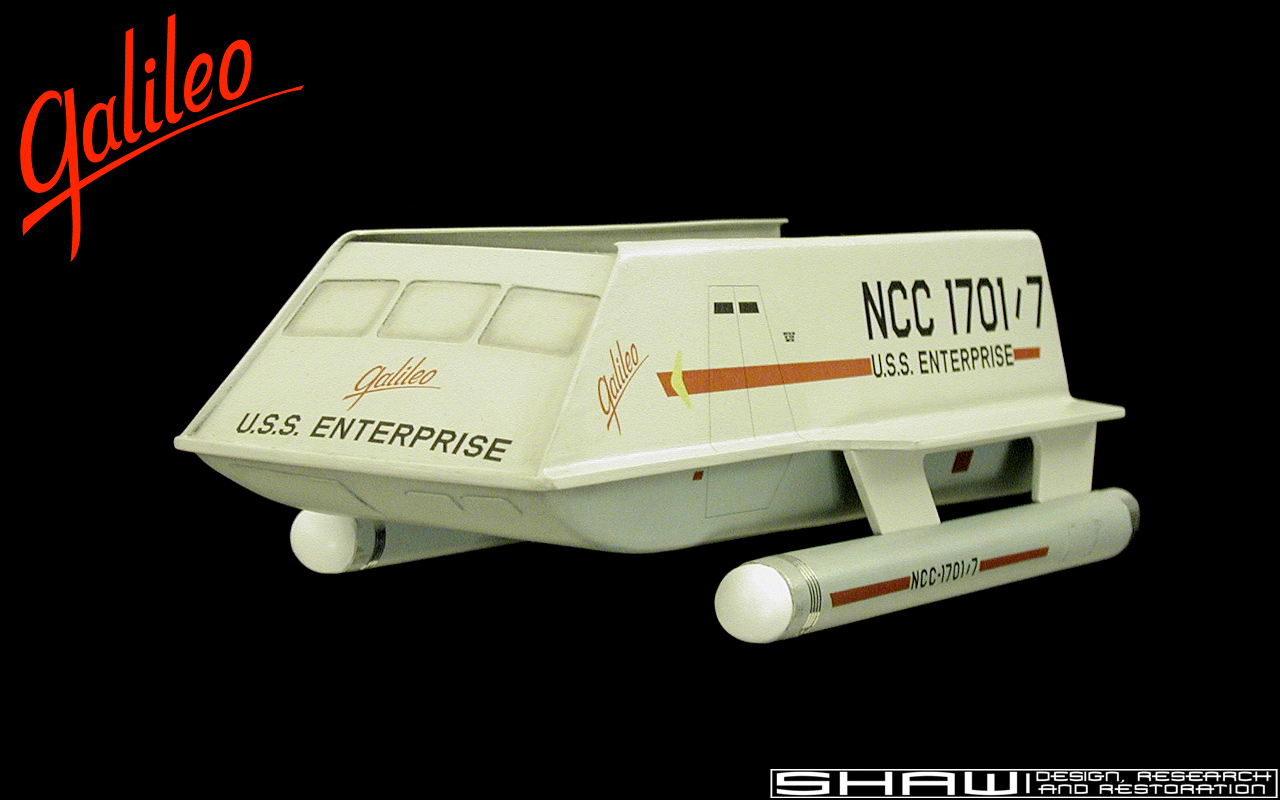
In person the difference is more stark, but I tend to use a number of large white panels to help light my models because the black background material make any areas in shadow all that much darker. The underside color was about the same as the Enterprise models, the top side should be about 20% lighter (the AS-5 has a brightness of about 70% where as the AS-20 is at about 90%).I'm curious about your color choice for the bottom half of the hull. Wasn't the original a darker gray?
I know some people would go with actual white for the top color, but because the nacelle domes and the impulse engine back panel are white, I wanted to make sure they stood out as much as possible from the rest of the hull (I had even considered going with a gull gray, which has a brightness of about 80%... but that was too close to the Luftwaffe Light Blue's 70%).
Both the miniature and large scale mockup were painted the same colors. It is often presumed that the large scale mockup was repainted before being used in The Way to Eden... but actually it is just the way it is lit that makes it look that way (like it was essentially all one color of gray).
Similar threads
- Replies
- 13
- Views
- 899
- Replies
- 157
- Views
- 12,850
- Replies
- 27
- Views
- 3,106