superjedi
Sr Member
Hi all,
This is something totally different than I usually do. (Cue John Cleese in a tux behind a desk
 )
)
I found a link on one of the MaK forums to a 1/8 scale female mechanic figure. I thought it was really cool looking. Sort of a retro sci-fi/steampunk vibe to it. The figure is called "el" and it was released by Kaiyodo.
Here she is.


I don't really collect female figures, or "anime" stuff at all. I think a lot of the figures look sort of cartoony in their features and proportions. Which ain't a bad thing. . . just not my style.
This figure has a great sculpt with a lot of detail, and is more realistic looking, which I like. She's carrying some kind of strange testing/sampling equipment. It just has a nice futuristic feel to it.

The paint app on the figure is amazing. These pics aren't quite getting the subtlety in shading, and the detail on the face and accessories is terrific!

The figure came on a small round base with locating pegs that fit into the bottoms of the feet.

It's nice as a standalone figure, but I wanted to do some kind of display or environment to put her into so it looked like she actually had a use for that stuff she's carrying around. Like she were working, so to speak.
If it's one thing I can't abide, it's lazy 1/8 scale figures!

I decided to do some kind of futuristic workshop/engine bay diorama, so I began looking for "stuff" to incorporate into a scene like that. I checked ebay for 1/8 scale accessories, and a lot of Pocher model stuff came up. I'm sure a lot of you know the Pocher brand. They're most well known for their incredibly detailed 1/8 scale cars. I found that Pocher makes models of engines as well. I guess they build into stand-alone display pieces. I saw one kit of a Volvo truck engine, and thought it might be interesting to work it into my little diorama. I got it for a good price, and was pretty happy with the size and detail when it arrived.
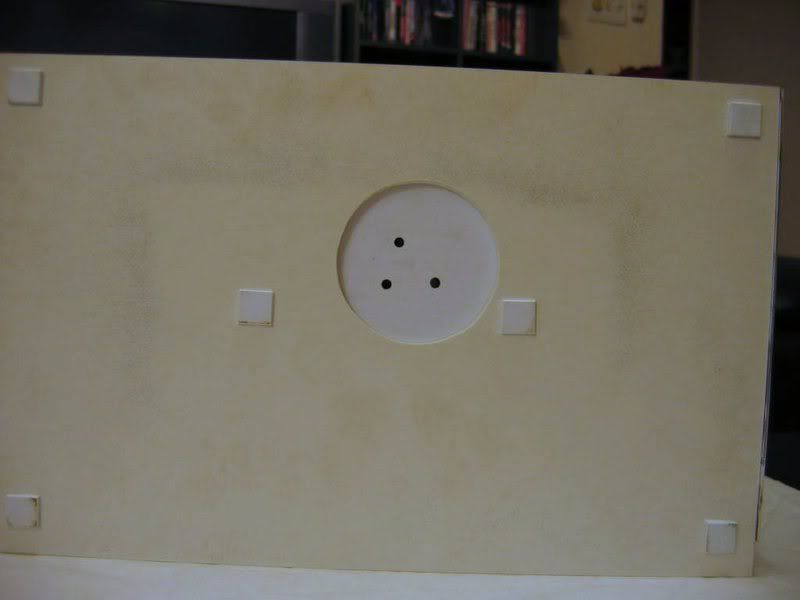
I also got a nice pre-cut sheet of Sintra at my LHS, and some sheet styrene to build the display. Here, I marked where I wanted the figure's base to go, and cut out a circle in the Sintra. It's covered by a sheet of Plastruct "floor tile" with 3 holes cut out for the figure's locating pegs to go thru.
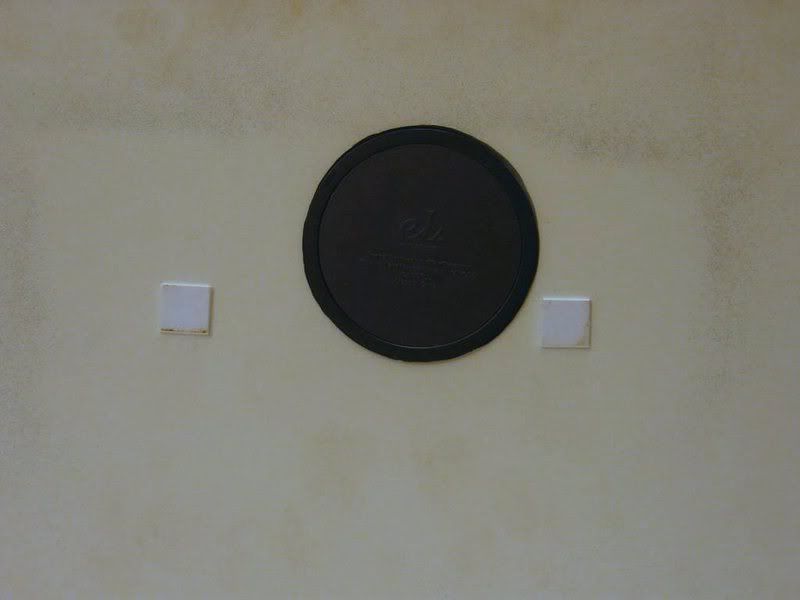
And with the base in place, only the 3 pegs come up thru the floor.
I'm kicking myself for not taking any in-progress shots of the work, but here's the finished scene.
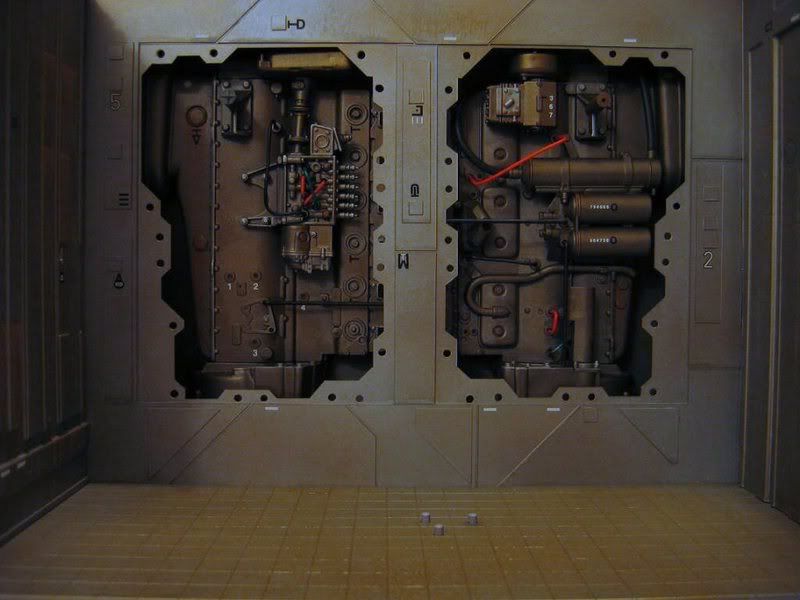
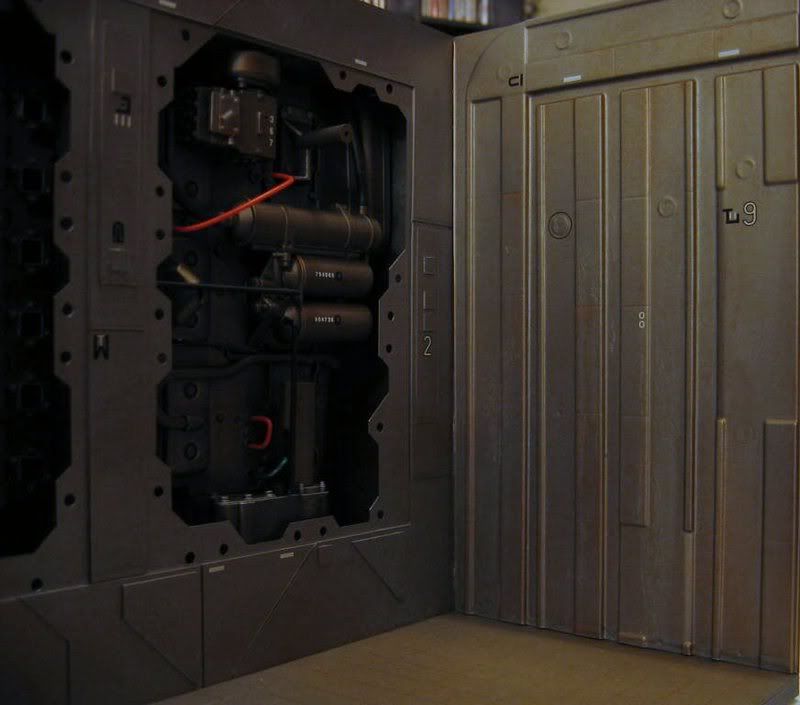
The back wall is one sheet of styrene with 2 openings cut out for the 2 main halves of the Pocher engine. I built a box to contain those parts, and made little "flanges" to fit around the edges of the openings, as if 2 big access panels had been removed.
I then added some thinner styrene panels to the wall.
All the little markings you'll see are just black and white dry transfer letters and numbers. I combined some of the letters in weird ways to make some "non-English" symbols.
The side walls were done from Plastruct sidewalk sections. I guess these are for model railroads, but they had a cool corrugated look to them.
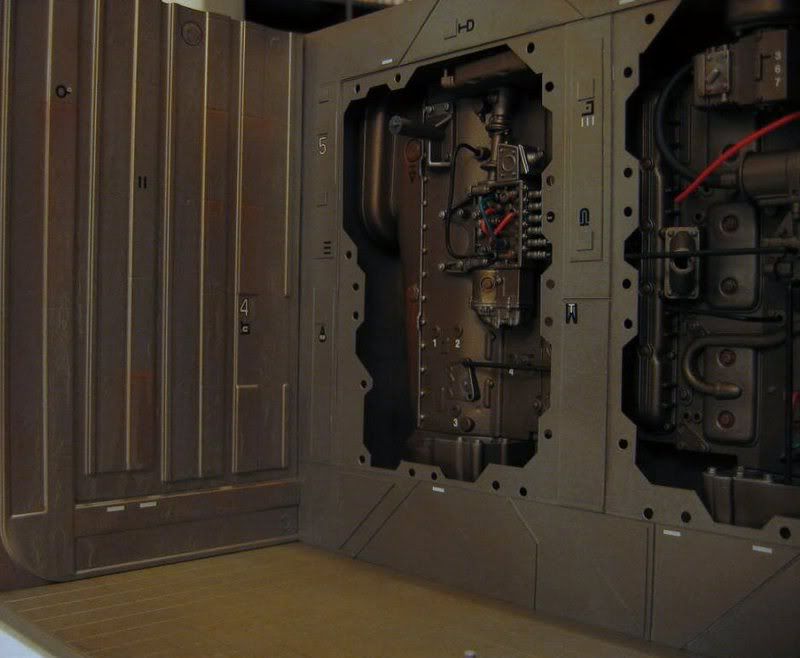
All the sections were painted and detailed before assembly. I used a combination of paints. Two shades of Testors Metalizers in Magnesium (base coat) and Stainless Steel. I then misted some Bronze and then used a spray called "Mess Master" from the Design Master series. This is basically a sprayable thinner, and it made everything blend and kind of run together. It gave the metallic shades some nice easy weathering!

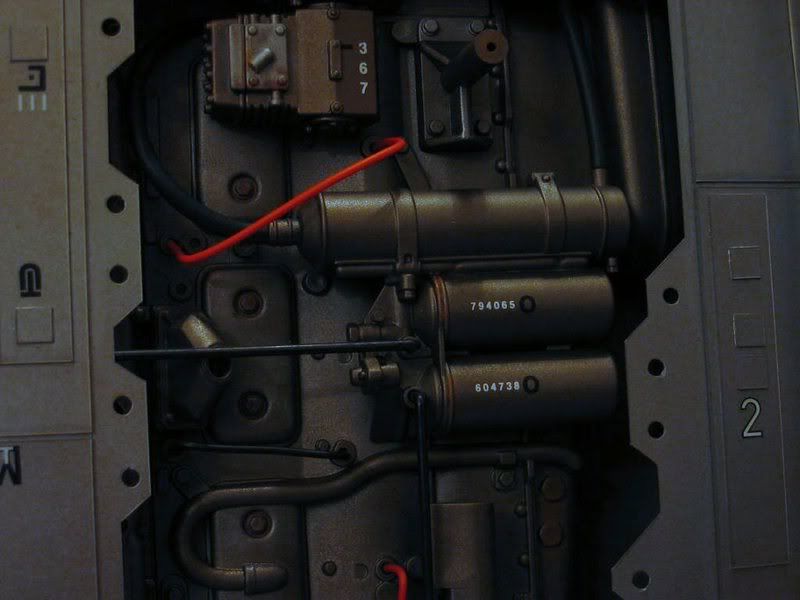
For the Pocher engine parts, I painted them almost the same way, but used a slightly heavier misting of Bronze to set them off visually. I dry brushed some silver onto some areas, just for a change of tone, and added some red, green, and black wires in a random way.
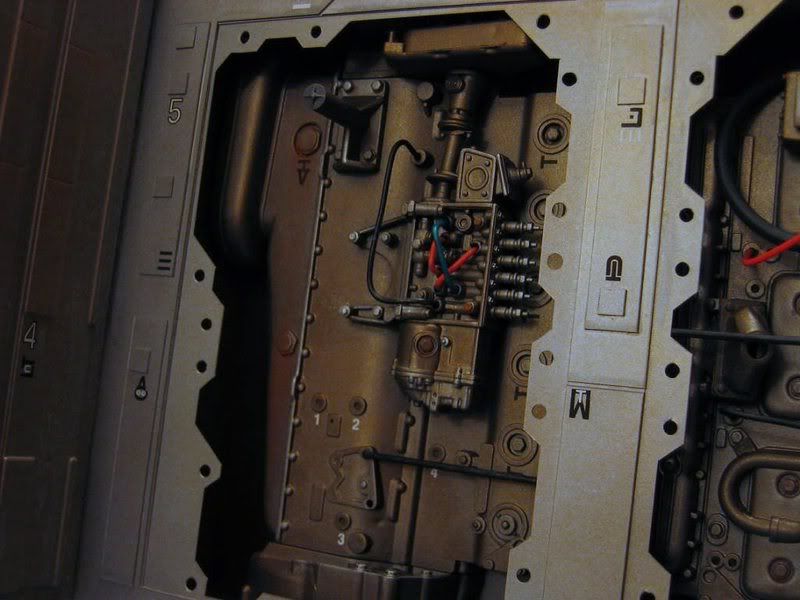
I also added some dry transfer letters/numbers to these parts, and some rusty pastel shades.
And here's the completed piece. The whole thing is 12" wide and 9" high!

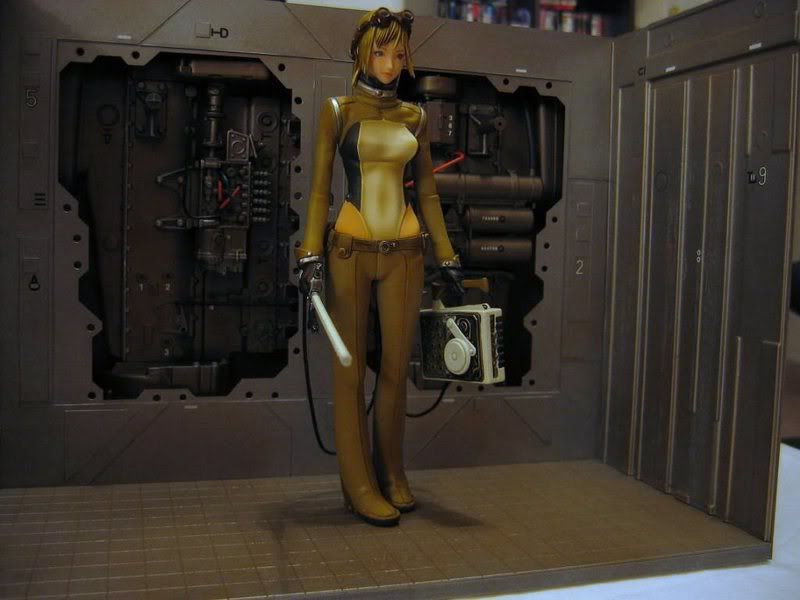
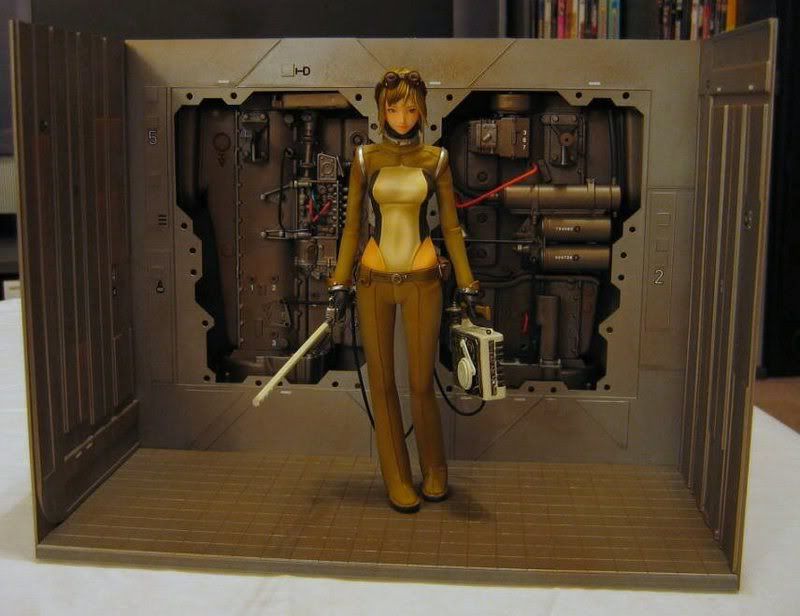
I may add a couple more small accessories. I have an in-scale fire extinguisher that I might hang on one of the walls, but that's pretty much it.
Thanks for looking!
Eric
This is something totally different than I usually do. (Cue John Cleese in a tux behind a desk
I found a link on one of the MaK forums to a 1/8 scale female mechanic figure. I thought it was really cool looking. Sort of a retro sci-fi/steampunk vibe to it. The figure is called "el" and it was released by Kaiyodo.
Here she is.
I don't really collect female figures, or "anime" stuff at all. I think a lot of the figures look sort of cartoony in their features and proportions. Which ain't a bad thing. . . just not my style.
This figure has a great sculpt with a lot of detail, and is more realistic looking, which I like. She's carrying some kind of strange testing/sampling equipment. It just has a nice futuristic feel to it.
The paint app on the figure is amazing. These pics aren't quite getting the subtlety in shading, and the detail on the face and accessories is terrific!
The figure came on a small round base with locating pegs that fit into the bottoms of the feet.
It's nice as a standalone figure, but I wanted to do some kind of display or environment to put her into so it looked like she actually had a use for that stuff she's carrying around. Like she were working, so to speak.
If it's one thing I can't abide, it's lazy 1/8 scale figures!
I decided to do some kind of futuristic workshop/engine bay diorama, so I began looking for "stuff" to incorporate into a scene like that. I checked ebay for 1/8 scale accessories, and a lot of Pocher model stuff came up. I'm sure a lot of you know the Pocher brand. They're most well known for their incredibly detailed 1/8 scale cars. I found that Pocher makes models of engines as well. I guess they build into stand-alone display pieces. I saw one kit of a Volvo truck engine, and thought it might be interesting to work it into my little diorama. I got it for a good price, and was pretty happy with the size and detail when it arrived.
I also got a nice pre-cut sheet of Sintra at my LHS, and some sheet styrene to build the display. Here, I marked where I wanted the figure's base to go, and cut out a circle in the Sintra. It's covered by a sheet of Plastruct "floor tile" with 3 holes cut out for the figure's locating pegs to go thru.
And with the base in place, only the 3 pegs come up thru the floor.
I'm kicking myself for not taking any in-progress shots of the work, but here's the finished scene.
The back wall is one sheet of styrene with 2 openings cut out for the 2 main halves of the Pocher engine. I built a box to contain those parts, and made little "flanges" to fit around the edges of the openings, as if 2 big access panels had been removed.
I then added some thinner styrene panels to the wall.
All the little markings you'll see are just black and white dry transfer letters and numbers. I combined some of the letters in weird ways to make some "non-English" symbols.
The side walls were done from Plastruct sidewalk sections. I guess these are for model railroads, but they had a cool corrugated look to them.
All the sections were painted and detailed before assembly. I used a combination of paints. Two shades of Testors Metalizers in Magnesium (base coat) and Stainless Steel. I then misted some Bronze and then used a spray called "Mess Master" from the Design Master series. This is basically a sprayable thinner, and it made everything blend and kind of run together. It gave the metallic shades some nice easy weathering!
For the Pocher engine parts, I painted them almost the same way, but used a slightly heavier misting of Bronze to set them off visually. I dry brushed some silver onto some areas, just for a change of tone, and added some red, green, and black wires in a random way.
I also added some dry transfer letters/numbers to these parts, and some rusty pastel shades.
And here's the completed piece. The whole thing is 12" wide and 9" high!
I may add a couple more small accessories. I have an in-scale fire extinguisher that I might hang on one of the walls, but that's pretty much it.
Thanks for looking!
Eric
")