Austin Mac
New Member
I joined this forum about a month ago since I'm getting into making my props more accurate down to smaller details rather than frankly winging it and going off a few reference photos. I started 3d printing about 3 years ago since I received an Ender 3 Max Neo as a gift and since have been hooked, I only recently upgraded to a Elegoo Neptune 3 Max to get some larger prints completed, such as my ANH Darth Vader Helmet that I finished late 2024, and other helmets such as Clone Trooper helmets that I can print in one go rather than separating into smaller pieces. That is until I got the urge to make a blaster, I originally was going to opt to print something like a ANH DL-44, but I soon realized that there are not that many accurate models that I could print out there, and being a Militaria collector, the fact of having no imperial proofs on a Broom handle from a 3d print bugged me. So, I decided to opt for an EE3.
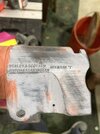
For the EE3 I found a very accurate model off ETSY that is sold by MCM Designs, the model features Webley and Scott proofing on the side of the receiver which caught my eye, and other features such as the Stock Bracket Chamfer. Included is also all the grieblies needed for the ESB EE3. I had to do some modifications to the files such as adjusting for the FieldMarshall stock, and replica screws but otherwise the file was very pleasant to print.
I started this build about a month ago and just has taken me that long to get everything mostly sanded and ready for paint, and to also get all the metal/real parts that aren't 3d printed purchased for the project. Listed below is all the parts I used.
Non 3d/Resin Parts INCLUDE:
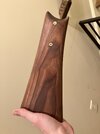
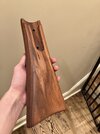
Walnut FieldMarshall Stock
ASI FieldMarshall Scope Mounts
Gen 2 Roman Props MPP
A.S.I. Scope with infinity symbol
FieldMarshall Replica Screw Kit
FDM PRINTED PARTS INCLUDE:
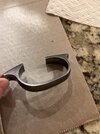
Stock Bracket
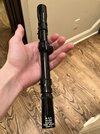
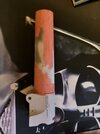
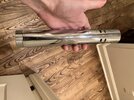
Barrel
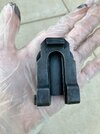
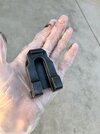
Resin Printed Parts INCLUDE
Receiver
Hammer
Trigger
Ejection Latch
Frame
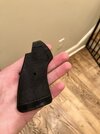
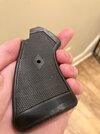
Grip
And Others that I can Mention Later in the thread
I have not printed many grieblies since I'm still debating whether I should purchase some genuine ones such as V8 Connecting rods, The Failsafe Switch, and Aerial Earth Plugs. Being a Military collector, I would love to have a Webley and Scott No.1 Mk1 Flare gun but turning it into a blaster I just don't think I could do it, I try my absolute best to preserve all the history associated with my helmets/rifles/bayonets, and gluing/attaching grieblies - Is not for me. However, the ones who have done this have done an absolute fantastic job.
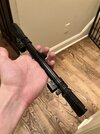
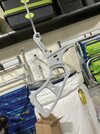
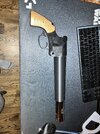
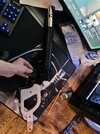
Back to the build. Here are some photos, I will try to post more later down the line when everything is painted in aluminum. However, for now here are some raw photos of the resin print attached to the barrel and some of the components I'm going to use. I'm going to use a method for the paint that makes it look like real blued steel. I will update the thread whenever I have everything painted in Gunmetal Gray and will show the process of the various washes that I will use. I would love any feedback for this so far, since I am quite new to the prop making world. I appreciate you reading!
For the EE3 I found a very accurate model off ETSY that is sold by MCM Designs, the model features Webley and Scott proofing on the side of the receiver which caught my eye, and other features such as the Stock Bracket Chamfer. Included is also all the grieblies needed for the ESB EE3. I had to do some modifications to the files such as adjusting for the FieldMarshall stock, and replica screws but otherwise the file was very pleasant to print.
I started this build about a month ago and just has taken me that long to get everything mostly sanded and ready for paint, and to also get all the metal/real parts that aren't 3d printed purchased for the project. Listed below is all the parts I used.
Non 3d/Resin Parts INCLUDE:
Walnut FieldMarshall Stock
ASI FieldMarshall Scope Mounts
Gen 2 Roman Props MPP
A.S.I. Scope with infinity symbol
FieldMarshall Replica Screw Kit
FDM PRINTED PARTS INCLUDE:
Stock Bracket
Barrel
Resin Printed Parts INCLUDE
Receiver
Hammer
Trigger
Ejection Latch
Frame
Grip
And Others that I can Mention Later in the thread
I have not printed many grieblies since I'm still debating whether I should purchase some genuine ones such as V8 Connecting rods, The Failsafe Switch, and Aerial Earth Plugs. Being a Military collector, I would love to have a Webley and Scott No.1 Mk1 Flare gun but turning it into a blaster I just don't think I could do it, I try my absolute best to preserve all the history associated with my helmets/rifles/bayonets, and gluing/attaching grieblies - Is not for me. However, the ones who have done this have done an absolute fantastic job.
Back to the build. Here are some photos, I will try to post more later down the line when everything is painted in aluminum. However, for now here are some raw photos of the resin print attached to the barrel and some of the components I'm going to use. I'm going to use a method for the paint that makes it look like real blued steel. I will update the thread whenever I have everything painted in Gunmetal Gray and will show the process of the various washes that I will use. I would love any feedback for this so far, since I am quite new to the prop making world. I appreciate you reading!
Attachments
-
 ee3 1 (1).jpg131.6 KB · Views: 41
 -
 ee3 6 (1).jpg194.8 KB · Views: 41
 -
 ee3 4 (1).jpg152.7 KB · Views: 36
 -
 ee3 5 (1).jpg168.6 KB · Views: 37
 -
 ee3 3 (1).jpg125.3 KB · Views: 43
 -
 ee3 2 (1).jpg174.8 KB · Views: 43
 -
 ee3 7 (1).jpg183 KB · Views: 43
 -
 ee3 9 (1).jpg173.9 KB · Views: 41
 -
 ee3 8 (1).jpg122.2 KB · Views: 40
 -
 ee3 11.jpg5.8 MB · Views: 35
 -
 ee3 10.jpg5.5 MB · Views: 41
 -
 ee3 12.jpg9.2 MB · Views: 38
 -
 ee3 13.jpg4.4 MB · Views: 46
Last edited: