coryalex
Active Member
Last January, I started working on a new prop for use with the charity group I'm part of... the Arizona Ghostbusters.
Phoenix Comicon is always in May, so I had a few months to make something... something for which there were no published dimensions or tutorials. I was really starting from scratch (sort of like I did again with my Vera build).
This build would not only be a challenge because I was going strictly off of screenshots, but because the prop was big AND had to be portable for use at conventions/events. :unsure
My plan was pretty simple.
1) build containment unit
2) figure a way to display the containment unit
3) also devise a way to safely transport the containment unit
Well, I combined steps 2 and 3 into a single chore... I... well, let's just look at these pictures and you'll see how I did it all.
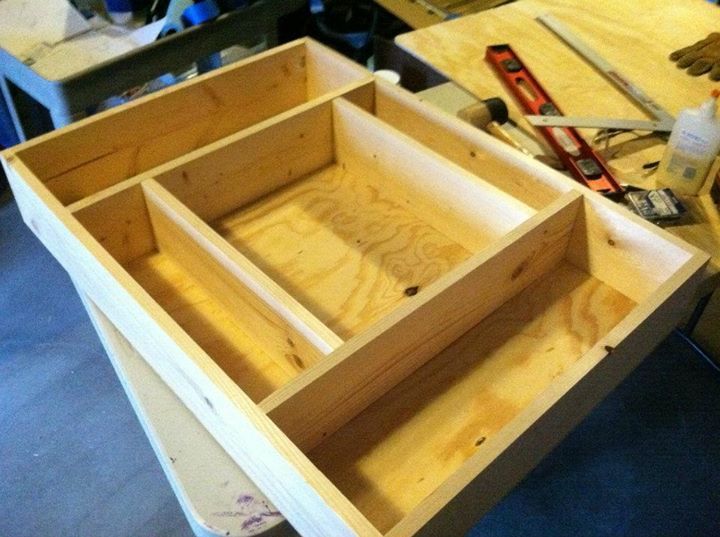
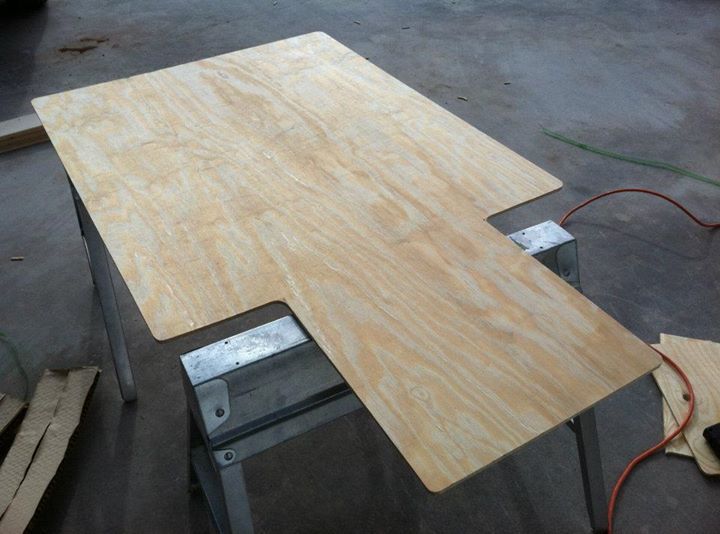
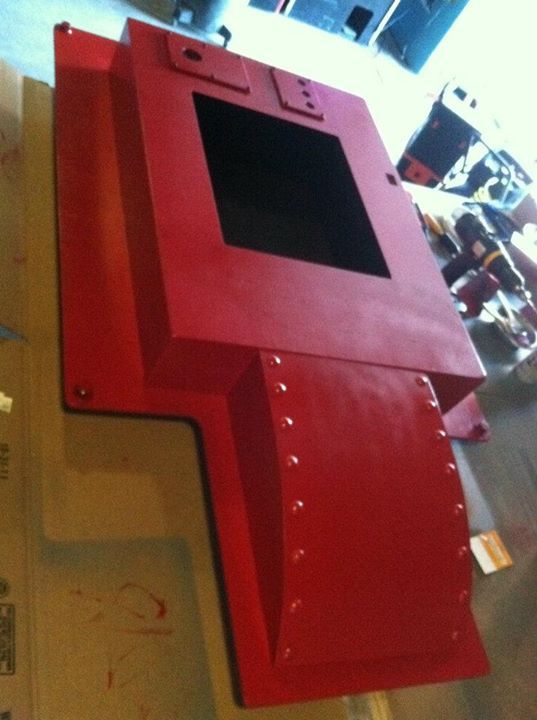
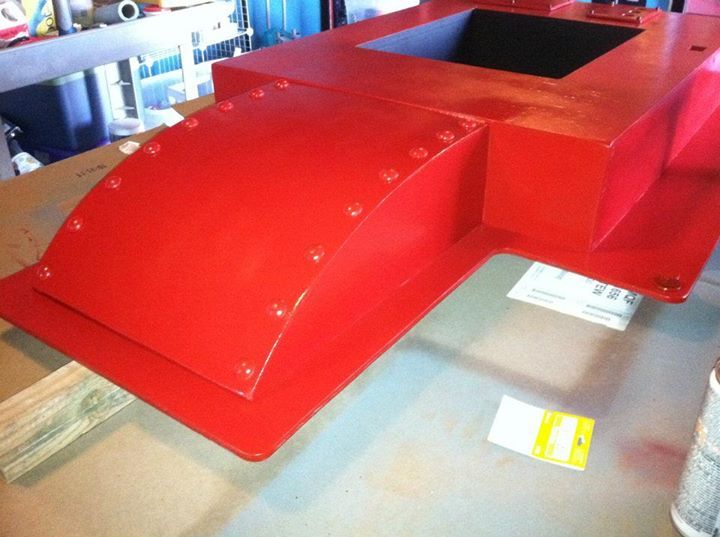
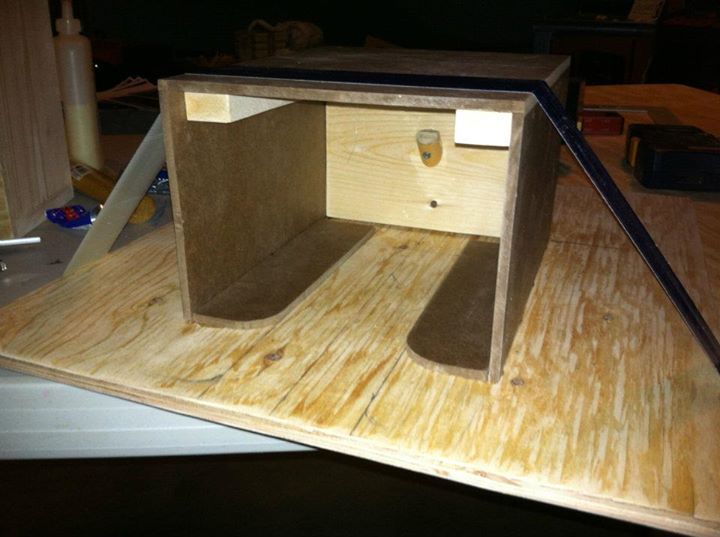
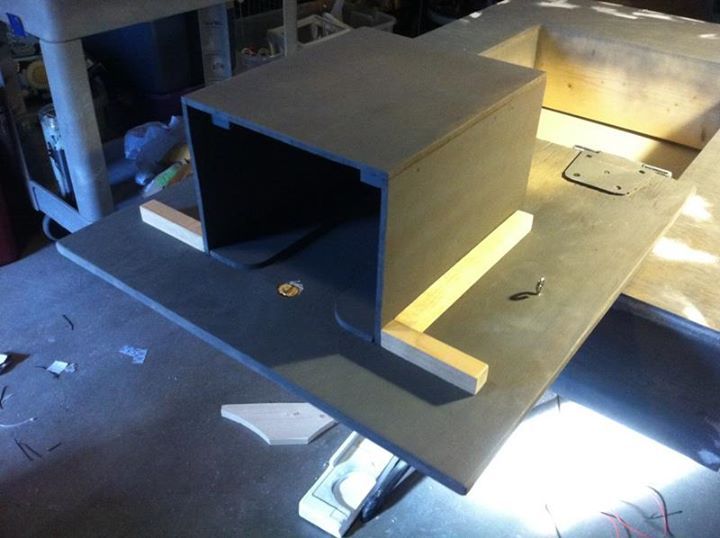
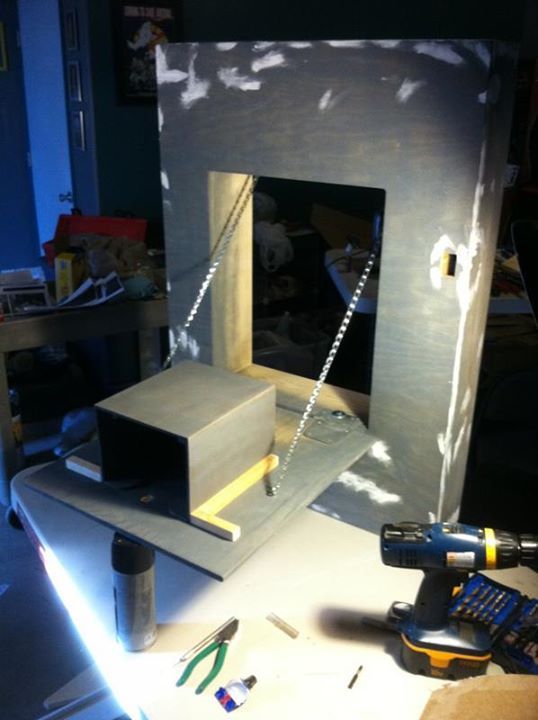
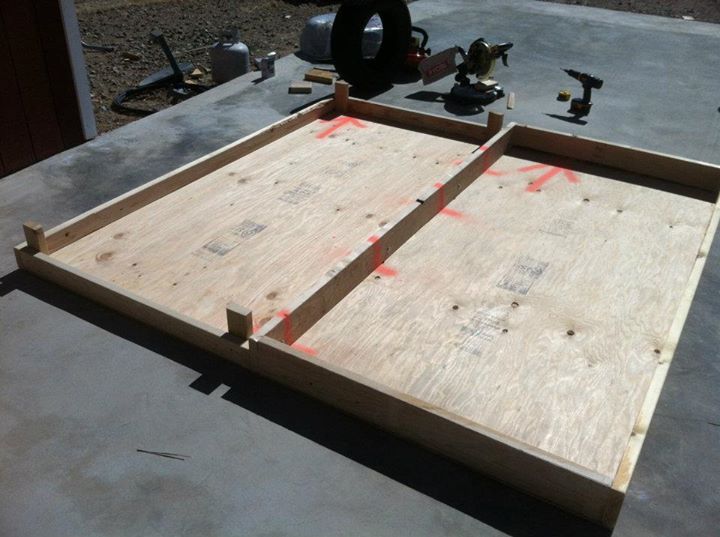
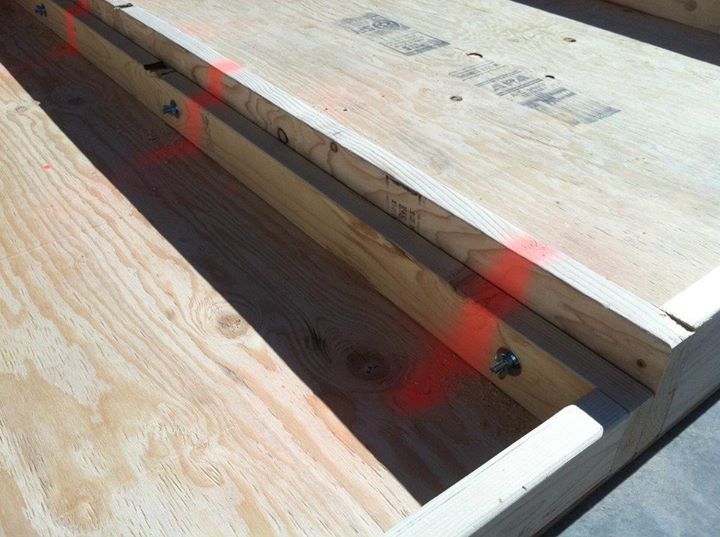
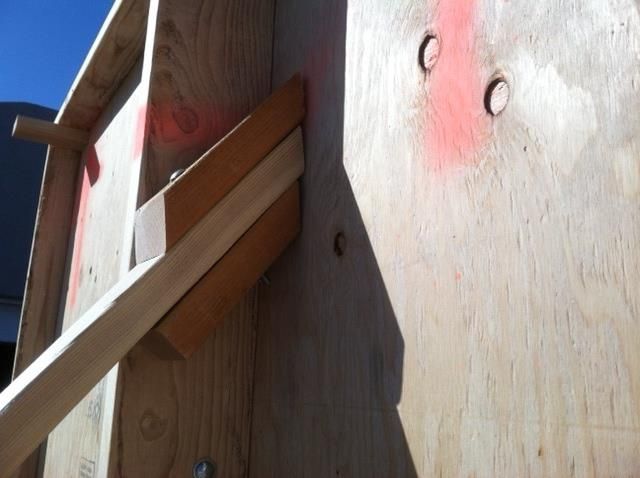
Starting with step 1, I built the ECU from mostly wood... plywood, pine, and a little trim pieces. Wood glue and heavy paint are your friend when working with these materials.
Main Body
1x6 pine boards made the "box frame" with plywood used for the skin
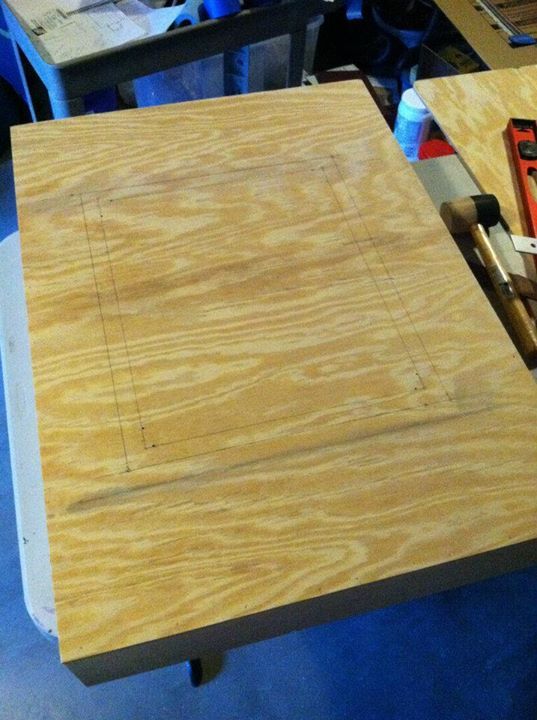
A router made quick work of making the hole for the door.
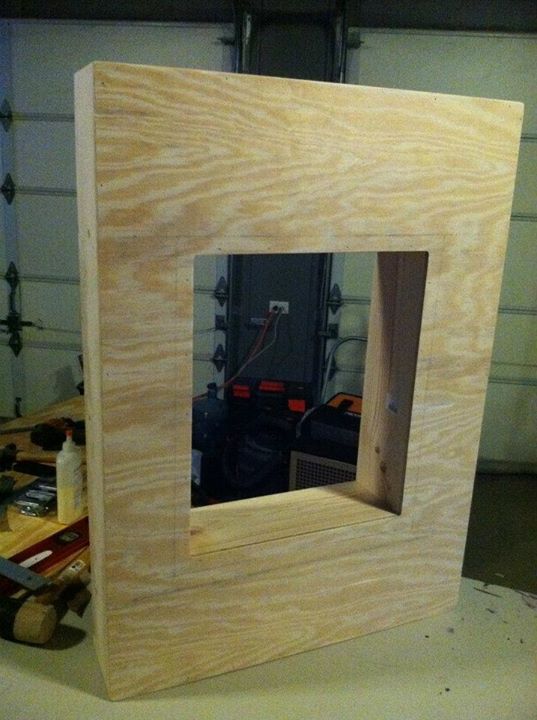
Plywood made a good "main plate" for this build
1x6 boards cut to form masonite over... staples and glue held the form in place
Pieces primed and ready for paint
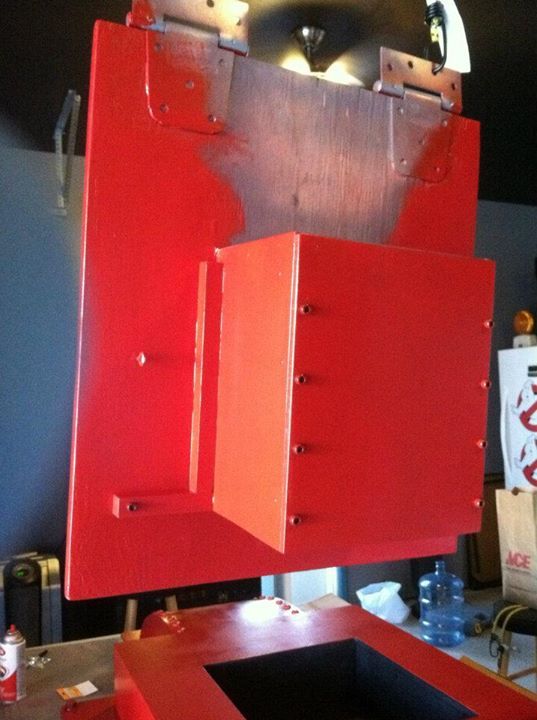
Heavy brushed-on red enamel paint helped hide the wood grain while making the surface look like painted industrial equipment

I used real metal nuts and washers on the corners (holes in nuts bondo'd closed to make them look like bolt heads)
I took wooden hole plugs, sawed the "bases" off and used the caps as "rivet heads" for the lower section
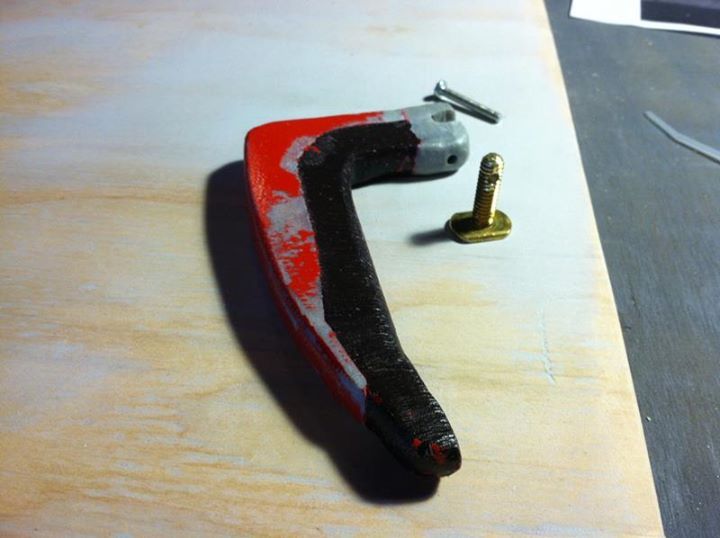
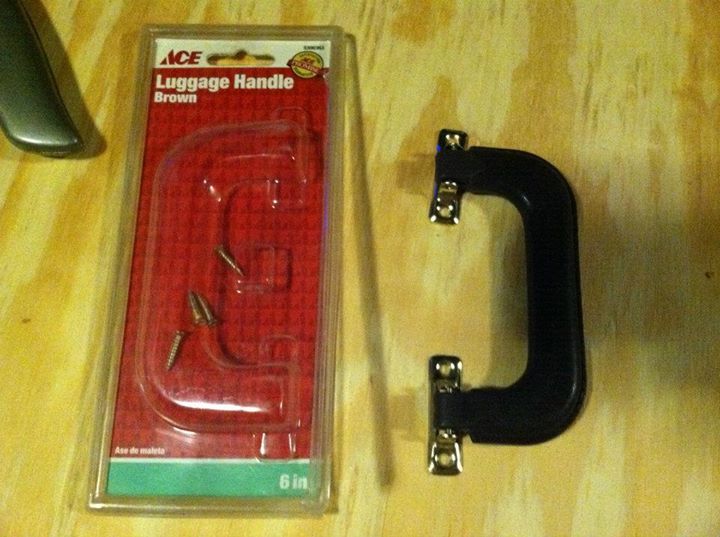
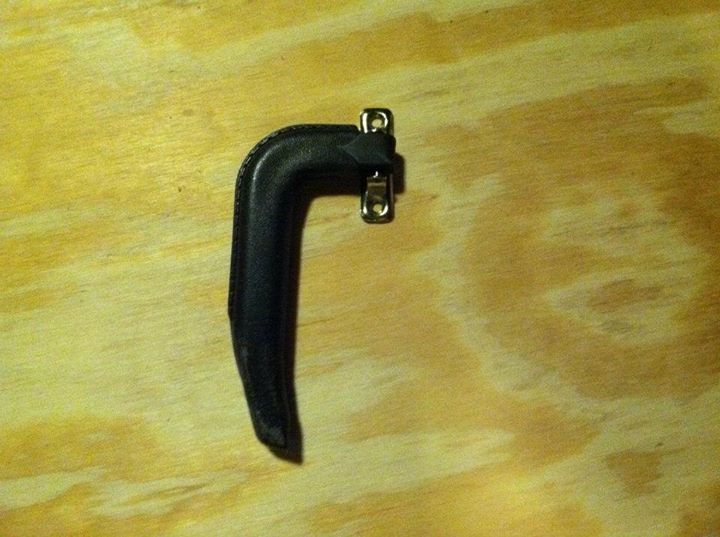
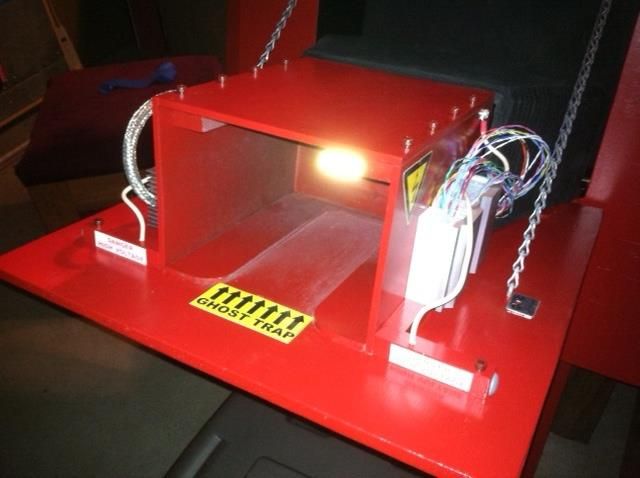
Door Build
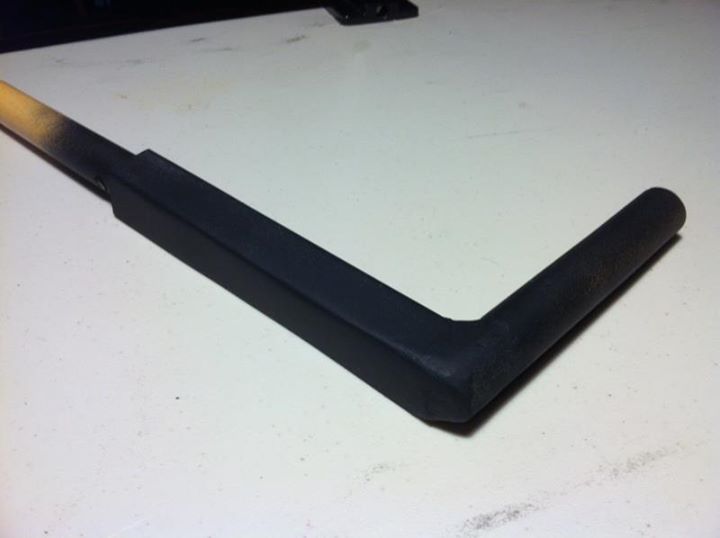
I found a replacement luggage handle at ACE Hardware I'd modify for the door's handle
I wanted to make sure the door accepted and worked with the Ghost Trap from Matty Collector
Here's a YouTube link to a video of my test...
My Containment Unit - Capturing Matty Trap - YouTube

Here's the assembly test fit... door looked good and worked well.
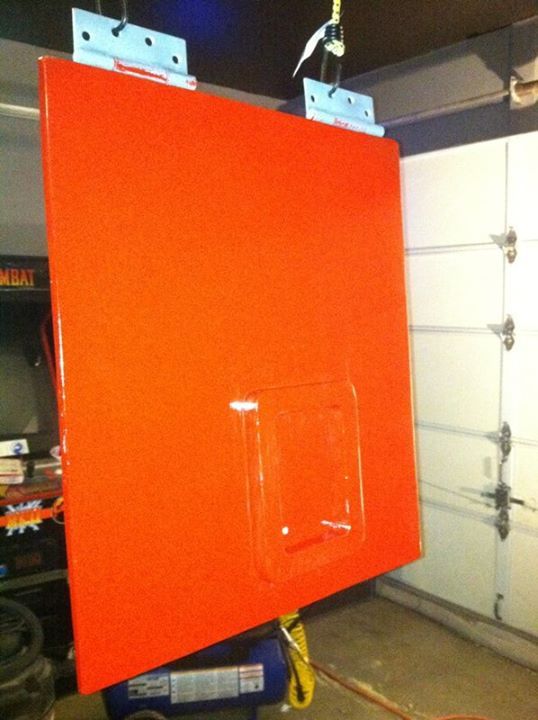
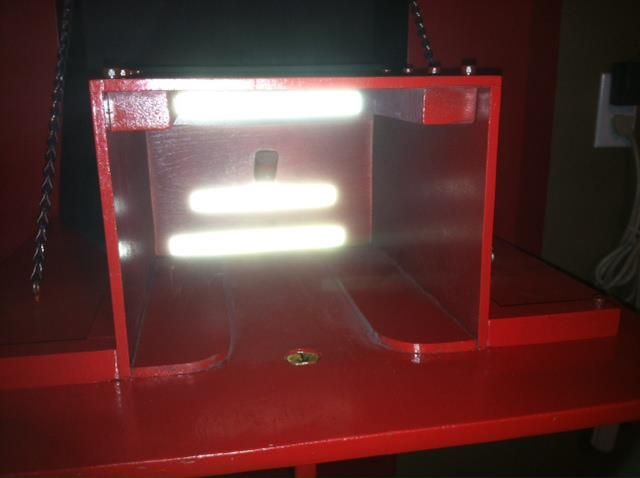
I used reflective safety tape inside (along with white LEDs) to make photographing the inside difficutl and mysterious.")
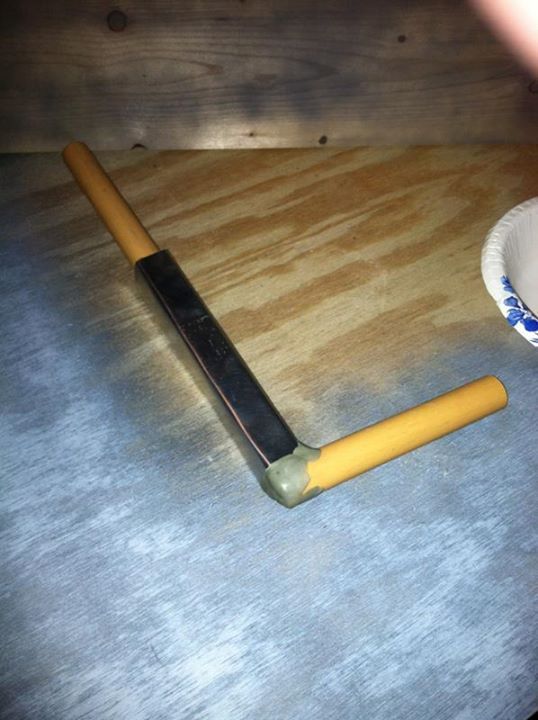
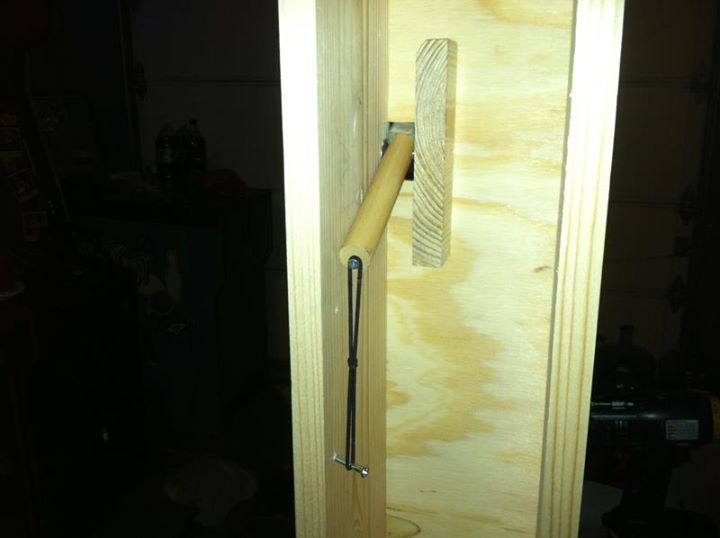
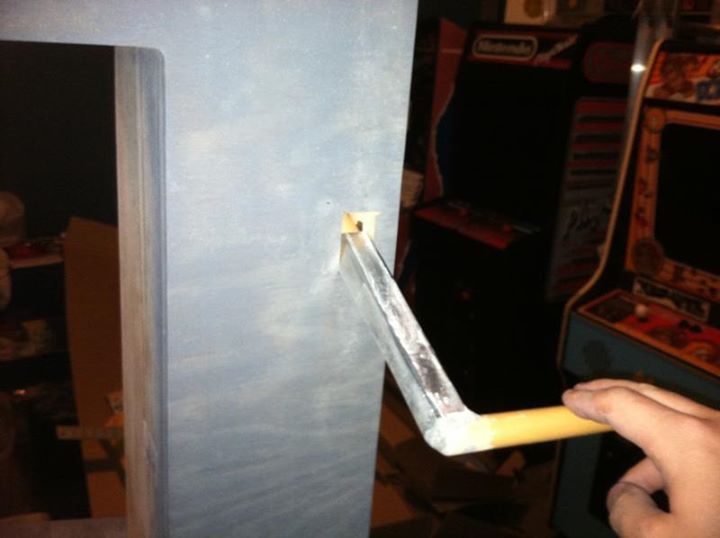
Dump Handle (The part that flushes the ghosts)
Basic dowel rod cut at an angle
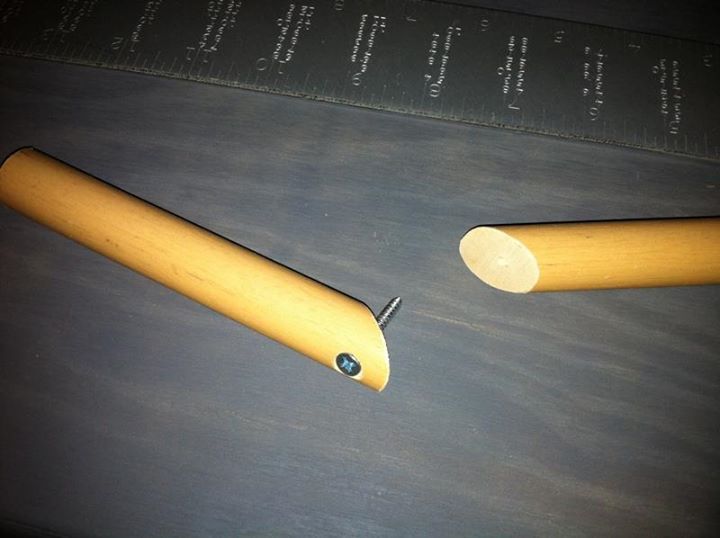

I added aluminum flashing material and Apoxie as a filler/bonding agent
Electronic switch to be added later to toggle between the big red and green lights
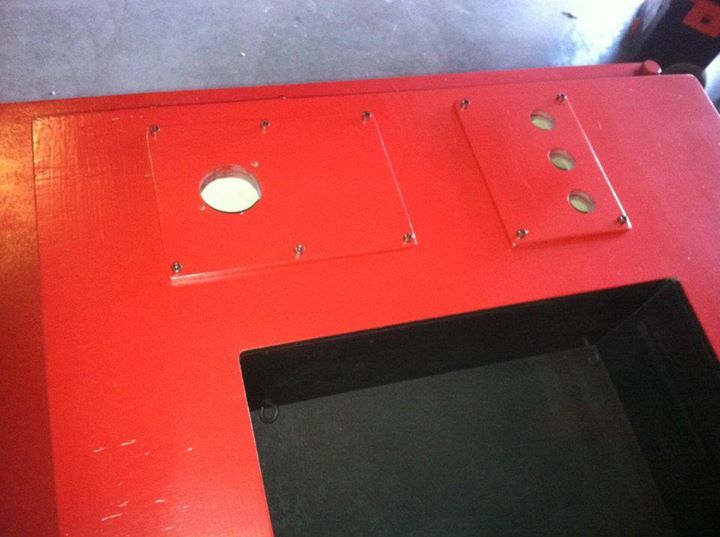
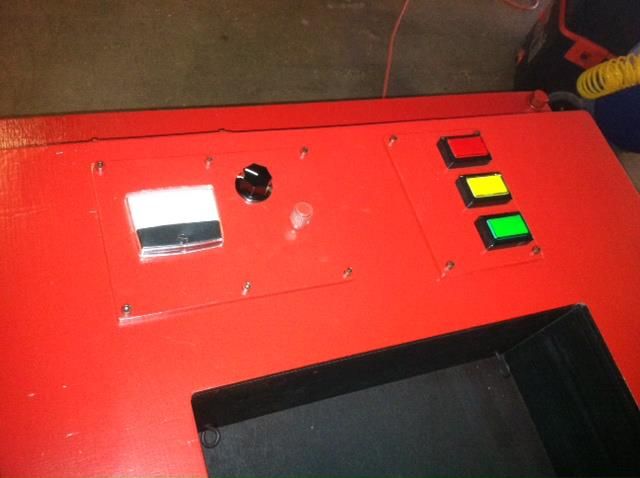
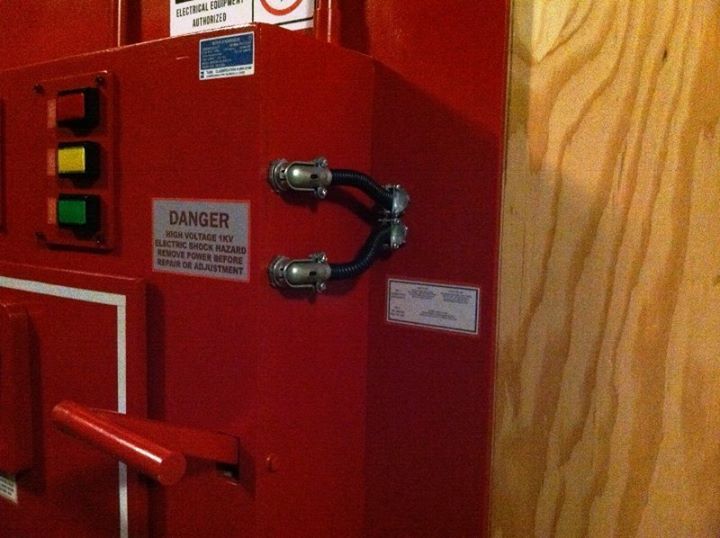
Control Panel
Pieces cut

Test fit
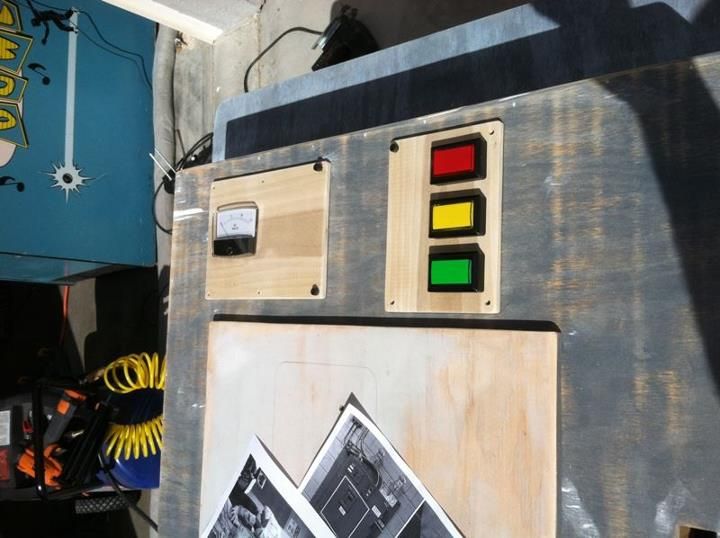
Painted
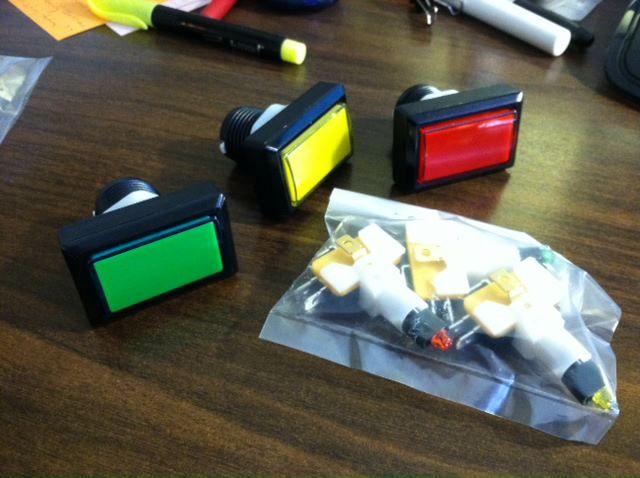
Control buttons (arcade buttons... not 100% accurate, but cheap)
Final fit (and the voltmeter gage reads the actual voltage of the power supply (can run on AC or batteries)
Globes (big lights)
I needed the prop to be portable, so I couldn't mount the lights right to the wall... they needed to be attached to the ECU directly.
I used "Magic Bullet" blender cups for my light globes. Inexpensive and just about unbreakable.
Dremel took off the "feet" and a propane torch blended the Dremel marks clear again
PVC made good arms for mounting the globes

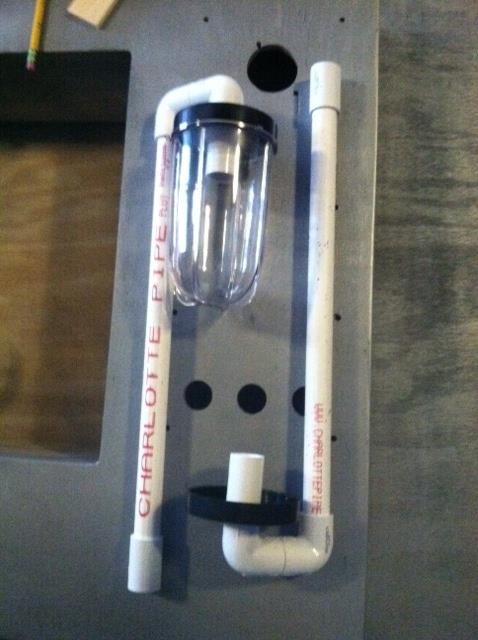
Did you know that a Dremel cutoff wheel will make quick work of thin glass? I didn't, either... but it works great. *Use tape along seam (and go slowly) to keep from shattering work :thumbsup
Also, I stuffed these bulbs with LEDs, as they take less power than the original incandescent guts.
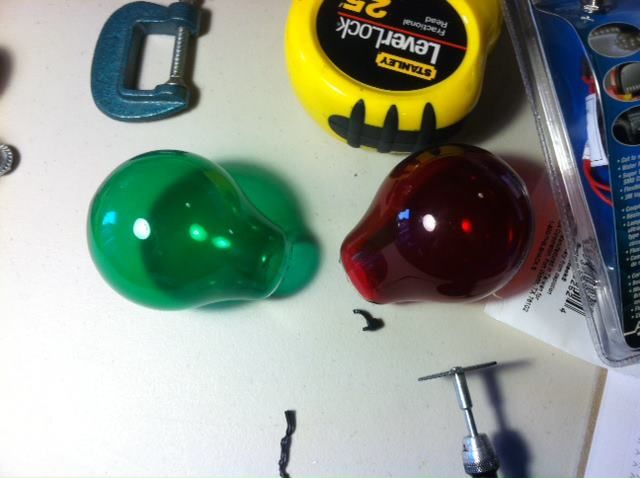
Apoxie rolled into little snakes made great "cage wire" for my globes

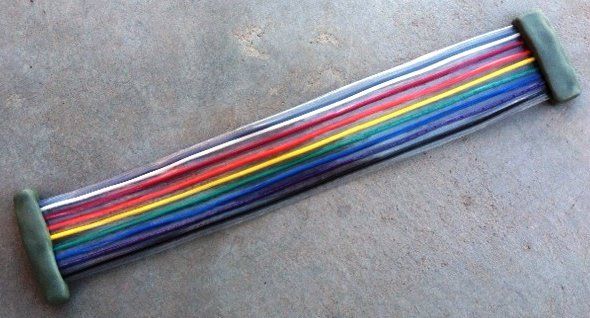
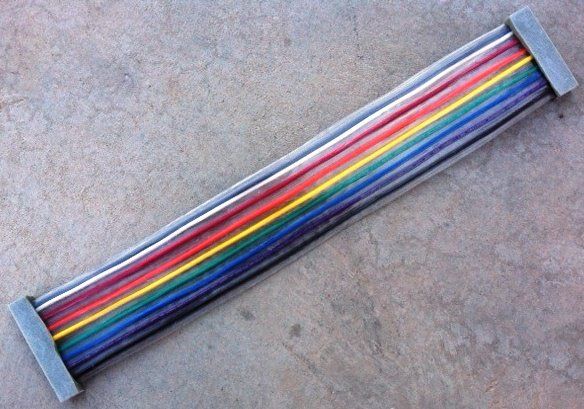
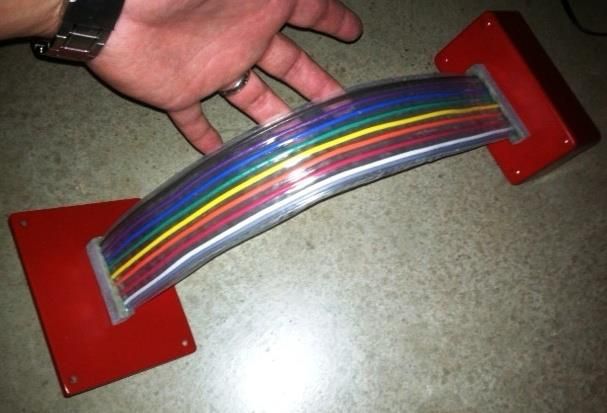
Ribbon Cable
I made this ribbon cable from scratch using colored wire, Apoxie for the ends, project boxes, and heat-shrink tape as the wire sheath
Here's where it gets really interesting and cool!
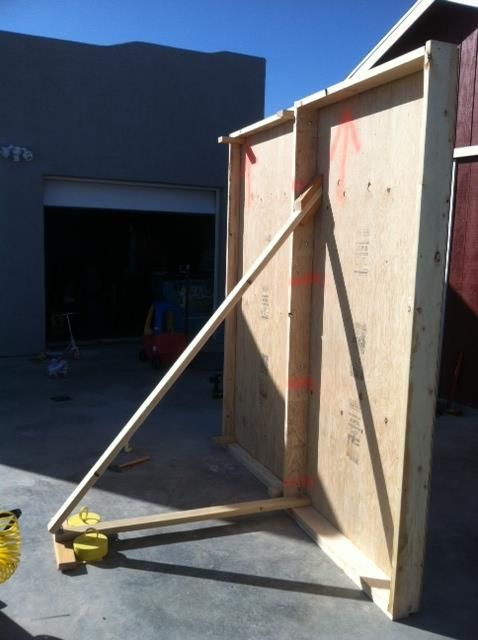
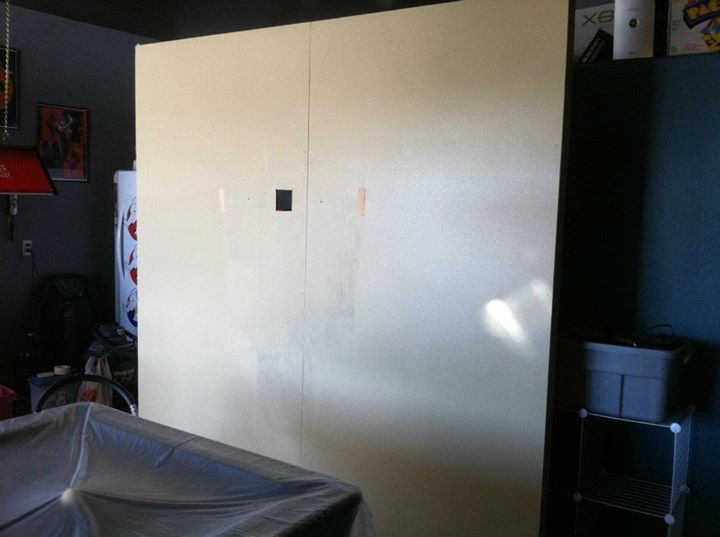
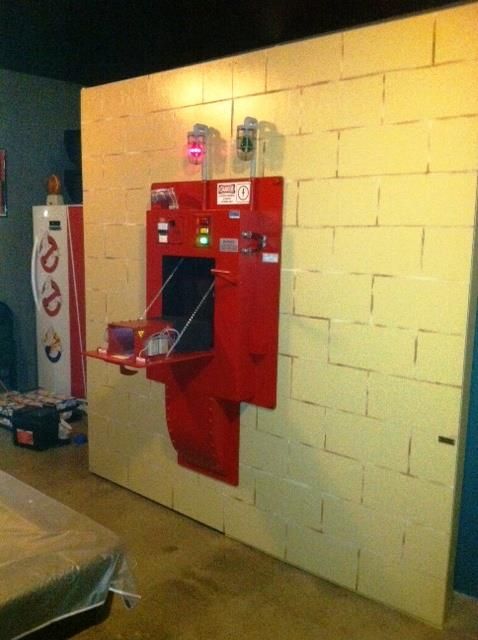
Display Wall
I decided that the wall for displaying the piece at a convention could also serve as a "crate" for transporting the prop! :ninja
Genius, right?
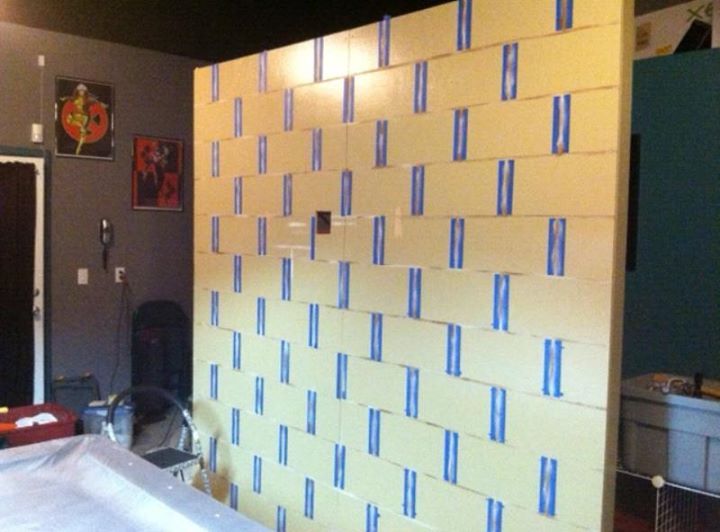
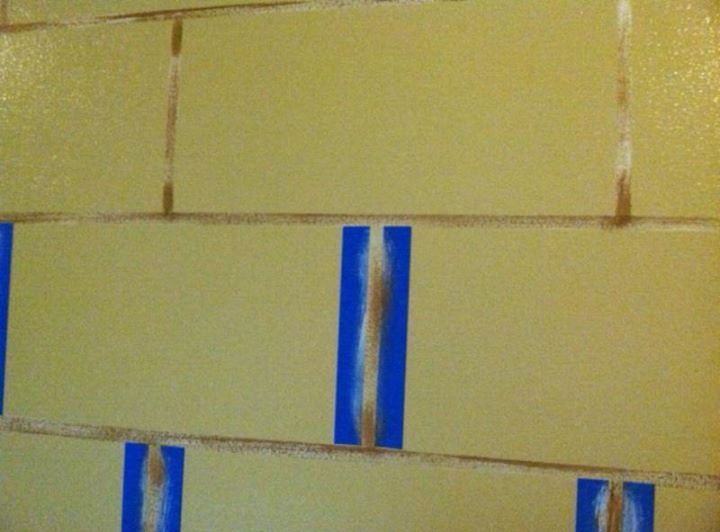
The wall was painted one color... closest I could find to the cinder block wall in the movie
Once painted one color, I masked and painted the mortar lines using two other colors of paint
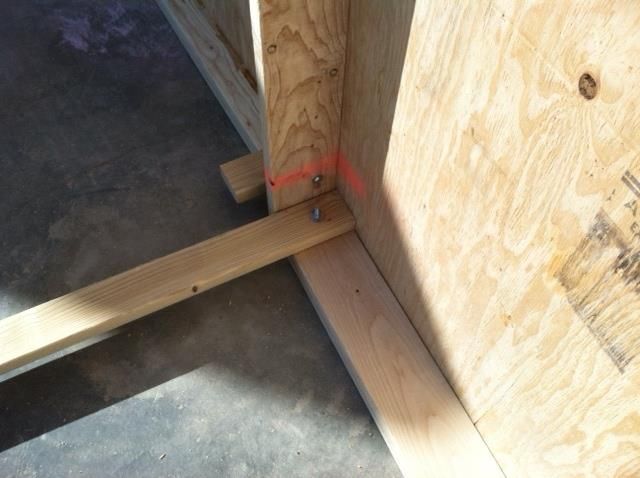
The wall comes apart in 2 sections

The ECU bolts inside... same bolts that hold it outside, just in different holes to change its position on the wall
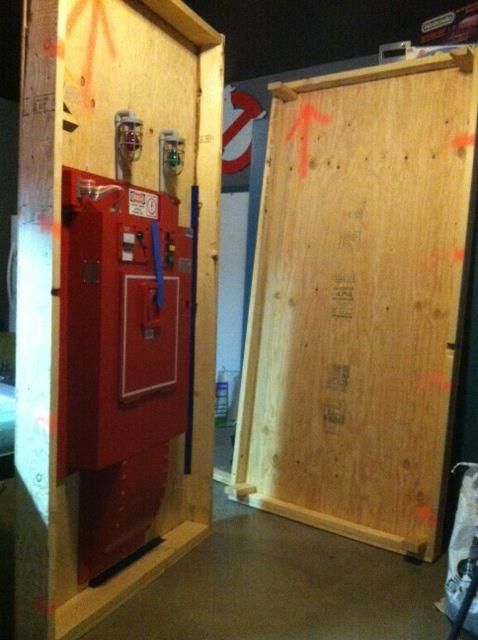
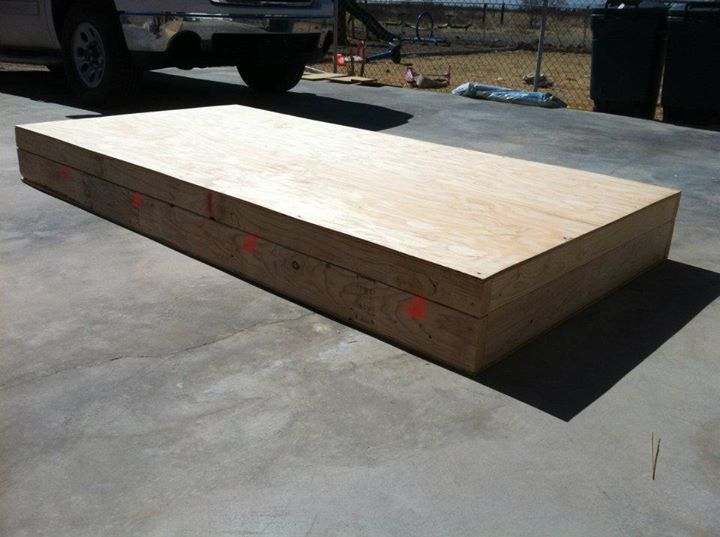
Here's what the wall/crate looks like closed
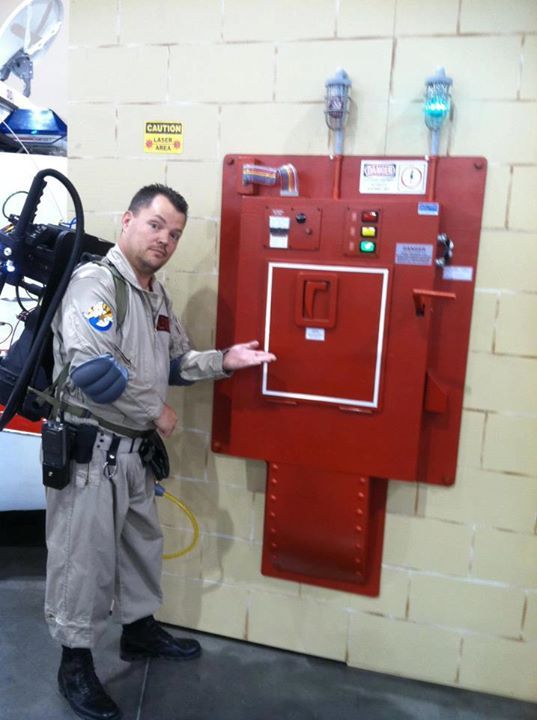
Finished Product
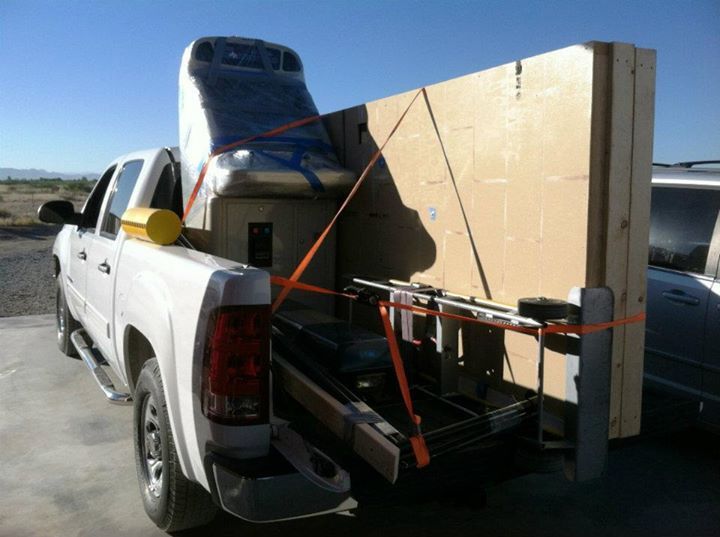
Here's my truck all loaded up for Phoenix Comicon 2012
The red and green lights toggle with the use of the "dump handle"
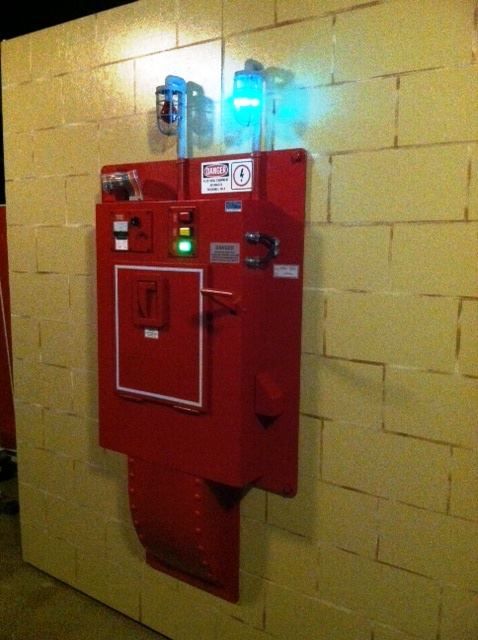
The white LEDs inside the door come on when the door is opened
The control panel lights toggle on/off when pressed
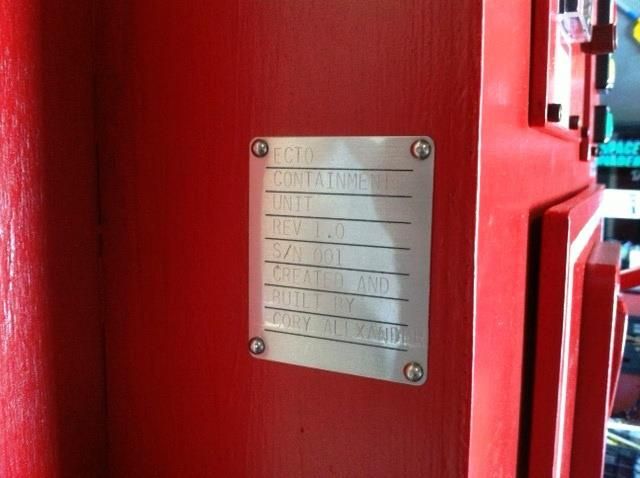
I had to sign/tag my work
Here's the unit on display at Phoenix Comicon 2012 :cool
Here's another YouTube video with a full demonstration of the ECU's lighting/switches.
It accepts the Matty Trap... and it lives on the wall in my man cave, now.
Ecto Containment Unit - progress - YouTube
If you have any questions I didn't answer above, feel free to ask... I love to share about my builds!
*I want to give thanks and credit to some awesome GBFans members for letting me use their labels on my ECU.
CapnCyan and Mereel (and of course, Ville!)
Phoenix Comicon is always in May, so I had a few months to make something... something for which there were no published dimensions or tutorials. I was really starting from scratch (sort of like I did again with my Vera build).
This build would not only be a challenge because I was going strictly off of screenshots, but because the prop was big AND had to be portable for use at conventions/events. :unsure
My plan was pretty simple.
1) build containment unit
2) figure a way to display the containment unit
3) also devise a way to safely transport the containment unit
Well, I combined steps 2 and 3 into a single chore... I... well, let's just look at these pictures and you'll see how I did it all.
Starting with step 1, I built the ECU from mostly wood... plywood, pine, and a little trim pieces. Wood glue and heavy paint are your friend when working with these materials.
Main Body
1x6 pine boards made the "box frame" with plywood used for the skin


A router made quick work of making the hole for the door.

Plywood made a good "main plate" for this build

1x6 boards cut to form masonite over... staples and glue held the form in place

Pieces primed and ready for paint

Heavy brushed-on red enamel paint helped hide the wood grain while making the surface look like painted industrial equipment


I used real metal nuts and washers on the corners (holes in nuts bondo'd closed to make them look like bolt heads)

I took wooden hole plugs, sawed the "bases" off and used the caps as "rivet heads" for the lower section


Door Build
I found a replacement luggage handle at ACE Hardware I'd modify for the door's handle


I wanted to make sure the door accepted and worked with the Ghost Trap from Matty Collector

Here's a YouTube link to a video of my test...
My Containment Unit - Capturing Matty Trap - YouTube


Here's the assembly test fit... door looked good and worked well.


I used reflective safety tape inside (along with white LEDs) to make photographing the inside difficutl and mysterious.


Dump Handle (The part that flushes the ghosts)
Basic dowel rod cut at an angle


I added aluminum flashing material and Apoxie as a filler/bonding agent

Electronic switch to be added later to toggle between the big red and green lights


Control Panel
Pieces cut

Test fit

Painted

Control buttons (arcade buttons... not 100% accurate, but cheap)

Final fit (and the voltmeter gage reads the actual voltage of the power supply (can run on AC or batteries)

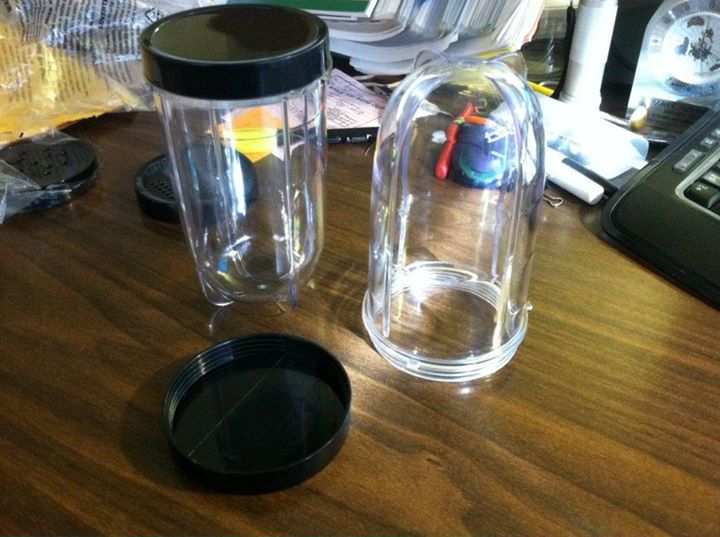
Globes (big lights)
I needed the prop to be portable, so I couldn't mount the lights right to the wall... they needed to be attached to the ECU directly.
I used "Magic Bullet" blender cups for my light globes. Inexpensive and just about unbreakable.

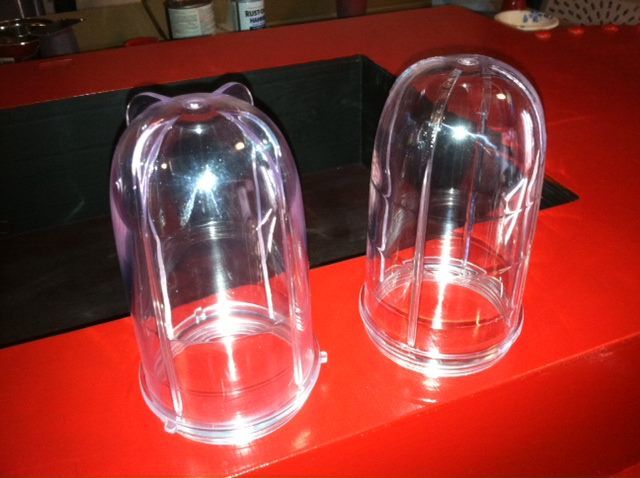
Dremel took off the "feet" and a propane torch blended the Dremel marks clear again

PVC made good arms for mounting the globes


Did you know that a Dremel cutoff wheel will make quick work of thin glass? I didn't, either... but it works great. *Use tape along seam (and go slowly) to keep from shattering work :thumbsup
Also, I stuffed these bulbs with LEDs, as they take less power than the original incandescent guts.

Apoxie rolled into little snakes made great "cage wire" for my globes

Ribbon Cable
I made this ribbon cable from scratch using colored wire, Apoxie for the ends, project boxes, and heat-shrink tape as the wire sheath


Here's where it gets really interesting and cool!
Display Wall
I decided that the wall for displaying the piece at a convention could also serve as a "crate" for transporting the prop! :ninja
Genius, right?


The wall was painted one color... closest I could find to the cinder block wall in the movie

Once painted one color, I masked and painted the mortar lines using two other colors of paint


The wall comes apart in 2 sections

The ECU bolts inside... same bolts that hold it outside, just in different holes to change its position on the wall

Here's what the wall/crate looks like closed

Finished Product
Here's my truck all loaded up for Phoenix Comicon 2012

The red and green lights toggle with the use of the "dump handle"


The white LEDs inside the door come on when the door is opened

The control panel lights toggle on/off when pressed

I had to sign/tag my work

Here's the unit on display at Phoenix Comicon 2012 :cool

Here's another YouTube video with a full demonstration of the ECU's lighting/switches.
It accepts the Matty Trap... and it lives on the wall in my man cave, now.
Ecto Containment Unit - progress - YouTube
If you have any questions I didn't answer above, feel free to ask... I love to share about my builds!
*I want to give thanks and credit to some awesome GBFans members for letting me use their labels on my ECU.
CapnCyan and Mereel (and of course, Ville!)
Last edited: