Bit of an update on the repair. I removed the battery as well as a lump of sticky goo that was either degraded glue or battery leakage I really am uncertain. It’s like play-doh but stickier! Snipped and labelled the wires into the Tri, and removed the charging jack so I could disconnect the wiring from it.
I'm not sure why the builders thought gluing the back down was a good idea, but it's ruined the paint on my Tricorder! Why they didn't use screen accurate screws is beyond me! Where the back had to be prised open, even using plastic tools made for phones the glue coming away took paint with it and cracked and chipped the finish all around the opening. It's unlikely that I'll find an exact paint match over here in the UK so I may have to try repainting to the panel lines as it were in the closest match I can find, or carefully masking all the graphics and scanner bars and giving the whole thing a "blow over". I'll cross that bridge when I come to it!
I may try rewiring this into the new setup as well as fitting this original NI-MH charger jack plug to a JST male cable so it fits my PI USB battery charger.
I ordered too large a battery by mistake but it will do for testing purposes. Would have been fine if this was a science tricorder!
New wiring setup temporarily held with wire nuts for a test run. Electronics are not my forte hence my labelling everything! But does it work?!
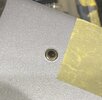
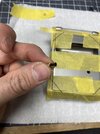
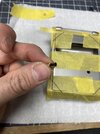
Ok we’re back in business, Mark X you have been silent for too long! I'll solder and finalise the wiring once I have a smaller battery on hand. I've now got to think about how to fit the cover back on to allow future maintenance. The cover panel is a little thin for magnets so I may go with these countersunk m2 screws and threaded inserts I have.
They'll be more screen accurate plus allow me to easily open the thing later! As I have to repaint all/part of the Tricorder anyway, drilling holes in it may be the best option! Still weighing the pros and cons - I've marked it out ready to drill but I haven't gone through with it yet!


