Dalex
Active Member
Hey guys,
This post is long overdue.
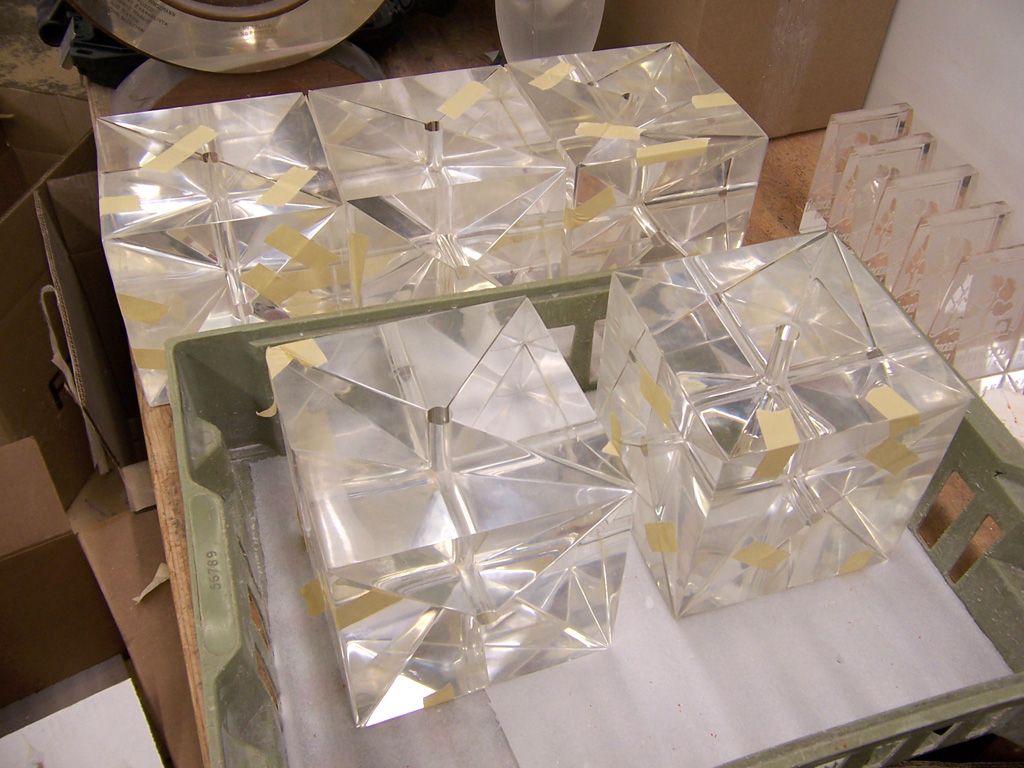
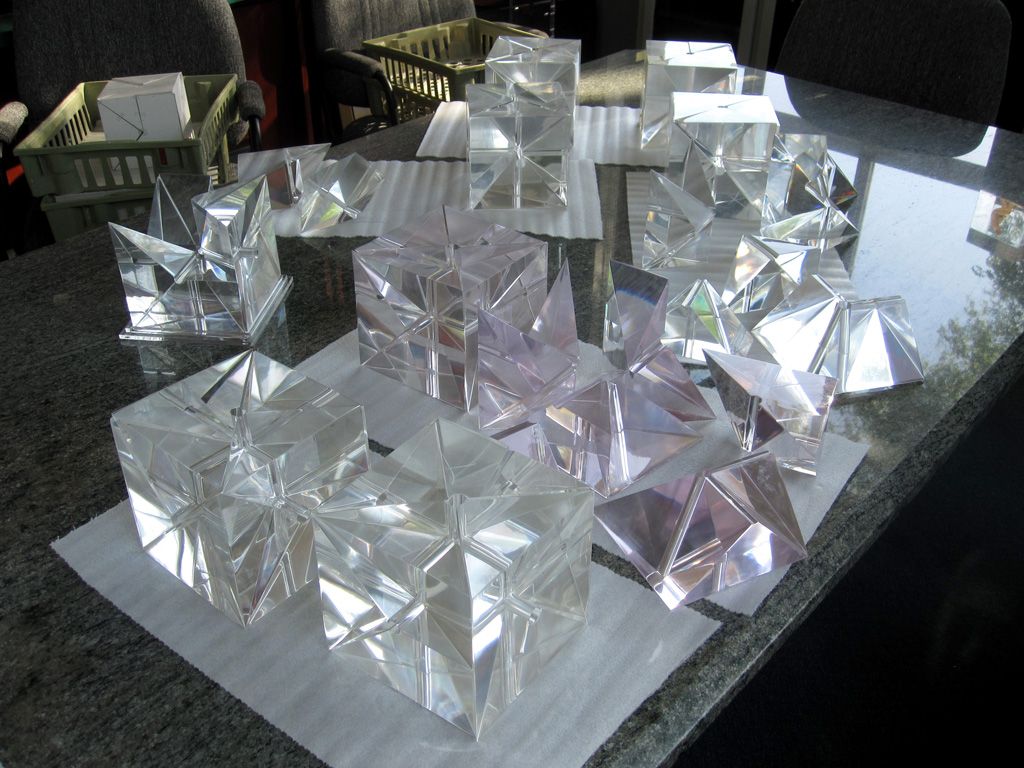
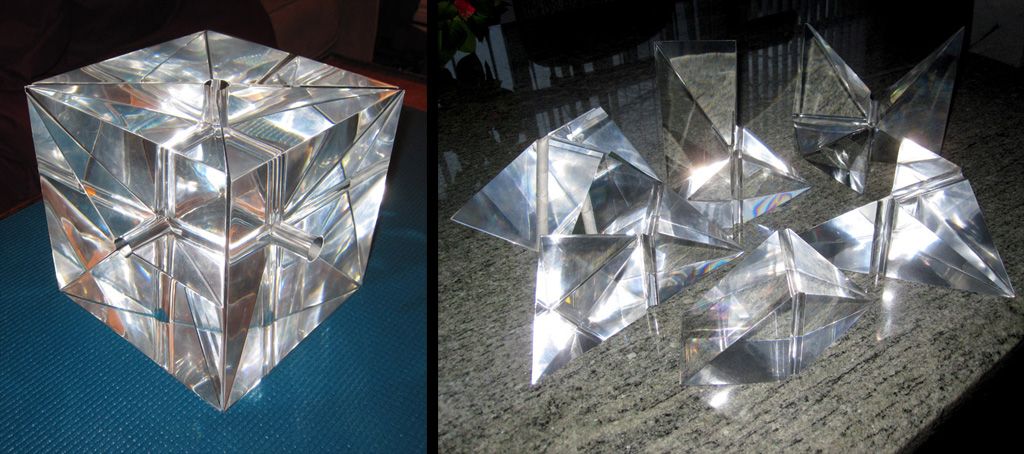
Last year I co-ordinated a project to build a replica of the Key to Time from Doctor Who:
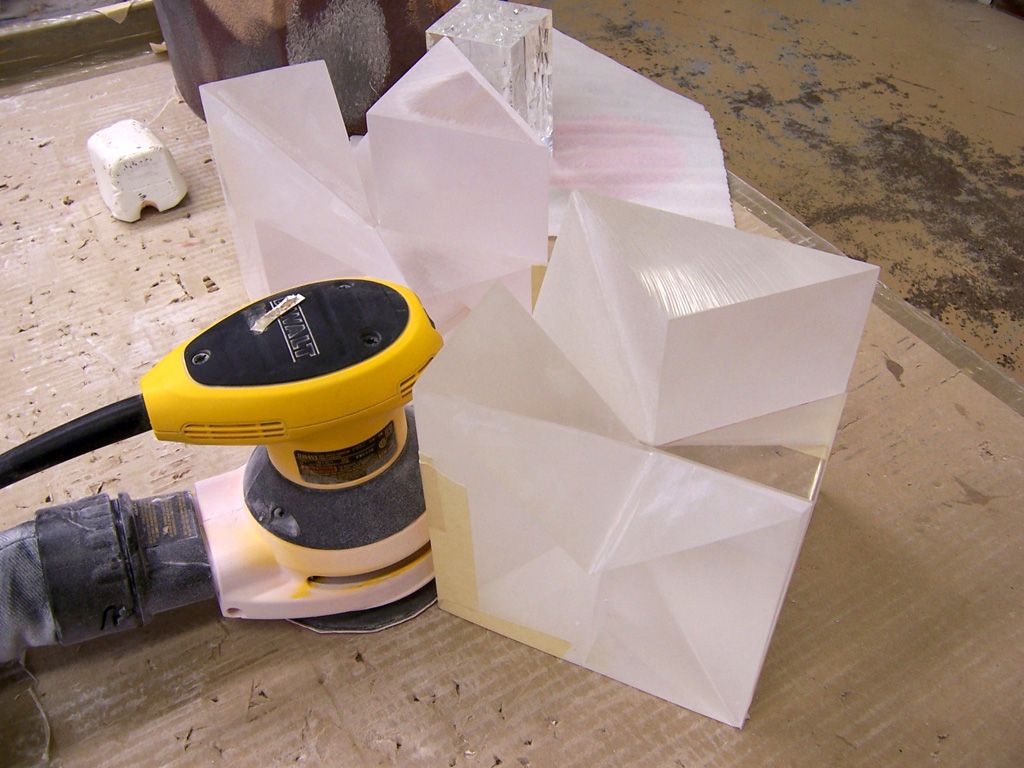
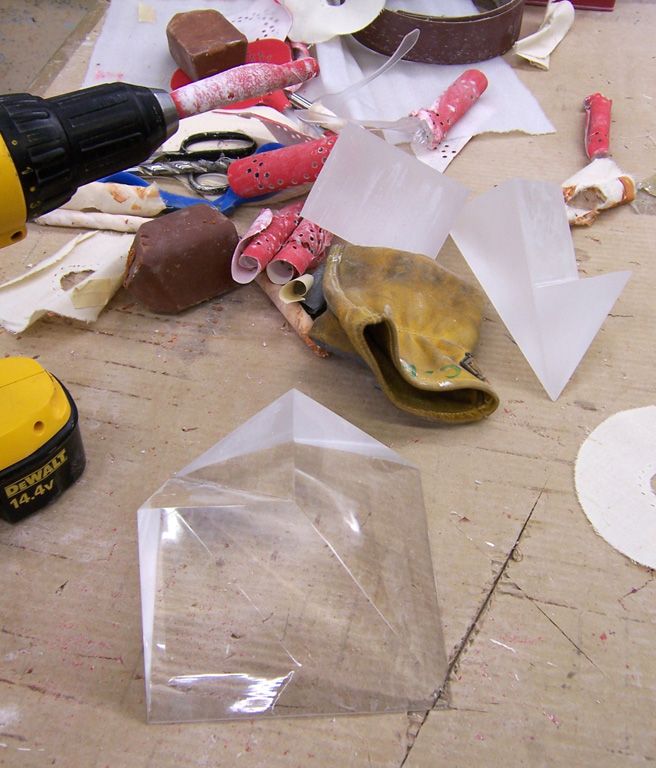
The factory that built these replicas was kind enough to provide some behind-the-scenes photos of the production process, showing the work that was involved in hand-cutting these pieces out of Lucite.
I thought people here would appreciate seeing these photos, so I got permission from the factory to post them.....
- - - Updated - - -
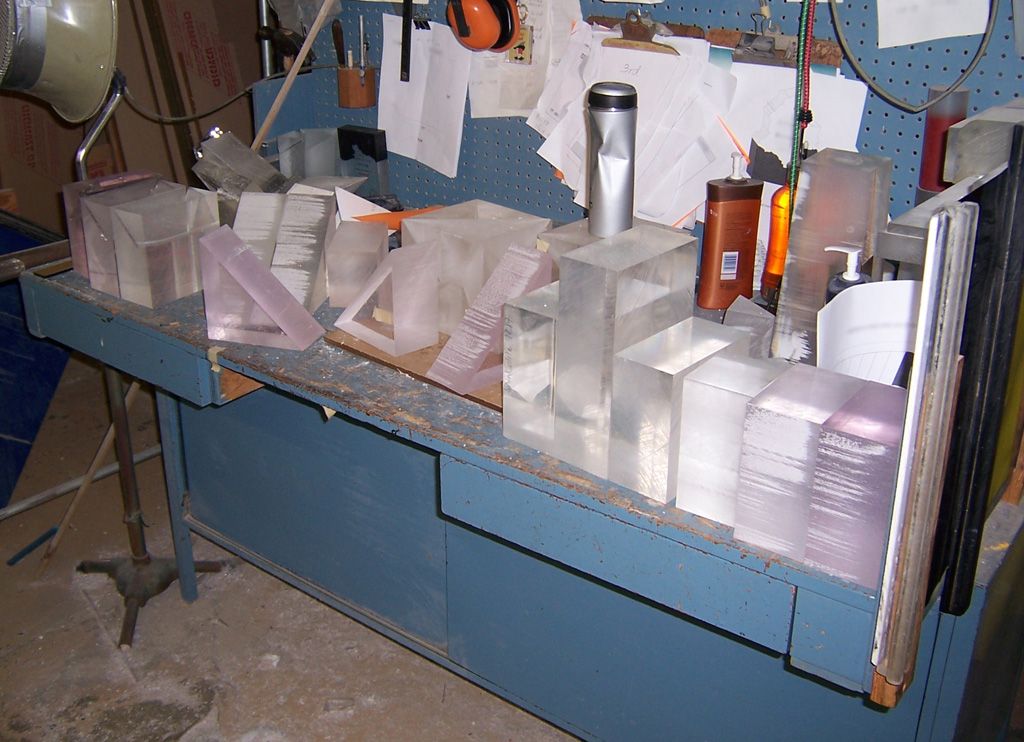
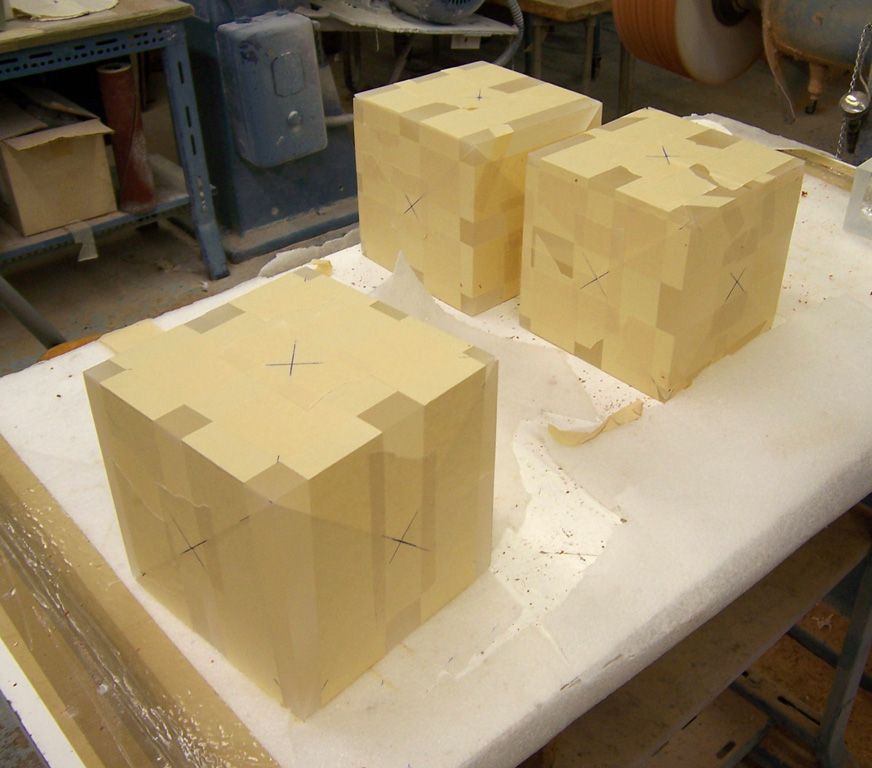
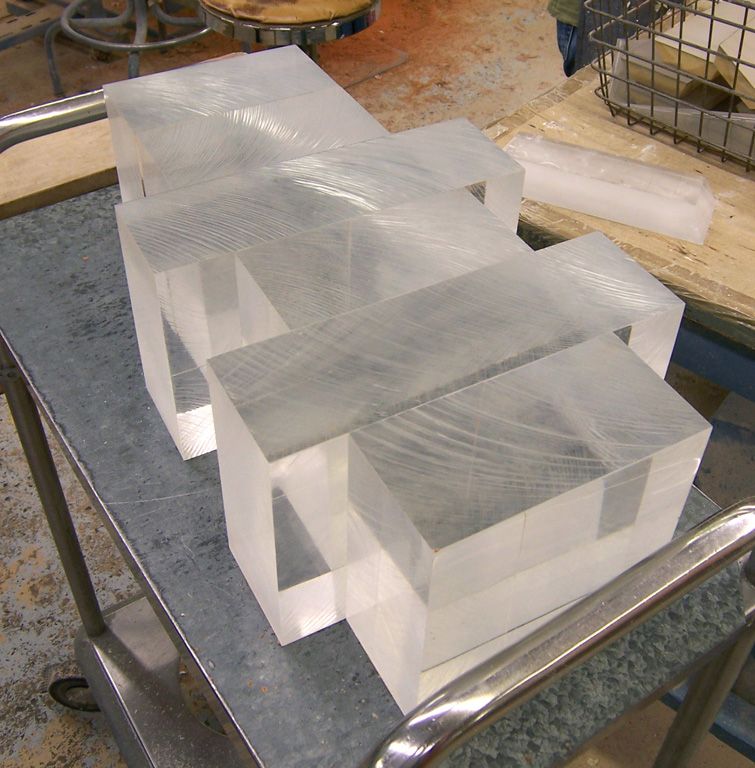
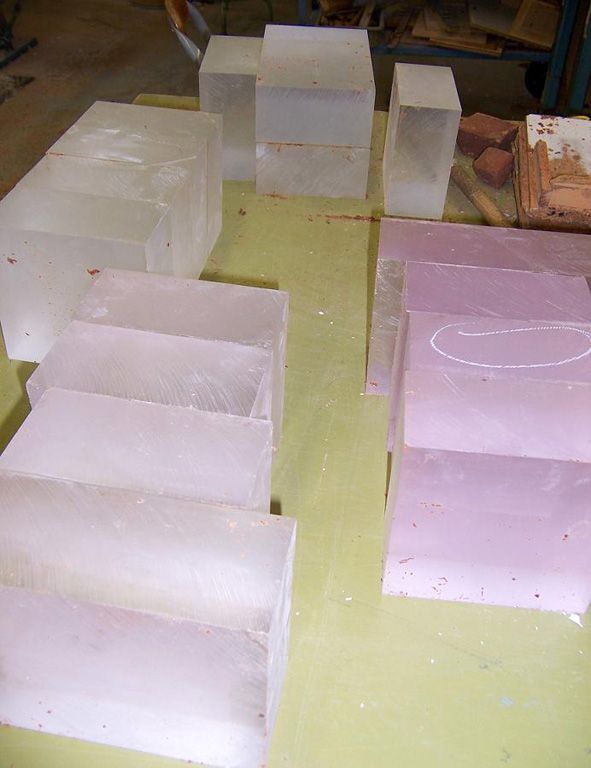
The Lucite used to make the Key to Time begins as a slurry, which is baked in an oven until it hardens into a solid block of Lucite. It is from these blocks of Lucite that the individual segments of the Key to Time are cut:
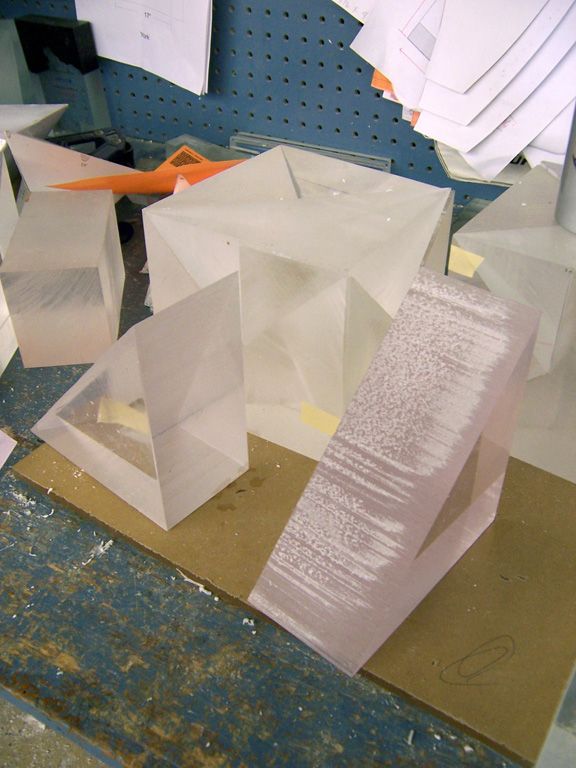
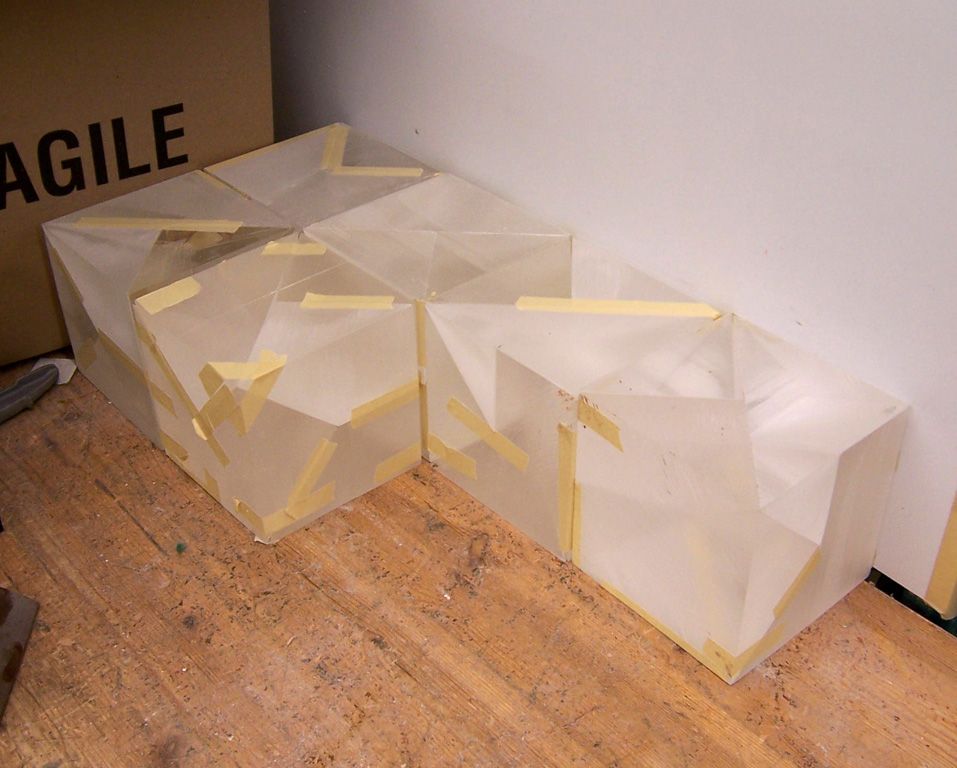
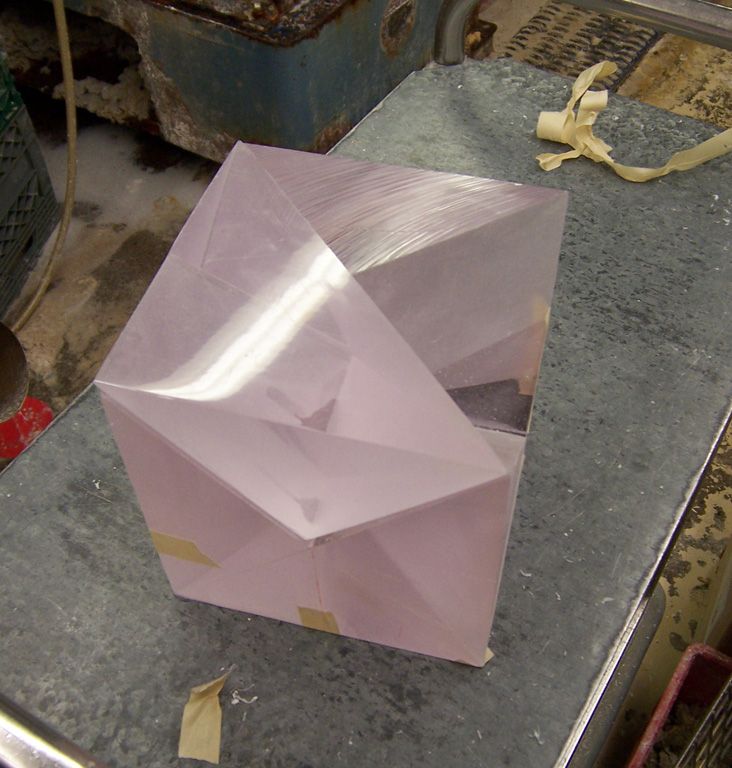
The Lucite can be tinted, so some people in our group had their Key to Time done with a pinkish-purplish hue:
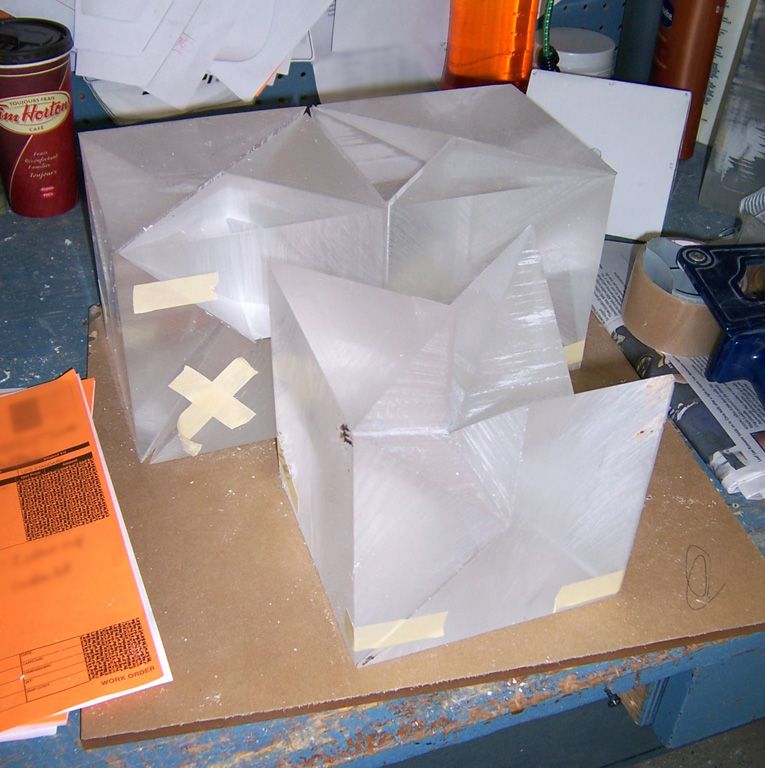
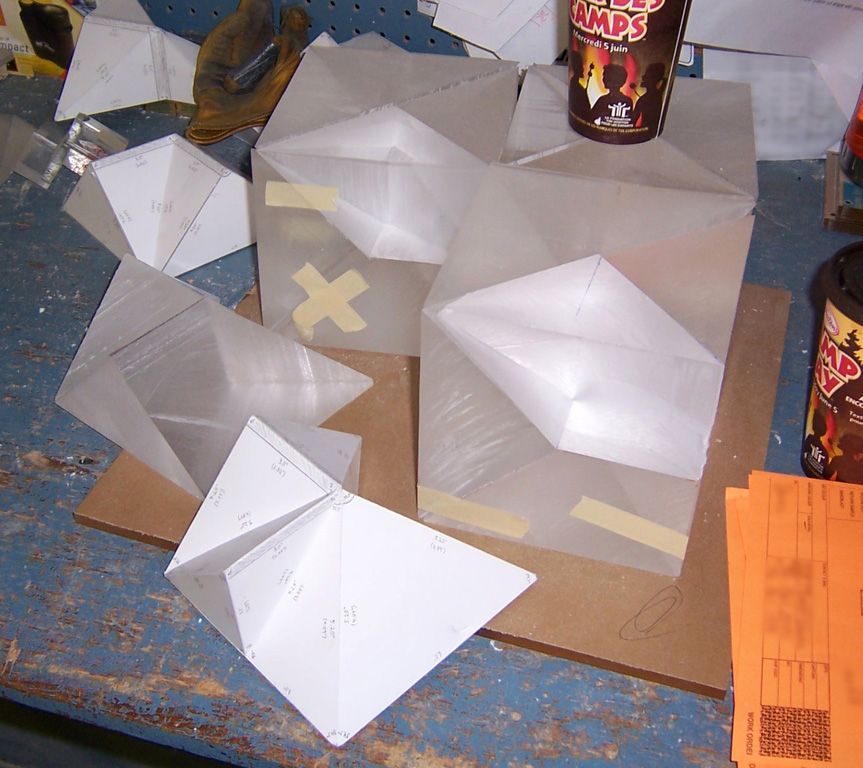
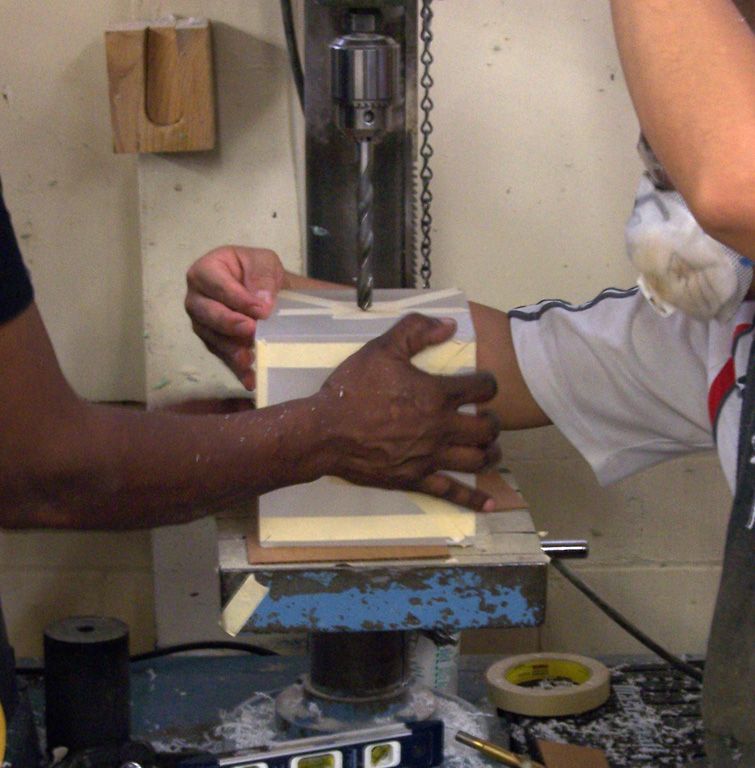
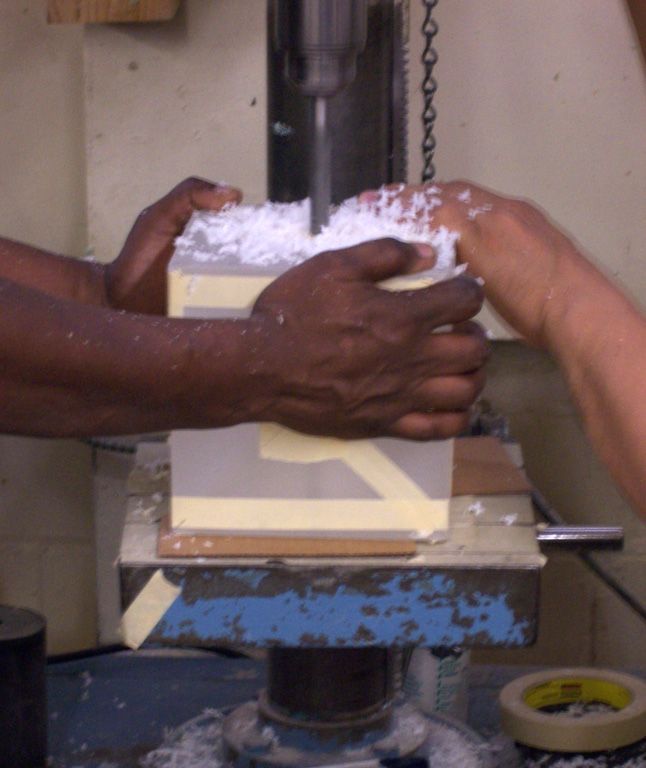
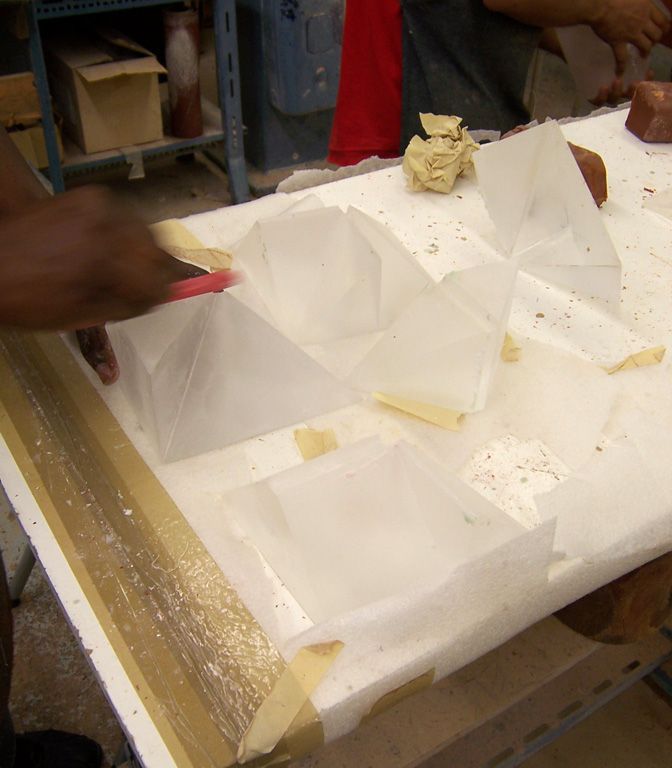
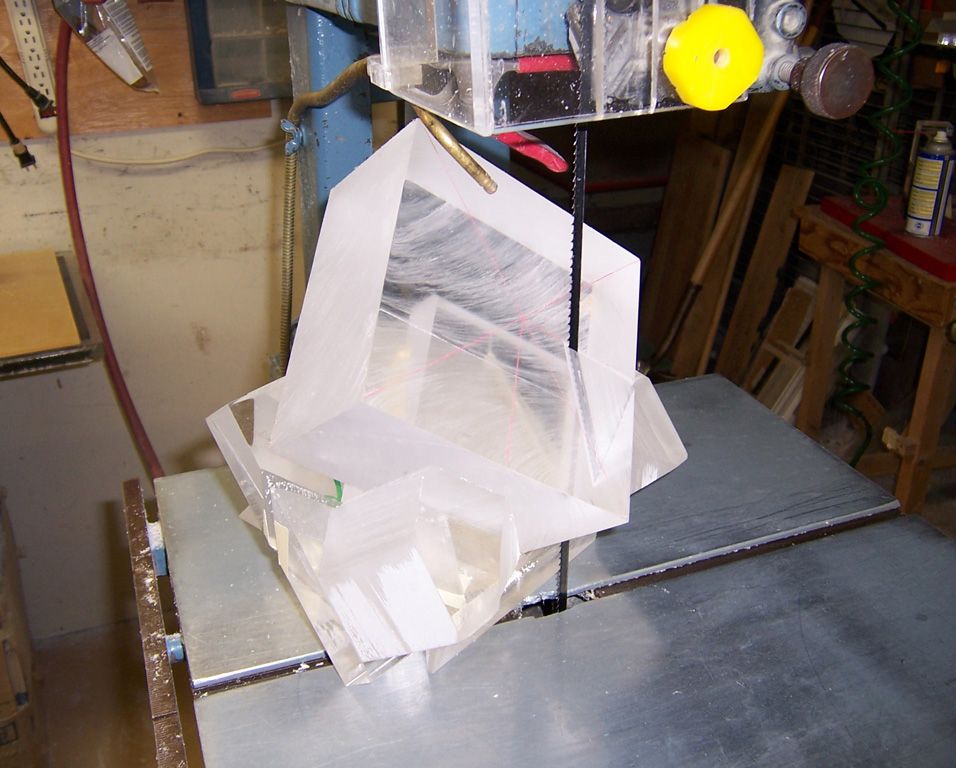
Everything is precisely measured and marked in preparation for the cutting process. The blocks are mounted on a custom rig (itself made of Lucite) and a band saw is used to cut individual segments from the blocks:

This post is long overdue.
Last year I co-ordinated a project to build a replica of the Key to Time from Doctor Who:
The factory that built these replicas was kind enough to provide some behind-the-scenes photos of the production process, showing the work that was involved in hand-cutting these pieces out of Lucite.
I thought people here would appreciate seeing these photos, so I got permission from the factory to post them.....
- - - Updated - - -
The Lucite used to make the Key to Time begins as a slurry, which is baked in an oven until it hardens into a solid block of Lucite. It is from these blocks of Lucite that the individual segments of the Key to Time are cut:
The Lucite can be tinted, so some people in our group had their Key to Time done with a pinkish-purplish hue:
Everything is precisely measured and marked in preparation for the cutting process. The blocks are mounted on a custom rig (itself made of Lucite) and a band saw is used to cut individual segments from the blocks: