Dr. Doom mask.

decaturvader

Sr Member
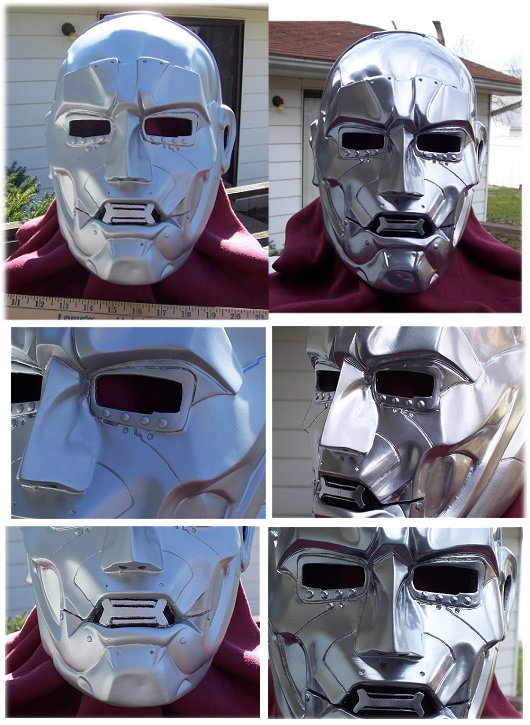
Been spending time after work, trying to re-work my mask a bit as seen in this thread.

I have sanded the entire mask, used various Dremil router bits to clean out the little valley lines (and a steady hand I must say). Found a couple thin spots that i had to Bondo cuz i went thru, but it's coming along.

I used sandable primmer during the whole process and used Duplicolor Chrome for my first time. Used some black speaker grill mesh to use for the mouth and will use in the ears too when I get done.

I salvaged the old mouth piece after i cut it out. After grinding away at it, it was basiclly a streched out 'X'. I used solder wire to make the top and bottom bars and just glued it all together.

Funny how that Chrome paint seems to show a lot of weird stuff in the pics...but in person, it looks cool. My wife actually likes it now and I am out of the doghouse :D

010.jpg


When I get it all done, I'll head outside and shoot some pics.
Cheers
 
Thanks folks for the words.
Shortly after those pics were taken, the mouth mesh shifted on me. I went to tweak it (against my better judgement) and got a stinkin fingerprint in the little "X" piece in the mouth. Arg. Gonna have to take it out, sand and repaint. :$

I have been feeding my seamstress gobbs of Doom pics so we can start on the trenchcoat. On the bonus DVD that came with my movie, it has some great behind the scenes shots of Doom's costume. I didn't know, but he wears some black neck colar thingie that looks like muscle. It covers the whole neck, most of the underchin area and then comes up high enough in the rear to let the mask sit under it. I'm hoping between her an I, we can make that piece too.
 
Originally posted by Kylash327@Mar 24 2006, 03:13 PM
alot better. Very cool :) Needs a little rust weathering in some of those cracks. lol
[snapback]1212364[/snapback]​

I finished the screens and put it together last night.
You may notice in some areas, like those big indents on the cheeks, that the seams look ruff. While dremilling on the mask, there are areas that I purposely made ruff. I wanted it to look like small welds at a glance.

Here's some comparison pics of before & after:

011.jpg


I do want to "weather" it in some fashion, but I have never done that before. I did start a thread over in the CF, here, when I asked how to paint my Predator bio helmet.
There are some good tips in there, but I'd love to see a picture tutorial. Nonetheless, I am gonna have to just find something to practice on before i go out and do it to Doom. There are obvious areas on Doom that I would like to airbrush some black. For example, on the underside of his angry eyebrows. Maybe on the bottom half of his lower lip. Maybe along the beveled edge of those indents on his cheeks. I dunno. maybe some one can take one of my pics and highlight their options of what to do. :confused

I did put a liner in the mask and now it fits like a glove. It's actually harder to get on, much harder, but the result is tight. No wobble...it moves the second i want it to.
 
Wow. That looks much better.
great job on the tweaks.
BTW...a very thin black acrylic paint wash will weather that up nicely.
-Brin
 
Wow! That looks much better.
great job on the tweaks.
BTW...a very thin black acrylic paint wash will weather that up nicely.
-Brin

A light black wash would look good.
Instead of airbrushing black like you mentioned try a darker shade of silver/gunmetal in the recessed areas (under the brow and under the cheek bone structure). Then do the very thin watered down black wash.
 
This thread is more than 11 years old.

Your message may be considered spam for the following reasons:

  1. This thread hasn't been active in some time. A new post in this thread might not contribute constructively to this discussion after so long.
If you wish to reply despite these issues, check the box below before replying.
Be aware that malicious compliance may result in more severe penalties.
Back
Top