jedi_master_adam
Well-Known Member
I made saber 14. There has been interest in showing how I made it so here is a build thread. I wanted to do something a little different so I thought a cut away saber would be nice.
I went to the Dollar Tree and walked up and down each isle looking for anything I could make a saber body from and anything that looked like it would be part of saber guts.
Here is what I ended up buying.
The receipts

The parts

Main body parts

Incense Stick Holder

Incense Holder cut

Flashlight 3


Flashlight 3 cut

Flashlight 4 parts

Bottle Pourer disassembled

Baster Cut

Saber body put together

Saber body cut in half

All saber body parts

Saber cut and assembled

Saber whole after the cuts.

Number 6 Mechanical pencils

Pencils disassembled

Pencil Grip cut for saber grips

Baster, Pourer, and Pencil parts emitter

Emitter partially assembled

Added flashlight parts, candle parts, and more pen parts, and silver paint

Test placement for grips

Next I took apart different items for the interior guts of the saber.
Watch

Watch disassembled

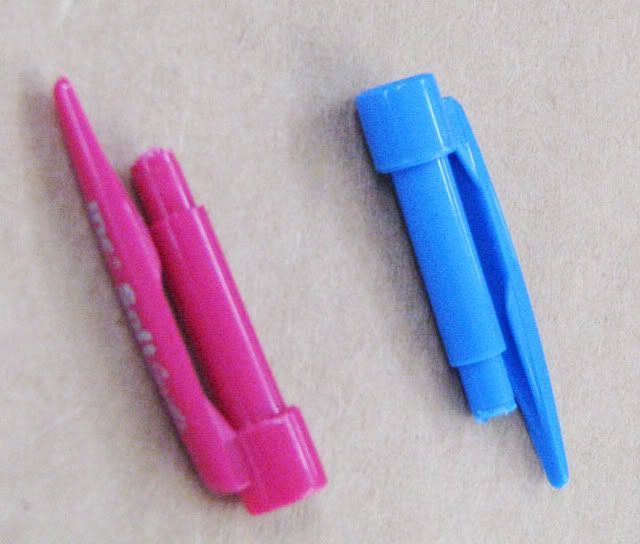
Number 8 Mechanical Pencils

Mechanical Pencils disassembled

Grips cut and spread over pencil tube

More pencil parts

Blue and clear jewelry beads

Gold floral wire and colored paper clips

Paper clips make good wiring

Toy car disassembled

Close up of Car parts

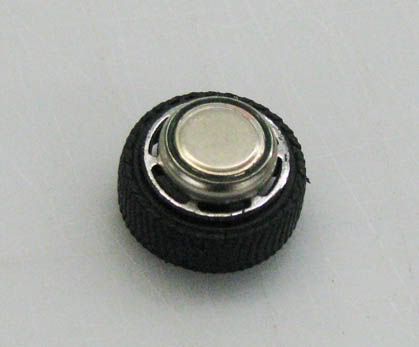
Car wheel and battery

Glued together to make the top saber button

Pedometer parts

Clip light parts. I originally wanted my crystals to light up but could not fit the batteries in the saber.

More clip light parts

Playing around with internal placement ideas

Power cell and crystall - using bead, pen parts, pourer parts and flashlight parts

Added blue crystal with a cut paper clip that I removed the colored coating from.


More pencil parts

Pencil parts cut

Plastic disk from flashlight lens

Gold wire cut

Wire into pencil parts

Wire and pencil parts into lens

More test fitting

Time to start painting external pieces


I didn't like the paper texture of the Incense tube so I went and got a thin plastic place mat.

I glued the placemat to the tube and held it with paperclips as it dried.

I then trimmed the matt to the Incense tube primed and painted with metallic silver paints. the Finish was much smoother.

Placing the painted saber back together.

I Painted the shelf liner silver and folded it over an placed in the back part of the saber. Hid the edge of the liner with part of the watch band.

Then I started adding internal parts

I just played around with various arrangements until I found something that I liked and then glued it down.

I decided I didn't like the wires going along the length of the saber so I took them out and later added them in other places. I added more various parts from the things I disassembled. I tried to use small metal pieces like the watch clasp and the cars wheel axles.

I painted all the plastic parts either silver or gold and glued everything down.


Well that is pretty much it. It was fun making the saber and it was a great contest. I want to say a big thank you to all who were involved.
I went to the Dollar Tree and walked up and down each isle looking for anything I could make a saber body from and anything that looked like it would be part of saber guts.
Here is what I ended up buying.
The receipts

The parts

Main body parts

Incense Stick Holder

Incense Holder cut

Flashlight 3


Flashlight 3 cut

Flashlight 4 parts

Bottle Pourer disassembled

Baster Cut

Saber body put together

Saber body cut in half

All saber body parts

Saber cut and assembled

Saber whole after the cuts.

Number 6 Mechanical pencils

Pencils disassembled

Pencil Grip cut for saber grips

Baster, Pourer, and Pencil parts emitter

Emitter partially assembled

Added flashlight parts, candle parts, and more pen parts, and silver paint

Test placement for grips

Next I took apart different items for the interior guts of the saber.
Watch

Watch disassembled

Number 8 Mechanical Pencils

Mechanical Pencils disassembled

Grips cut and spread over pencil tube

More pencil parts

Blue and clear jewelry beads

Gold floral wire and colored paper clips

Paper clips make good wiring

Toy car disassembled

Close up of Car parts

Car wheel and battery

Glued together to make the top saber button

Pedometer parts

Clip light parts. I originally wanted my crystals to light up but could not fit the batteries in the saber.

More clip light parts

Playing around with internal placement ideas

Power cell and crystall - using bead, pen parts, pourer parts and flashlight parts

Added blue crystal with a cut paper clip that I removed the colored coating from.


More pencil parts

Pencil parts cut

Plastic disk from flashlight lens

Gold wire cut

Wire into pencil parts

Wire and pencil parts into lens

More test fitting

Time to start painting external pieces


I didn't like the paper texture of the Incense tube so I went and got a thin plastic place mat.

I glued the placemat to the tube and held it with paperclips as it dried.

I then trimmed the matt to the Incense tube primed and painted with metallic silver paints. the Finish was much smoother.

Placing the painted saber back together.

I Painted the shelf liner silver and folded it over an placed in the back part of the saber. Hid the edge of the liner with part of the watch band.

Then I started adding internal parts

I just played around with various arrangements until I found something that I liked and then glued it down.

I decided I didn't like the wires going along the length of the saber so I took them out and later added them in other places. I added more various parts from the things I disassembled. I tried to use small metal pieces like the watch clasp and the cars wheel axles.

I painted all the plastic parts either silver or gold and glued everything down.


Well that is pretty much it. It was fun making the saber and it was a great contest. I want to say a big thank you to all who were involved.
Last edited:
