Denix LeMat Boo Conversion WIP - Pic Heavy

SirNedKingsly

Well-Known Member
Months ago I ordered a Denix and the conversion kit from Sidewinder. I have finally gotten around to finishing the kit. I was a bit nervous about setting out on this conversion as I had never worked with metal before - not to mention that the LeMats are increasingly rare these days.

In any event - I will be chronicling the build as I go along. The pictures hopefully will help others with their build. Constructive criticism is always appreciated. Information on the best paint to use would also be appreciated.

IMG_1554.jpg

IMG_1552.jpg

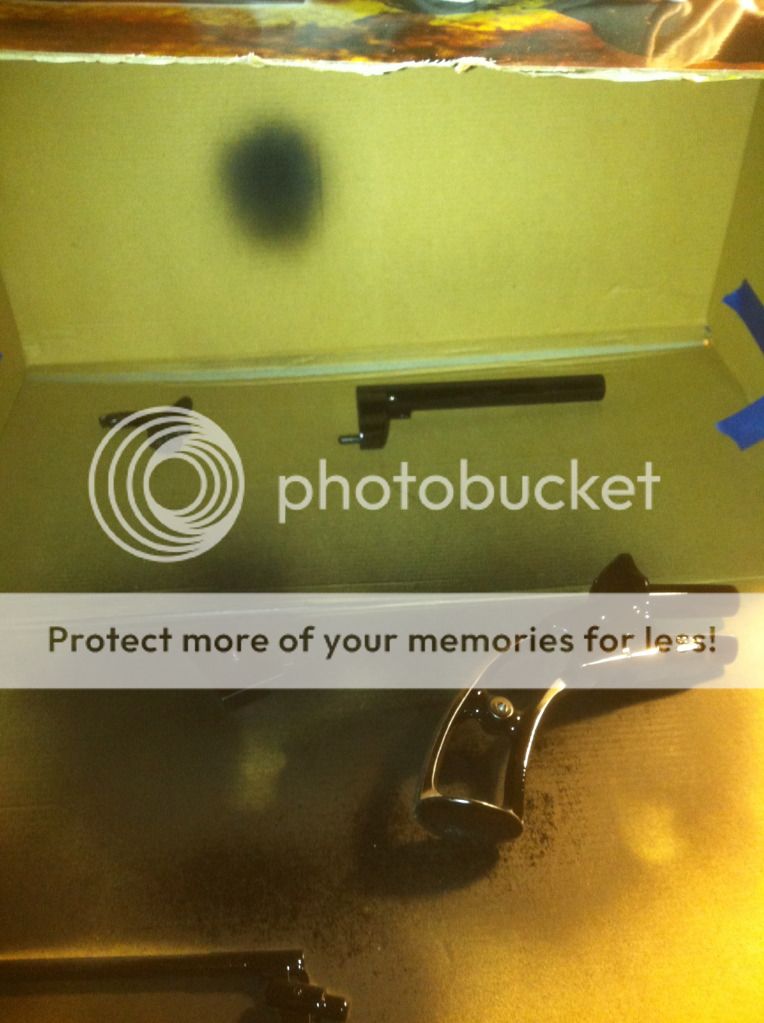
Prepping the conversion

IMG_1550.jpg

One of the beginning cuts

IMG_1551.jpg

IMG_1555.jpg

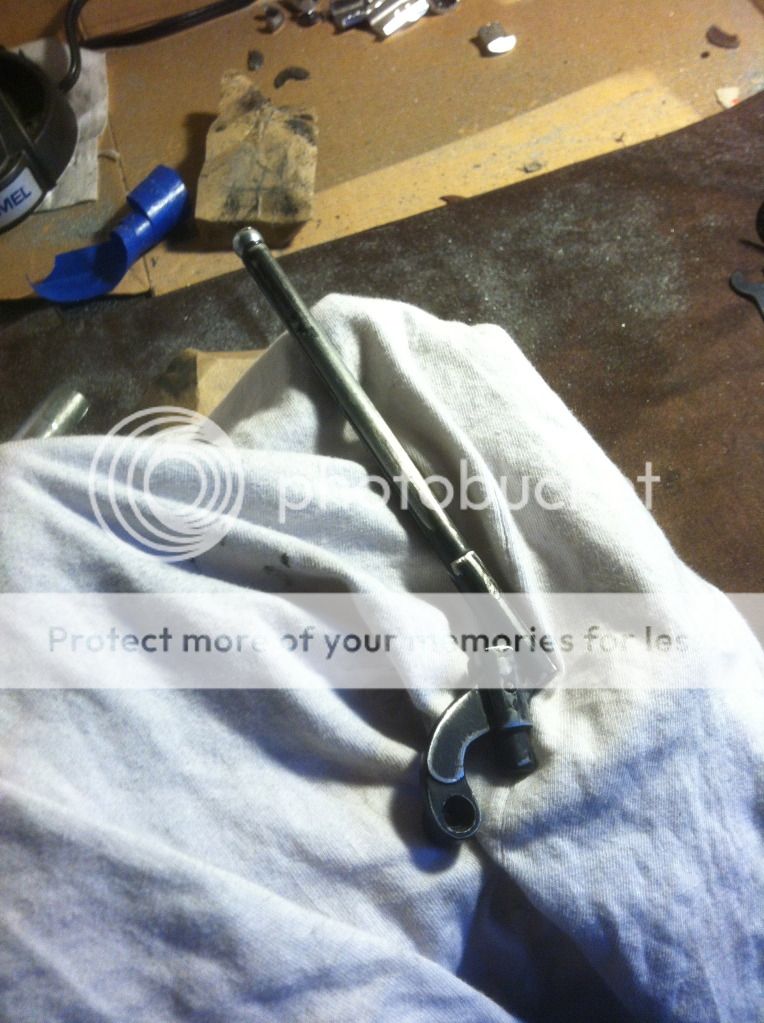
Removal of the Army take-down knob

IMG_1559.jpg

IMG_1560.jpg

IMG_1557.jpg

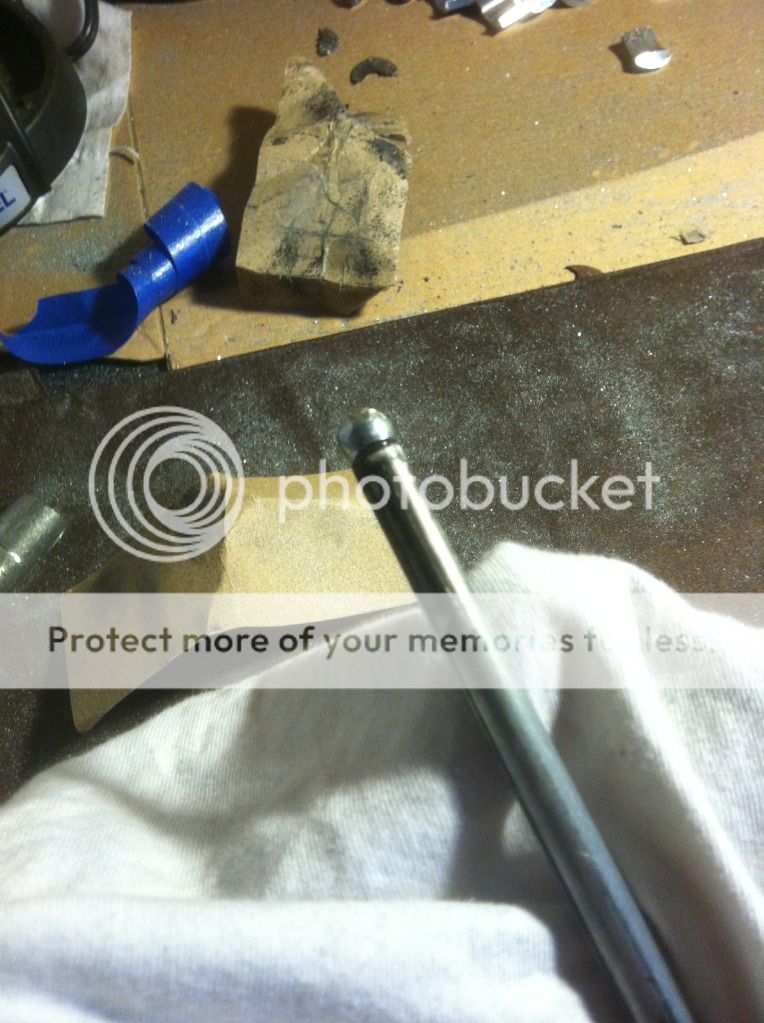
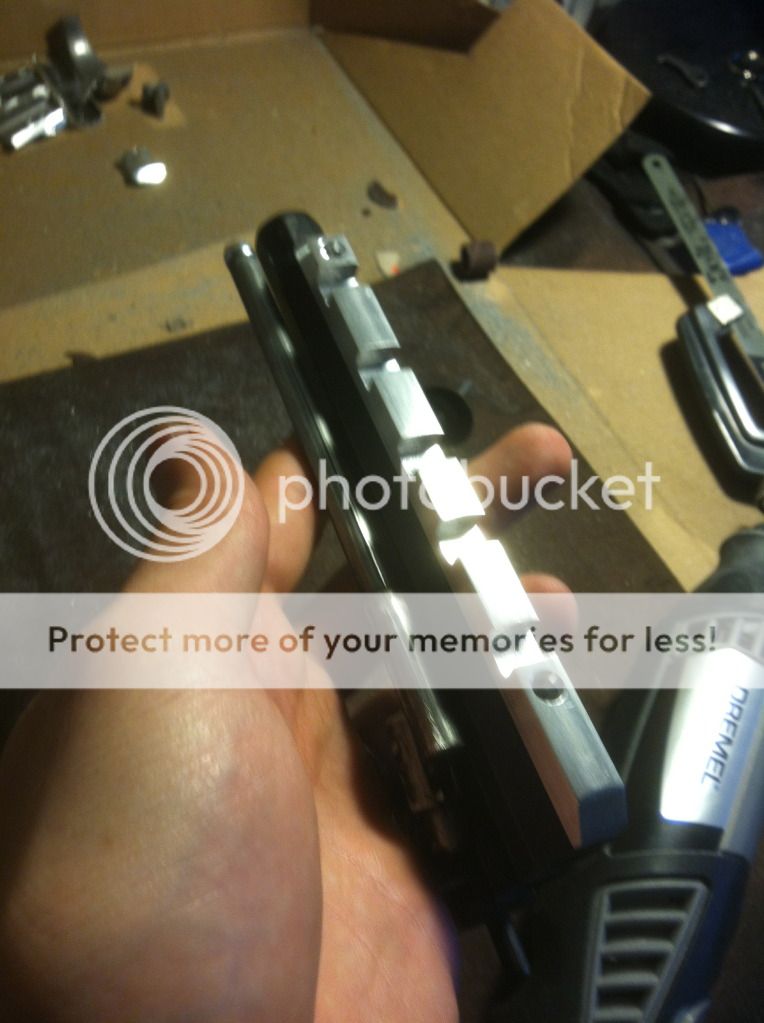
Removal of the front sight. I used the sanding wheel on the Dremel to take that down flush with the barrel.

IMG_1564.jpg

IMG_1566.jpg

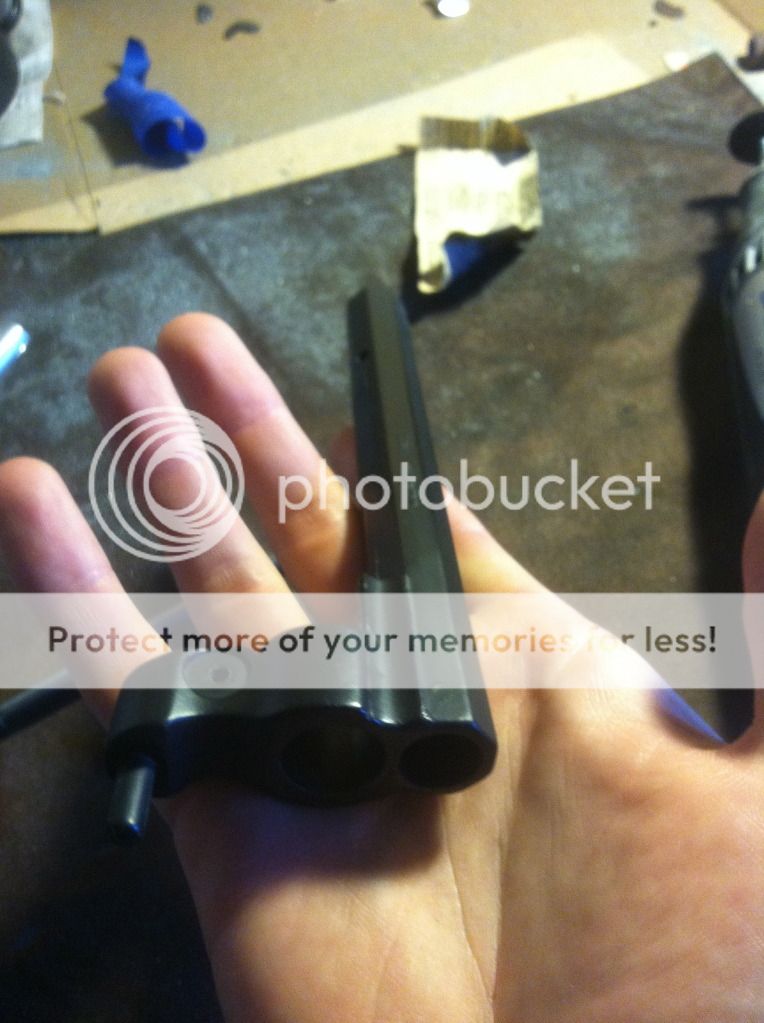
The removal of the shotgun barrel

IMG_1570.jpg

Complete removal - before everything has been sanded.

I took a break from the barrel work and test fitted the set of cast wood grips recently arrived from RobStyle.
IMG_1563.jpg

IMG_1562.jpg

They fit pretty nicely right out of the box - no shaping needed. These are a huge improvement over the plastic grips that come standard on the Denix.

Final pictures for this set is the removal of the Army version lanyard loop.
IMG_1571.jpg

IMG_1572.jpg

IMG_1573.jpg


IMG_1576.jpg

The pile of scrap parts. Not bad.

The parts that I ordered from VTI Gunparts never came through - apparently they are back ordered through October. So I called them and asked who else might have some - and located some parts. The cav trigger guard and lanyard loop assembly are on their way and will be arriving on Tuesday.

If anyone is looking for these particular parts shoot me a PM and I will tell you where I got them. If VTI is to be believed - these are pretty rare at the moment, so I want to avoid a run.

That all being said - enjoy the pictures. Anyone that has worked with these trigger guards before, any insight on to how to fit them would help.

Thanks for looking, standby for more once the rest of my parts arrive.

~SNK
 
Nice work SNK. I'll be watching closely. I've had one of Sidewinders conversions for a while. I just haven't had time to start yet. I figured I'd start pretty much the same way as you. Take the shot gun barrel off and grind off the lanyard loop(?).
Cheers,
Kevin
 
The Denix LeMat is great to work with. It is a solid kit. After Firefly, I also got one, but I was in a more "steam-punky" mood, so I went a little off script with the following results;

lr-rosie_r.jpg


lr-rosie_l.jpg


lr-rosie_barrel.jpg


A hint: when you finish it up, I suggest you put a rubber bumper on the frame where the hammer strikes so you don't have to worry about dry-firing and causing metal fatigue (I broke the hammer of an old .45 colt model when I was a kid because of all the dry-firing).
 
The Denix LeMat Boo is one of the most fun builds I have done! Yours is coming along quite nicely
 
Got some more updates on the build today.

IMG_1574.jpg


I'm going to start with something that y'all have seen. Just tweeked it a bit. I used some 220 grit sandpaper to smooth out the somewhat rough job that the sanding wheel on the Dremel yields. I did the same to the barrel assembly.
IMG_1582.jpg


IMG_1592.jpg

IMG_1591.jpg

IMG_1590.jpg

I used the cutting wheel - destroying 2 of them in the process - to remove the trigger guard assembly in preparation for the installation of the Cavalry "spur" trigger guard on its way from my supplier. This part was the hardest part ot get off (see earlier part about destroying 2 of my cutting wheels) - but it came away smoothly in the end.

I used the sanding wheel to get the remaining nub off the curved part of the grip. That, coupled with the use of the sandpaper, smoothed the piece down flush.

IMG_1583.jpg

IMG_1584.jpg

IMG_1586.jpg

IMG_1587.jpg


When the barrel assembly was sanded down and smooth I test fit some of the pieces. As can be seen in one of the pictures, some slight modification was necessary on the small piece that fits under the "shotgun greeble." I used the drum sander on the Dremel to open up the left hand side semi-circle in order to accommodate the mounting bolt for the loading ram-rod.

After that was completed I set up my makeshift paint booth (taped up cardboard box.....) and put a primer coat on the pieces. I am using Rust-oleum Flat Black Protective Enamel. I am going to spay them and then sand them down a bit in preparation
for the drilling of the holes to accept the kit parts.

The hole drilling is going to have to wait until I can get a drill press for my Dremel - as holding it in my hand - as I discovered on one of my scrap pieces - is not going to produce the results I desire.

IMG_1593.jpg

IMG_1599.jpg

IMG_1597.jpg

IMG_1596.jpg

IMG_1595.jpg


Thanks for looking.
More to follow later - I am expecting the new parts to be delivered no later than Tuesday and I will be getting a drill press with the next payday.

This has been a very fun build so far - I am looking forward to completing it.

~SNK
 
Looks like fun!. I think you should strip the paint and Blue it though....

I was thinking about that - but in the course of doing research on the subject both on the thread here - and on an antique firearms forum - it has collectively been decided that the prep process and the upkeep required afterwards on the blued finish is not worth the trouble.

As the Denix is not steel but rather a zinc alloy - it has to undergo a considerable de-greasing and stripping process in order to accept the bluing, and then the bluing itself requires much maintenance to maintain under regular use, again because it was designed for steel, not "pot metal."

I have no doubts that the look would be fantastic - but as I intend this piece to moonlight as a holster piece at cons as well as a display - I think that I will stick with the painted finish.
 
Looks great. Got rid of my denix last year due to it just sitting there.

Now I wish I head kept it

Jayne has the best guns.

Cheers

Sebastian
 
So I just wanted to put up a few progress photos. I am still waiting on the trigger guard and the lanyard assembly - along with the drill press attachment for my Dremel. All of those should be in and no later than Tuesday.

When you last saw the paint finish it was wet and glossy. Here are a few that show what it ended up looking like. I installed the cast wood grips for ease of handling - but this will need a final sanding and a final coat of paint once the hole for the lanyard is drilled and the slot for the cav. style take-down lever installed.
IMG_1604.jpg

IMG_1603.jpg

IMG_1605.jpg


Meanwhile I have made some improvements and a few more steps towards finishing this piece.

IMG_1607.jpg


I have taped off the cylinder and once I have my Dremel up on the mount I will be able to have a solid base upon which to scribe a line in the metal. On the actual piece the cylinder is in two pieces - the result of the black powder cylinder being modified to accept modern cartridges.

I need a steady hand - and I frankly do not relish the thought of doing that by hand. The results on a scrap piece were less than spectacular.

Anyways - moving on to other pieces of the build.
I was looking around for something to put on the end of the loading rod. As per the screen used piece, the original knob assembly on the end was removed and the tip sanded smooth. I searched through my tool box and I spotted one of my clamps in there. That was what I needed.

Boy did the sparks fly getting this part off. I was initially surprised, as there were no sparks cutting through the LeMat, but I remembered that the clamp is made from tempered steel.
IMG_1602.jpg

IMG_1601.jpg

This was taken after I had polished the piece and let it cool in some water.
IMG_1600.jpg

because this is what it did when it came away from its original rod.

It fits perfectly though. Mixed up some JB Weld and attached it to the end of the rod.
IMG_1608.jpg

IMG_1609.jpg

IMG_1610.jpg


And of course - some obligatory shots to see how its all going to look.
I still have not decided how I am going to attach the brass band that replaces the ram rod cradle - but we are not there yet.

IMG_1613.jpg

IMG_1614.jpg


I'm not too far off now. Once the awaited parts arrive later this week I have a feeling that this will start coming together quite nicely. I expect this to grace my holster, replacing its resin cousin by Wilco, by the end of next week.

Thanks for looking.
~ SNK
 
Last edited:
My trigger guard and lanyard assembly arrived today.
Still waiting on the Dremel drill press and we can finish this up.

If anyone that has any advice on how to bend the trigger guard into shape please let me know via PM or message here for the rest of the folks to see.

I know that this has to be somewhat custom shaped as the guard is designed for the Pietta LeMat which has slightly different lines than the Denix replica.
 
This may be a shot in the dark but do you still have Sidewinder's contact info?
I'm thinking about starting this project myself so I was curious if he was still selling those conversion kits.
 
Back
Top