GAVAL
New Member
I have a bit of time, so I'm going to try before the end of the week to put things onto the pants that I had considered forgiveable if they were not there or at least temporarily optional.
These details include the details on the calf and ankle of the rear of the pants as well as often forgotten armored cable that attaches to tubing near the knees.
Reference:
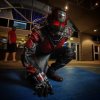
Promotional image of the back of the pant legs. Calf details.

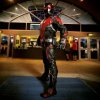
Suit on Display at a comic con a year or two ago. Note the armored cables outside the knees.

Eldridge Arts suit WIP and her solution.

Sewing foam-fabricated calf attachments and velcro to the back of the ant pants.


Trying the pants on with the boots for the first time. The tension of the pants being worn on the front plastic joints was too much, as I suspected. I wanted to try this gorilla glue hot glue stick everyone has been swearing by. It didn't do worth a damn. I stand by my statement: Hot glue is a lazy and unreliable solution to most cosplay applications. Don't ever rely on it. Take the time to use a overnight-setting contact cement and never glue what you can screw or sew.
All things considered, I like how the pants look. They are without a doubt the best fit as my untailorable jacket is slightly too large for me and the arms too long. Way too late to worry about that now. After this try on I added some stitches to the calf accessories and a bit of stick on velcro to the sides to hold it wrapped around my calves. These pants are not at all like the actual suit pants and have an elastic opening in the rear so the pants fit the wearer and stretch for him. That made it tricky to attach these things so I sewed over the elastic part and used velcro on the leather parts on the sides.


Tonight I'll see about attaching that cable to the knee area. I have an idea about running rigid wire through it and attaching the wire on both ends with some stitches and wax thread, then covering those stitches with plastic or clay joints.
----
8/17/17
I think I had to get the most creative on this project last night when I had to come up with a leg hose and cable assembly and make it attach. A few failed attempts with crafting thread and big leather awls left me frustrated when I just couldnt' pull the big needle through the leather even with a pair of pliars. I could get the needle to poke through but the back end where the thread was just wouldn't go through. I felt like I was doing more damage to the suit than improvements.
So here's the apparatus I added:

It is made from a plastic T joint, the same armored cable as the helmet to back connections, rubber tubing for the lower part to match piping and tubing on the suit, foam for the secondary joint, and then some rigid crafting wire inside to hold it all together and give it some shape. I could probably remove the wire now that the glue and thread has set but I might leave it. I like the idea of having more real metal on the suit.
So to attach it, I had to settle with a more pointed needle and standard thread. I don't know much about sewing but I saw in a video that you can make a loop with thread and double run it through stuff for strength, so that's what I did. I double thread stitched the stuff into place and then used Barge contact cement. After it set overnight it seemed pretty sturdy. Let's hope that doesnt' change when I put on the pants. There is a lot of stress over bendy knee joints.

I still need to make it look like this assembly connects to the piping running down the front of the leg, but I have a couple of options. Will probably have to cut out more piping which is not fun, but I'm getting better at it. I've learned that resharpening an exacto knife or a box cutter regularly makes a HUGE difference in how easy it can cut through things. All this time I was just wearing them down then changing the blades.
The helmet is still in transit. It's made it to my state capital. But it says delivery is tomorrow. That's cutting it close. This all has to be done, reliable, and ready to meet and greet kids at an event on Saturday and I still have to attach the back box to the suit jacket.
ONWARD!
These details include the details on the calf and ankle of the rear of the pants as well as often forgotten armored cable that attaches to tubing near the knees.
Reference:
Promotional image of the back of the pant legs. Calf details.

Suit on Display at a comic con a year or two ago. Note the armored cables outside the knees.

Eldridge Arts suit WIP and her solution.

Sewing foam-fabricated calf attachments and velcro to the back of the ant pants.


Trying the pants on with the boots for the first time. The tension of the pants being worn on the front plastic joints was too much, as I suspected. I wanted to try this gorilla glue hot glue stick everyone has been swearing by. It didn't do worth a damn. I stand by my statement: Hot glue is a lazy and unreliable solution to most cosplay applications. Don't ever rely on it. Take the time to use a overnight-setting contact cement and never glue what you can screw or sew.
All things considered, I like how the pants look. They are without a doubt the best fit as my untailorable jacket is slightly too large for me and the arms too long. Way too late to worry about that now. After this try on I added some stitches to the calf accessories and a bit of stick on velcro to the sides to hold it wrapped around my calves. These pants are not at all like the actual suit pants and have an elastic opening in the rear so the pants fit the wearer and stretch for him. That made it tricky to attach these things so I sewed over the elastic part and used velcro on the leather parts on the sides.


Tonight I'll see about attaching that cable to the knee area. I have an idea about running rigid wire through it and attaching the wire on both ends with some stitches and wax thread, then covering those stitches with plastic or clay joints.
----
8/17/17
I think I had to get the most creative on this project last night when I had to come up with a leg hose and cable assembly and make it attach. A few failed attempts with crafting thread and big leather awls left me frustrated when I just couldnt' pull the big needle through the leather even with a pair of pliars. I could get the needle to poke through but the back end where the thread was just wouldn't go through. I felt like I was doing more damage to the suit than improvements.
So here's the apparatus I added:

It is made from a plastic T joint, the same armored cable as the helmet to back connections, rubber tubing for the lower part to match piping and tubing on the suit, foam for the secondary joint, and then some rigid crafting wire inside to hold it all together and give it some shape. I could probably remove the wire now that the glue and thread has set but I might leave it. I like the idea of having more real metal on the suit.
So to attach it, I had to settle with a more pointed needle and standard thread. I don't know much about sewing but I saw in a video that you can make a loop with thread and double run it through stuff for strength, so that's what I did. I double thread stitched the stuff into place and then used Barge contact cement. After it set overnight it seemed pretty sturdy. Let's hope that doesnt' change when I put on the pants. There is a lot of stress over bendy knee joints.

I still need to make it look like this assembly connects to the piping running down the front of the leg, but I have a couple of options. Will probably have to cut out more piping which is not fun, but I'm getting better at it. I've learned that resharpening an exacto knife or a box cutter regularly makes a HUGE difference in how easy it can cut through things. All this time I was just wearing them down then changing the blades.
The helmet is still in transit. It's made it to my state capital. But it says delivery is tomorrow. That's cutting it close. This all has to be done, reliable, and ready to meet and greet kids at an event on Saturday and I still have to attach the back box to the suit jacket.
ONWARD!
Last edited:


