Larcwide
New Member
Hi all,
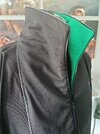
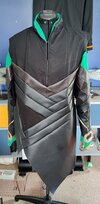
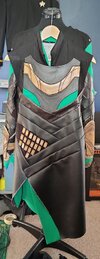
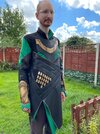
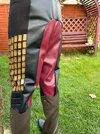
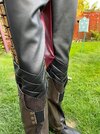
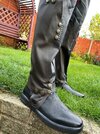
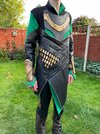
This is my first post here, and I wanted to show and document my build of Loki from the Dark World (with provisions being made to allow it to change to a reasonable Avengers armoured Loki).
The costume will be my first fully custom drafted costume, rather than from a pattern, which combined with only a couple of hours a week to spend on it means it will be a long term project. I actually started around April 2021, but feel enough progress has now been made to share it.
After lots of searching for suitable fabrics, I settled on the following:
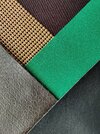
My camera washes out the green quite a lot, so here is a very close up photo better showing the colour:

The top black is a simple jersey fabric, acting as a thin base for everything else to attach to and for the tunic's non-leather chest/collar.
Then we have some aluminium mesh for various accent areas and the jacket "coat tails"
The green is a crepe
Then there is brown faux leather which has been watermark ink and a mixture of black and clear matte embossing powder in the shape of the triqueta pattern
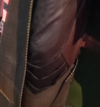
And finally some black faux leather for the majority of the costume
I started with the sleeves, which I wanted to be seperate to the rest of the tunic, to allow better movement when wearing it, as well as making the costume easier to get on and off. First I made a muslin to get the right size and sort out the final pattern.
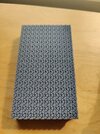
The sleeves are made up of about 25 invidiual pieces each (plus embelishments). The layered strips are done by attaching a strip, folding it over the stitch, then basting in down before the next one is stitched on top of it. It starts with a couple of green layers, then onto the patterned brown. To create the pattern I 3D printed a large stamp of the repeating triqueta pattern:
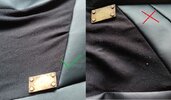
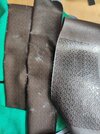
I had put a coat of varnish over the embossed pieces to stop the embossing from peeling off, but very quickly realised that it wasn't going to work. The varnish simply wasn't flexible enough and immedietly started cracking and peeling when the fabric was folded or moved too much. Here are the varnished pieces vs an unvarnished:
I removed the varnished pieces and replaced with unvarnished. These held up a lot better, but with all the movement during sewing and wear testing the embossing has started to peel away in places. If anyone has any ideas for "sealing" the embossing onto the faux leather, I would be extremely happy to hear them!
After many, many layers I finally had something sleeve like:
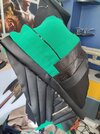
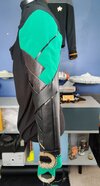
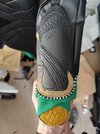
After attaching, some mesh was added around velcro wear the wrist and forearm armour will attach (gaps were left on the upper arm for the extra armour from Avengers to be attached later):
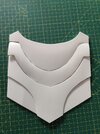
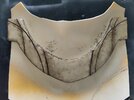
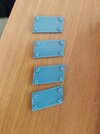
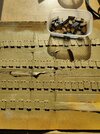
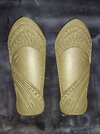
I then started work on the armour pieces. For these pieces I designed the pieces in Fusion 360, then 3D printed them. Unfortunately without a resin printer I wasn't able to capture all of the fine details. So what I did was wrap the 3D prints in Worbla, then use the lines on the 3D print as a guide to carve the lines into the worbla. I then used a philips screwdriver to create the "mesh" pattern on them.
After priming a layer of gold paint was added:
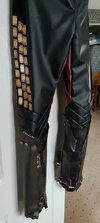
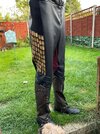
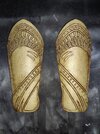
Then some weathering applied:
Next up, the rest of the tunic!
This is my first post here, and I wanted to show and document my build of Loki from the Dark World (with provisions being made to allow it to change to a reasonable Avengers armoured Loki).
The costume will be my first fully custom drafted costume, rather than from a pattern, which combined with only a couple of hours a week to spend on it means it will be a long term project. I actually started around April 2021, but feel enough progress has now been made to share it.
After lots of searching for suitable fabrics, I settled on the following:

My camera washes out the green quite a lot, so here is a very close up photo better showing the colour:

The top black is a simple jersey fabric, acting as a thin base for everything else to attach to and for the tunic's non-leather chest/collar.
Then we have some aluminium mesh for various accent areas and the jacket "coat tails"
The green is a crepe
Then there is brown faux leather which has been watermark ink and a mixture of black and clear matte embossing powder in the shape of the triqueta pattern
And finally some black faux leather for the majority of the costume
I started with the sleeves, which I wanted to be seperate to the rest of the tunic, to allow better movement when wearing it, as well as making the costume easier to get on and off. First I made a muslin to get the right size and sort out the final pattern.
The sleeves are made up of about 25 invidiual pieces each (plus embelishments). The layered strips are done by attaching a strip, folding it over the stitch, then basting in down before the next one is stitched on top of it. It starts with a couple of green layers, then onto the patterned brown. To create the pattern I 3D printed a large stamp of the repeating triqueta pattern:

I had put a coat of varnish over the embossed pieces to stop the embossing from peeling off, but very quickly realised that it wasn't going to work. The varnish simply wasn't flexible enough and immedietly started cracking and peeling when the fabric was folded or moved too much. Here are the varnished pieces vs an unvarnished:

I removed the varnished pieces and replaced with unvarnished. These held up a lot better, but with all the movement during sewing and wear testing the embossing has started to peel away in places. If anyone has any ideas for "sealing" the embossing onto the faux leather, I would be extremely happy to hear them!
After many, many layers I finally had something sleeve like:

After attaching, some mesh was added around velcro wear the wrist and forearm armour will attach (gaps were left on the upper arm for the extra armour from Avengers to be attached later):

I then started work on the armour pieces. For these pieces I designed the pieces in Fusion 360, then 3D printed them. Unfortunately without a resin printer I wasn't able to capture all of the fine details. So what I did was wrap the 3D prints in Worbla, then use the lines on the 3D print as a guide to carve the lines into the worbla. I then used a philips screwdriver to create the "mesh" pattern on them.

After priming a layer of gold paint was added:

Then some weathering applied:

Next up, the rest of the tunic!

