colonelmasako
Active Member
So first off I want to make a shout out to all the amazing RPFers who have skills with casting and creating custom helmets. I do not have such skills, but I do have skills with electronics. This project will come in multiple phases, following work and inspiration from Volpin and Tekparasite on here.
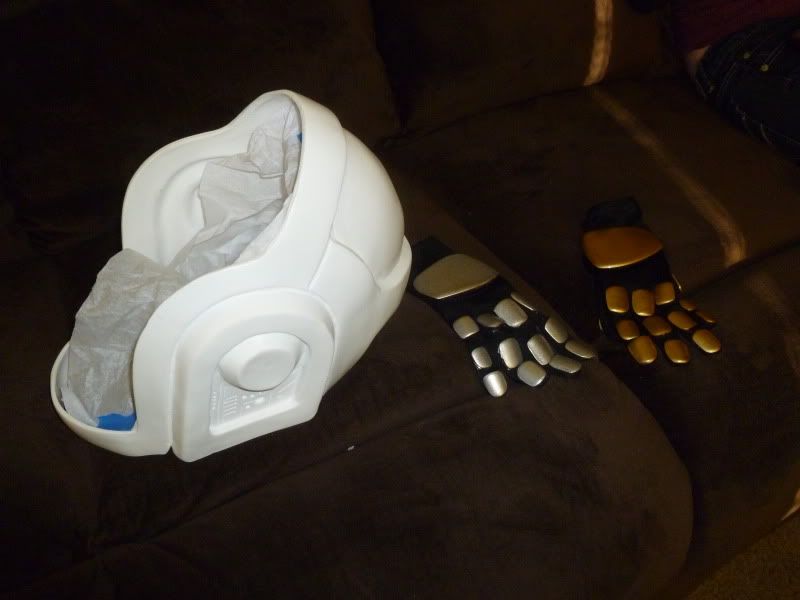
I bought this helmet from a fellow RPFer for a very reasonable sum, visor included. I also bought a pair of gloves from a friend that were originally purposed for the "Discovery" era Daft Punk Guy Manuel, but poorly painted.
The Tron Legacy version of Guy's helmet is silver, as are his gloves. The gloves I bought were black, but I think this was ok.
Here was the unpainted helmet, visor not shown, and gloves.
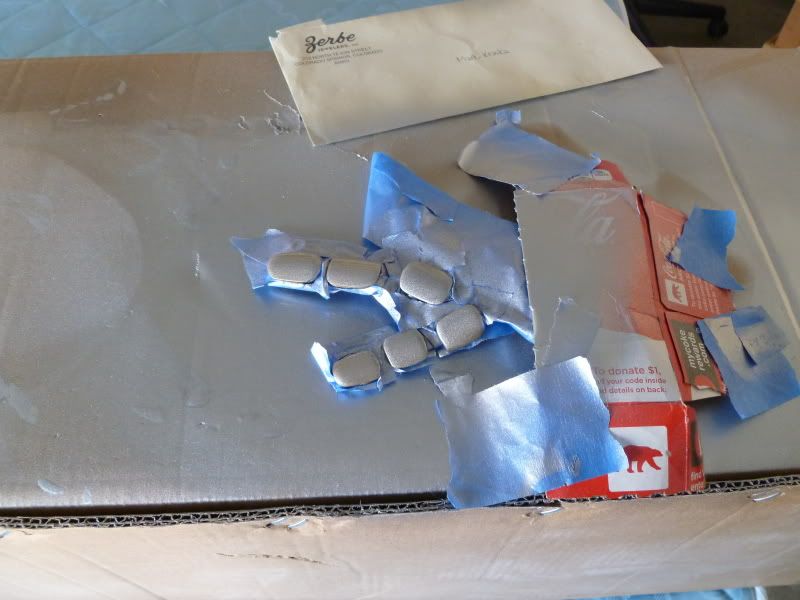
To paint the gloves and the helmet, I used this awesome automotive silver spray paint, a lot of painters tape, and some automotive clear coat enamel. Here is me painting two fingers at a time, being very careful to mask off the black glove material.
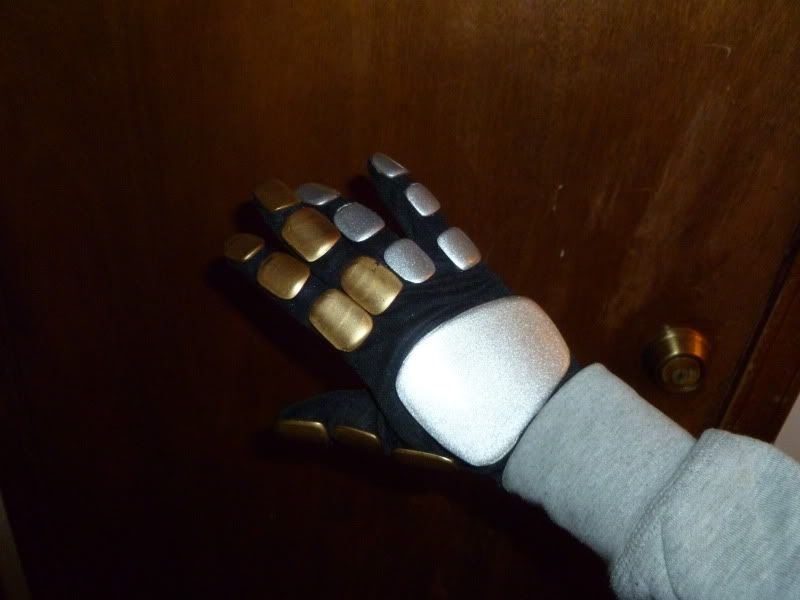
And here is the result, as progress moved forward.
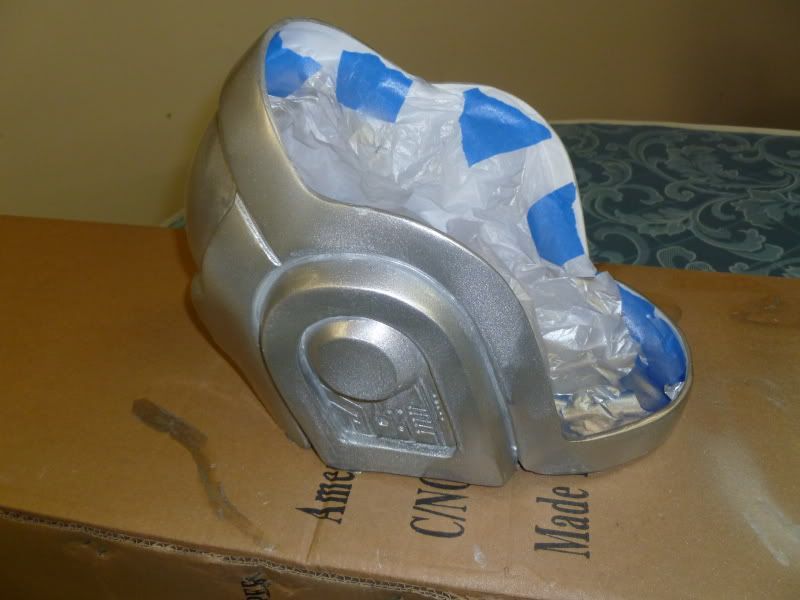
Painting the helmet was straightforward, but over such a large surface area I needed more coats than the gloves. Used a bag to keep the paint off the inside of the helmet. Using same paints as the gloves, results turned out nicely.
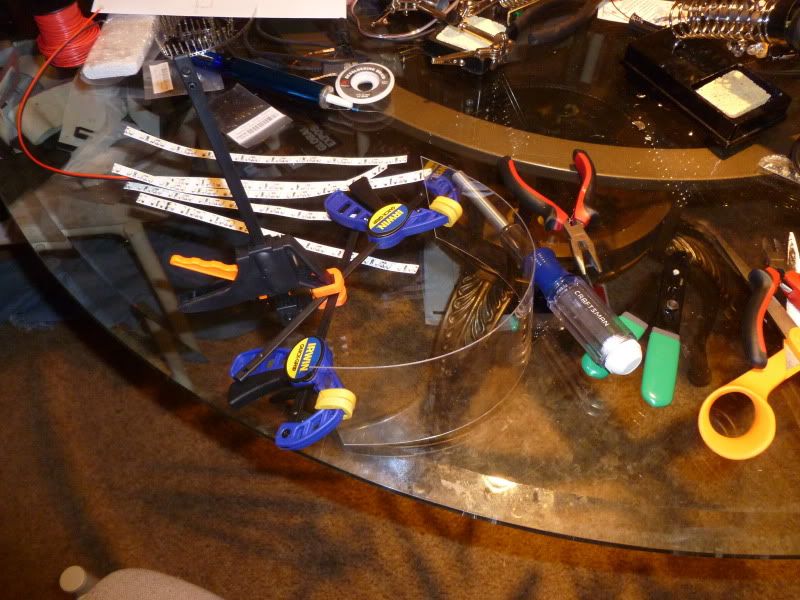
Using some thin PETG (the same I will use for my LED array at a later stage) for the LED strips to mount to. This stuff is crystal clear and molds nicely with heat. I used my clamps to form the shape, and a hair dryer to get it to take.
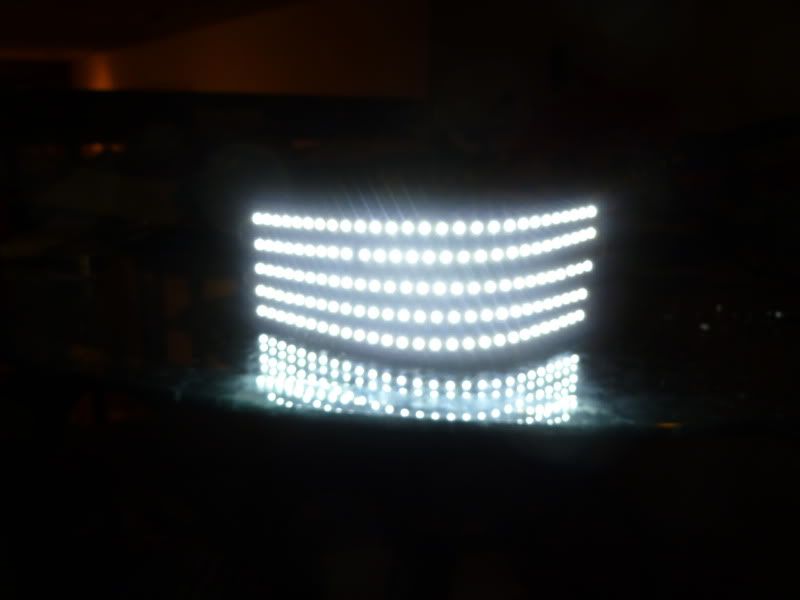
Skipped a lot of steps here, sorry. LED strips run off 12V, and these high density ones draw on average 200mA per foot, and get fairly warm. I cut 5 strips the length of the sub visor PETG, and put a small separation in between the rows so I could see out of. Wired them up, tested. Extreme brightness is an understatement, I love these things :love
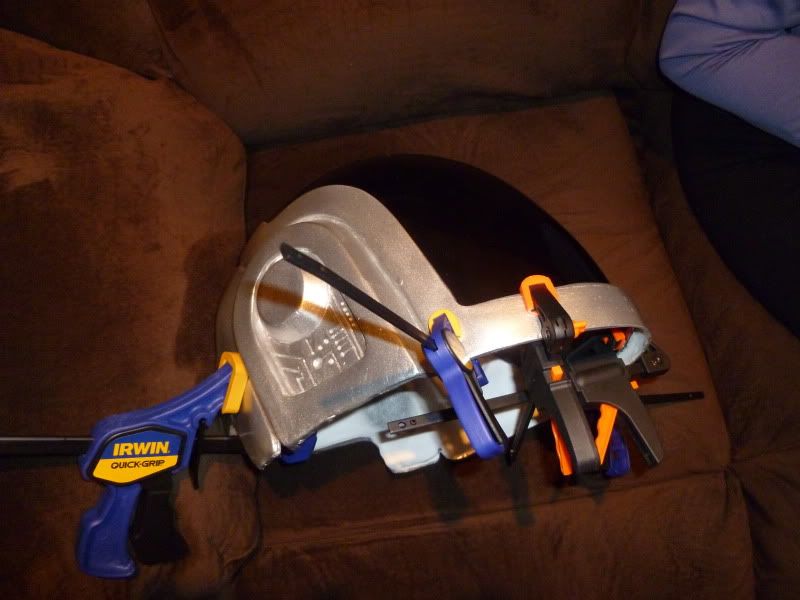
Once my subvisor was created, I needed to mount the actual helmet visor to the painted helmet. I used some E9001 glue, and lots of clamps, and about 3 days of drying time. Results are rock solid, this visor isn't going anywhere.
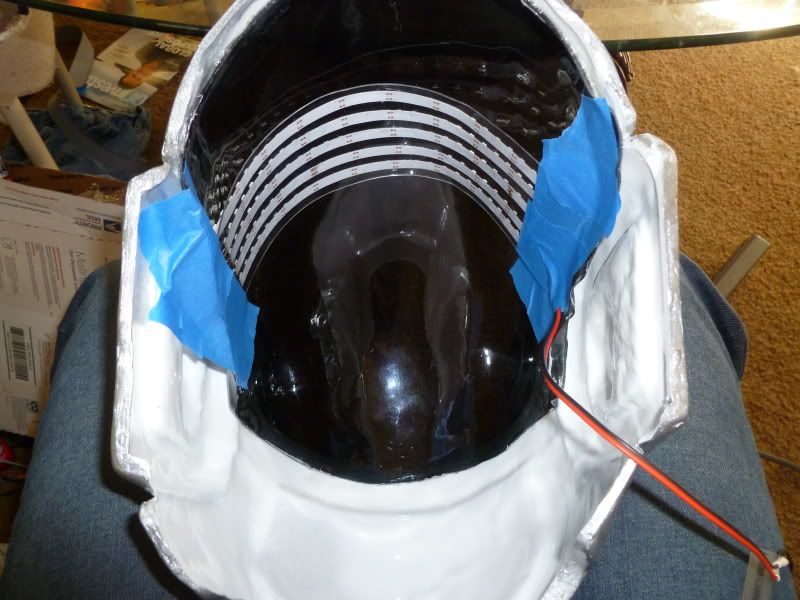
This is kind of ghetto, but surpisingly resilient. I used some painters tape to fit check the sub visor inside the main visor, to make the LEDs line up right. This actually sticks very well so I kept it taped in there.
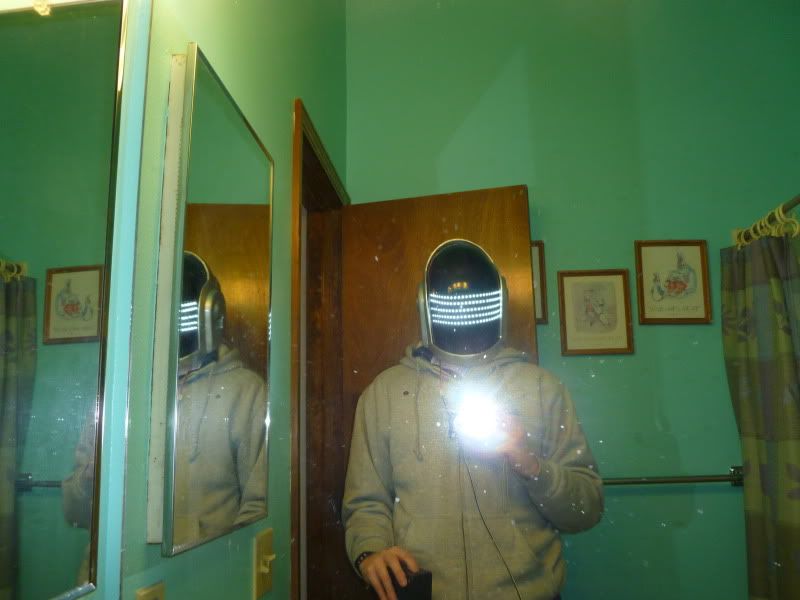
Because when I tried on the helmet, it looked really good. Sorry about the flash in this picture. It was quite warm inside the helmet, too warm for my tastes.
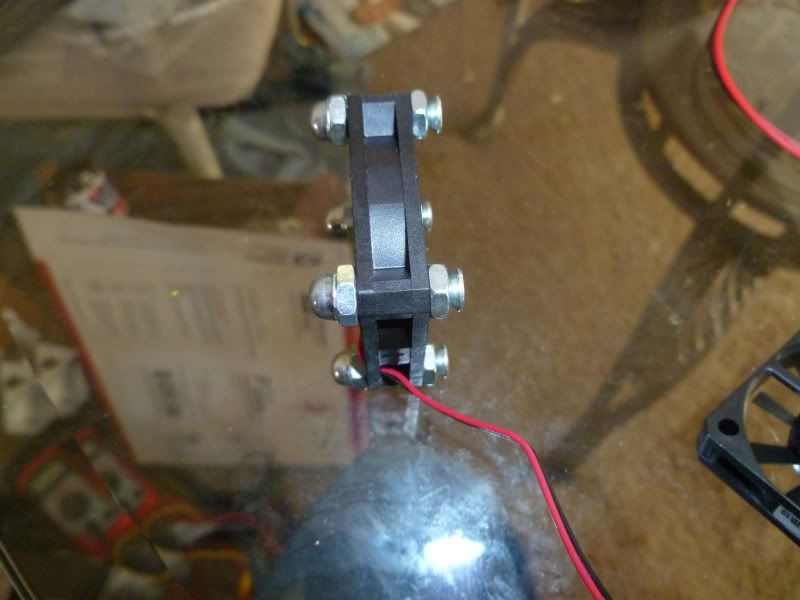
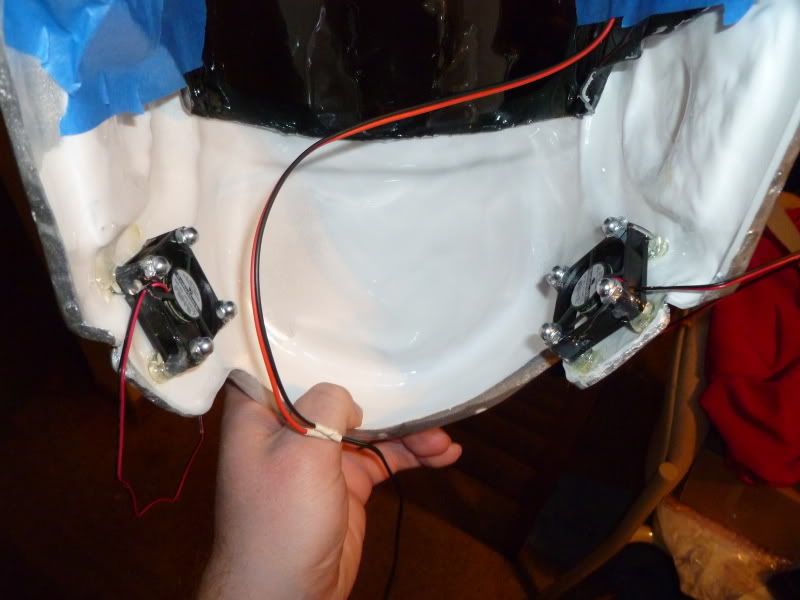
Ran to radio shack and picked up a few fans. Used some #6-32 3/4" bolts with some rounded ends to create a nice gap to help glue the bolts in, to mount the fans. Finding a spot to mount it in the helmet without interfering with my head was mighty tricky.
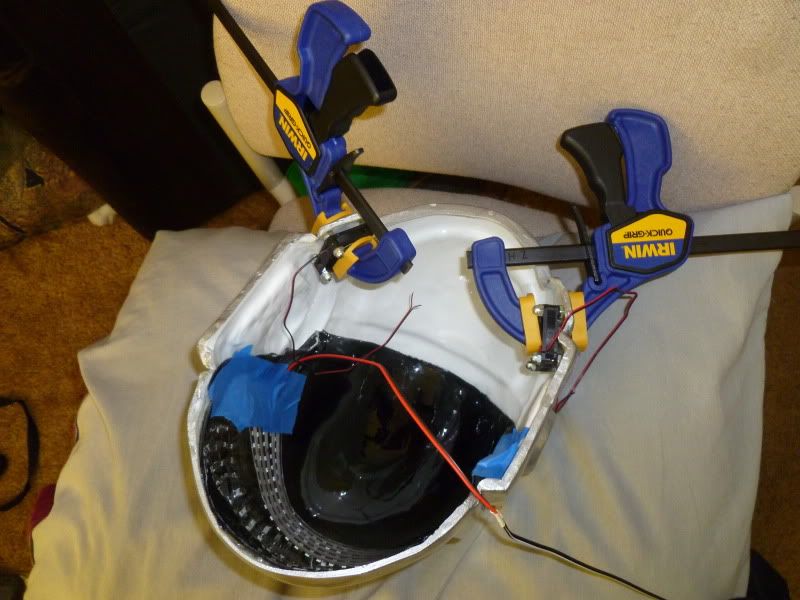
Used my super clamps and a lot of E9001 glue, mounted the fans where they wanted to fit best, without causing things to be too tight in the helmet. I notice that this helmet, compared to Thomas's, is a lot more tight on space.
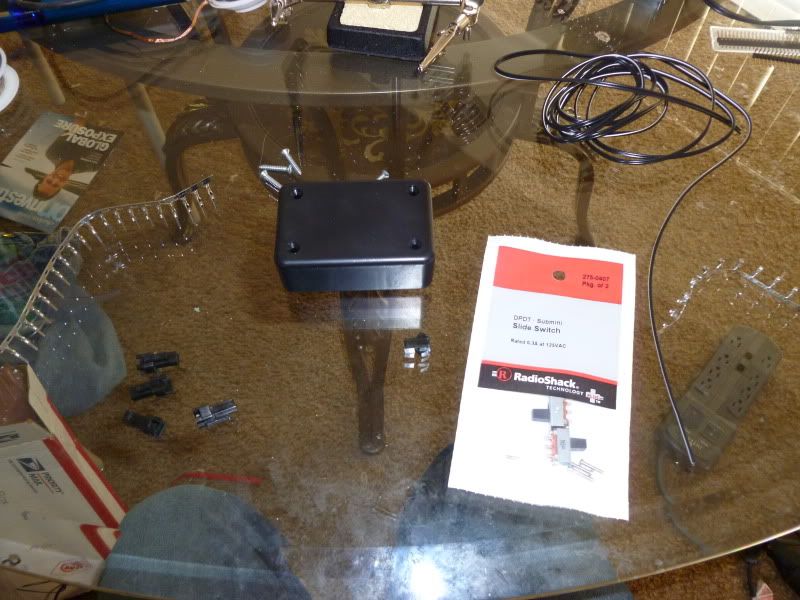
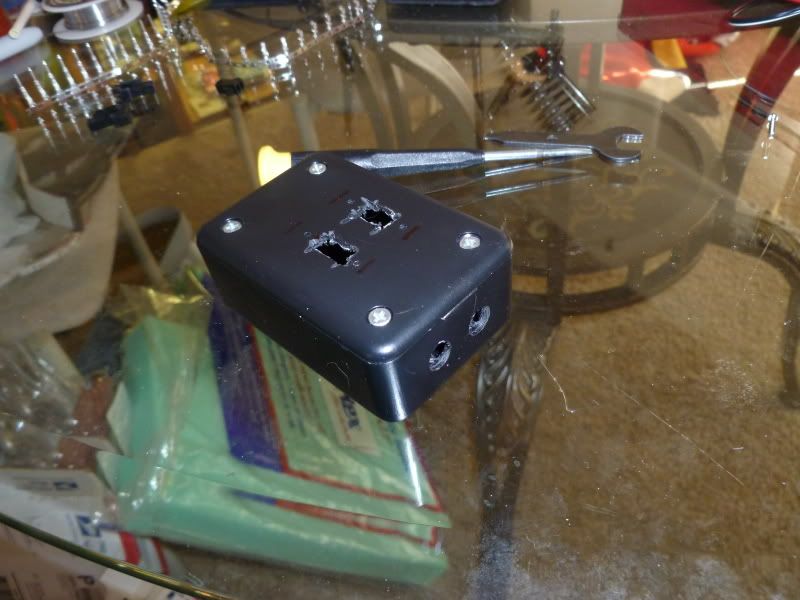
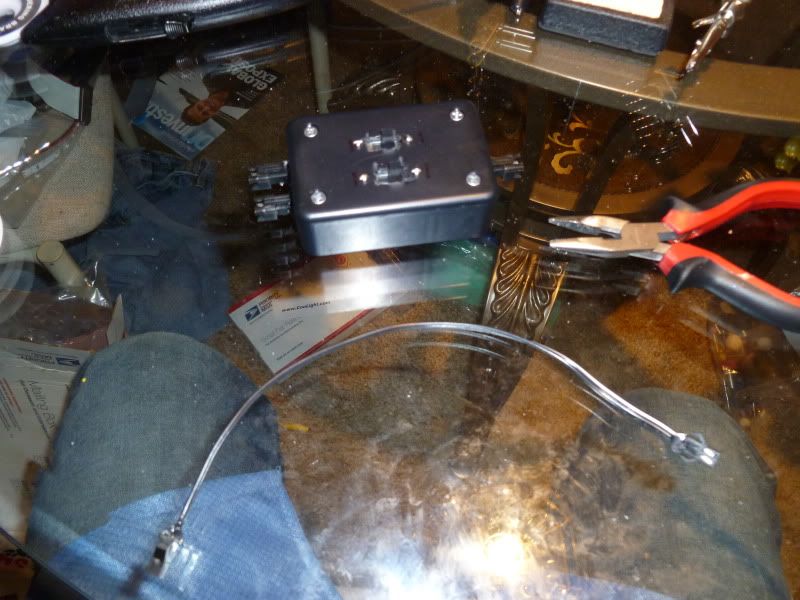
Now while the glue was drying, I considered power for the helmet. The fans and the lights all run off 12V, and I had an existing 12V Lithium Ion battery box from another project. I started to create a splitter box that would allow me to control these two power types independently.
Some dremel and drill work to get everything mounted.
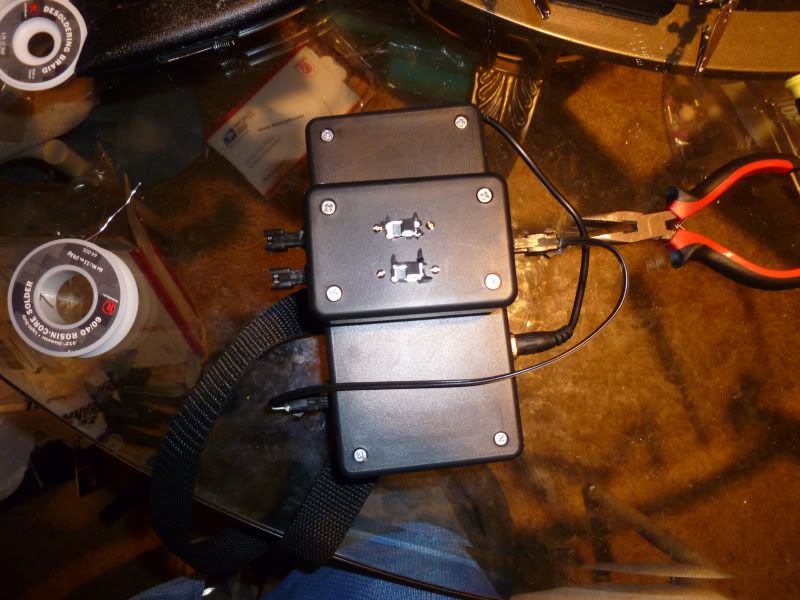
Final product with extender cable to my battery box. Wire gauge used for all of this was 22AWG. I was careful here, as 22AWG can carry a max 920mA for power. I measured my system at a maximum 840mA, pushing the limits but still ok.
And mounted using velcro to my battery box. Its kind of bulky, but thats because there is a 6800mAh battery in here, works very nicely.
Glue dried on fans, I reinforced this with hot glue just in case. Did a fit check, its hard getting my head into the helmet but once on the fans don't interfere with my head.
Glued some foam in for a tighter fit, and to make sure my better half can also wear this helmet.

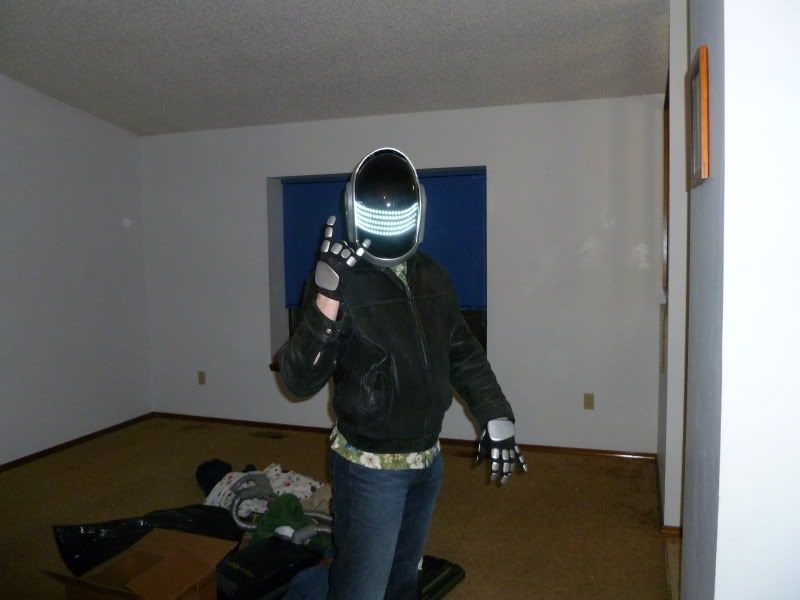
My lame Daft Punk pose with the helmet and my standard leather jacket. The fans feel AMAZING, makes the helmet so much more comfortable.
All ready on the helmet for con next weekend. Next steps: reflective tape for the track jacket for the rest of this costume.
Then for an April con: switch this LED system out for a fully animated version, just like Thomas's, only white. Stay tuned....
I bought this helmet from a fellow RPFer for a very reasonable sum, visor included. I also bought a pair of gloves from a friend that were originally purposed for the "Discovery" era Daft Punk Guy Manuel, but poorly painted.
The Tron Legacy version of Guy's helmet is silver, as are his gloves. The gloves I bought were black, but I think this was ok.
Here was the unpainted helmet, visor not shown, and gloves.
To paint the gloves and the helmet, I used this awesome automotive silver spray paint, a lot of painters tape, and some automotive clear coat enamel. Here is me painting two fingers at a time, being very careful to mask off the black glove material.
And here is the result, as progress moved forward.
Painting the helmet was straightforward, but over such a large surface area I needed more coats than the gloves. Used a bag to keep the paint off the inside of the helmet. Using same paints as the gloves, results turned out nicely.
Using some thin PETG (the same I will use for my LED array at a later stage) for the LED strips to mount to. This stuff is crystal clear and molds nicely with heat. I used my clamps to form the shape, and a hair dryer to get it to take.
Skipped a lot of steps here, sorry. LED strips run off 12V, and these high density ones draw on average 200mA per foot, and get fairly warm. I cut 5 strips the length of the sub visor PETG, and put a small separation in between the rows so I could see out of. Wired them up, tested. Extreme brightness is an understatement, I love these things :love
Once my subvisor was created, I needed to mount the actual helmet visor to the painted helmet. I used some E9001 glue, and lots of clamps, and about 3 days of drying time. Results are rock solid, this visor isn't going anywhere.
This is kind of ghetto, but surpisingly resilient. I used some painters tape to fit check the sub visor inside the main visor, to make the LEDs line up right. This actually sticks very well so I kept it taped in there.
Because when I tried on the helmet, it looked really good. Sorry about the flash in this picture. It was quite warm inside the helmet, too warm for my tastes.
Ran to radio shack and picked up a few fans. Used some #6-32 3/4" bolts with some rounded ends to create a nice gap to help glue the bolts in, to mount the fans. Finding a spot to mount it in the helmet without interfering with my head was mighty tricky.
Used my super clamps and a lot of E9001 glue, mounted the fans where they wanted to fit best, without causing things to be too tight in the helmet. I notice that this helmet, compared to Thomas's, is a lot more tight on space.
Now while the glue was drying, I considered power for the helmet. The fans and the lights all run off 12V, and I had an existing 12V Lithium Ion battery box from another project. I started to create a splitter box that would allow me to control these two power types independently.
Some dremel and drill work to get everything mounted.
Final product with extender cable to my battery box. Wire gauge used for all of this was 22AWG. I was careful here, as 22AWG can carry a max 920mA for power. I measured my system at a maximum 840mA, pushing the limits but still ok.
And mounted using velcro to my battery box. Its kind of bulky, but thats because there is a 6800mAh battery in here, works very nicely.
Glue dried on fans, I reinforced this with hot glue just in case. Did a fit check, its hard getting my head into the helmet but once on the fans don't interfere with my head.
Glued some foam in for a tighter fit, and to make sure my better half can also wear this helmet.
My lame Daft Punk pose with the helmet and my standard leather jacket. The fans feel AMAZING, makes the helmet so much more comfortable.
All ready on the helmet for con next weekend. Next steps: reflective tape for the track jacket for the rest of this costume.
Then for an April con: switch this LED system out for a fully animated version, just like Thomas's, only white. Stay tuned....
")