You are using an out of date browser. It may not display this or other websites correctly.
You should upgrade or use an alternative browser.
You should upgrade or use an alternative browser.
Completed! Wheems project -batteries not included
- Thread starter jas070680
- Start date


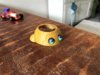

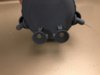
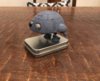
Glacial speed, but progress nonetheless. I want to have him pivot at the waist so I’ve been figuring out how to pack a servo, Controller and LED lights into the tiny space. Also made some progress on the “chassis”
Attachments
Keep at it! It's the only way to finish!
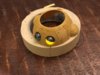
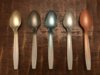
Doing some work on color matching (perhaps prematurely). I’m not convinced on the blue and gold/brass. Any thoughts/suggestions (using acrylics)?
Attachments
NakedMoleRat
Legendary Member
I have always loved that little guy. You have done a great job with it.
Thank you. I appreciate the support. Hopefully I can wrap this up soon. It has been on the back burner for too long.I have always loved that little guy. You have done a great job with it.
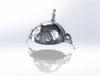
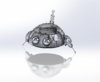
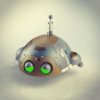
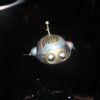
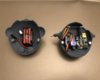
Update: I have been working on the mechanics, programmed the controller and printed a full set of test pieces. Everything is mocked up. Next step is to test movement in assembly, finalize details (panel seams, feet, etc..)
Attachments
Oh My God! Just that simple action brings it alive! That's great!
Are the lights pre-programmed? Or are they remote controlled too.
Are the lights pre-programmed? Or are they remote controlled too.
Thanks. The lights and servo are tied into the micro controller.Oh My God! Just that simple action brings it alive! That's great!
Are the lights pre-programmed? Or are they remote controlled too.
Where do you get the controllers for this? and how do you program. This is the part that has always challenged me.
Nicely done. Always loved these guys.
Nicely done. Always loved these guys.
Similar threads
- Replies
- 36
- Views
- 1,695
- Replies
- 3
- Views
- 289
- Replies
- 4
- Views
- 258